
Monday, January 24, 2011

Divine Temptation (PTU) Tutorial

Divine Temptation - Dianna


This tutorial was written by Dianna Richards of Digicats (and Dogs)/Di Before Dawn Tutorials. Any resemblance to any other tutorial, published or unpublished, living, dead or undead, is purely coincidental.

Please do not rebroadcast, redistribute or otherwise claim this tutorial or any part there of as your own work.


Items you will need to complete this project:

The Chaos Angels taggers kit by Foxys Designz, This is a PTU kit can be purchased at Stargazer Scraps.

Tube of choice. I am using Divine Temptation, by James Jack. This is a PTU tube, and you must have a license to use this tube, which is available at My Tubed Art.com.

Mask of choice. I am using the Spooked mask by Nik's Scripts & Scraps which is part of her PSP Masks Mega Pack.

Font and/or alpha of choice. I am using Century Gothic which is a Windows System font. If you do not have it, you can download it HERE.

I am also using the Moonbeam alpha by Julie It Is. This is a free to use alpha that you may download from Julie's blog HERE. Be sure to leave her a thank you if you download.


Note that H# and V# refer to horizontal and vertical coordinates on your canvas ruler grid. Make sure you have View -> Rulers checked in order to see the ruler grid.

When I say "Add to your canvas" I expect that you will copy and paste it as a new layer, unless otherwise stated in the tutorial.

This tutorial assumes you have a working knowledge of PSP. It was written using PSP X3, but should work in PSP 8 and up.

To begin, open a new raster layer canvas, 800 x 800 pxl, flood fill white.

Open paper of choice. I am using Paper1_FD. Layers -> Load/Save Mask -> Load Mask from Disk and select mask of choice. I am using Spooked by Nik's Scripts and Scraps. Make sure the fit to canvas box is checked, then click on Load.

Edit -> Copy Special -> Copy Merged and add to main canvas, centered.

Open Element46, and add to main canvas, centered.

Open Element41_FD and resize to 75%. Add to main canvas, centered at H400, V300. On the Layers pallet, set your opacity level to 60%.

Open tube of choice. I am using Divine Temptation by James Jacks. Copy the tube layer and add to main canvas, centered.

Open Element32_FD, and add to main canvas, centered.

Open Element25_FD and add to main canvas, centered at H400, V550.

Using your eraser tool, erase the candle base that is visible below the cloud layer. Return to top layer.

Open Element28_FD, and add to main canvas, centered at H200, V400.

Open Element3_FD, and add to main canvas, centered at H400, V600.

Open Element20_FD, and add to main canvas, centered at H600, V600. Image -> Free Rotate -> Free Rotate Right, 20 degrees.

On the materials pallet, set your foreground color to transparant and your background color to dark blue (#000040). Using font of choice, add copyright information to the main canvas, For the Divine Temptation tube, that information is:

©James Jacks inaneglory.deviantart.com Your MtA_License#

I am using Century Gothic, 4 points, bold and centered. I also added the background credit and tagged by information at this time. I have my credits centered at H400, V675.

Using the following settings, add a drop shadow to the copyright text: Offsets of 3 each, opacity of 100%, blur of 5, and color white. Repeat, using offsets of -3 each while leaving all other settings the same.

Starting with Raster 2, the bling layer, on the layers pallet, add a drop shadow to each of the element on your main canvas except for Raster 3, the candle layer and the copyright layer.

I am using offsets, vertical and horizontal of 5 each, opacity of 85, blur of 15 and oclor dark blue (#000040).

You may now save the artist's copy of your tag as a .pspimage file.

using font or alpha of choice, add name of choice to tag. I am using the Moonbeam Alpha by Julie It Is, and have my name centered at H300, V500. Add a drop shadow to the name to match the rest of the elements on the tag.

Drop the white background layer and merge visible. Resize to 75% (600 x 600 pixels) and save as a .png file, and you are all done.

Note that if you are planning on using the tag on Facebook, you may wish to save it as a .jpg as Facebook does not handle .pngs well.

I hope you enjoyed this tutorial. If you should have a problem, please feel free to E-Mail Me and I'll be happy to help you out.
Sunday, January 23, 2011

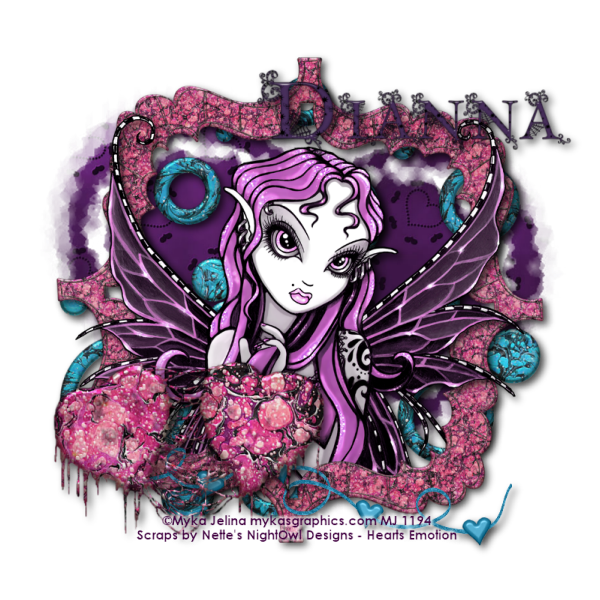
Emo Fae (PTU) Tutorial

Emo Fae - Dianna


This tutorial was written by Dianna Richards of Digicats (and Dogs)/Di Before Dawn Tutorials. Any resemblance to any other tutorial, published or unpublished, living, dead or undead, is purely coincidental.

Please do not rebroadcast, redistribute or otherwise claim this tutorial or any part there of as your own work.


Items you will need to complete this project:

The Hearts Emotions taggers kit by Nette's Nightowl Work which is a PTU kit available at Scraps and the City.com.

Tube of choice. I am using Lacey, by Myka Jelina. You must have a license to use this tube, which is available at Myka's Graphics.com.

Mask of choice. I am using Wee Scots Mask #171 which you can download HERE.

Font(s) and/or alpha of choice. I am using Century Gothic which is a windows system font. If you do not have it, you can download it HERE.

I am also using the Goth Chic alpha by Whispy's D'zines. This was a FTU alpha. I've recently been informed that it's no longer available on line, which is kind of sad, as it's one of my favorites.


Note that H# and V# refer to horizontal and vertical coordinates on your canvas ruler grid. Make sure you have View -> Rulers checked in order to see the ruler grid.

When I say "Add to your canvas" I expect that you will copy and paste it as a new layer, unless otherwise stated in the tutorial.

This tutorial assumes you have a working knowledge of PSP. It was written using PSP X3, but should work in PSP 8 and up.

To begin, open a new raster layer canvas, 800 x 800 pxl, flood fill white.

Open paper of choice. I am using NNW emo paper8. Layers -> Load/Save Mask -> Load Mask from Disk. I am using Wee Scots Lass Mask 171. Make sure the fit to canvas box is checked, then click on load.

Resize to 85%. Edit -> Copy Special -> Copy Merged and add to main canvas, centered.

Open NNW Emo Doodlieos2 and resize to 75%. Add to main canvas, centered.

Open NNW Emo Grunge Frame and resize to 75%. Add to main canvas, centered.

Open tube of choice. I am using Lacey by Myka Jelina. Copy the close up tube and add to main canvas, centered.

With your selection tool set to rectangle - replace, select the bottom part of the frame layer, Raster 3, from V550 to V750. Selection -> Promote selection to layer. On the layers pallet, right click on the Promoted Selection and go to Arrange -> Bring to Top.

Open NNW Emo Heart String and add to main canvas, centered at H400, V650.

Open NNW Emo Bleeding Hearts and resize to 75%. Add to main canvas, centered at H250, V600.

On the materials pallet, set your foreground color to transparent and your background color to dark purple (#400040). Using font of choice, add copyright information ot the tag. For the Myka Jelina tag, that information is:

©Myka Jelina mykasgraphics.com Your MJ_License#

I am using Century Gothic, 4 points bold and centered. I have the copyright centered at H400, V700. I have also added the background credits and tagged by information at this point.

Using the following settings, add a drop shadow to the tag: Offsets of 3 each, opacity of 100%. blur of 5, color white (#ffffff). Repeat using offsets of -3 each and leaving all other setting the same.

Starting with the circles layer and working upward, add a drop shadow of choice to each of the elements on the main canvas, except the Promoted Selection and the copyright layer.

You may now save the Artist's Copy of your tag as a .PSPImage file.

Using font or alpha of choice, add name of choice to tag. I am using the Goth Chic alpha by Whispy's D'Zigns. I have my name centered at H500, V150 and have added a drop shadow to match the rest of the tag.

Drop the white background layer, and resize to 75% (600 x 600 pixels). Save as a .png file, and you are all done!

If you are planning on using the tag on Facebook, you may wish to save it as a .jpg with a white background layer, as this displays better on Facebook.

I hope you enjoyed this tutorial. If you should have a problem, please feel free to E-Mail Me and I'll be happy to help you out.
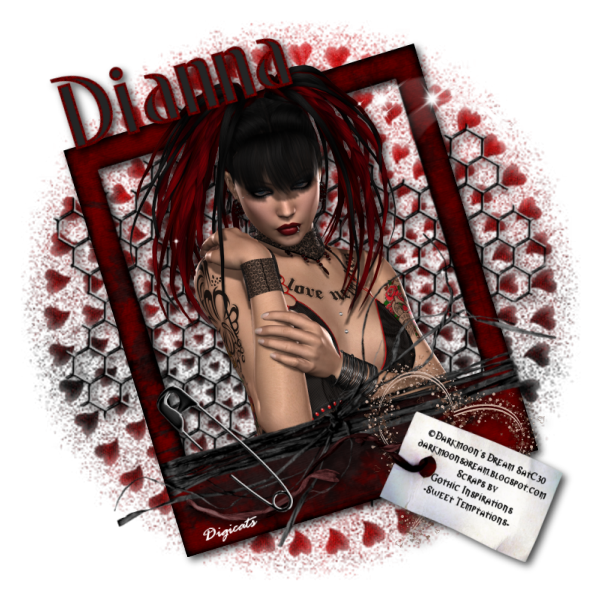
Wicked Ways (PTU) Tutorials

Wicked Ways - Dianna


This tutorial was written by Dianna Richards of Digicats (and Dogs)/Di Before Dawn Tutorials. Any resemblance to any other tutorial, published or unpublished, living, dead or undead, is purely coincidental.

Please do not rebroadcast, redistribute or otherwise claim this tutorial or any part there of as your own work.


Items you will need to complete this project:

The Devilish taggers kit by Digcats (& Dogs). This is a PTU kit that can be purchased at Scraps and the City.com.

Tube of choice. I am using Succubus, by Serg Grapik. This is a PTU tube, and you must have a license to use this tube, which is available at Pics for Design.com.

Font(s) choice. I am using Century Gothic which is a Windows System font. If you do not have it, you can download it HERE.

I am also using Morpheus, which is a FTU font that can be downloaded at OutlawByDesign.com.


Note that H# and V# refer to Horizontal and vertical coordinates on your canvas grid. Make sure you have View, Rulers checked in order to see the ruler grid.

When I say "Add to your canvas" I expect that you will copy and paste it as a new layer, unless otherwise state in the tutorial.

This tutorial assumes you have a working knowledge of PSP. It was written using PSP X3, but should work in PSP 8 and up.

To begin, open a new raster layer canvas, 800 x 800 pxl, flood fill white.

Open paper of choice. I am using DCD_Devil_Paper8. Layers -> Load/Save Mask -> Load Mask from Disk and select mask of choice. I am using using Wee Scots Lass mask 173. Make sure the fit to canvas box is checked, then click on load.

Edit -> Copy Special -> Copy Merged and add to main canvas, centered.

Open DCD_Devil_Smoke1, and add to main canvas, centered. With you magic wand tool, click anywhere outside the masked paper layer on Raster 1 to select. With the area still selected, activate Raster 2 on the layers pallet, and then click delete.

Open DCD_Devil_Thorns02 and add to main canvas, centered.

Open DCD_Devil_Wicked Ways WA, and add to main canvas, centered at H400, V150.

Open DCD_Devil_Flames and reize to 75%. Add to main canvas, centered at H400, V550.

Open tube of choice. I am using Succubus by Grafik. Resize to 65%, and add to main canvas, centered.

Open DCD_Devil_Ribbon03 and resize to 75%. Add to main canvas, centered at H450, V550.

Open DCD_Devil_Glowing Eyes and add to main canvas, centered at H500, V500.

Open DCD_Devil_Candle02 and resize to 75%. Add to main canvas, centered at H550, V550.

On the Materials pallet, set your foreground color to transparent, and your background color to dark red (#400000). Using font or alpha of choice, add the copyright information to the tag. For the Succubus tube, that information is:

©Serg Grafik http://artboard.biz Your PFD_License#

You should also add the background credits and tagged by information at this point as well. I am using Century Gothic, 4 points, bold and centered and have my copyright located at H400, V700.

Add a white drop shadow to the text using the following settings: Offsets 3 each, opacity of 100%, blur if 5 and color (#ffffff). Repeat using offsets of -3 each and leaving all other settings the same.

Starting with Raster 3, the thorns layer and working upward, add a drop shadow to each of the elements on the main canvas, except for the fire line, the glowing eyes and the copyright layer. I am using offsets, vertical and horizontal, of 5 each, opacity of 75%, blur of 15 and color black (#000000).

You can now save the artist's copy of your tag as a .pspimage file.

Using font or alpha of choice, add desired name to the tag. I am using Morpheus, which is a FTU font, 24 points, bold and centered and have my foreground color set to black (#000000) and by background color set to Red (#800000). I have centered my name Hat H250, V500. I then added a drop shadow to match the rest of the elements on the canvas.

Drop your white background layer, and merge visible. Resize to 75% (600 x 600 pixels) and add save as a .png file and you are all done.

If you are planning on using the tag on Facebook, you might want to save it as a .jpg file, as Facebook's handling of .pngs has changed and the tags look better with the white background on them.

I hope you enjoyed this tutorial. If you should have a problem, please feel free to E-Mail Me and I'll be happy to help you out.
Friday, January 21, 2011

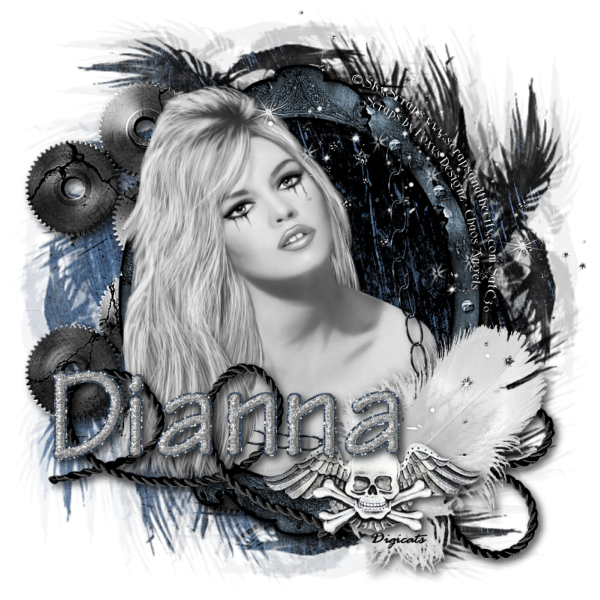
Gothic Temptations (PTU) Tutorial

Gothic Temptations - Dianna


This tutorial was written by Dianna Richards of Digicats (and Dogs)/Di Before Dawn Tutorials. Any resemblance to any other tutorial, published or unpublished, living, dead or undead, is purely coincidental.

Please do not rebroadcast, redistribute or otherwise claim this tutorial or any part there of as your own work.


Items you will need to complete this project:

The Sweet Temptations taggers kit by Gothic Inspirations, This is a PTU kit which is part of a collaboration available at Stargazer Scraps. It is free with a $10 purchase from January 15 to February 15, 2011.

Tube of choice. I am using Gothic Love, by Darkmoon's Dream. This is a PTU tube, and you must have a license to use this tube, which is available at ScrapsandtheCity.com.

Mask of choice. I am using Wee Scots Mask #312 which you can download HERE.

Font(s) and/or alpha of choice. I am using the font Morpheus, which is a free to use font that can be downloaded HERE.

The Gothique Romance Alpha - Black by Whispy's D'Zignes. This is an older alpha that is no longer commercially available, so please choose something you like instead. ;)


Note that H# and V# refer to horizontal and vertical coordinates on your canvas ruler grid. Make sure you have View -> Rulers checked in order to see the ruler grid.

When I say "Add to your canvas" I expect that you will copy and paste it as a new layer, unless otherwise stated in the tutorial.

This tutorial assumes you have a working knowledge of PSP. It was written using PSP X3, but should work in PSP 8 and up.

To begin, open a new raster layer canvas, 800 x 800 pxl, flood fill white.

Open paper of choice. I am using Paper6-GI_SweetTemptations. Layers -> Load/Save Mask -> Load Mask from Disk and select mask of choice. I am using Wee Scots Lass mask #312. Make sure the fit to canvas button is checked, then click on load.

Resize to 90%. Edit -> Copy Special -> Copy Merged and add to main canvas, centered.

Open Mesh-GI_SweetTemptations and resize to 85%, Add to main canvas, centered.

Open Frame7-GI_SweetTemptations, and resize to 75%. Add to main canvas, centered. Image -> Free Rotate -> Rotate Left, 17 degrees.

Open tube of choice. I am using GothicLove04 by Darkmoon's Dream. Resize to 35%, and add to main canvas, centered.

On the layers pallet, right click on the frame layer, Raster 3, and duplicate. Right click again, on the Copy of Raster 3, and go to Arrange -> Bring to Top.

With your selection tool set to rectangle - replace, select the top half the frame copy, Copy of Raster 3, and delete.

Selections -> Select None.

Using your eraser tool, erase the bits of the tube that are hanging below the frame layer. Return to top layer.

Open Ribbon1-GI_SweetTemptations and resize to 75%. Add to main canvas, centered at H440, V530. Image -> Free Rotate -> Rotate Left, 17 degrees. Using your eraser tool, erase the bit of the ribbon on the right hand side that is hanging to the right of the frame.

Open HeartEmbl-GI_SweetTemptations and resize to 250 pixels wide. Add to main canvas, centered at H600, V600.

Open Tag2. On the Materials pallet, set your foreground color to transparent and your background color to black #000000. Using font of choice, add copyright information to the tag. Make it BIG because we are going to resize the tag in the next step and you want it to remain legible.

The copyright information for the GothicLove tube is:

©DarkMoon's Dream http://darkmoonsdream.blogspot.com Your SatC_License#

I am using the font Morpheus, 4 points, bold and centered, and then free rotated the text right, 23 degrees to match the angle on the tag.I also added the background credits and tagged by information.

Merge visible, and then resize the tag to 65%. Copy and add to main canvas, centered at H500, V650.

Open SafetyPin-GI_SweetTemptations and resize to 50%. Add to main canvas, centered at H300, V600.

Open Bling-GI_SweetTemptations and resize to 600 pixels wide. Add to main canvas centered at H400, V250.

Starting with Raster 2, the mesh layer and working upward, add a drop shadow of choice to each of the elements on your main canvas, except the frame layer copy, Copy of Raster 3, and the bling layer, Raster 9.

You can now save the artist's copy of your tag as a .pspimage file.

Using font or alpha of choice, add name of choice to the tag. I have my name centered at H225, V125, and have free rotated it left, 17 degrees to match the angle of the frame. I then added a drop shadow to match the rest of the tag.

Drop the white background layer, and merge visible. Resize to 75% (600 x 600 pixels), and save as a .png file, and you are all done.

Note that if you are planning on using the tag on Facebook, you may wish to save it as a .jpg as Facebook does not handle .pngs well.

I hope you enjoyed this tutorial. If you should have a problem, please feel free to E-Mail Me and I'll be happy to help you out.

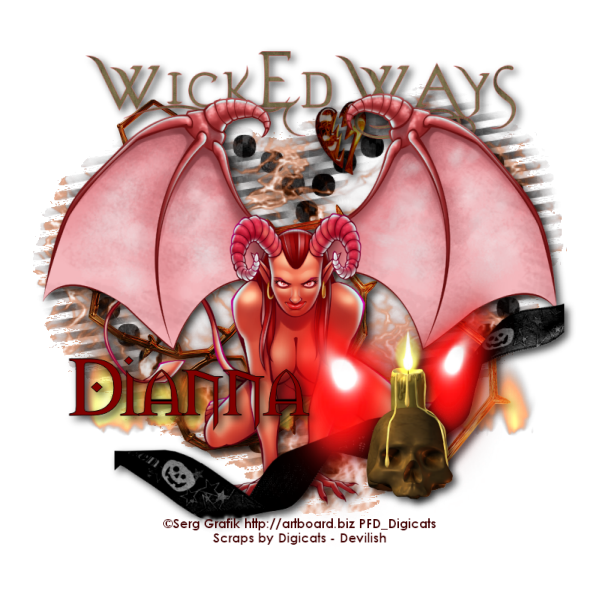
Chaos Angel (PTU) Tutorial

Chaos Angel - Dianna


This tutorial was written by Dianna Richards of Digicats (and Dogs)/Di Before Dawn Tutorials. Any resemblance to any other tutorial, published or unpublished, living, dead or undead, is purely coincidental.

Please do not rebroadcast, redistribute or otherwise claim this tutorial or any part there of as your own work.


Items you will need to complete this project:

The Chaos Angels taggers kit by Foxys Designz, This is a PTU kit can be purchased at Stargazer Scraps.

Tube of choice. I am using Brigitte, by Sky Scraps. This is a PTU tube, and you must have a license to use this tube, which is available at ScrapsandtheCity.com.

Mask of choice. I am using Wee Scots Mask #59 which you can download HERE.

Font(s) and/or alpha of choice. I am using Scythe, which is a free to use font that can be downloaded HERE.

I am also using the Moonbeam alpha by Julie It Is. This is a free to use alpha that you may download from Julie's blog HERE. Be sure to leave her a thank you if you download.


Note that H# and V# refer to horizontal and vertical coordinates on your canvas ruler grid. Make sure you have View -> Rulers checked in order to see the ruler grid.

When I say "Add to your canvas" I expect that you will copy and paste it as a new layer, unless otherwise stated in the tutorial.

This tutorial assumes you have a working knowledge of PSP. It was written using PSP X3, but should work in PSP 8 and up.

To begin, open a new raster layer canvas, 800 x 800 pxl, flood fill white.

Open paper of choice. I am using Paper8_FD. Layers -> Load/Save Mask -> Load Mask from Disk and select mask of choice. I am using Wee Scots Lass mask #59. Make sure the fit to canvas box is checked, then click on load.

Edit -> Copy Special -> Copy Merged and add to main canvas, centered.

Open Element33_FD and add to main canvas, centered at H200, V400.

Open Element30_FD and add to main canvas, centered.

Open tube of choice. I am using Brigitte by Sky Scraps. Resize to 75%, then copy Layer 2, and add to main canvas, centered at H375, V375.

On the layers pallet, right click on the frame layer and duplicate. Right click on the frame layer copy and go to Arrange -> Bring to top.

Set your selection tool to rectangle-replace and select the left hand side of the frame layer copy (to the H300 mark). Tap your delete kit.

Selections -> Select None.

Using your eraser tool, erase the bit of chain (and tiny bit of frame) on the left hand side so that it looks like it's vanising under the girl's hair.

Using your selection tool again, select the top bit of the frame and delete.

Selections -> Select None.

Open Element11_FD and flip. Add to main canvas centered at H400, V600.

Open Element43_FD and resize to 75%. Add to main canvas, centered at H575, V600.

Open Element10_FD and resize to 75%. Add to main canvas, centered at H500, V650.

Starting with the gear layer, raster 2 and working upward, add to drop shadow of choice to each of the items on the main canvas.

I am using offsets, vertical and horizontal of 5 each, opacity of 75%, blur of 15 and color black (#000000).

On the Materials Pallet, set your foreground color to transparent and your background color to (#ffffff).

Using font of choice add copyright information to the tag. For the Brigitte tube, that information is:

©Sky Scraps www.scrapsandthecity.com Your SacT License#.

I am using the font Scythe, 4 points, bold and centered. I then fit my text to path. Because I needed to rotate the text to get it to the right side of the frame, I used a circle, rather than an oval for the path. It makes it easier to move.

It is beyond the scope of this tutorial to explain how to bind text to path, but you can find a tutorial explaining this procedure at Michele's Paint Shop Newbie 101.

Also note that the Scythe font does not support the © character, so you will need to switch to a different font for that one character.

(*Tip: when I am composing white text, I change the background color to medium gray so I can read it and make sure there are no misspellings.)

Once you have your text where you want it, add a drop shadow to the text using the following settings: Offsets of 3 each, opacity of 100, blur of 5 and color black (#000000). Repeat, using offsets of -3 each and leaving all other settings the same.

Open Element19_FD and add to main canvas, centered at H550, V300.

You can now save the Artist's Copy of your tag as a .pspimage file.

using font or alpha of choice add name of choice to tag. I am using the Moonbeam alpha by Julie It Is. I have my name centered at H300, V550 and have added a drop shadow to match the rest of the elements on the canvas.

Delete the white background layer and merge visible. Resize to 75% (600 x 600 pixels) and save as a .png file and you are all done.

Note that if you are planning on using the tag on Facebook, you may wish to save it as a .jpg as Facebook does not handle .pngs well.

I hope you enjoyed this tutorial. If you should have a problem, please feel free to E-Mail Me and I'll be happy to help you out.
Thursday, January 20, 2011

Queen of Hearts (PTU) Mini-Tut

Queen of Hearts _ Dianna


This tutorial was written by Dianna Richards of Digicats (and Dogs)/Di Before Dawn Tutorials. Any resemblance to any other tutorial, published or unpublished, living, dead or undead, is purely coincidental.

Please do not rebroadcast, redistribute or otherwise claim this tutorial or any part there of as your own work.


Items you will need to complete this project:

The Sweet Temptations mini-taggers kit by Gemini Creationz, This is a PTU kit which is part of a collaboration available at Stargazer Scraps. It is free with a $10 purchase from January 15 to February 15, 2011.

Tube of choice. I am using Queen, by Karen M. Koski. You must have a license to use this tube, which is available at My Tubed Art.com.

Mask of choice. I am using Wee Scots Mask #311 which you can download HERE.

Font(s) and/or alpha of choice. I am using Rage Italic, which you can download from free from Acid Fonts.

I am also using the Satin Gold Alpha by Marie Stones. This is a FTU alpha that can be downloaded at FreeDigitalScrapbooking.com.


Note that H# and V# refer to horizontal and vertical coordinates on your canvas ruler grid. Make sure you have View -> Rulers checked in order to see the ruler grid.

When I say "Add to your canvas" I expect that you will copy and paste it as a new layer, unless otherwise stated in the tutorial.

This tutorial assumes you have a working knowledge of PSP. It was written using PSP X3, but should work in PSP 8 and up.

To begin, open a new raster layer canvas, 800 x 800 pxl, flood fill white.

Open paper of choice. I am using Gemini-SweetTemptations-paper_05. Layers -> Load/Save Mask -> Load Mask from Disk. I am using Wee Scots Lass mask #311. Make sure the fit to canvas box is checked, then click on ok.

Edit -> Copy Special -> Copy Merged and add to main canvas, centered.

Open Gemini-SweetTemptations-heartswirl and resize to 75%. Add to main canvas, centered at H200, V400. On the layers pallet, right click and duplicate. Image -> Mirror.

Open tube of choice. I am using Queen by Karen M. Koski. Copy the tube layer and add to main canvas, centered.

Open Gemini-SweetTemptations-doodle and add to main canvas, centered at H400, V600. Adjust -> Add/Remove Noise -> Add noise. Select Gaussian, noise 85% and check the Monochrome box. Then click OK.

Open Gemini-SweetTemptations-heartscatter and resize to 75%. Add to main canvas, centered at H400, V600.

On the materials pallet, set your foreground color to transparent and your background color to black (#000000). Using font of choice, add copyright information to the canvas. For the Queen tube, that information is:

©Karen M. Koski EnchantedCanvas.com Your MtA_License#

I am using Rage Italic, 6 points, bold and centered. I am have also added the background credits and tagged by information at this time.

I have my credits centered at H400, V725.

Note that the Rage Italic font does NOT support the © symbol, so you will have to use a different font for that character.

Effects -> 3D Effects -> Drop Shadow. Use the setting of offsets 3 each, opacity of 100, blur of 5 color Red (#c00000). Repeat using offsets of -3 each and leaving all other settings the same.

Starting with Raster 2, the heartswirl layer, add a drop shadow to each of the elements on your tag (except the copyright layer, Raster 6). I am using offsets of 5 each, opacity of 75, blur of 15 and color black (#000000).

You should now save the artist's copy of your tag as a .pspimage file.

Using font or alpha of choice add name of choice to the tag. I am using the Satin Gold alpha by Marie Stones, which is a FTU alpha. I have my name centered at H275, V625, although this may change depending upon the length of the name. Add a drop shadow to match the one used on the rest of the tag.

Drop your white background layer, and merge visible. Resize your tag to 75% (600 x 600 pixels) and save a .png file, and you are all done.

Note that if you are planning on using the tag on Facebook, you may wish to save it as a .jpg as Facebook does not handle .pngs well.

I hope you enjoyed this tutorial. If you should have a problem, please feel free to E-Mail Me and I'll be happy to help you out.
Wednesday, January 19, 2011

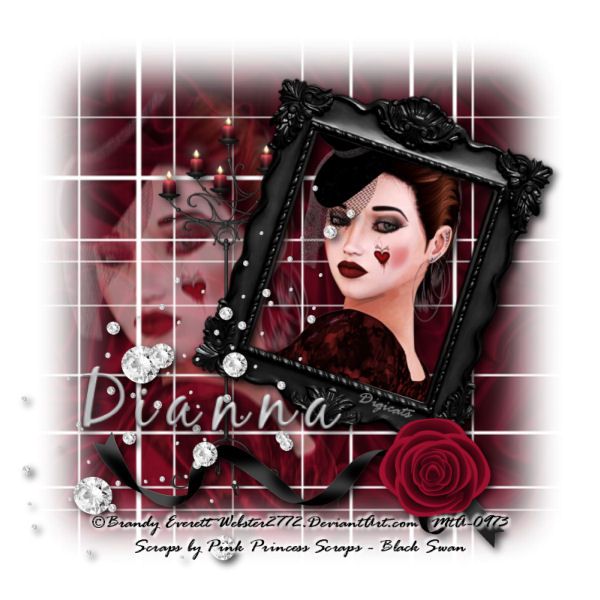
A Secret Love (PTU) Tutorial

Black Swan - Dianna


This tutorial was written by Dianna Richards of Digicats (and Dogs)/Di Before Dawn Tutorials. Any resemblance to any other tutorial, published or unpublished, living, dead or undead, is purely coincidental.

Please do not rebroadcast, redistribute or otherwise claim this tutorial or any part there of as your own work.


Items you will need to complete this project:

The Black swan taggers kit by Pink Princess Scraps, which is a PTU kit that can be purchased at Scraps and the City.

Tube of choice. I am using Clandestine Meeting, by Brandy Everett. You must have a license to use this tube, which is available at My Tubed Art.com.

Mask of choice. I am using Wee Scots Mask #194 which you can download HERE.

Font(s) and/or alpha of choice. I am using Rage Italic, which you can download from free from Acid Fonts.

I am also using the metallic gel alpha by Marie Stones. This is a FTU alpha that can be downloaded from Free Digital Scrapbooking.


Note that H# and V# refer to Horizontal and vertical coordinates on your canvas grid. Make sure you have View, Rulers checked in order to see the ruler grid.

When I say "Add to your canvas" I expect that you will copy and paste it as a new layer, unless otherwise state in the tutorial.

This tutorial assumes you have a working knowledge of PSP. It was written using PSP X3, but should work in PSP 8 and up.

To begin, open a new raster layer canvas, 800 x 800 pxl, flood fill white.

Open paper of choice. I am using pp2. Layers -> Load/Save Mask -> Load Mask from Disk and select mask of choice. I am using using Wee Scots Lass mask # 194. Make sure the fit to canvas box is checked, then click on load.

Edit -> Copy Special -> Copy Merged and add to main canvas, centered.

Open Ele4, and add to main canvas, centered at H500, V350. Image -> Free Rotate -> Rotate right, 18 degrees.

Open tube of choice, I am using Clandestine Meeting by Brandy Everett.

Click on paper layer, Raster 1, to active. Copy the tube and add to main canvas, centered at H250, V400. On the Layers pallet, set your opacity level to 60%.

Adjust -> Blur -> Motion Blur -> Strength 15%, Angle 0.

On the layers pallet, set your blend mode to screen.

Returning to the tube file, resize to 65%. Copy the tube layer again and add to the main canvas, centered at H500, V350. Image -> Free Rotate -> Rotate right, 18 degrees.

Return to the top layer, the frame layer.

Open Ele45, and rotate right. Add to main canvas, centered at H400, V650.

Open Ele17 and resize to 50%. Add to main canvas, centered at H580, V630 (or right in the middle of the bow on the ribbon).

Open Ele6 and resize to 75%. On the layers pallet, click on raster 3 to activate, then add the candelabra to your main canvas, centered at H300, V400.

Open Ele28, and add to main canvas, centered at H250, V500.

On the layers pallet, set your foreground color to transparent and your background color to black (#000000). Using font of choice add copyright information to the tag. For the Clandestine Meeting tube that information is:

©Brandy Everett Webster2772.DeviantArt.com Your MtA_License#

I am using Rage Italic, 6 points, bold and centered. I also add the background credits and tagged by information at this time.

Note that Rage Italic does not support the © symbol, so you will have to change that part of the line to a different font.

I have my credits, centered at H400, V725. Using the following settings, add a white drop shadow to the text: Offsets of 3 each, opacity of 100, blur of 5, color (#ffffff). Repeat using offsets of -3 each and leaving all other settings the same.

Starting with Raster 7, the candelabra layer, and working upward add a drop shadow to each of the elements on your main canvas, I am using offsets, vertical and horizontal of 5 each, opacity of 75%, blur of 15 and color black (#000000).

You can now save the artist copy of your tag as a .pspimage file.

Using font or alpha of choice add name of choice to tag. I am using the silver gel alpha and have centered my name at or around H300, V550. I then added a drop shadow to match the rest of the tag.

Layers -> Merge Visible.

Resize your canvas to 75% (600 x 600 pixels) and save as a .jpg file and you are all done!

I hope you enjoyed this tutorial. If you should have a problem, please feel free to E-Mail Me and I'll be happy to help you out.
Love is (PTU) tutorial

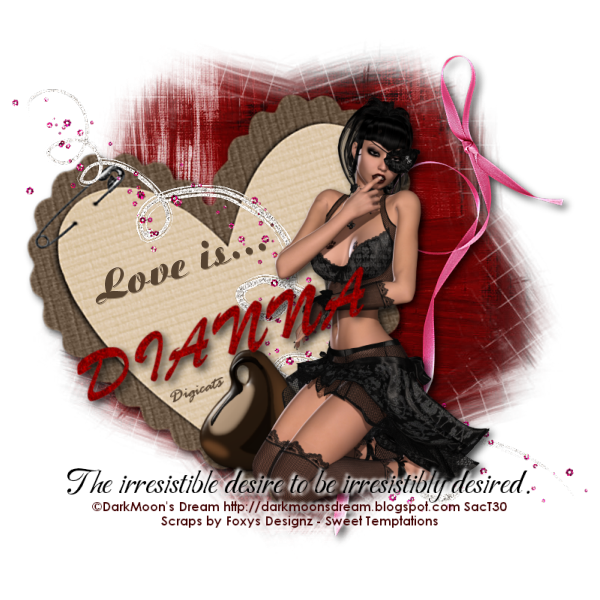
Sweet Temptations - Dianna


This tutorial was written by Dianna Richards of Digicats (and Dogs)/Di Before Dawn Tutorials. Any resemblance to any other tutorial, published or unpublished, living, dead or undead, is purely coincidental.

Please do not rebroadcast, redistribute or otherwise claim this tutorial or any part there of as your own work.


Items you will need to complete this project:

The Sweet Temptations taggers kit by Foxys Designz, This is a PTU kit which is part of a collaboration available at Stargazer Scraps. It is free with a $10 purchase from January 15 to February 15, 2011.

Tube of choice. I am using Flirtations, by Darkmoon's Dream. This is a PTU tube, and you must have a license to use this tube, which is available at ScrapsandtheCity.com.

Mask of choice. I am using Wee Scots Mask #141 which you can download HERE.

Font(s) and/or alpha of choice. I am using Century Gothic which is a windows system font. If you do not have it, you can download it HERE.

The font Aristocrat, which is a free to use font that can be downloaded HERE.

I used something called the Red Felt ABC's for the names. I've had this alpha for a while, I have no idea who did it or where I got it from as a TOU was not included in the zip. You can use whatever font or alpha suits your fancy.


Note that H# and V# refer to horizontal and vertical coordinates on your canvas ruler grid. Make sure you have View -> Rulers checked in order to see the ruler grid.

When I say "Add to your canvas" I expect that you will copy and paste it as a new layer, unless otherwise stated in the tutorial.

This tutorial assumes you have a working knowledge of PSP. It was written using PSP X3, but should work in PSP 8 and up.

To begin, open a new raster layer canvas, 800 x 800 pxl, flood fill white.

Open paper of choice. I am using Paper 10_FD. Layers -> Load/Save Mask -> Load Mask from Disk and select mask of choice. I am using Wee Scots Lass Mask #141.

Open Element15_FD and add to your main canvas at H300, V400. Image -> Free Rotate -> Rotate Left, 18 Degrees

On you materials pallet, set your foreground color to transparent and your background color to brown (#564331). Using the font Arisotcrat, 14 Points, bold and centered, type in "Love is...".

Image -> Free Rotate -> Rotate Left, 18 Degrees. Move your text so that it is centered at H250, V350.

Open Element32_FD and add to your main canvas, centered.

Open Element8-FD and add to your main canvas, centered at H600, V400.

Open Element40_FD and resize to 75%. Add to your main canvas centered at H350, V550.

Open tube of choice. I am using Flirtations04 by Darkmoon's Dream. Resize to 35% and add to your main canvas centered at H500, V400.

Open Element13_FD and add to your main canvas, centered at H400, V650. Using the following settings, a white drop shadow to the element: offsets of 3 each, opacity of 100%, blur of 5, color #ffffff. Repeat, using offsets of -3 each and leaving all other settings the same.

Starting with Raster 2 and working upward, add a drop shadow to each of the elements on your main canvas, except for the swirl layer, Raster 3, and the Robert Frost quote, Raster 6.

I am using offsets, vertical and horizontal of 5 each, opacity of 75%, blur of 15, and color black (#000000).

Using font of choice, add copyright information to the tag. For the Flirtations tube that information is:

©DarkMoon's Dream http://darkmoonsdream.blogspot.com Your SacT_License#.

I am using the font Century Gothic, 4, bold, and centered, color dark red (#400000). I also added the background credits and tagged by information at this point.

Using the following settings, a white drop shadow to the text: offsets of 3 each, opacity of 100%, blur of 5, color #ffffff. Repeat, using offsets of -3 each and leaving all other settings the same.

You can now save the Artist's Copy of your tag as a .pspimage file.

Using font or alpha of choice, add desired name to the tag. I have my name centered at H300, V450, and then free rotated it, left, 18 degrees. Add a drop shadow to match the rest of the elements on the tag.

Drop the white background layer, and resize to 75% (600 x 600 pixels). Save as a .png file, and you are all done.

Note that if you are planning on using the tag on Facebook, you may wish to save it as a .jpg as Facebook does not handle .pngs well.

I hope you enjoyed this tutorial. If you should have a problem, please feel free to E-Mail Me and I'll be happy to help you out.

Tuesday, January 18, 2011

Dark Fae (PTU) Tutorial

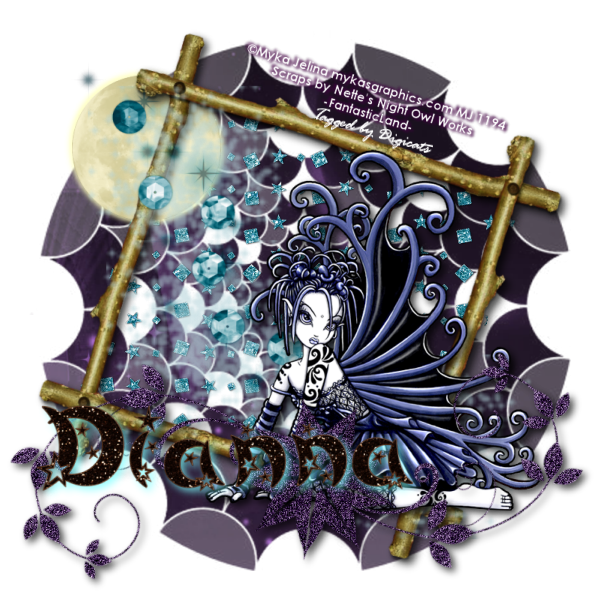
FantasticLand 2 - Dianna


This tutorial was written by Dianna Richards of Digicats (and Dogs)/Di Before Dawn Tutorials. Any resemblance to any other tutorial, published or unpublished, living, dead or undead, is purely coincidental.

Please do not rebroadcast, redistribute or otherwise claim this tutorial or any part there of as your own work.


Items you will need to complete this project:

The Fantasticland taggers kit by Nette's Nightowl Work which is a PTU kit available at Scraps and the City.com.

Tube of choice. I am using Sophia, by Myka Jelina. You must have a license to use this tube, which is available at Myka's Graphics.com.

Mask of choice. I am using the Step Into the Light mask by Nik's Scripts & Scraps which is part of her PSP Masks Mega Pack.

Font(s) and/or alpha of choice. I am using Century Gothic which is a windows system font. If you do not have it, you can download it HERE.

I am also using the Bewitched alpha by Gemini Creationz. This is a PTU alpha available at Scraps and the City.com.


Note that H# and V# refer to horizontal and vertical coordinates on your canvas ruler grid. Make sure you have View -> Rulers checked in order to see the ruler grid.

When I say "Add to your canvas" I expect that you will copy and paste it as a new layer, unless otherwise stated in the tutorial.

This tutorial assumes you have a working knowledge of PSP. It was written using PSP X3, but should work in PSP 8 and up.

To begin, open a new raster layer canvas, 800 x 800 pxl, flood fill white.

Open paper of choice. I am using 7nnwflandpaper. Layers -> Load/save Mask - Load mask from disk and select mask of choice. I am using StepIntoTheLight by Nik's Scripts and Scraps.

Resize to 85%. Edit -> Copy Special -> Copy Merged and add to main canvas, centered.

Open NNwflandbling2 and add to main canvas, centered.

Open nnwflandtwigframe4, and resize. Add to main canvas, centered. Image -> Free Rotate -> Rotate right, 17 degrees.

Using your magic wand, click anywhere outside the frame area to select. With the area still selected, click on Raster 2 on the layer pallet and press the delete key.

Selections - Select none.

Return to top layer.

Open nnwflandsparkle3, resize to 75% and add to main canvas, centered.

Open tube of choice. I am using Sophia by Myka Jelina. Copy the Sophia layer and add to main canvas, centered at V500, V450.

Open nnwflandflowerdoodle1. Resize to 75%, but make sure you UNCLICK the resize all layers button before you do it. Image, free rotate -> rotate left, 45 degrees. Copy and add to main canvas, centered at H400, V625.

Open nnwflandmoon1 and resize to 200 pixels wide. You can reclick the resize all layers button.

On the layers pallet, click on raster 2, the bling layer. Add the moon to your pallet, centered at H200, V200. Add a drop shadow to the moon using the following settings:

Offsets 3 each, opacity 100, blur 10, color Light yellow (#ffffc0). Repeat using offsets of -3 each, leaving all other settings the same.

Return to top layer.

On the materials pallet, set your foreground color to transparent, and your background color to white (#ffffff).

Using font of choice, add copyright information to your canvas. For the Myka Jelina tube, that information is:

©Myka Jelina mykasgraphics.com Your MJ_License#

I am using Century Gothic, 4 points, bold and centered. I centered my text at H500, V130, then I free rotated it right, 17 degrees to match the angle on the frame.

I also added my background credit and tagged by information at this point.

Using the following settings, add a drop shadow to the text:

Offsets of 3 each, opacity of 100%, blur of 5, color dark purple (#400040). Repeat using offsets of -3 each, leaving all other settings the same.

Click on raster 6, the doodle layer. Go to Adjust -> Add/Remove Noise -> Add Noise and use the settings of Gaussian, Noise: 85, and check the Monochrome box. Click on OK.

Add drop shadow of choice to the following layers:

The frame layer - Raster 3
The tube layer - Raster 5
The doodle layer - Raster 6

I am using offsets, vertical and horizontal of 5 each, opacity of 75, blur of 15 and color black (#000000).

You can now save the artists copy of your tag as a .pspimage file.

Using font or alpha of choice, add name of choice to tag. I am using the Bewitched Alpha by Gemini Creationz.

I have centered my name at H300, V600. Since this is a dark alpha, I am using a light drop shadow. Use same settings as for the tube layer above, but change the color to sky blue (#80ffff).

Drop the white background layer, and resize your tag to 75% (600 x 600 pixels). Save as a .png file and you are all done!

If you are planning on using the tag on Facebook, you may wish to save it as a .jpg with a white background layer, as this displays better on Facebook.

I hope you enjoyed this tutorial. If you should have a problem, please feel free to E-Mail Me and I'll be happy to help you out.
Monday, January 17, 2011

Steam Pirate (PTU) Tutorial

Steam Pirate - Dianna


This tutorial was written by Dianna Richards of Digicats (and Dogs)/Di Before Dawn Tutorials. Any resemblance to any other tutorial, published or unpublished, living, dead or undead, is purely coincidental.

Please do not rebroadcast, redistribute or otherwise claim this tutorial or any part there of as your own work.


Items you will need to complete this project:

The SteamWorks taggers kit by Digcats (& Dogs). This is a PTU kit that can be purchased EXCLUSIVELY at Scraps and the City.com.

Tube of choice. I am using Helana, by ©Myka Jelina. This is a PTU tube, and you must have a license to use this tube, which is available at Myka's Graphics.com.

Mask of choice. I am using Gears by Nik's Scripts & Scraps which is part of her PSP Masks Mega Pack.

Font(s) choice. I am using Century Gothic which is a Windows System font. If you do not have it, you can download it HERE.

Optional Alpha of choice. The Black Epoxy alpha by Marie Stones. This is a FTU alpha that may be downloaded from Free Digital Scrapbooking.


Note that H# and V# refer to Horizontal and vertical coordinates on your canvas grid. Make sure you have View, Rulers checked in order to see the ruler grid.

When I say "Add to your canvas" I expect that you will copy and paste it as a new layer, unless otherwise state in the tutorial.

This tutorial assumes you have a working knowledge of PSP. It was written using PSP X3, but should work in PSP 8 and up.

To begin, open a new raster layer canvas, 800 x 800 pxl, flood fill white.

Open paper of choice. I am using DCD-StWo_Paper14. Image -> Load/Save Mask -> Load mask from Disk. I am using Gears, by Nik's Scripts and Scraps. Make sure the fit to canvas box is checked, then click on load.

Edit -> Copy Special -> Copy Merged and add to main canvas, centered.

Open DCD_StWo_Chicken Wire01 and resize to 75%. Add to main canvas, centered.

Open DCD-StWo_Cog3, and add to main canvas, centered at H300, V525.

Open DCD_StWo_Frame03 and resize to 75%. Add to main canvas, centered. Image -> Free Rotate -> Rotate Left, 23 degrees.

Open tube of choice. I am using Helena by Myka Jelina. Copy Layer 3, and add to main canvas, centered.

On the layers pallet, right click on the frame layer, Raster4, and duplicate. Right click on the frame copy, Copy of Raster 4 -> Arrange -> Bring to top.

With your selection tool set to rectangle, replace, select the top 1/3 of the frame copy (to V300) and delete. Selections -> Select none. Next select the bit the frame copy that's over the pistol on the right hand side of the canvas, and delete that as well. Selections -> Select none.

Using your eraser tool, erase the bit of the tube on the left hand side of the canvas, that is showing on the outside of the frame.

Return to top layer.

Open DCD-StWo-Ribbon03 and resize to 75%. Add to main canvas, centered at H400, V650.

Open DCD_StWo_Spyglass and resize to 75%. Add to main canvas, centered at H350, V600. Image -> Free Rotate -> Rotate left, 55 degrees.

Open DCD_StWo_Compass and resize to 50%. Add to main canvas, centered at H300, V600.

On the materials pallet, set your foreground color to transparent and your background color to white (#ffffff). Using font of choice, add the copyright information to the tag. For the Helana tube, that information is:

©Myka Jelina mykasgraphics.com Your MJ_License#.

I am using Century Gothic, 4 points, bold and centered and have located the copyright information at H250, V110. I then free rotated the text 23 degrees left ot match the angle on the frame. I also added the background credits and tagged by information at this point.

Starting with Raster 2 - the mesh layer - and working upward, add a drop shadow of choice to each of the elements on the main canvas except the frame copy, copy of Raster 4.

I am using offsets, vertical and horizontal of 5 each, opacity of 75%, blur of 15 and color black (#000000).

You can now save the artist's copy of your tag as a .pspimage file.

Using font or alpha of choice, add name of choice to the tag. I am using the black epoxy alpha by Marie Stones. I have centered my name at H500, V500 and added a drop shadow to match the rest of the tag.

Drop the white background layer and merge visible. Resize to 75% (600 x 600 pixels) and save as a .png file and you are all done.

Note that for forum use, I am resizing by 75% again to reduce the tag to 450 x 450 pixels. For Facebook, I am saving the tag as a .jpg, with a white background.

I hope you enjoyed this tutorial. If you should have a problem, please feel free to E-Mail Me and I'll be happy to help you out.
Monday, January 10, 2011

FantasticLand (PTU) tutorial

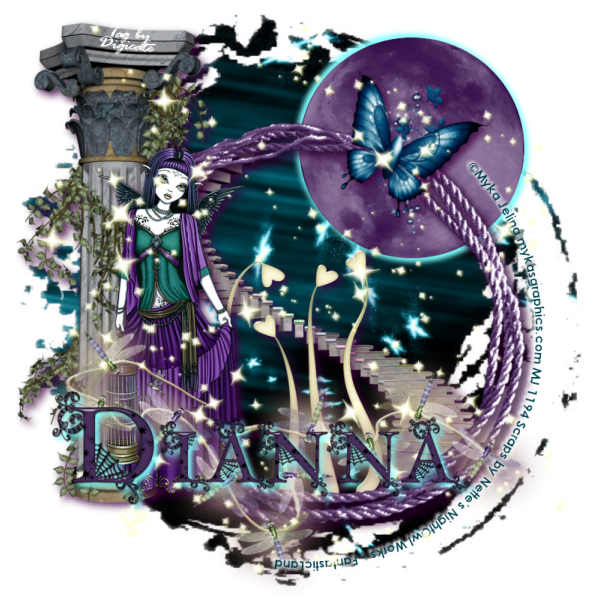
Fantasticland - Dianna


This tutorial was written by Dianna Richards of Digicats (and Dogs)/Di Before Dawn Tutorials. Any resemblance to any other tutorial, published or unpublished, living, dead or undead, is purely coincidental.

Please do not rebroadcast, redistribute or otherwise claim this tutorial or any part there of as your own work.


Items you will need to complete this project:

The Fantasticland taggers kit by Nette's Nightowl Work which is a PTU kit available at Scraps and the City.com.

Tube of choice. I am using Avery, by Myka Jelina. You must have a license to use this tube, which is available at Myka's Graphics.com.

Mask of choice. I am using the Grunge99 mask by Nik's Scripts & Scraps which is part of her PSP Masks Mega Pack.

Font(s) and/or alpha of choice. I am using Century Gothic which is a windows system font. If you do not have it, you can download it HERE.

I am also using the Goth Chic alpha by Whispy's D'zines, which is a FTU alpha you may download at whispysdzines.blogspot.com.


Note that H# and V# refer to horizontal and vertical coordinates on your canvas ruler grid. Make sure you have View -> Rulers checked in order to see the ruler grid.

When I say "Add to your canvas" I expect that you will copy and paste it as a new layer, unless otherwise stated in the tutorial.

This tutorial assumes you have a working knowledge of PSP. It was written using PSP X3, but should work in PSP 8 and up.

To begin, open a new raster layer canvas, 800 x 800 pxl, flood fill white.

Open paper of choice. I am using nnwflandpaper14. Layers -> Load/Save Mask -> Load Mask from Disk and select mask of choice. I am using Grunge99 by Nik's Scripts and Scraps. Make sure the fit to canvas box is checked, then click on load.

Resize to 85%. Edit -> Copy Special -> Copy Merged and add to main canvas, centered.

Open NNwflandmoon2 and resize to 45%. Add to main canvas, centered at H550, V200.

Open nnwflandstairs and resize to 75%. Add ot main canvas, centered.

Open nnwflandheartsprig2 and resize to 50%. Add to main canvas, centered at H400, V500.

Open nnwflandframe7 and add to main canvas, centered at H500, V400.

Using your eraser tool, erase the bits of the stair that fall outside the frame on the left hand side. Return to top layer.

Open nnwflandcolumn1 and resize to 75%. Add to main canvas, centered at H150, V350.

Open tube of choice. I am using Avery by Myka Jelina. Copy the full body layer and add to main canvas, centered at H200, V450.

Open nnwflandfairylights1, resize to 75% and add to main canvas, centered at H400, V600.

Open NNwflandbfly11 and resize to 25%. Add to main canvas, centered at H550, V200. Image -> Free Rotate -> Rotate Right, 18 degrees.

On the materials pallet, set your foreground color to transparent and your background color to teal (#004350). Using font of choice add copyright information to the tube. For the Avery tube, that information is:

©Myka Jelina mykasgraphics.com Your MJ License#

I am using Century Gothic, 4 points, bold and centered and have fit by text to path. It is beyond the scope of this tutorial to explain how to fit text to path, but you can find a tutorial covering this subject HERE.

You should also add the background credits and tagged by information at this time.

Using the following settings, add a drop shadow to the text: Offsets 3 each, opacity 100%, blur 5, and color white (#FFFFFF). Make sure you rotate the text to the desired location BEFORE you apply the drop shadow.

Repeat, using offsets of -3 each and leaving all other settings the same.

Click on raster 2, the moon layer to activate. Using the following settings, add a drop shadow to the moon: offsets of 5 each, opacity of 100%, blur of 10, color light blue (#80ffff). Repeat using offsets of -5 each, leaving all other settings the same.

Starting the the stair layer, Raster 3 and working upward add a drop shadow to each of the elements on your main canvas: Offsets, vertical and horizontal of 5 each, opacity 85%, blur 15 and color dark purple (#400040).

Do NOT add a drop shadow to the copyright info as you have already done that.

Open nnwflandpixdust and add to main canvas, centered.

You can now save the artist's copy of your tag as a .pspimage file.

Using font or alpha of choice, add desired name to tag. I am using the Goth Chic alpha by Whispy's D'zines and have my name centered at H350, V600.

Add a drop shadow to the name to match the setting you used for the drop shadow on the MOON, Raster 2: offsets of 5 each, opacity of 100%, blur of 10, color light blue (#80ffff).

Delete the white background layer and merge visible. Resize to 75% (600 x 600 pixels) and save as a .png file and you are all done.

If you are planning on using the tag on Facebook, you may wish to save it as a .jpg with a white background layer, as this displays better on Facebook.

I hope you enjoyed this tutorial. If you should have a problem, please feel free to E-Mail Me and I'll be happy to help you out.

Saturday, January 8, 2011

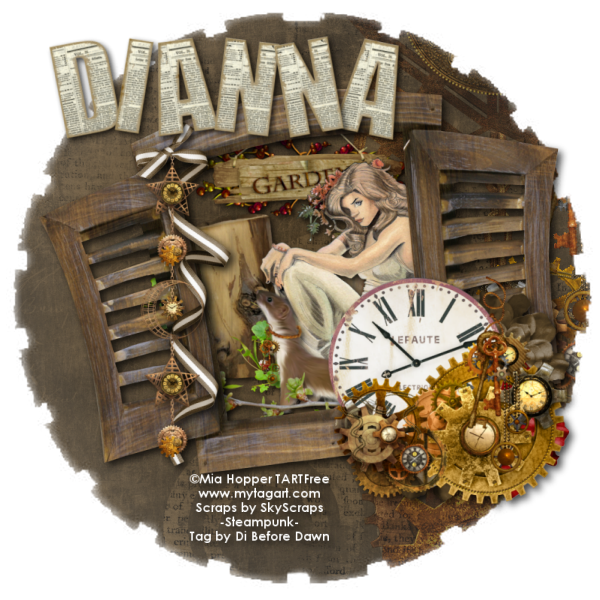
Garden of Earthly Delights (PTU) Tutorial

Garden of Earthly Delights - Dianna


This tutorial was written by Dianna Richards of Digicats (and Dogs)/Di Before Dawn Tutorials. Any resemblance to any other tutorial, published or unpublished, living, dead or undead, is purely coincidental.

Please do not rebroadcast, redistribute or otherwise claim this tutorial or any part there of as your own work.


Items you will need to complete this project:

The Steampunk taggers kit by Sky Scraps, which is a PTU kit that can be purchased at Scraps and the City.

Tube of choice. I am using MBHFreebie1, by Mia Hopper. This is a FTU tube, which is available at My Tag Art.com.

Mask of choice. I am using Gear by Nik's Scripts & Scraps which is part of her PSP Masks Mega Pack.

Font(s) and/or alpha of choice. I am using Century Gothic, which is a Windows systems font. If you do not have it, you can download it HERE.

Optional Alpha of choice. I am using the PTU Old News Alpha by Scrappergirl Designs. I have no idea where you can get this one at, as the blog referenced in the TOU is no longer active. You may choose to use a font to add your name to the tag instead.


Note that H# and V# refer to Horizontal and vertical coordinates on your canvas grid. Make sure you have View, Rulers checked in order to see the ruler grid.

When I say "Add to your canvas" I expect that you will copy and paste it as a new layer, unless otherwise state in the tutorial.

This tutorial assumes you have a working knowledge of PSP. It was written using PSP X3, but should work in PSP 8 and up.

To begin, open a new raster layer canvas, 800 x 800 pixels, flood fill dark blue (#000040).

Open paper of choice. I am using SkyScraps-AS-pp9. Layers -> Load/Save mask -> Load mask from disk and select mask of choice. I am using Gear by Nik's Scraps & Scraps. Make sure the fit to canvas box is checked, then click on load.

Edit -> Copy Special -> Copy Merged and add to main canvas, centered.

Open SkyScraps-AS-EI and resize to 75%. Add to main canvas, centered at H400, V150.

Open SkyScraps-AS-E2 and add to main canvas, centered.

Open tube of choice. ia m using MBHFreebie1. Copy Raster1 and add to man canvas, centered at H500, V400.

Open SkyScraps-AS-A1 and resize to 75%. Add to main canvas, centered at H500, V500.

Open SkyScraps-AS-E4 and resize to 75%. Add to main Canvas, centered at H450, V575.

Using your eraser tool, erase the bit of the gown on the tube that falls below the weasle and branch on the main canvas.

Starting with Raster 2 and working upward, add a drop shadow to each of the elements on the main canvas. I am using offsets, vertical and horizontal of 5 each, opacity of 75, blur of 15 and color of black (#000000).

On the layers pallet, click the little eyes on Raster 1 and on the Background to hide them. Layers -> Merge visible. Resize the merged element to 75%.

Unhide Raster 1 and the background layer.

Open SkyScraps-As-F1 and add to main canvas, centered at H400, V375.

Open Skyscraps-AS-E23b and resize to 75%. Add to the main canvas, centered at H240, V390.

Open SkyScraps-AS_E27 and resize to 75%. Add to main canvas, centered at H600, V525.

On the materials pallet set your foreground color to transparent and your background color to white. Using font of choice add the copyright information to the tag.

For the Mia Hopper tube that information is:

©Mia Hopper www.mytagart.com TARTFree

Remember - this is the free tube. Do NOT use your TART license #. You must use TARTFree as the license.

You should also add the background credits and tagged by info at this time. Be sure to add the "Tag by" as there is no other way to tell who created the tag with the TARTFree license.

I am using Century Gothic, 4 points, bold and centered. I have my credits centered at H350, V675.

Starting with what is now Raster 2, the frame layer and working upward, add a drop shadow to each of the items on the main canvas. Use the same settings you used for the background elements.

You can now save the artist's copy of your tag as a .pspimage file.

Using font or alpha of choice, add desired name to tag. I am using the old new alpha by Scappergirl Designs, and have my name centered at H300, V125. Location may vary depending upon the size the length of the name you are using.

Add a matching drop shadow to the name.

Drop the white background layer and merge visible. Resize to 75% (600 x 600 pixels) and save as a .png file and you are all done.

For forum use, you might wish to reduce it by 75% again, to 450 x 450 pixels). If you plan on posting it to Facebook, consider saving it as a .jpg file with the white background, as that tends to work better on Facebook.

I hope you enjoyed this tutorial. If you should have a problem, please feel free to E-Mail Me and I'll be happy to help you out.
Friday, January 7, 2011

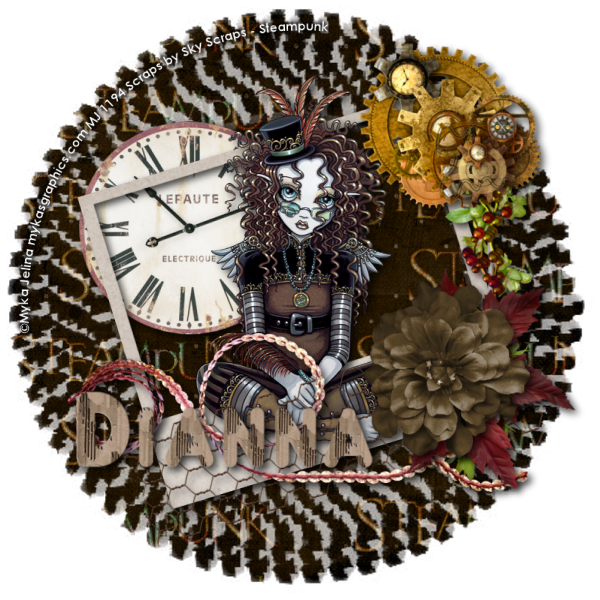
Cloudy Skies (PTU) Tutorial

Cloudy Skies - Dianna


This tutorial was written by Dianna Richards of Digicats (and Dogs)/Di Before Dawn Tutorials. Any resemblance to any other tutorial, published or unpublished, living, dead or undead, is purely coincidental.

Please do not rebroadcast, redistribute or otherwise claim this tutorial or any part there of as your own work.


Items you will need to complete this project:

The Ghosts in the Machine taggers kit by Digcats (& Dogs). This is a PTU kit that can be purchased EXCLUSIVELY at Scraps and the City.com.

Tube of choice. I am using Cloud Burst, by ©Myka Jelina. This is a PTU tube, and you must have a license to use this tube, which is available at Myka's Graphics.com.

Mask of choice. I am using Grate by Nik's Scripts & Scraps which is part of her PSP Masks Mega Pack.

Font(s) choice. I am using Century Gothic which is a Windows System font. If you do not have it, you can download it HERE.

Optional Alpha of choice. The PTU Old News Alpha by Scrapper Girl Designs. I have no idea where you can get this one at, as the blog referenced in the TOU is no longer active. You may choose to use a font to add your name to the tag instead.


Note that H# and V# refer to Horizontal and vertical coordinates on your canvas grid. Make sure you have View, Rulers checked in order to see the ruler grid.

When I say "Add to your canvas" I expect that you will copy and paste it as a new layer, unless otherwise state in the tutorial.

This tutorial assumes you have a working knowledge of PSP. It was written using PSP X3, but should work in PSP 8 and up.

To begin, open a new raster layer canvas, 800 x 800 pxl, flood fill white.

Open paper of choice. I am using DCD_GitM_Paper09. Layers -> Load/Save Mask -> Load Mask from Disk and select mask of choice. I am using Grate, by Nik's Scripts & Scraps. Make sure the fit to canvas box is checked, then click on load.

Edit -> Copy Special -> Copy Merged and add to main canvas, centered.

Open DCD_GitM_Barbed Wire01, and add to main canvas, centered at V400, H550.

On the layers pallet, click on Raster 1 the paper layer to activate. Using your Magic Wand tool, click anywhere outside the masked paper area to select. With the Grate Mask, you will need to set your mode to Add (Shift) and click in several places to get the whole outside area selected.

With the area still selected, click on Raster 2, and press the delete key.

Selections -> Select None.

Open DCD_GitM-Airship, resize to 75% and add to main canvas, centered at H200, V350.

Open DCD_Gitm-Pipeworks and resize to 75%. Add to main canvas, centered at H500, V450.

Open DCD_GitM-Frame05 and add to the main canvas, centered at H500, V400.

Open tube of choice. I am using "Cloud Burst" by Myka Jelina. Copy Layer 3, and add to main canvas, centered at H500, V400.

On the layers pallet, right click on Raster 5, the frame layer, and duplicate. Right Click on the Copy of Raster 5 -> Arrange - Bring to top.

With your selection tool set to rectangle - replace, select the top half the frame copy, Copy of Raster 5, and delete.

Selections -> Select None.

Using your eraser tool erase any part of the pipeworks, Raster 4, that falls outside the frame area.

Open DCD_GitM_Threadbow 03, rotate left, and resize to 75%. Add to main canvas, centered at H700, V400.

Open DCD_GitM-Light02 and mirror. Add to main canvas, centered at H300, V550.

Open DCD-GitM-Barbed Wire02 and resize to 75%. Add to main canvas, centered at H400, V650.

Open DCD_GitM_Gears1 and resize to 50%. Add to main canvas, centered at H600, V575.

Open DCD_GitM_Tag05, and rotate left. Using font of choice add the copyright information, background credits and tagged by info to the tag. For the Cloud Burst tube, that information is:

©Myka Jelina mykasgraphics.com Your MJ License#

I am using Century Gothic, 4 points, bold and centered, and then used my pick tool to resize downward just a bit to fit everything on the tag.

Merge visible, and rotate right. Add to the main canvas, centered at H700, V380.

Using your eraser tool, erase the top bit of Tag02 to make it look like the bow has the tag tied to the frame.

(The cheat for this is to click on Raster 7, the threadbow layer, to activate. Using your selection tool set to rectangle - replace, select just a little bit of the bow knot. Selection -> Promote Selection to Layer. Right click on the Promoted Selection layer -> Arrange -> Bring to top. If you use this method do NOT add a drop shadow the Promoted Selection in the next step.)

Starting with Raster 2, the first Barbed Wire layer, and working upward, add a drop shadow of choice to each of the elements on your main canvas, except for the frame layer copy, Copy of Raster 5.

I am using offsets, vertical and horizontal of 5 each, opacity of 75%, blur of 15 and color black (#000000).

Open DCD_GitM_Mist and resize to 75%. On your layers pallet, click on Raster 9, the second Barbed Wire layer to activate. Add the Mist to your main canvas, centered at H400, V550. Using either your eraser tool or your smudge tool, or a combination of both, smudge out the left edge of the mist a bit so it looks more natural and is not a straight edge.

I used mainly the eraser tool, and then did just a little bit of smudging around the top of the mist to blend it.

You should now save the artist's copy of your tag as a .pspimage file.

Using font or alpha of choice, add desired name to tag. Being Queen of Alphas, I am using the Old New Alpha by Scrapper Girl Designs. I have the name centered at H300, V600, and have added drop shadow to match the rest of the tag.

Drop your white background layer and merge visible. Resize to 75% (600 x 600 pixels) and save as a .png file, and you are all done!

Note that for forum use, I am resizing by 75% again to reduce the tag to 450 x 450 pixels. For Facebook, I am saving the tag as a .jpg, with a white background.

I hope you enjoyed this tutorial. If you should have a problem, please feel free to E-Mail Me and I'll be happy to help you out.
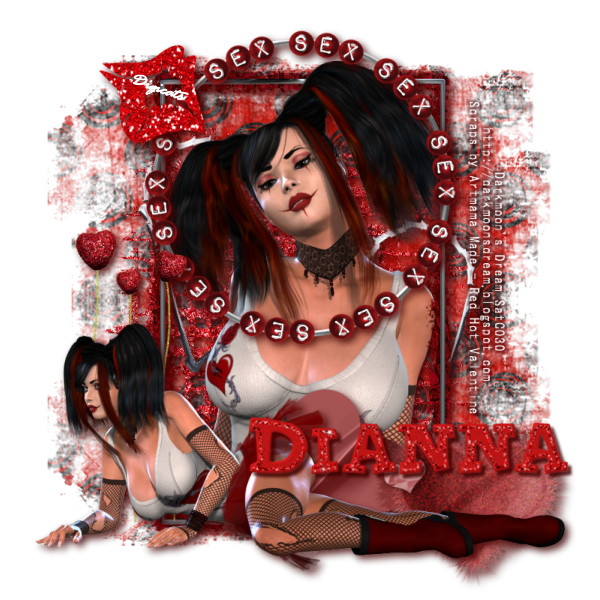
Skypunk (PTU) Tutorial

SkyPunk - Dianna


This tutorial was written by Dianna Richards of Digicats (and Dogs)/Di Before Dawn Tutorials. Any resemblance to any other tutorial, published or unpublished, living, dead or undead, is purely coincidental.

Please do not rebroadcast, redistribute or otherwise claim this tutorial or any part there of as your own work.


Items you will need to complete this project:

The Steampunk taggers kit by Sky Scraps, which is a PTU kit that can be purchased at Scraps and the City.

Tube of choice. I am using Lucy, by Myka Jelina. This is a PTU tube, and you must have a license to use this tube, which is available at Myka's Graphics.com.

Mask of choice. I am using Gears by Nik's Scripts & Scraps which is part of her PSP Masks Mega Pack.

Font(s) and/or alpha of choice. I am using Century Gothic, which is a Windows systems font. If you do not have it, you can download it HERE.

I am also using the PTU Corrugated alpha by Elayne Araujo.


Note that H# and V# refer to Horizontal and vertical coordinates on your canvas grid. Make sure you have View, Rulers checked in order to see the ruler grid.

When I say "Add to your canvas" I expect that you will copy and paste it as a new layer, unless otherwise state in the tutorial.

This tutorial assumes you have a working knowledge of PSP. It was written using PSP X3, but should work in PSP 8 and up.

To begin, open a new raster layer canvas, 800 x 800 pixels, flood fill dark blue (#000040).

Open paper of choice. I am using SkyScraps-AS-pp10. Layers -> Load/Save Mask -> Load Mask from Disk and select mask of choice. I am using Gears by Nik's Scripts and Scraps.

Edit -> copy Special -> Copy Merged and add to main canvas, centered.

Open Sky Scraps-AS-F2, and add to main canvas, centered. Image -> Free rotate -> Rotate Left, 17 degrees.

Open tube of choice. I am using Myka Jelina's Lucy tube. Copy Layer 4 and add to main canvas, centered at H400, V350.

Open SkyScraps-AS-BW-1 and rotate left (or right) and add to main canvas centered at H450, V575. Image -> free rotate -> rotate left, 17 degrees.

Open SkyScraps-AS-Cluster5 and rotate left. Resize to 75%, and add to main canvas, centered at H600, V350.

Open SkyScraps-AS-E12, and resize to 75%. Add to main canvas, centered at H400, V550.

Open SkyScraps-AS-E16 and resize to 75%. Add to main canvas, centered at H600, V500.

Open SkyScraps-AS-E17 and resize to 75%. Add to main canvas, centered at H600, V500.

On the layers pallet, click on the paper layer, raster 1, to activate.

Open SkyScraps-AS-E6 and resize to 75%. Add to main canvas, centered at H250, V300.

Return to top layer, Raster 8.

On the materials pallet, set your foreground color to transparent and your background color to white (#ffffff). Using font of choice add copyright information to the tag. For the Myka Jelina tube that information is:

©Myka Jelina mykasgraphics.com Your MJ License#

I am using Century Gothic, 4 points, bold and centered. I also add the background credits and tagged by information at this point. I then fit text to path to put the copyright around in the inside edge of the masked paper. It is beyond the scope of this tutorial to explain how to do this, but you can find a separate tutorial explaining how to fit text to path HERE.

Using the following settings, add a drop shadow to to your text: Offsets of 3 each, opacity of 100%, blur of 5 and color of black (#000000). Repeat using offsets of -3 each, while leaving all other settings the same.

On your layers pallet, click on the clock layer, raster 9 to activate. Starting with that layer and working upward, add a drop shadow of choice to each of the items on your main canvas, except the copyright, which you've already add a drop shadow to. I am using offsets of 5 each, opacity of 75%, blur of 15 and color of black (#000000).

Save your artist's copy as a .pspimage file.

Using font or alpha of choice, add desired name to tag. I am using the Corrugated alpha by Elayne Araujo. I have the name centered at H300, V575, and have added a drop shadow to the name to match the rest of the tag.

Drop the white background layer and merge visible. Resize to 75% (600 x 600 pixels) and save as a .png file and you are all done.

If you will be using this tag on facebook or posting it to galleries, you might wish to save it as a .jpg file, as it looks much better with the white background on it, than the black one that some places are imposing.

I hope you enjoyed this tutorial. If you should have a problem, please feel free to E-Mail Me and I'll be happy to help you out.
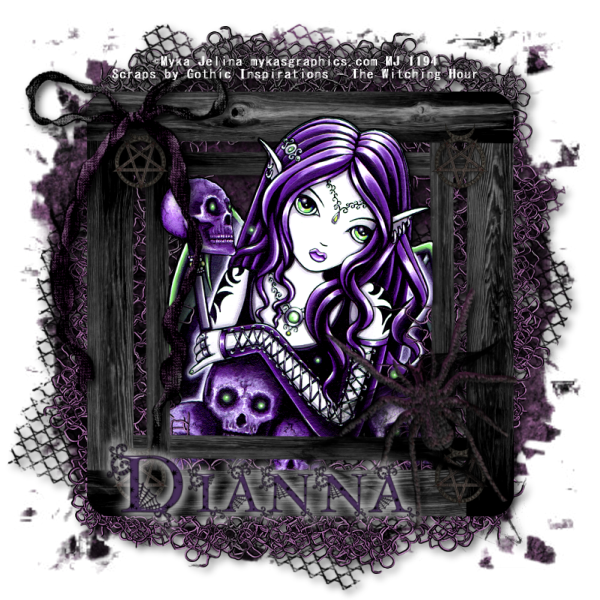
Red Hot Lover (PTU) Tutorial

Red Hot Lover - Dianna


This tutorial was written by Dianna Richards of Digicats (and Dogs)/Di Before Dawn Tutorials. Any resemblance to any other tutorial, published or unpublished, living, dead or undead, is purely coincidental.

Please do not rebroadcast, redistribute or otherwise claim this tutorial or any part there of as your own work.


Items you will need to complete this project:

The Red Hot Valentine taggers kit by Artmama Made which is a PTU kit available at Stargazer Scraps.

Tube of choice. I am using Cold Hearted, by Darkmoon's Dream. This is a PTU tube, and you must have a license to use this tube, which is available at ScrapsandtheCity.com.

Mask of choice. I am using Wee Scots Mask #83 which you can download HERE.

Font(s) and/or alpha of choice. I am using MS Gothic which is a Windows System font. If you do not have it, you can download it HERE.

I am also using the Red Alpha by Stephinette. It is a Christmas alpha but it works for Valentine's Day too.


Note that H# and V# refer to horizontal and vertical coordinates on your canvas ruler grid. Make sure you have View -> Rulers checked in order to see the ruler grid.

When I say "Add to your canvas" I expect that you will copy and paste it as a new layer, unless otherwise stated in the tutorial.

This tutorial assumes you have a working knowledge of PSP. It was written using PSP X3, but should work in PSP 8 and up.

To begin, open a new raster layer canvas, 800 x 800 pxl, flood fill white.

Open paper of choice. I am using AM-Red Hot Valentine09. Layers -> Load/Save Mask -> Load mask from disk and select mask of choice. I am using Wee Scots Lass mask #83. Make sure the fit to canvas box is checked, then click on load.

Edit -> Copy Special -> Copy Merged and add to main canvas, centered.

Open AM-Red Hot Valentine embellie20 and add to main canvas, centered at H300, V350. Image - Free Rotate -> Rotate Right, 18 degrees. Duplicate and Mirror. Relocate the duplication to H500, V450.

Open AM-Red Hot Valentine embellie16 and add to main canvas, centered. Right click on Raster 3 on the layers pallet and go to Arrange -> Move down. Repeat the move down.

Return to top layer.

Open AM-Red Hot Valentine embellie07 and rotate left (or right, makes no difference). Add to main canvas, centered.

Open tube of choice. I am using Cold Hearted by Darkmoon's Dream. Open the close up, Cold Hearted04, resize to 65% and add to main canvas, centered.

On the layers pallet, right click on the frame layer, Raster 4, and duplicate. Arrange -> Bring to top.

Set your selection tool to rectangle - replace and select the top half of the frame copy layer, Copy of Raster 4, and delete.

Using your eraser tool, erase the bits of the tube that fall below the frame. Return to top layer.

Open AM-Red Hot Valentine embellie38, and add to main canvas, centered at H400, V250.

Open AM-Red Hot Valentine embellie17, and resize to 65%. Add to main canvas, centered at H175, V500.

Open Cold Hearted03, and resize to 45%. Add to main canvas, centered at H400, V600.

OpenAM-Red Hot Valentine embellie44 and add to main canvas, centered at H575, V650. Arrange -> Move down.

Return to top layer.

Open AM-Red Hot Valentine embellie48 and add to main canvas, centered at H200, V125.

On the materials pallet, set your foreground color to transparent and your background color to white (#ffffff). Using font of choice add copyright information to the canvas. For the Cold Hearted tube, that information is:

©Darkmoon's Dream http://darkmoonsdream.blogspot.com Your SATC_License#.

You should also add the background credits and tagged by info at this time.

I am using MS Gothic, 4 points bold and centered. I then free rotated the text right, 90 degrees, and located it along the right side of the frame at H650, V350.

Starting with the mesh layer, Raster 3, and working upward, add a drop shadow of choice to each of the elements on your canvas, except for the frame copy, Copy of Raster 4, and the copyright.

I am using offsets, vertical and horizontal of 5 each, opacity of 85, blur of 15 and color dark red (#400000).

For the copyright information, change your settings to offsets of 3 each, opacity of 100% and blur of 5 and add the drop shadow. Repeat, using offsets of -3 each.

You can now save your tag as a .pspimage file.

using font or alpha of choice, add desired name(s) to tag. I am using the Red Alpha by Stephinette, and have the name centered at H550, V600.

I then added a drop shadow to it of offsets, 5 each, opacity of 85%, blur of 5, and color dark red (#400000).

Drop the white background layer and merge visible. Resize to 75% (600 x 600 pixels) and save as a .png file, and you are all done!

Note that if you are planning on using the tag on Facebook, you may wish to save it as a .jpg as Facebook does not handle .pngs well.

I hope you enjoyed this tutorial. If you should have a problem, please feel free to E-Mail Me and I'll be happy to help you out.

Thursday, January 6, 2011

Bewitching (PTU) Tutorial

Bewitching - Dianna


This tutorial was written by Dianna Richards of Digicats (and Dogs)/Di Before Dawn Tutorials. Any resemblance to any other tutorial, published or unpublished, living, dead or undead, is purely coincidental.

Please do not rebroadcast, redistribute or otherwise claim this tutorial or any part there of as your own work.


I wanted to write this using her two freebie samplers but I could not fine the Sunshine and Lollipops one, so I used the PTU kit instead. So, items you will need to complete this project:

The Witching Hour taggers kit by Gothic Inspirations, which is a PTU kit that is available at Gothic Inspiration.com.

Tube of choice. I am using Belladonna, by Myka Jelina. This is a PTU tube, and you must have a license to use it, which is available at Myka's Graphics.com.

Mask of choice. I am using the Shambles mask by Nik's Scripts & Scraps which is part of her PSP Masks Mega Pack.

Font(s) and/or alpha of choice. I am using MS Gothic which is a Windows System font. If you do not have it, you can download it HERE.

I am also using the Goth Chic alpha by Whispy's D'zines, which is a FTU alpha you may download at whispysdzines.blogspot.com.


Note that H# and V# refer to Horizontal and vertical coordinates on your canvas grid. Make sure you have View, Rulers checked in order to see the ruler grid.

When I say "Add to your canvas" I expect that you will copy and paste it as a new layer, unless otherwise state in the tutorial.

This tutorial assumes you have a working knowledge of PSP. It was written using PSP X3, but should work in PSP 8 and up.

To begin, open a new raster layer canvas, 800 x 800 pxl, flood fill white.

Open paper of choice. I am using Paper9-GI_TheWitchingHour. Layers -> Load/Save mask -> Load Mask from Disk and select mask of choice. I am using Shambles by Nik's Scripts and Scraps. Make sure the fit to canvas box is checked, then click on load.

Resize to 90%. Edit -> Copy Special -> Copy Merged and add to main canvas, centered.

Open Mesh-GI_TheWitchingHour and Resize to 90%. dd to main canvas, centered. Image -> Free Rotate -> Rotate Right, 20 degrees.

Open Frame2-GI_TheWitchingHour and add to main canvas, centered.

Open tube of choice. I am using Belladonna by Myka Jelina. Copy Layer 3, and add to main canvas, centered.

On the Layers pallet, right click on Raster 3, the frame layer and duplicate. Right click on Copy of Raster 3 -> Arrange -> Bring to Top.

With your selection tool set to rectangle, replace select the top half of frame copy, Copy of Raster 3, and delete.

Selections -> Select none.

Using your eraser tool, erase just a bit of the wing on the right hand side to make it fit into the frame. Return to top layer.

Open Bow-GI_TheWitchingHour and resize to 75%. Add to main canvas, centered at H175, V160.

Open Cobweb-GI_TheWitchingHour and resize to 50%. Add to main canvas, centered at H550, V600.

Open Spider-GI_TheWitchingHour and resize to 75%. Add to main canvas, centered at H575, V550. Image -> Free Rotate -> Rotate left, 17 degrees.

On the Materials Pallet, set your foreground color to transparent and your background color to white (#ffffff). Using font of choice add copyright information to the tag. For the Belladonna tube that information is:

©Myka Jelina mykasgraphics.com Your MJ License#

(Note the change in artist's url if you purchased this tube from CILM.)

You should also add the background credit and tagged by information at this time. I am using MS Gothic, 4 points, bold and centered and have my copyright information located at H400, V90.

Starting with Raster 2 on your layers pallet and working upward, add a drop shadow of choice to each of the elements on your canvas, except for the frame layer copy, Copy of Raster 3. I am using offsets, vertical and horizontal of 5 each, opacity of 75%, blur of 15 and color black (#000000).

You can now save the artist's copy of your tag as a .pspimage file.

Using font or alpha of choice add name of choice to tag. I am using the Gothic Chic alpha by Whispy's D'zines and have my name centered at H350, V600.

Using the same settings as above, add a white drop shadow to the name. Then repeat using offsets of -5 each, leaving all other settings the same.

Drop the white background layer, and merge visible. Resize to 75% (600 x 600 pixels) and save as a .png file and you are all done!

Note that if you are planning on using the tag on Facebook, you may wish to save it as a .jpg as Facebook does not handle .pngs well.

I hope you enjoyed this tutorial. If you should have a problem, please feel free to E-Mail Me and I'll be happy to help you out.