Sunday, January 24, 2010

Three Gothic Romance tags

These tags were all done using the new Gothic Romance taggers kit from Scraps by j0eswife. I had written up the tut for the first tag this morning when the computer crashed. It's been very uncooperative today. I had the tag saved, but the tut was not saved and so it's gone to cyber heaven (or hell, or where unsaved tuts go). So I will either re-write the tut for "My Little Pet" or I'll do yet a fourth tag and tut that. There's enough here to throw several dozen tags - LOL.

My Little Pet


I love Unholy Vault Designs. The tube is called Arachne. The problem with re-writing the tut for this tag is um...I forgot which paper I used. There are 100 in the kit. Plus an overlay. Yikes!

Vampy


I know, I know, there's a PG rated version of this tube, but there's something about the black tape over the nipples that just really bothers me. I mean...wouldn't that hurt when you took it off?

This is another great Diana Martinez tube. I REALLY like her stuff.

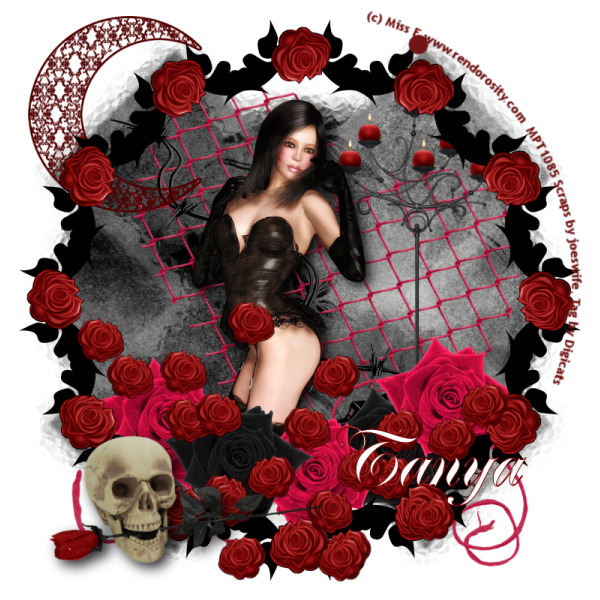
I never promised you...


The full title is "I never promised you a rose garden". The tube is by Miss E, who I believe has left MyPSPTubes.

Tuesday, January 19, 2010

Always in Love tutorial


This tutorial was written by Dianna Richards of Digicats (and Dogs)/Di Before Dawn Tutorials. Any resemblance to any other tutorial, published or unpublished, living, dead or undead, is purely coincidental.

Please do not rebroadcast, redistribute or otherwise claim this tutorial or any part there of as your own work.


Items you will need to complete this project:

The Always in Love taggers kit by Crazed's Creations. This is a PTU kit which may be obtained for free as part of the January Collab at Twilight Scraps.

Tube of choice. I am using psp14725-Dulcina by Elias Chatzoudis. You must have a license to use this tube, which is available at MyPSPTubes.com.

Wee Scots Mask #177 which you can download HERE.

Font(s) and/or alpha of choice. I am using Trebuchet MS which is a windows system font, and the Chocolate Alpha by Creative Intentionz. This is a PTU alpha which is available at Twilight Scraps.


Note that H# and V# refer to Horizontal and vertical coordinates on your canvas grid. Make sure you have View, Rulers checked in order to see the ruler grid.

When I say "Add to your canvas" I expect that you will copy and paste it as a new layer, unless otherwise state in the tutorial.

This tutorial assumes you have a working knowledge of PSP. It was written using PSP X1, but should work in PSP 8 and up.

Open a new raster layer canvas, 800 x 800 pxls, flood filled white.

Open Crazeds_paper6_AIL. Layers --> Load/Save Mask --> Load mask from disk and locate WSL mask # 177 Make sure the fit to canvas box is checked, then click on load.

Copy merged and add to your main canvas, centered.

Open Crazeds_button1_AIL, and add to main canvas, centered at H200, V500. Image --> free rotate --> rotate left 15 degrees.

Open Crazeds_button1_AIL, and add to main canvas, centered at H600, V200. Image --> free rotate --> rotate right 15 degrees.

Open psp14725-SCChatzoudis-Dulcina and copy "Layer1", the close up layer. Add to your main canvas, centered at H450, V350.

Open Crazeds_frame1_AIL, resize to 125% and add to canvas, centered at H400, V350. Using you magic wand, click anywhere outside the frame. On the Layers pallet click on the tube layer (Raster 4) then press delete. This gets rid of the bits of tube outside the frame area.

Add a drop shadow of choice to tube. I am using offsets, vertical and horizontal of -5 each, opacit of 50, blur of 23, color black (#000000).

Selections --> Select None. Then click on Raster 5, the frame area, to activate.

Open Crazeds_balloons1_AIL, copy and add to canvas centered at H550, V500.

Open Crazeds_Bear_AIL, resize to 75% and add to canvas, centered at H575, V575. Using your eraser tool, erase any of the balloon strings that fall below the bear.

Open Crazed_charm3_AIL, resize to 75% and add to canvas, H400, V700.

On the layers pallet, set your foreground color to transparent and your background color to Vanilla (#ecd9aa). Using font of choice, add the copyright information to the tag. For the Chatzoudis tube, that information is (c)Elias Chatzoudis www.elias-design.gr MPTLicense#

I am using the font Trebuchet MS, size 4, bold and centered.

You can now save your artist's copy as a .pspimage.

Using font or alpha of choice, add name of choice to tag. I am using the Chocolate Alpha by Creative Intentionz and have located the name at H290, V675. Actual location will depend upon the size of the name that you are using.

Layers --> Merge --> Merge Visible, resize to 75% (600 x 600 pxls) and save as a .jpg file and you're all done!

I hope you enjoyed this tutorial. If you should have a problem, please feel free to E-Mail Me and I'll be happy to help you out.

Saturday, January 16, 2010

Devilish Lover tutorial


This tutorial was written by Dianna Richards of Digicats (and Dogs)/Di Before Dawn Tutorials. Any resemblance to any other tutorial, published or unpublished, living, dead or undead, is purely coincidental.

Please do not rebroadcast, redistribute or otherwise claim this tutorial or any part there of as your own work.


Items you will need to complete this project:

The Devilish Love kit by Jules Junk. This is a FULL SIZE PTU kit which is available at Scrappetizing.com. I resized this kit using Queen Brat Designs resizing script. You MUST resize this kit before attempting the tuturial.

Tube of choice. I am using psp3531-SCHoyer-DevilGirlII by Cane Hoyer. You must have a license to use this tube, which is available at MyPSPTubes.com.

If you do not wish to use this tube, I have provided additional instructions to substitute the Cheeky Devil graphic included in the kit.

Wee Scots Mask #261 which you can download HERE.

Font(s) and/or alpha of choice. I am using Trebuchet MS, which is a windows system font, and Vivaldi, which is a FTU font available for download from Outlaw by Design.


Note that H# and V# refer to Horizontal and vertical coordinates on your canvas grid. Make sure you have View, Rulers checked in order to see the ruler grid.

When I say "Add to your canvas" I expect that you will copy and paste it as a new layer, unless otherwise state in the tutorial.

This tutorial assumes you have a working knowledge of PSP. It was written using PSP X1, but should work in PSP 8 and up.

NOTE: This is a full size kit that I re-sized using Queen Brat Designs resizing script. You must resize this kit before attempting this tutorial.

To begin, open a new raster layer canvas, 800 x 800 pixels, flood fill white.

Open JJ-DL paper 9. Layers --> Load/Save Mask --> Load Mask from Disk and locat WSL Mask # 128. Make sure the fit to canvas box is checked, then click on load.

Image --> resize --> resize to 125% Uncheck the "Resize all Layers" box before clickin on okay. You only want to resize the mask layer.

Copy merged and paste to your main canvas, centered.

Open JJ-DL element 37. Resize to 55% and add to canvas, centered at H150, V400. Duplicate and relocate copy to H650, V400.

Open JJ-DL Element 33. Resize to 75% and add to canvas, centered at H650, V300. Duplicat and relocate copy to H600, V350.

Open psp3531-SCHoyer-DevilGirlII, copy the tubed layer and add to canvas, centered.

Add a drop shadow of choice to the tube. I am using offsets, vertical and horizontal of -7 each, opacity of 75%, blur of 25, color Black (#000000).

Open JJ-DL element 8, resize to 85%. Go to Adjust --> Color --> Channel mixer. Set your output channel to Grey, and your source channels to Red 80%, Green 28% and Blue -12%. Constant should be -1% and your Monochrome box should be checked. Then click on OK.

Open your manual color correction tool. Your source color should be medium grey, change your target color to light black (#404040). Then click on OK.

Add the recolored frame to your main canvas, centered.

Open JJ-DL Element 36. Add to canvas centered at H550, V600. Image --> Free Rotate --> Rotate Left, 25%. (Make sure both the "All layers" and "Rotate single layer around canvas center" are unchecked.

Open JJ-DL element 21, resize to 60% and add to canvas centered at H400, V700.

Open JJ-DL Element 41. Using your eraser tool, erase the stem & leaf portion of the flower. You can leave the leaves that are directly under the flower in tact, be remove the stem.

Resize to 75% and add to your main canvas centered at H570, V700. Add a drop shadow to match the one on your tube.

On the materials pallet, set your foreground color to transparent and your background color to white (#ffffff). Using font of choice, add the copyright information to your tag.

For the Devil Girl II tube, that information is: (c) Cane Hoyer www.canehoyer.com MPTLicense#

I am using Trebuchet MS, 4 points, bold, centered and have pathed it fit the outside of the frame.

You can now save the artist's copy of your tag as a .pspimage file.

Using either font or alpha of choice, add the name of choice to the tag. I am using the font Vivaldi, 24 points, bold, centered with a silver gradient. I have centered the name at H200, V600, but the actual location will depend upon the length of name.

Delete the white background layer and merge visible. Resize the tag to 75%. You will want to check the resize all layers button if you have not done so already.

You can then save your finished tag as a .png file. Alternately, you can save the white background layer and save as .jpg file.


Alternate Non A/C version: Instead of the Hoyer tube, open JJ-DL element 20. Resize to 125% and add to the canvas instead of the Hoyer tube.

You will not need to add the copyright info beyond Scraps by Jules although if you are posting this to a tag group that requires a complete copyright you can use:

(c)Jules Junk http://julesjunk.blogspot.com/

All other portions of the tutorial remain the same, including the drop shadow on the tube.

I hope you enjoyed this tutorial. If you should have a problem, please feel free to E-Mail Me and I'll be happy to help you out.

Cupid's Dart Tutorial

Cupid's Dart


This tutorial was written by Dianna Richards of Digicats (and Dogs)/Di Before Dawn Tutorials. Any resemblance to any other tutorial, published or unpublished, living, dead or undead, is purely coincidental.

Please do not rebroadcast, redistribute or otherwise claim this tutorial or any part there of as your own work.


Items you will need to complete this project:

The Valentine Cupid taggers kit by Gothic Inspirations. This is a PTU kit which is available at Just4Taggers.com.

Tube of choice. I am using psp14191-Corset by Jose Cano. You must have a license to use this tube, which is available at MyPSPTubes.com.

Wee Scots Mask #177 which you can download HERE.

Font(s) and/or alpha of choice. I am using Trebuchet MS, which is a windows system font, and Hancock, which is a FTU font that can be downloaded from Outlaw by Design.


Note that H# and V# refer to Horizontal and vertical coordinates on your canvas grid. Make sure you have View, Rulers checked in order to see the ruler grid.

When I say "Add to your canvas" I expect that you will copy and paste it as a new layer, unless otherwise state in the tutorial.

This tutorial assumes you have a working knowledge of PSP. It was written using PSP X1, but should work in PSP 8 and up.

To begin, open a new raster layers canvas, 600 x 600 pxls, flood filled white.

Open Pink Plaid 1-GT_V09BT. Go to effects, Distortion Effects, Wind and use the factory default setting. Then press apply.

Open paper Red 3 GI_V09BT. Layers -> Load/Save Mask -> Load mask from disk and locate WSL mask 177. Make sure the fit to canvas box is checked, then click on load.

Copy merged and add to main canvas, centered at H350, V200. Duplicate and relocate the copy to H250, V400.

Click on Raster 2 (the first heart) to active. Image, free rotate, rotate right, 15 degrees.

Click on Copy of Raster 2 (the second heart) to active. Image, free rotate, rotate left, 15 degrees.

Open Bling Red Bright Purple and add to the canvas, centered.

Open psp14191-SCCano-Corset, copy the Tube layer and add to canvas, centered at H300, V290.

Add a drop shadow of choice to your tube. I am using Offsets, vertical and horizontal of -10 each, opacity of 85, blur of 25, color black (#000000).

Open Roses-GI_V09BT, resize to 75% and add to canvas centered at H400, V435.

Open Arrow Doodle Pink, and add to canvas, H475, V100. Open Heart Doodle Swirl Pink and add to canvas, centered at H75, V400.

On the Materials pallet, set your foreground color to transparent and your background color to dark red (#8a0000). Using font of choice, add the copyright information down at the bottom of your tag.

For the Corset tube, that information is:

(c)Jose Cano http://personales.ya.com/jocachi MPTLicense#
Scraps by Gothic Inspirations; Tag by Digicats

You can now save your artist's copy as a .pspimage.

Reset your background color to a gradient, material or color of choice. Using font of choice, add desired name to tag.

I am using a silver gradient, the font Hancock, 20 points, Bold, centered and located the name around H175, V500, Then I used Image, free rotate and rotated left, 5 degrees. You exact location will vary depending upon name length.

Open Quill Pink, and resize to 50%. Add to your canvas just off the upper right hand side of your tag near the name. I have mine centered at H400, V410, your settings may differ depending upon the name you're using.

Delete the white background layer, merge visible and save as a .png file, and you're all done.

I hope you enjoyed this tutorial. If you should have a problem, please feel free to E-Mail Me and I'll be happy to help you out.
I have your Heart tutorial

I have your heart


This tutorial was written by Dianna Richards of Digicats (and Dogs)/Di Before Dawn Tutorials. Any resemblance to any other tutorial, published or unpublished, living, dead or undead, is purely coincidental.

Please do not rebroadcast, redistribute or otherwise claim this tutorial or any part there of as your own work.


Items you will need to complete this project:

The Chocolate Lovers taggers kit by Gothic Inspirations. This is a PTU kit which is part of the January collab available at Just4Taggers.com.

Tube of choice. I am using psp12767-NowYourHeartIsMine by Unholy Vault Designs. You must have a license to use this tube, which is available at MyPSPTubes.com.

Wee Scots Mask #261 which you can download HERE.

Font(s) and/or alpha of choice. I am using Trebuchet MS, which is a windows system font, and the Bloody Mess alpha, which is a FTU personal use alpha available for download at Free Digital Scrapbooking. It is a full size alpha I have scripted down for tagging purposes.


Note that H# and V# refer to Horizontal and vertical coordinates on your canvas grid. Make sure you have View, Rulers checked in order to see the ruler grid.

When I say "Add to your canvas" I expect that you will copy and paste it as a new layer, unless otherwise state in the tutorial.

This tutorial assumes you have a working knowledge of PSP. It was written using PSP X1, but should work in PSP 8 and up.

To begin, open a new raster layer canvas, 800 x 800 pxls., flood filled white.

Open Paper8-GI_ChocolateLovers. Layers --> Load/Save Mask --> Load Mask from Disk and locate WSL mask # 261. Make sure the fit to canvas box is checked, then click on load.

Edit --> Copy Merged --> and add to your main canvas, centered.

Open Glitter Trail-GI_ChocolateLovers and add to main canvas, centered.

Open Heart-GI_ChocolateLovers, resize to 75% and add to main canvas, centered at H200, V600.

Open Ribbon-GI_ChocolateLovers, resize to 75% and add to main canvas, centered at H400, V600.

Resize your main canvas to 75% (600 x 600 pxls). Make sure the Resize all layers box is checked.

Open psp12767_SCUVD-NowYourHeartIsMine, and copy the tube layer. Add to your main canvas, centered.

Add a drop shadow of choice to tube. I am using offsets, vertical and horizontal of -7 each, opacity of 65, blur of 25, color Chocolate (#311c25).

Open Frame1-GI_ChocolateLovers, and add to main canvas, centered.

Open ChocolateMartini-GI_ChocolateLovers, resize to 75% and add to canvas centered at H500, v350.

Open Bow-GI_ChocolateLovers and add to canvas, centered at H350, V475. Image --> Free Rotate --> rotate left, 25 degrees.

Relocate center to H400, V450.

Open Strawberry-GI_ChocolateLovers, resize to 75% and add to canvas, centered at H475, V475.

On you materials pallet, set your foreground color to white (#ffffff), and your background color to Chocolate (#311c25).

Using font of choice, add the copyright info to your tag. I am using Trebuchet MS, 4 points, bold, and centered.

For the Unholy Vault Design tube, that information is: (c)Unholy Vault Designs http://asaenath.deviantart.com MPTLicense#

You can now save the artist's copy of your tag as a .pspimage file.

Using font or alpha of choice, add name of choice to tag. I am using the Bloody Mess alpha, which is a full size alpha I have resized for tagging purposes.

My name is centered at H200, V50. The exact location you use will depend upon the length of the name you are using.

Delete the white background layer, and merge visible. Save your file as a .png file and you're all done!

I hope you enjoyed this tutorial. If you should have a problem, please feel free to E-Mail Me and I'll be happy to help you out.

Thursday, January 14, 2010

My Secret Lover tutorial


This tutorial was written by Dianna Richards of Digicats (and Dogs)/Di Before Dawn Tutorials. Any resemblance to any other tutorial, published or unpublished, living, dead or undead, is purely coincidental.

Please do not rebroadcast, redistribute or otherwise claim this tutorial or any part there of as your own work.


Items you will need to complete this project:

The My Gothic Rose taggers kit by Scraps by j0eswife. This is a PTU kit which is available at Scrapper's Secret.com.

Tube of choice. I am using PSP13508-A Lil Devil by Diana Martinez. You must have a license to use this tube, which is available at MyPSPTubes.com.

Wee Scots Mask #281 which you can download HERE.

Font(s) and/or alpha of choice. I am using Trebuchet MS, which is a windows system font, and the Love Me Tender Rose Alpha by Bon Scrapatit Designs. This is a full size alpha I have scripted down for tagging purposes.


Note that H# and V# refer to Horizontal and vertical coordinates on your canvas grid. Make sure you have View, Rulers checked in order to see the ruler grid.

When I say "Add to your canvas" I expect that you will copy and paste it as a new layer, unless otherwise state in the tutorial.

This tutorial assumes you have a working knowledge of PSP. It was written using PSP X1, but should work in PSP 8 and up.

Open a new raster layer canvas, 800 x 800, Flood filled white.

Open SBJ_Paper_24 and resize to 80%. Layers --< Load/Save Mask --< Load Mask from Disk and locate WSL Mask #281. Make sure the fit to canvas button is checked, then click on load.

Copy Merged, then add to main canvas, centered.

Open SBJ_Glitter Mesh Heart_2, resize to 75% and add to canvas, centered at H250, V300. Image --< Rotate left, 15 degrees.

Open SBJ_Leaves_6, copy and add to canvas, centered at H350, V250. Image --< Free Rotate --< Rotate right, 25 degrees.

Open SBJ_Ribbon_2, resize to 75%, and add to canvas, centered at H400, V650.

OPen PSP 13508-SCMartinez-ALilDevil, copy tube layer and add to canvas, centered.

Add a drop shadow of choice to tube. I am using offsets, vertical and horizontal of -7 each, opacity of 50, blur of 25, color rose (#cd5271).

Open SBJ_Glitter Circle_2 and add to canvas, centered.

Open SBJ_Butterfly_1, resize to 75% and add to canvas, centered at H450, V600. Image --< Free Rotate --< Rotate right, 15 degrees.

On the materials pallet, set your foreground color to transparent and your background color to silver (#cdcdcd).

Using font of choice, add the copyright information to your tag, for the A Lil Devil tube, that information is: (c)Diana Martinez www.myspace.com/dianamcornejo MPTLicense#

I am using the font Trebuchet MS, size 4 points, Bold, and centered.

You can now save your artist's copy as a .pspimage file.

Using alpha or font of choice, add name of choice to the tag centered at around H550, V100. Actual final placement of name will depend upon the size (height and width) of the name you are using.

Add a drop shadow to the name to match the one used on your tube.

Delete your white background layer, and merge visible. Resize your canvas by 75% (to 600 x 600 pxls) and save as a .png file and you're all done!

I hope you enjoyed this tutorial. If you should have a problem, please feel free to E-Mail Me and I'll be happy to help you out.

Friday, January 8, 2010

No Angel tutorial

No Angel


This tutorial was written by Dianna Richards of Digicats (and Dogs)/Di Before Dawn Tutorials. Any resemblance to any other tutorial, published or unpublished, living, dead or undead, is purely coincidental.

Please do not rebroadcast, redistribute or otherwise claim this tutorial or any part there of as your own work.


Items you will need to complete this project:

The Always and Forever taggers kit by Crazed's Creations. This is a PTU kit which may be purchased at Scrappetizing.com.

Tube of choice. I am using psp12874_LilDevil by Mike James. You must have a license to use this tube, which is available at MyPSPTubes.com.

Wee Scots Mask #223 which you can download HERE.

The No Angel word art, which is FTU. You can snag it HERE. (It's white, so it may not look like there's anything there, but there is, trust me on this one!)

Font(s) and/or alpha of choice. I am using Trebuchet MS which is a windows system font, and Marriage, which is available for download from Outlaw by Design.


Note that H# and V# refer to Horizontal and vertical coordinates on your canvas grid. Make sure you have View, Rulers checked in order to see the ruler grid.

When I say "Add to your canvas" I expect that you will copy and paste it as a new layer, unless otherwise state in the tutorial.

This tutorial assumes you have a working knowledge of PSP. It was written using PSP X1, but should work in PSP 8 and up.

To begin, open a raster layer canvas, 800 x 800 pxls, flood fill white.

Open Crazed_paper4_AFT. Layers --< Load/Save Mask --< Load mask from disk, and local WSL mask # 223. Make sure the fit to canvas button is checked, then click on load. Using you pick tool, drag the boundary lines to the outside of the canvas, enlarging the mask area. Then copy merged and add to your main canvas, centered.

Open Crazed-hearts3_AFT and add to canvas H150, V350. Duplicate and mirror.

Duplicate Crazeds_hearts3_AFT again, and move the copy to H300, V400. Duplicate and mirror.

Open psp12874_SCJames-LilDevil, copy the tube later and add to canvas, centered. On the layers pallet, drag it over Copy of Raster 2, so it's on top.

Click on Copy of Raster 2 to activate.

Open Crazeds_bottle_AFT, resize to 75% and add to canvas, centered at H300, V470. Image --< free rotate --< rotate left --< 15 degrees.

Open Crazeds_ribbon3_AFT, resize to 75% and add to canvas, centered at H400, V650.

Open Crazeds_flower8_AFT, and add to canvas, centered at H550, V350.

Open Crazeds_flower7_AFT, and add to canvas, centered at H550, V500.

Open Crazeds_candybox_AFT, resize to 75% and add to canvas, centered at H600, V600. Image --< free rotate --< rotate right --< 15 degrees.

Using your eraser tool, erase the part of the rose stem and leave (flower7) that is still visible below the box of chocolates.

Click on your tube layer (Raster 3) to activate. Add a drop shadow of choice to your tube. I am using offsets, vertical and horizontal of -7 each, opacity of 85, blur of 35, color black (#000000).

On the materials pallet, click on Copy of Raster 2 to active. Open the "No Angel" word art, and add to your canvas centered at H350, H150. Image --< Free Rotate --< Rotate left 35 degrees.

On the materials pallet, click on the tube layer (Raster 3) to activate.

Open Crazeds_candle2_AFT, resize to 55% and add to your canvas, centered at H250, V570.

Open Crazed_Candle3_AFT, resize to 50$ and add to canvas, centered at H310, V610.

On the Materials pallet, set your foreground color to transparent and your background color to white (#ffffff). Using font of choice, add the copyright information to your tag. For the Lil Devil tube, that info is:

(c)Mike James www.jamesart.com YOUR MPTLicense #

I am using the font Trebuchet MS, 4 points, bold, and centered, rotated it left 90 degrees and relocated it to center at H150, V400.

You can now save the artist's copy of your tag as a .pspimage file.

Set the background color on the materials pallet to a gold gradient. (There should be a nice one that came with your version of PSP.) Using font of choice (or alpha of choice) add the desired name to your tag.

I am using the font Marriage, 26 points, bold and centered located it at H550, V700. Exact location will depend upon the length of the name you are using. I then added a drop shadow to match the one on the tube.

Delete the white background layer, merge visible and resize to 76%. Save as a .png file and your all finished.

I hope you enjoyed this tutorial. If you should have a problem, please feel free to E-Mail Me and I'll be happy to help you out.