Saturday, April 17, 2010

The Hunger tutorial (PTU)

The Hunger


This tutorial was written by Dianna Richards of Digicats (and Dogs)/Di Before Dawn Tutorials. Any resemblance to any other tutorial, published or unpublished, living, dead or undead, is purely coincidental.

Please do not rebroadcast, redistribute or otherwise claim this tutorial or any part there of as your own work.


Items you will need to complete this project:

The Life's Blood taggers kit by Gothic Inspirations. This is a PTU kit which may be purchased at the Gothic Inspirations store.

Tube of choice. I am using psp12314-Hunger by Unholy Vault Designs. You must have a license to use this tube, which may be purchased at MyPSPTubes.com.

Wee Scots Lass mask #281 which you can download HERE.

Font(s) and/or alpha of choice. I am using Trebuchet MS which is a windows system font, and the Bloody alpha by Sarah Bryan, which is a FTU alpha that may be downloaded from Pimp by tags with Scraps.


Note that H# and V# refer to Horizontal and vertical coordinates on your canvas grid. Make sure you have View, Rulers checked in order to see the ruler grid.

When I say "Add to your canvas" I expect that you will copy and paste it as a new layer, unless otherwise state in the tutorial.

This tutorial assumes you have a working knowledge of PSP. It was written using PSP X1, but should work in PSP 8 and up.

To begin, open a new raster layer canvas, 800 x 800 pxls, flood filled white.

Open Paper4-GI_LifesBlood. Layers --> Load/Save Mask --> Load Mask from Disk and select Wee Scots Lass mask#281. Make sure the fit to canvas box is checked, then click on load.

Copy merged and add to main canvas, centered.

Open Netting-GI_Life'sBlood and add to main canvas, centered.

Open WireDeco-GI_Life'sBlood and add to main canvas, centered at H400, V200.

Open Ivy-GI_Life'sBlood and mirror. Add to main canvas, centered at H225, V400.

Open HeartCrossCharm-GI_Life'sBlood. Resize to 75% and add to main canvas, centered at H525, V275.

Open Bow-GI_Life'sBlood. Resize to 50% and add to main canvas, to align with the top of the HeartCrossCharm (centered at H520, V225). Add a drop shadow of choice to bow. I am using offsets, vertical and horizontal of 2 each, opacticy of 65, blur of 10, color black (#000000),

Open psp12314-SCUVD-Hunger, copy the tube layer and add to main canvas, centered at H300, V350. Add a drop shadow of choice to tube. I am using offsets vertical and horizontal of 8 each, opacity of 85, blur of 35, color black (#000000). Keep the shadow on the same layer as the tube.

Duplicate the tube layer, and resize the copy by 75%. Relocate the copy to H450, V450.

Duplicate the tube copy, and resize the new copy by 75%. Relocate to H600, V550.

Open Blood-GI_Life'sBlood and add to main canvas, centered at H300, V600.

Open Rose-GI_Life'sBlood, and resize to 25%. Add to main canvas, centered at H250, V660.

On the materials pallet, set your foreground color to transparent and your background color to Orange-Gold (#f2a91c). Using font of choice, add copyright information to tag.

For the Hunger tube, that information is: (c) Unholy Vault Designs http://asaenath.deviantart.com Your_MPT_License#.

I am using Trebuchet MS, 4 points, centered and bold and have fit my text to path.

You may now save the artist's copy of your tag as a .pspimage file.

Click on the Ivy layer to activate. Using font or alpha of choice, add name of choice to tag. I have the name centered at H300, V100. Actual location may very depending upon length and size of name. I am using the Bloody Alpha by Sarah Bryan, which is a FTU alpha.

Delete the white background layer, and merge visible. Resize tag by 75%, to 600 x 600 pxls, and then save as a .png file and you're all done!

I hope you enjoyed this tutorial. If you should have a problem, please feel free to E-Mail Me and I'll be happy to help you out.

Thursday, April 15, 2010

Vindictive Voodoo

VindictiveVoodoo


This tutorial was written by Dianna Richards of Digicats (and Dogs)/Di Before Dawn Tutorials. Any resemblance to any other tutorial, published or unpublished, living, dead or undead, is purely coincidental.

Please do not rebroadcast, redistribute or otherwise claim this tutorial or any part there of as your own work.


Items you will need to complete this project:

The Vindictive Pleasures taggers kit by Gothic Inspirations. This is a PTU kit which may be purchased at the Gothic Inspirations store.

Tube of choice. I am using psp12307-VoodooDoll by Unholy Vault Designs. You must have a license to use this tube, which may be purchased at MyPSPTubes.com.

Wee Scots Lass mask #116 which you can download HERE.

Font(s) and/or alpha of choice. I am using Verdana which is a windows system font, and the Goth Chic alpha by Whispy's D'zines, which is a FTU alpha that may be downloaded from her blog.


Note that H# and V# refer to Horizontal and vertical coordinates on your canvas grid. Make sure you have View, Rulers checked in order to see the ruler grid.

When I say "Add to your canvas" I expect that you will copy and paste it as a new layer, unless otherwise state in the tutorial.

This tutorial assumes you have a working knowledge of PSP. It was written using PSP X1, but should work in PSP 8 and up.

Open a new raster layer canvas, 800 x 800 pxls, flood filled white.

Open Paper20-GI_VindictivePleasures. Go to layers --> load/save mask --> load mask from disk and local Wee Scots Lass mask #116. Make sure the fit to canvas box is checked, then click on load.

Copy merged and add to canvas, centered.

Open Puzzle-GI_VindictivePleasures. Copy and add to main canvas, centered.

Open Beads-GI_VindictivePleasures. Copy and add to main canvas, centered.

Open Plants-GI_VindictivePleasures, resize to 75% and add to main canvas, centered at H725, V400.

Open Frame3-GI_VincictivePleasures, resize to 75% copy and add to main canvas, centered.

Open psp12307-SCUVD-VoodooDoll, copy tube layer and add to main canvas, centered.

Add a drop shadow of choice to tube. I am using offsets, vertical and horizontal of 7 each, opacity of 65, blur of 25, color dark purple (#400040).

Open Candle-GI_VindictivePleasures, resize to 35% and add to main canvas, centered at H530, V570.

Open Ribbon1-GI_VindictivePleasures, copy and add to main canvas, centered at H400, V625.

Open Flower2-GI_VindictivePleasures. Resize to 50%, copy and add to main cavnas, centered at H300, V625.

On the materials pallet, set your foreground color to transparent and you background color to black (#000000).

Using font of choice, add copyright information to the tag. For the VoodooDoll tube, that information is: (c) Unholy Vault Designs http://asaenath.deviantart.com Your_MPT_License#.

I am using Verdana, 4 points, bold and centered, but then I kind of squished it a bit to fit along the side of the frame.

You can now save the artist's copy of the tag as a .pspimage file.

Using font or alpha of choice, add name of choice to tag. I am using the Goth Chic alpha by Whispy's D'zines. The name is centered at around H550, V700. Actual location will depend on length and size of name you are using.

Delete your white background layer and merge down. Resize to 75% (600 x 600 pxls) and save as a .png file and you're all done!

I hope you enjoyed this tutorial. If you should have a problem, please feel free to E-Mail Me and I'll be happy to help you out.
Wednesday, April 14, 2010

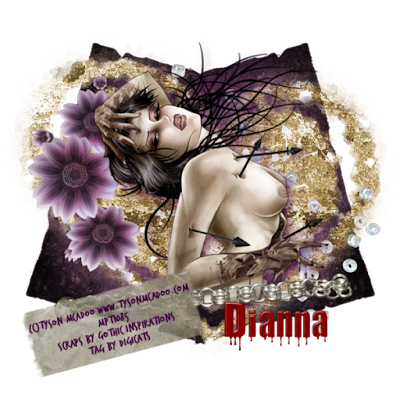
Vindicated Tutorial (PTU/SAC)

Vindicated


This tutorial was written by Dianna Richards of Digicats (and Dogs)/Di Before Dawn Tutorials. Any resemblance to any other tutorial, published or unpublished, living, dead or undead, is purely coincidental.

Please do not rebroadcast, redistribute or otherwise claim this tutorial or any part there of as your own work.


Items you will need to complete this project:

The Vindictive Pleasures taggers kit by Gothic Inspirations. This is a PTU kit which may be purchased at the Gothic Inspirations store.

Tube of choice. I am using psp15475-LovedToDeath by Tyson McAdoo. You must have a license to use this tube, which may be purchased at MyPSPTubes.com.

Wee Scots Lass mask #171 which you can download HERE.

Font(s) and/or alpha of choice. I am using Trash Hand which is a FTU font that can be downloaded from Free Digital Scrapbooking.com, and the Bloody alpha by Sarah Bryan, which is a FTU alpha that may be downloaded from Pimp by tags with Scraps.


Note that H# and V# refer to Horizontal and vertical coordinates on your canvas grid. Make sure you have View, Rulers checked in order to see the ruler grid.

When I say "Add to your canvas" I expect that you will copy and paste it as a new layer, unless otherwise state in the tutorial.

This tutorial assumes you have a working knowledge of PSP. It was written using PSP X1, but should work in PSP 8 and up.

To begin, open a new raster layer canvas, 800 x 800, Flood filled white.

Open Parchment-GI_VindictivePleasures. Copy and add to main canvas, centered. Images --> Free Rotate --> rotate right, 15 degrees.

Relocate to H300, V400. Duplicate and mirror.

Open Paper16-GI_VindictivePleasures. Go to Layers --> Load/Save Mask --> Load mask from disk and locate Wee Scots Lass mask #171. Make sure the fit to canvas box is checked, then click on load.

Copy merged and add to main canvas, centered.

Open Flowers-GI_VindictivePleasures and add to main canvas, centered at H250, V350.

Open Beads-GI_VindictivePleasures and add to main canvas, centered at H550, V400.

Open psp15475-SCMcAdoo-LovedToDeath and copy the bonus close up. Add to canvas centered at H400, V350.

Add drop shadow of choice to tube. I am using offsets, vertical and horizontal of 7 each, opacity of 65, blur of 25, color dark purple (#400040).

Open Chain-GI_VindictivePleasures and resize to 75%. Copy and add to main canvas, centered at H400, V600. This will put it right at the bottom of the tube layer.

Open Tape-GI-vindictivePleasures and add to main canvas, centered at H225, V650. Image --> Free Rotate --> Rotate left, 15 degrees.

On the materials pallet, set your foreground color to transparent and your background color to dark purple (#400040). Using font of choice add copyright info to the tag.

For the Loved to Death tube that information is: (c)Tyson McAdoo www.tysonmcadoo.com Your_MPTLicense_#.

I am using Trash Hand, 6 points, bold and centered and then free rotated the text left, 15 degrees to match the tape.

You can now save the artist's copy of the tag as a .pspimage file.

Using font or alpha of choice, add name of choice to tag. I am using the Bloody alpha by Sarah Bryan, and have located the name at H550, V650. Actual location will depend upon the size and length of the name you are using.

Delete the White background layer, merge visible and resize to 75% (600 x 600 pxls). Save as a .png file and your all done!

I hope you enjoyed this tutorial. If you should have a problem, please feel free to E-Mail Me and I'll be happy to help you out.

Tuesday, April 13, 2010

Voodoo Chile Tutorial (PTU)

Voodoo Chile


This tutorial was written by Dianna Richards of Digicats (and Dogs)/Di Before Dawn Tutorials. Any resemblance to any other tutorial, published or unpublished, living, dead or undead, is purely coincidental.

Please do not rebroadcast, redistribute or otherwise claim this tutorial or any part there of as your own work.


Items you will need to complete this project:

The Blood Moon Volturi taggers kit by Gothic Inspirations. This is a PTU kit which may be purchased at the Gothic Inspirations store.

Tube of choice. I am using psp15527-VoodooGirl by Unholy Vault Designs. You must have a license to use this tube, which may be purchased at MyPSPTubes.com.

Wee Scots Lass mask #129 which you can download HERE.

Font(s) and/or alpha of choice. I am using Verdana which is a windows system font, and the Goth Chic alpha by Whispy's D'zines, which is a FTU alpha that may be downloaded from her blog.


Note that H# and V# refer to Horizontal and vertical coordinates on your canvas grid. Make sure you have View, Rulers checked in order to see the ruler grid.

When I say "Add to your canvas" I expect that you will copy and paste it as a new layer, unless otherwise state in the tutorial.

This tutorial assumes you have a working knowledge of PSP. It was written using PSP X1, but should work in PSP 8 and up.

To begin, open a new raster layer canvas, 800 x 800 pxls, flood filled white.

Open Paper23-GI_BMVolturi. Layers --> Load/Save Mask --> Load Mask from Disk and select Wee Scots Lass mask # 129. Make sure the fit to canvas box is checked then click on load.

Copy Merged and add to main canvas, centered.

Open Mesh3-GI_BMVolturi and add to main canvas, centered. Image --> Free Rotate --> Rotate Right --> 10 degrees.

Open Splatter2-GI_BMVolturi and add to main canvas, centered at H550, V325.

Open Thorns-GI_BMVolturi and add to main canvas, centered at H400, V300.

Open psp15527-SCUVD-VoodooGirl, copy Raster 1 and add to main canvas, centered.

Add a drop shadow of choice to tube. I am using offsets vertical 7, horizontal -7, opacity 85, blur35, color very dark red (#400000).

Open GlitterSpill-GI_BMVolturi and resize to 50%. Add to main canvas, centered at H350, V550.

Open Leaves-GI_BMVolturi and add to main canvas, centered at H400, V600.

Open Pin-GI_BMVolturi and resize to 35%. Using your eraser tool, erase a small portion of the pin near the center so that it appear stuck through the canvas.

Copy and add to canvas, centered at H600, V450. Image --> free rotate --> rotate right 15 degrees.

Place a second copy of the Pin at H200, V250. Image --> free rotate --> rotate left 20 degrees.

Open Splatter-GI_BMVolturi, flip, copy and add to main canvas, centered at H400, V650.

On the materials pallet set your foreground color to black (#000000) and your background color to blood red (#7a0000). Using font of choice, add copyright info to the tag.

For the VoodooGirl tube that information is: (c) Unholy Vault Designs http://asaenath.deviantart.com Your_MPT_License#

I am using the font Verdana, 4 points, bold and centered at around H400, V700.

You can now save the artist's copy of your tag as a .pspimage file.

Using font or alpha of choice, add name of choice to tag. I am using the Goth Chic alpha by Whispy's D'zines. The name is centered at around H550, V100. Actual location will depend on length and size of name you are using.

Delete your white background layer and merge down. Resize to 75% (600 x 600 pxls) and save as a .png file and you're all done!

I hope you enjoyed this tutorial. If you should have a problem, please feel free to E-Mail Me and I'll be happy to help you out.

Wednesday, April 7, 2010

Crazy Attitude tutorial (PTU)

Crazy Attitude


This tutorial was written by Dianna Richards of Digicats (and Dogs)/Di Before Dawn Tutorials. Any resemblance to any other tutorial, published or unpublished, living, dead or undead, is purely coincidental.

Please do not rebroadcast, redistribute or otherwise claim this tutorial or any part there of as your own work.


Items you will need to complete this project:

The All About Attitude taggers kit by Crazed's Creations. This is a PTU kit, which available at Just4Taggers.com as well as other fine online stores.

Tube of choice. I am using psp15216-Clubbing by Elias Chatzoudis. You must have a license to use this tube, which is available at MYPSPTubes.com.

Wee Scots Lass mask #225 which you can download HERE.

Font(s) and/or alpha of choice. I am using Verdana which is a windows system font, and the Goth Chic alpha by Sarah Bryan. This is a FTU alpha which may be downloaded from Sarah's Blog.


Note that H# and V# refer to Horizontal and vertical coordinates on your canvas grid. Make sure you have View, Rulers checked in order to see the ruler grid.

When I say "Add to your canvas" I expect that you will copy and paste it as a new layer, unless otherwise state in the tutorial.

This tutorial assumes you have a working knowledge of PSP. It was written using PSP X1, but should work in PSP 8 and up.

Open a new raster layer canvas, 800 x 800 pxls, flood fill white.

Crazeds_paper11_AAMAT. Layers --> Load/Save Mask --> Load Mask from Disk and select Wee Scots Lass mask #243. Make sure the "Fit to Canvas" button is checked, then click on load.

Copy Merged and add to main canvas, centered.

Open Crazeds_blingcurtain1_AAMAT and add to canvas, centered at top.

Using your magic wand tool, click anywhere outside the paper area on Raster 1 to select, then activate Raster 2, the bling curtain layer and press delete.

Selections --> Select None.

Open Crazeds_forgetmenot3_AAMAT and add to main canvas, centered at H250, V300. ON the layers pallet, drag it under the bling curtain layer.

Open Crazeds_envelope1_AAMAT and add to main canvas, centered at H300, V500. Images --> Free rotate --> Rotate right 20 degrees.

Open psp15216-SCChatzoudis-Clubbing, copy Raster 1 and add to main canvas, centered.

Open Crazeds_stars4_AAMAT and mirror. Add to main canvas centered at H500, V450.

Image --> free rotate --> rotate right 45 degrees.

Using your eraser tool, erase the part of the tube that falls between the second and outside lines of the star.

Add a drop shadow of choice to tube. I am using offsets vertical of -7, horizontal of 7, opacity 65, blur of 25, color very dark blue (#000040).

Open Crazed_word1_AAMAT and add to main canvas, centered at H500, V600.

On the materials pallet, set your foreground color to transparent and your background color to raspberry (#c51b63). Using font of choice add copyright information to the tag.

For the Clubbing tube, that information is (c) Elias Chatzoudis www.elias-design.gr Your MPTLicense#.

I am using Verdana, 6 points, bold and centered and fit text to patch to mirror the arch of the stars on the bottom of the tag.

You can now save the artist's copy of you tag as a .pspimage file.

Using font of alpha of choice add name of choice to tag. I am using the Goth Chic alpha by Sarah Bryan, which is a FTU alpha.

I centered the name at H150, V650 and then used free rotate to rotate it right, 20 degrees. Actual location may very depending upon the size and length of your name.

Delete your white background layer and Merge visible. Resize tag by 75% to 600 x 600 pxls and save as a .png file and your all done!

I hope you enjoyed this tutorial. If you should have a problem, please feel free to E-Mail Me and I'll be happy to help you out.
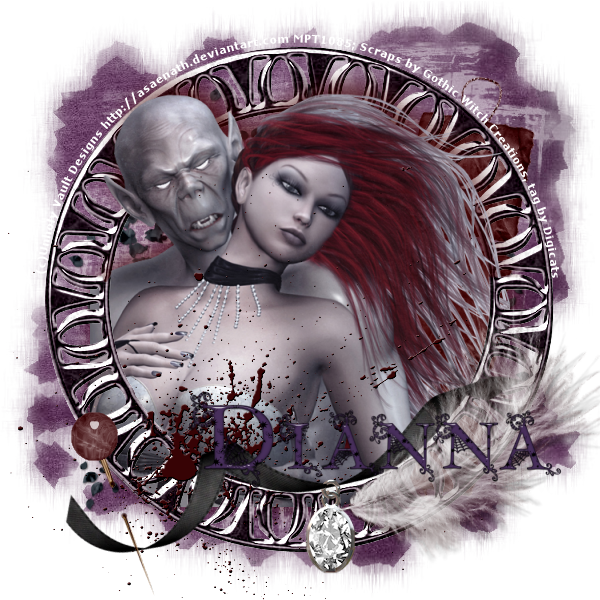
My Demon Lover tutorial (PTU)

My Demon Lover


This tutorial was written by Dianna Richards of Digicats (and Dogs)/Di Before Dawn Tutorials. Any resemblance to any other tutorial, published or unpublished, living, dead or undead, is purely coincidental.

Please do not rebroadcast, redistribute or otherwise claim this tutorial or any part there of as your own work.


Items you will need to complete this project:

The Erszebet Bathory taggers kit by Gothic Witch Creations. This is a PTU kit, which can be purchased at Aussie Scrap Designs.

Tube of choice. I am using psp14621-GothicRomance by Unholy Vault Designs. You must have a license to use this tube, which can be purchased at MyPSPTubes.com.

Wee Scots Lass mask #222 which you can download HERE.

Font(s) and/or alpha of choice. I am using Verdana which is a windows system font, and the Gothic Chic alpha, which is a FTU alpha by Whispy's D'zines. This is a full sized alpha I have resized for tagging purposes.


Note that H# and V# refer to Horizontal and vertical coordinates on your canvas grid. Make sure you have View, Rulers checked in order to see the ruler grid.

When I say "Add to your canvas" I expect that you will copy and paste it as a new layer, unless otherwise state in the tutorial.

This tutorial assumes you have a working knowledge of PSP. It was written using PSP X1, but should work in PSP 8 and up.

Open a new raster layer canvas, 600 x 600 pxl, flood filled white.

Open GWC_EB_paper15. Go to Layers --> Load/Save Mask --> Load Mask from Disk and select Wee Scots Lass mask #222. Make sure the "Fit to Canvas" box is checked, then click on load.

Edit --> Copy Merged and add to main canvas, centered.

Open GWC_EB_petals1 and add to main canvas, centered.

Open GWC_EB_GI_CGSign3 and add to main canvas centered at H450, V300. Image --> Free rotate --> rotate right 10 degrees.

Open GWC_EB_frame38, copy and add to main canvas, centered.

Open psp14621-SCUVD-GothicRomance, copy the close up layer and add to main canvas, centered. Resize by 80% (Make the resize all layers box is unchecked as you only want to resize the tube.)

Duplicate the frame layer (Raster 4) and drag the copy over the tube layer.

Using your magic wand, click anywhere outside the copy of frame to select. The on the layers pallet, activate your tube layer (Raster 5) and press delete.

Selections --> Select none.

Set your selection tool to Selection Type: Rectangle, Mode: Replace and select the part of the frame copy (Copy of Raster 4) - no lower than 275 on the vertical guide bar - then press delete.

use your eraser tool to fix the shoulder area on the tube to fit to frame. Should just be a wee bit needs to be erased.

Add a drop shadow of choice to tube. I am using offsets vertical -7, horizontal 7, opacity of 85, blur of 35, color very dark red (#400000).

Open GWC_EB_bloodsplat2, copy and add to main canvas, centered at H250, V400.

Open GCW_EB_charm16, copy and add to main canvas, centered at H300, V475.

Open GCW_EB_feather2, resize to 75%, copy and add to main canvas centered at H475, V425. Image --> Free rotate --> rotate left, 10 degrees.

Open GCW_EB_stickpin3, copy and add to main canvas, centered at H110, V500.

On the materials pallet, set your foreground color to transparent and your background color to white (#ffffff). Using font of choice, add copyright info to the tag. For the Gothic Romance tube that information is:

(c)Unholy Vault Designs http://asaenath.deviantart.com Your MPTLIcense@

I am using Verdana, 4 points, centered and bold, and have it text to path to match my frame.

Using font of alpha of choice, add name of choice to tag. I am using the Goth Chic alpha by Whispy's D'zines, and have the name centered at h400, V450. Actual location will depend on the size and length of the name you are using.

Delete your white background layer, merge visible, and save a .png file and you're all done!

I hope you enjoyed this tutorial. If you should have a problem, please feel free to E-Mail Me and I'll be happy to help you out.

The Warrior Fallen tutorial (FTU)

The Warrior Fallen


This tutorial was written by Dianna Richards of Digicats (and Dogs)/Di Before Dawn Tutorials. Any resemblance to any other tutorial, published or unpublished, living, dead or undead, is purely coincidental.

Please do not rebroadcast, redistribute or otherwise claim this tutorial or any part there of as your own work.


Items you will need to complete this project:

The Beloved Memories taggers kit by Gothic Inspirations. This is a FTU kit, which is available on Jessica's Blog.

Tube of choice. I am using psp12491-Warrior by Joseph Corsentino. This is a FTU tube, but you must have a license to use it which may be obtained from My PSP Tubes.com.

Wee Scots Lass mask #186 which you can download HERE.

Font(s) and/or alpha of choice. I am using Verdana which is a windows system font, and the Beloved Memory alpha by Steph's Graphx. This is a free to use alpha that may be downloaded from Steph's Graphx.


Note that H# and V# refer to Horizontal and vertical coordinates on your canvas grid. Make sure you have View, Rulers checked in order to see the ruler grid.

When I say "Add to your canvas" I expect that you will copy and paste it as a new layer, unless otherwise state in the tutorial.

This tutorial assumes you have a working knowledge of PSP. It was written using PSP X1, but should work in PSP 8 and up.

To begin, open a new raster layer canvas, 800 x 800, flood fill white.

Open Paper 8-GI_BelovedMemory. Go Go to Layers --> Load/Save Mask --> Load Mask from Disk and locate Correll_07_007. Make sure the "Fit to canvas" box is checked, then click on load.

Edit --> Copy Merged, and add to main canvas, centered. Note that because Jessica's papers are larger then our canvas area, some of the masked paper will run off the edges. This is fine, and desirable for what we are trying to do.

Open Paper4-GI_BelovedMemory. Go to Layers --> Load/Save Mask --> Load Mask from Disk and locate Wee Scots Lass Mask #186. Make sure the "Fit to canvas" box is checked, then click on load.

Edit --> Copy Merged, and add to main canvas, centered.

Open PhotoFrame-GI_BelovedMemory and add to main canvas, centered. Image --> Free Rotate --> Rotate left, 20 degrees.

Open Tears-GI_BelovedMemory and add main canvas, centered at V200, H350.

Resize to 75% and add a second copy to main canvas, centered at H100, V300.

Resize your canvas to 75% (600 x 600 pxls).

Open Newspaper2-GI_BelovedMemory. Resize to 75% and add to main canvas centered at H300, V425. Image -->Free Rotate -- Rotate left, 15 degrees.

Open Ribbon-GI_BelovedMemory, resize to 75% and add to main canvas, centered at H300, V450.

Open Candle-GI_BelovedMemory, resize to 35% and add to main canvas, centered at H450, V400.

Open HeartCharm-GI_BelovedMemory, resize to 25% and add to main canvas, centered at H475, V475. Image -->Free Rotate --> rotate right, 10 degrees.

Open psp12491-SCCorentino-Warrior, copy the tube layer and add to your main canvas, centered.

Add drop shadow of choice to tube. I am using offset vertical of -8, horizontal of 5, opacity of 85, and blur of 35, color black (#000000).

On the materials pallet, set your foreground color to tranparent and your background color to black #000000. Using font of choice, add copyright information to tag.

For the Warrior tube, that information is: (c)Joseph Corsentino www.timeofthefaeries.com Your_MPTLicense#

You can now save the artist's copy as a .pspimage file.

Using font or alpha of choice add name of choice to tag. I am using the Beloved Memory alpha by Steph's Graphx and have centered my name around H350, V480. Actual location will depend upon the size and length of name.

Merge down and save as a .jpg file and your all done!

I hope you enjoyed this tutorial. If you should have a problem, please feel free to E-Mail Me and I'll be happy to help you out.