Sunday, October 4, 2009

Autumn Mage Tutorial

Autumn Mage


This tutorial was written by Dianna Richards of Digicats (and Dogs)/Di Before Dawn Tutorials. Any resemblance to any other tutorial, published or unpublished, living, dead or undead, is purely coincidental.

Please do not rebroadcast, redistribute or otherwise claim this tutorial or any part there of as your own work.


Items you will need to complete this project:

The Back to Nature taggers kit by Scraps by j0eswife. This kit is available for purchase at Digital Chaos and other fine stores.

Tube of choice. I am using Brandy Everett's Celetic Mage, which is available at Mistaken Art. You must have a license to use this tube which can be obtained at Mistaken Art.

Wee Scots Mask #275 which you can download HERE.

Alpha or font of choice. I am using the Bronze Halloween Charm alpha by Digital Delights, which is a PTU full sized alpha. The alpha and chain needs to be resized to 15% for use in this tutorial.


Note that H# and V# refer to Horizontal and vertical coordinates on your canvas grid. Make sure you have View, Rulers checked in order to see the ruler grid.

When I say "Add to your canvas" I expect that you will copy and paste it as a new layer, unless otherwise state in the tutorial.

This tutorial assumes you have a working knowledge of PSP. It was written using PSP X1, but should work in PSP 8 and up.

To begin, open a new raster layer canvas, 800 x 800 pxls, flood filled white.

Open SBJ Paper08, and resize to 80%. Go to layers --> Load/Save Mask --> Load Mask from Disk, and locate WSL mask # 275. Make sure the fit to canvas box is checked, then click on load.

Edit --> Copy Merged, then add to your canvas, centered.

Open SBJ Glitter Spill 1, copy and add to canvas centered.

Open SBJ Flower Branch 3, and add to canvas, centered at H550, V400.

Open cardboard scrap 2, resize to 75% and add to canvas, centered at H200, V400.

Open Brandy Everett's Celtic Mage (or tube of choice), click on the tube layer, copy and add to canvas, centered. Add a drop shadow of choice. I am using vertical offset of 10, a horizontal offset of -10, opacity of 65, blur of 35, color black (#000000).

Open Glitter Glass Frame 2. Go to image, resize and, uncheck the Lock aspect ratio box and set the width of the frame to 700 pixels and the height of the frame to 800 pxls. This will give a nice oval shaped frame.

Copy and past to your canvas, centered. Click on the cardboard scrap to activate it and using your eraser tool, erase any parts of the cardboard that show outside the frame. (Corel_01_004 works well for this as there's a pretty good sized chunk to be erased.)

On the layers pallet, click on the frame layer to activate it. Open SBJ Little Bird and resize to 25%. Mirror. Add to canvas centered at H470, V620. (Make sure you've rechecked the Lock aspect ratio button.)

Open Ivy 1, resize to 75%, and add to canvas, centered at H620, V400.

Open Stick 2, resize to 76%, and add to canvas, centered at H400, V700.

Open Leaf 1, and resize to 50%. Add to your canvas, centered at H550, V620. Repeat with Leaf 2, centering at H620, V620.

Repeat with Leaf 3, centering at H550, V670. Image --> Free Rotate --> rotate right, 15 degrees.

Open Leaves 3, resize to 25% and mirror. Add to canvas at H520, V720.

Open Flower 7, resize to 35% and add to canvas, centered at H470, V700.

You can now add your copyright information to the tag. For the Brandy Everett tube, that information is:

(c) Brandy Everett Webster2772.DeviantArt.com YOUR MtA License #

You may also add your optional tag by watermark. After that you can save the artist's copy as a .pspimage.

Using the alpha or font of choice add the desired name to your tag. I am using the Bronze Halloween Charm Alpha by Pam at Digital Delights which is a full sized, PTU alpha that is a bit of a pain to work with, but which returns very nice results.

Once you've added your name, you can delete the white background layer and select Layers --> Merge --> Merge Visible. Resize your tag by 75% (to 600 x 600 pxls) and save as a .png file and your all done.

I hope you enjoyed this tutorial. If you should have a problem, please feel free to E-Mail Me and I'll be happy to help you out.

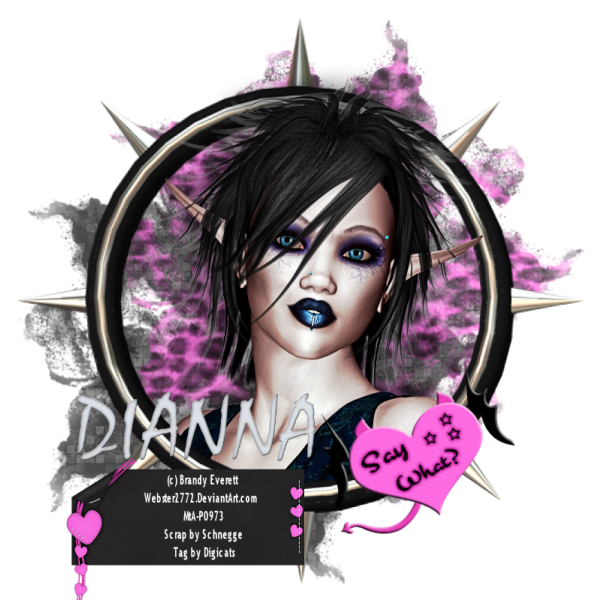
Say What Tutorial

Say What?


This tutorial was written by Dianna Richards of Digicats (and Dogs)/Di Before Dawn Tutorials. Any resemblance to any other tutorial, published or unpublished, living, dead or undead, is purely coincidental.

Please do not rebroadcast, redistribute or otherwise claim this tutorial or any part there of as your own work.


Items you will need to complete this project:

The Say What taggers kit by Schnegge's Scraps. This kit is available for purchase at Scrappetizing as well as other fine stores.

Tube of choice. I am using Dark Faerie Portrait by Brandy Everett, which is available for purchase at Mistaken Art. You must have a license from MtA to use this tube.

Wee Scots Mask #225 which you can download HERE.

Alpha or font of choice. I am using the White Grunge alpha by Dreams Fulfilled. This is a FTU alpha that can be downloaded at her blog.


Note that H# and V# refer to Horizontal and vertical coordinates on your canvas grid. Make sure you have View, Rulers checked in order to see the ruler grid.

When I say "Add to your canvas" I expect that you will copy and paste it as a new layer, unless otherwise state in the tutorial.

This tutorial assumes you have a working knowledge of PSP. It was written using PSP X1, but should work in PSP 8 and up.

Open a new raster layer canvas, 800 x 800 pxls, flood filled white.

Open P-04, then select layers --> load/save mask --> load mask from disk. Locate WSL mask # 225, make sure the fit to canvas box is checked, then click on load.

Edit --> Copy Merged, then add to your canvas, centered at H350, V450.

Open P-18, then select layers --> load/save mask --> load mask from disk. Locate WSL mask # 225, make sure the fit to canvas box is checked, then click on load.

Edit --> Copy Merged, then add to your canvas, centered at H450, V350.

Open tube of choice. I am using Brandy Everett's Dark Faery Portrait which can be purchased at MTA.  

Copy the tube layer, and add to canvas, centered.

Open Frame 10, resize to 150%, and add to canvas, centered.

Using your eraser tool, erase the parts of the tube that show outside of the frame ON THE BOTTOM ONLY.

On the layers pallet, duplicate the frame, then drag the copy under the tube layer.

Set your selection tool to rectangle, then use it to select the top half of the original frame (Raster 4). Then press your delete key. Selections --> Select None.

Add a drop shadow of choice to the tube. I am using Vertical and Horizontal offsets of -10, opacity 65, blur 35, color black (#000000).

Open DevilHeart1, and add to your canvas centered at H550, V600.

Image --> Free Rotate: rotate left, 20 degrees --> Okay.

Open Tag01. Add your copyright information to the tag. For the Dark Faery tube, that information is:

(c) Brandy Everett Webster2772.DeviantArt.com YOURMtALICENSE #

You can also add your "tagged by" information to the tag.  

Edit --> Copy Merged, then add to canvas, centered at V250, H700.  

You can now save your artists' copy as a .pspimage.

Using alpha or font of choice, compose the name you wish to add to the tag and add to the image, centered at around H260, V575. Resize to taste, this may vary based on the length of the name you are using.

I am using the White Grunge alpha by Dreams Fulfilled. This is a FTU alpha available on her blog.

Delete the white background layer, and then select layers --> Merge --> Merge Visible.

Resize your canvas to 75% (600 x 600 pxls), and save as a .png file and your all done!

I hope you enjoyed this tutorial. If you should have a problem, please feel free to E-Mail Me and I'll be happy to help you out.
Saturday, October 3, 2009

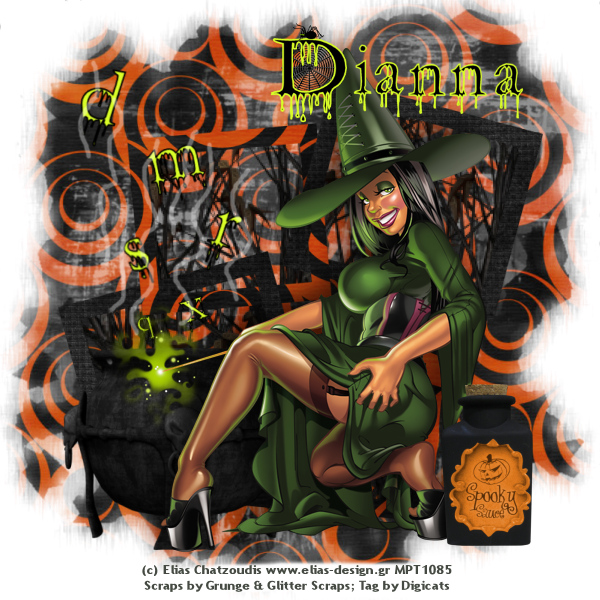
Alphabet Soup

Alphabet Soup


This tutorial was written by Dianna Richards of Digicats (and Dogs)/Di Before Dawn Tutorials. Any resemblance to any other tutorial, published or unpublished, living, dead or undead, is purely coincidental.

Please do not rebroadcast, redistribute or otherwise claim this tutorial or any part there of as your own work.


Items you will need to complete this project:

The Hocus Pocus taggers kit by Grunge and Glitter Scraps. This kit is available for purchase at Sophisti-Scraps as well as other fine stores.

Tube of choice. I am using psp10758 Hocus Pocus by Elias Chatzoudis. You must have a license to use this tube, which is available at www.mypsptubes.com.

Wee Scots Mask #222 which you can download HERE.

Alpha of choice. I am using the "Creepy Alpha" by Winter's Loft which is a FTU alpha available for download on her blog.


Note that H# and V# refer to Horizontal and vertical coordinates on your canvas grid. Make sure you have View, Rulers checked in order to see the ruler grid.

When I say "Add to your canvas" I expect that you will copy and paste it as a new layer, unless otherwise state in the tutorial.

This tutorial assumes you have a working knowledge of PSP. It was written using PSP X1, but should work in PSP 8 and up.

Open a new raster canvas 800 x 800 pxls., flood fill White.

Open GG_Hocus Pocus-paper. Layers --> Load/Save Mask --> Load mask from Disk. Find WSL Mask 222. Make sure the Fit to canvas box it checked and then click on load.

Edit --> Copy Merged and add to canvas, centered.

Using your pick tool, expand the boundaries out to fit the canvas.  

Open dead Bush, enlarge to 200%, and add to canvas, centered. Open Frame 1, and add to canvas, centered.

On the Materials pallet, click on the paper layer, raster 1, and set to invisible. Then activate the bush layer.

Using your eraser tool, erase all the parts of the bush that are not inside the frames area. (You might want to set your eraser to Corel_01_04, as there's a lot of it.)

click on the frame layer to activate it.

Open Cauldron, resize to 75% and add to canvas centered at H250, V600.

Open alpha of choice. I am using Creepy SC g&b by Winter's Loft. Select letters at random and place the on your canvas over the cauldron. Use your pick tool to resize the ones closer to the cauldron smaller, with the ones further up, larger. you can also tilt them to taste.

Resize canvas to 75%, 600 x0 600 Pxls. Open my psp10758 Elias Chatzoudis Hocus Pocus (or tube of choice).

Copy the tube layer, and add to your canvas, centered. Add a drop shadow of choice to tube. I am using Vertical and Horizontal offsets of -10 each, Opacity of 60, blur of 35, color #000000 black.  

On the layer menu, click to activate your paper layer and make it visible. Then reselect your tube layer (which may be raster 12 depending upon how many letters you used).

Using the drop down box in the upper left hand corner of the layers pallet, add a new raster layer. On the materials pallet, set your foreground color to white (#ffffff).

Click on your paint brush tool, and set it to Corel_01_002, size 5, hardness 25. Change the opacity level to 35.

Using your brush, draw some wavy lines over the cauldron to make it look like steam is coming out. (See example.) Painting over the letters is fine.

Open Bottle 2, resize to 50%, and add to canvas, centered at H500, V500.

Use your erase tool to erase any of the background below 560 or 570 on the vertical scale.

Add your copyright info and license number to the tag. You can then save your artist's copy as a .pspimage.

Using the same or similar alpha to the one you used earlier, add you name (or desired name) to the tag, centered at around H400, V80. Resize to taste.

Drop (delete) the white background layer, merge visible and save as a .png file, and your all done!

I hope you enjoyed this tutorial. If you should have a problem, please feel free to E-Mail Me and I'll be happy to help you out.
Wednesday, September 9, 2009

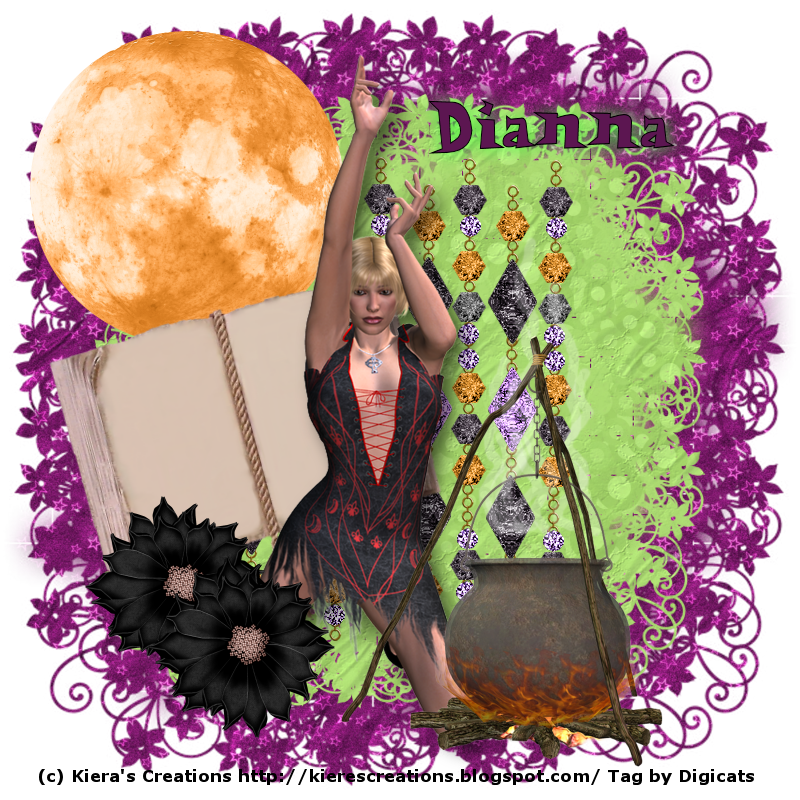
Witchful Thinking

Witchful Thinking


This tutorial was written by Dianna Richards of Digicats (and Dogs)/Di Before Dawn Tutorials. Any resemblance to any other tutorial, published or unpublished, living, dead or undead, is purely coincidental.

Please do not rebroadcast, redistribute or otherwise claim this tutorial or any part there of as your own work.


Items you will need to complete this project:

The Witchful Thinking kit by Kiera's Creations, which can be purchased at Scrappetizing.com. It's mainly a full sized kit, although some elements are taggers sized.

Tube of choice. I am using one of the posers that is included in the kit.

Wee Scots Mask #248 which you can download HERE.

Font of choice. I am using the Spooky Magic font for the name, which can be downloaded from www.freedigitalscrapbooking.com for, well, free.


Note that H# and V# refer to Horizontal and vertical coordinates on your canvas grid. Make sure you have View, Rulers checked in order to see the ruler grid.

When I say "Add to your canvas" I expect that you will copy and paste it as a new layer, unless otherwise state in the tutorial.

This tutorial assumes you have a working knowledge of PSP. It was written using PSP X1, but should work in PSP 8 and up.

To begin, open a raster canvas, 800 x 800 pxls, flood fill white.

Open Paper_6, Resize to 800 x 800 pxls, then go do Layers --> Load/Save Mask --> Load Mask from Disk, and locate Wee Scot's Lass Mask #284. Make sure the fit to canvas box is checked, then click on load.

Layers --> Merge -- Merge Group, then add to your canvas, centered.

Open Paper-2, Resize to 800 x 800 pxls, then further resize by 80%. Repeat the load mask process from above, selecting WSL mask #284 again, then merge  group, and add to your canvas, centered over the purple paper.

Open Gem Curtain 2, then add to canvas, centered.

Open WT Moon, resize by 50% and add to canvas, centered at H 170, V200.

Open WT Book, resize by 50% - HOWEVER - make the sure the resize all layers button is unchecked when you do it! Then go to Image, rotate, free rotate, and rotate left, 15 degrees. Copy and add to your canvas, centered at H250, V450.

Open Poser 4, resize to 35% (you can recheck the resize all layers button), and add to canvas, centered at H350, V400.

Add a drop shadow of choice to the tube. I am using Offset, V&H of 10 each, opacity of 60 and blur of 25.

Open WT_Cauldron, resize to 35% and add to canvas at H500, V550.

Open Flower_1, resize to 24% and add to canvas at H180, V600. Duplicate layer and the move the copy to H250, V650.

ON the layers pallet, click on the tube layer (which should be Raster6), then insert a new raster layer. Set the foreground color on your materials pallet to white, then using your paint brush, draw some wavy lines over the cauldron to make it look like it's steaming.

I have my brush set to size 10, hardness 50, step 10, density 100, thickness 100, rotation 0 and opacity 25. Blend mode is normal.

On the materials pallet, set your foreground color to transparent, and your background color to black. As their is no copyright info included for the tube, go ahead and enter (c) Kiera's Creations http://kierescreations.blogspot.com/ and your "tagged by" info.

You can then save the artist's copy of your tag as a .pspimage file.

On the materials pallet, reset your foreground color to black (#000000) and your background color to #5c1651 (dark purple). Center your text tool at H550, V150, then click and using the font of choice, type in your name (or the name of choice).

I am using Spooky Magic, which is FTU font that is available at http://freedigitalscrapbooking.com. You may add a drop shadow - or a glow - if you wish to make the name stand out more.

Resize your tag to 75% -- make sure you've rechecked that resized all layers button -- to 600 x 600 pxls.

You can then either merge visible and save your tag as a .jpg file with the white background, or you can drop the white background, merge visible and save as a .png file. You're all done!

I hope you enjoyed this tutorial. If you should have a problem, please feel free to E-Mail Me and I'll be happy to help you out.
Monday, August 10, 2009

My Punky Pony tutorial

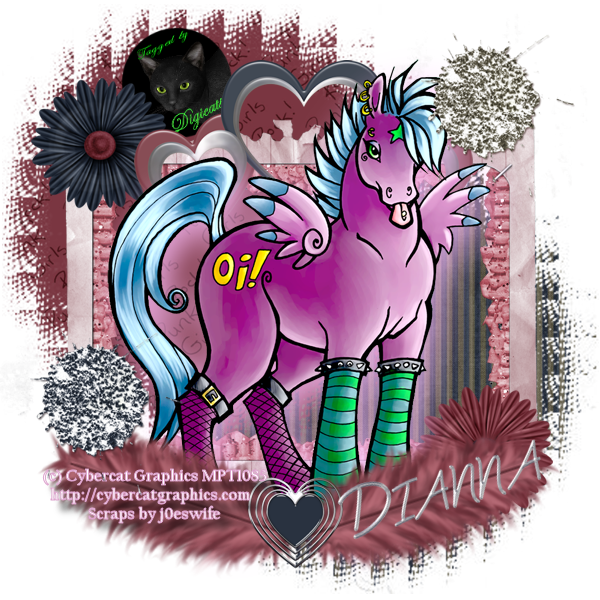
My Punky Pony


This tutorial was written by Dianna Richards of Digicats (and Dogs)/Di Before Dawn tutorials. Any resemblance to any other tutorial, published or unpublished, living, dead or undead, is purely coincidental.

Please do not rebroadcast, redistribute or otherwise claim this tutorial or any part there of as your own work.


Items you will need to complete this project:

The Punk Fae kit (including the Add on Freebie) by Scraps by j0eswife, which may be purchased at Digital Chaos and other fine online stores.

Tube of choice. I am using PSP11444 Punk Pony by Cybercat. You must have a license to use this tube, which may be obtained at www.mypsptubes.com.

Cameron Mask # 25, which you can download for free from her website.

Font and Alpha (optional) of choice. I am using the Silver alpha by Crazed's Creations, which is a FTU alpha that may be which may be download from her blog.


Note that H# and V# refer to Horizontal and vertical coordinates on your canvas grid. Make sure you have View, Rulers checked in order to see the ruler grid.

When I say "Add to your canvas" I expect that you will copy and paste it as a new layer, unless otherwise state in the tutorial.

This tutorial assumes you have a working knowledge of PSP. It was written using PSP X1, but should work in most other versions of PSP.


Open a new raster canvas, 800 x 800 pxls, flood fill white.

Open SBJ_Paper 10. Resize to 60%. Select Layers --> Load/Save Mask --> Load Mask from Disk and locate Cameron Mask 25. Make sure the "Fit to canvas" box is checked in Orientation, and the "Invert Transparency" box under Options, then click on load.

Layers --> Merge --> Merge Group. Add to your canvas located at H500, V500.

Repeat the above steps with SBJ_Paper 1, except that when you add it the canvas, center at H300, V300.

Freebie Add on, open SBJ_Frame 5. Add to canvas, centered.

Still in the Freebie Add on, open SBJ_Flower 1, resize to 50% and add to canvas centered at H130, V200.

Open Freebie Add On SBJ_Flower 2, resize to 50% and add to canvas centered at H650, V600.

Open Freebie Add on Triple Heart frame, resize to 60% and add to canvas centered at H400, V200.

Resize your canvas to 75% (600 x 600 pxls).

Open PSP11444_SCCyberCat PunkPony and copy the tube (no glow) and add to canvas, centered.

Add a drop shadow glow to the tube. I am using Offsets, V&H of 10 each, Opacity of 80, blur of 45 and color of #ffc0ff.

Open Freebie Add On Feather, then select image --> rotate left. Resize to 65% and add to canvas, centered at H180, V500. Using your pick tool, rotate clockwise about 20 to 25 degrees.

Duplicate and Mirror.

Open Heart Charm 2, resize to 50% and add to canvas, H300, V520.

On the materials pallet, set your foreground color to #dea5cf and your background color to #ffffff (White). Using font of choice, add the copyright info for your tube and your scraps by line to your tag.

For the Punk Pony tube, the copyright info is:

(c) Cybercat Graphics http://cybercatgraphics.com YOUR MPT License #
Scraps by j0eswife

I am using California FB, 4 points, bold and centered. I also added a drop shadow to make it more legible.

You may also add your tag by info at this point.

Open SBJ_Glitter Splat 4, resize to 50% and add to canvas, centered at H480, V100.

Repeat with SBJ_Glitter Spat 2, except center at V100, 400.

You can now save your artist's copy as a .pspimage file.

Using the optional alpha of choice, add the name of your choice to your canvas, then drop the white background select layers --> Merge --> Merge Visible and save as a .png file. Or merge to the white background and save as a .jpg file.

I hope you enjoyed this tutorial. If you should have a problem, please feel free to E-Mail Me and I'll be happy to help you out.

Century City Tutorial

Century City


This tutorial was written by Dianna Richards of Digicats (and Dogs)/Di Before Dawn Tutorials. Any resemblance to any other tutorial, published or unpublished, living, dead or undead, is purely coincidental.

Please do not rebroadcast, redistribute or otherwise claim this tutorial or any part there of as your own work.


Items you will need to complete this project:

My Chili Peppers taggers kit, which is free to use for one week only (starting August 10th). You can grab it at Scrappetizing.

Tube of choice. I am using PSP12487 Myst Crouching by Joseph Coresentino. You must have a license to use this tube which can be purchased at MyPSPTubes.com.

Wee Scots Mask #340 which you can download HERE.

Font(s) of choice.


Note that H# and V# refer to Horizontal and vertical coordinates on your canvas grid. Make sure you have View, Rulers checked in order to see the ruler grid.

When I say "Add to your canvas" I expect that you will copy and paste it as a new layer, unless otherwise state in the tutorial.

This tutorial assumes you have a working knowledge of PSP. It was written using PSP X1, but should work in PSP 8 and up.


To begin, open a new raster layer canvas, 800 x 800 pxls, flood fill white.

Open DCD_Paper02. Select --> Layers --> Load/Save Mask --> Load mask from disk and locate Wee Scots Mask #340. Make sure the "Fit to Canvas" orientation button is checked, then click on load.

Layers --> Merge --> Merge Group, then add to canvas, centered.

Open LA Skyline, resize to 80% and add to canvas, centered at H400, V500.

Open DCD_Frame03, resize to 125% and add to canvas, centered. Using your eraser tool, erase the parts of the skyline that appear outside the frame area.

Open DCD_CD 01, resize to 50% and add to canvas, centered at H500, V170.

Open DCD_Platinum 03, resize to 50% and add to canvas, centered at V630, H280.

Open DCD_Musical Note04 resize by 75% and add to canvas, centered at H150, V300. Using your pick tool but a slight counterclockwise tilt of about 15 degrees on the note.

Resize your canvas by 75% - to 600 x 600 pxls.

Open psp12487-SCCorsentino-MystCrouching (or tube of choice). Add to your canvas centered at H250, V300.

Add a drop shadow to the tube. I am using offsets, V & H of 10 each, opacity of 60, and blur of 25.

Open DCD_Barbed Wire, mirror and add to canvas centered at H300, V500.

Open DCD Flower04, resize to 65% and add to canvas, centered at H375, V475.

Open Nik-SWNACChiliPepper2, resize to 50% and add to canvas, centered at H450, V520.

On the materials pallet, set your foreground color to transparent, and your background color to #404040 (black). Using the font of your choice add the copyright information to the tag. For the Myst Crouching tag, the copyright info is:

(c) Joseph Corsentino www.timeofthefairies.com YOUR MPT LICENSE #

You may also add an optional scraps by and tag by line at this time. I am using the font Clarence, 4 points, Bold and centered.

Save your artist copy as a .pspimage file.

On the materials pallet, set your background color to #f5c37d (honey yellow).

Click on the Musical Note later to activate it (it should be Raster 6). Using the font of your choice, type in your name (or the name you desire on the tag).

I am using Brush Script MT, size 16 points, Bold and centered. Put a bit of a counter clockwise tilt to it so it matches the musical note.

On the layers pallet, right click on Vector 2, and on the pop up menu choose "Convert to Raster layer".

Choose Effects --> 3D Effects and Inner Bevel. Set your Bevel to 2, Width 24, Image: Smoothness, Ambiance and Shininess 0, Depth 5, Light #ffffc0 (Light yellow), Angle 115, Intensity 50 and Elevation 35, then click on OK.

Drop the white background layer from your canvas, select Layers --> Merge --> Merge Visible, then save your tag as a .png image and your all done!

I hope you enjoyed this tutorial. If you should have a problem, please feel free to E-Mail Me and I'll be happy to help you out.
Tuesday, August 4, 2009

Fairy Play Tutorial

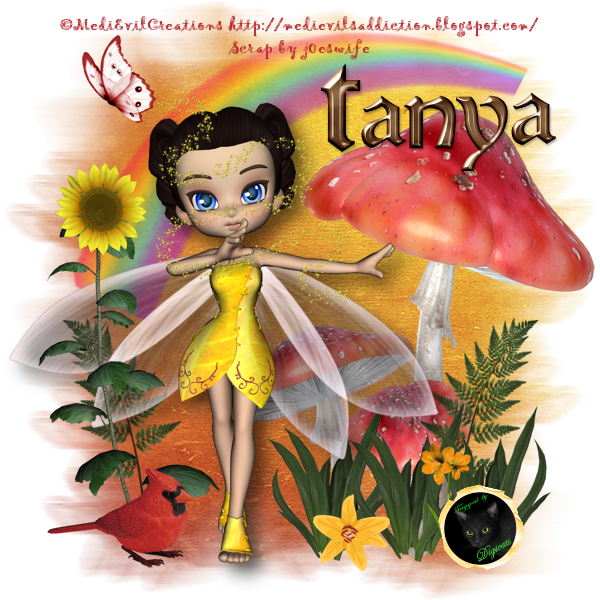
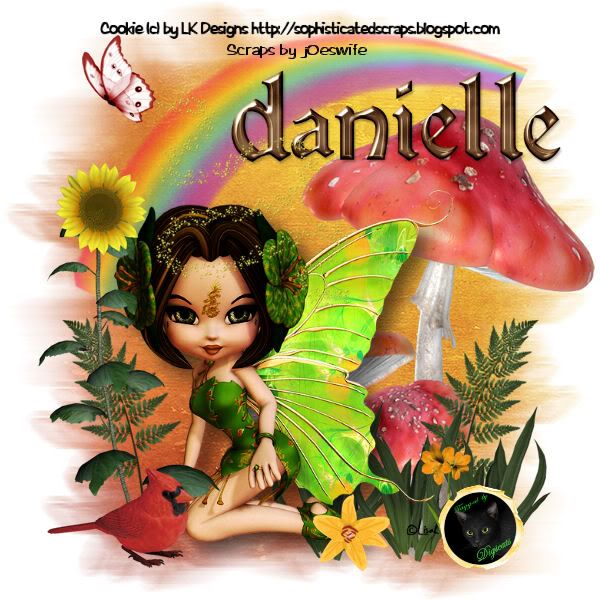
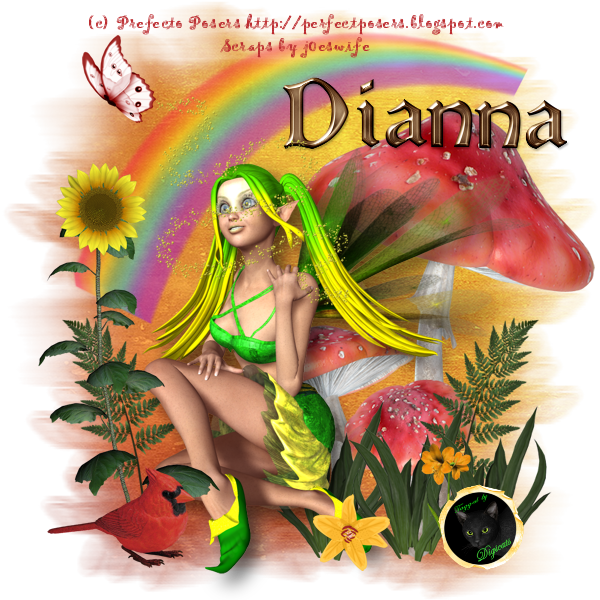
Where Fairies Play


"Where the Fairies Play" is another fun mega-kit from Scraps by j0eswife, which is filled with all sorts of fairy goodness, including a collection of Fae by MediEvil Creations, a unicorn, and of course, Tanya's signature ponies.

In doing this tag I strove to do something was versatile enough that you could drop just about any fairy tube or poser in it and achieve good results and I believe I've managed to accomplish that.

I've done three different version of the tag, so far. LOL! I also think I could put this together as a two layers plug and play tag. Hmmmm....

Where Fairies Play 2 Where Fairies Play 3


This tutorial was written by Dianna Richards of Digicats (and Dogs). Any resemblance to any other tutorial, published or unpublished, living, dead or undead, is purely coincidental.

Please do not rebroadcast, redistribute or otherwise claim this tutorial or any part there of as your own work.


Items you will need to complete this project:

The Where the Fairies Play taggers kit by Scraps by j0eswife. This kit is available for purchase at Digital Chaos and Stargazer Scraps.

Tube of choice. This tutorial was written using the Alvarie poser by Perfect Posers, but just about any fairy tube will work.

Wee Scots Mask #260 which you can download HERE.

Font of choice.


Note that H# and V# refer to Horizontal and vertical coordinates on your canvas grid. Make sure you have View, Rulers checked in order to see the ruler grid.

When I say "Add to your canvas" I expect that you will copy and paste it as a new layer, unless otherwise state in the tutorial.

This tutorial assumes you have a working knowledge of PSP. It was written using PSP X1, but should work in PSP 8 and up.

To begin open a raster canvas, 800 x 800 pxls, Flood Fill White.

Open SBJ_Paper37 and resize by 80%.

Select -- Layers -- Load/Save Mask -- Load Mask from Disk and locate Wee Scots Lass mask # 260. Make sure the "fit to canvas" box is checked, and click on load.

Layers -- Merge -- Merge Group and add to the main canvas, centered.

Open SBJ_Rainbow 1. Resize by 45% and add to canvas, centered at H400, V240.

Open SBJ_Mushrooms1 and add to canvas, centered at H550, V450.

Open SBJ_Leafy Things 3, resize to 25% and add to canvas, centered at H650, V50. Duplicate and Mirror.

Open SBJ_Leafy Things 2, and resize to 50%. Add to canvas at H450, V650. Duplicate and move the duplicated layer to H450, V650. Duplicate again and move the duplicated layer to H650, V650.

Resized your canvas by 75% - to 600 x 600 pxls.

Open Alvarie 1 (or tube of choice). Resize by 50%, mirror and add to canvas, centered at H340, V360.

Open SBJ_Flower 15, resize to 25% and add to canvas, centered at H350, V530.

Open SBJ_Flower 11, resize to 25% and add to canvas, centered at H450, V500.

Open SBJ_Flower 17, resize to 50% and add to canvas, centered at H130, V360.

Open SBJ_Bird2, resize to 25% and add to canvas, centered at H120, V515.

Open SBJ_Butterfly 3, resize to 25% and add to canvas, centered at H120, V80.

Open SBJ_Fairy Dust 3, resize to 25% and add to canvas, centered at H250, V200.

Click on your tube layer to active it, and add a drop shadow to your tube. I am using Offsets of V&H 10 each, Opacity of 60, Blur of 25.

On the materials pallet, set your foreground color to transparent and your background color to #bc2c30 (cardinal red).

Using your font of choice, add the copyright information to the tag. I am using the font Gigi, 4 points, centered & bold. You can also add your "tag by" information at this point.

You can then save the artist's copy of your tag as a .pspimage.

Add your name to the tag using the font or alpha of your choice. I am using the Guinevere Alpha by Sarah Grimwood.

You can now either merge the layers down and save as a .jpg file, or drop the white background as save as a .png file. That's it! You're all done.