Friday, December 25, 2009

Santa Baby Tutorial

Santa Baby


This tutorial was written by Dianna Richards of Digicats (and Dogs)/Di Before Dawn Tutorials. Any resemblance to any other tutorial, published or unpublished, living, dead or undead, is purely coincidental.

Please do not rebroadcast, redistribute or otherwise claim this tutorial or any part there of as your own work.


Items you will need to complete this project:

The Winter Solstice taggers kit by Scrapping all the Way. This is a PTU *Full Size* kit which is available at Scrapper's Secret.

**Note that this is a full size kit that I have resized using Queen Brat Designs resizing script. You must resize this kit prior to attempting this tutorial.

Tube of choice. I am using Santa Baby White by Crystalex Designs. You must have a license to use this tube, which is available at MyPSPTubes.com.

Wee Scots Mask #258 which you can download HERE.

Font(s) and/or alpha of choice. I am using Trebuchet MS, which is a windows system font, and the Winter Snow Alpha from Designs by Ali, which may be purchased at Just4Taggers.com.


Note that H# and V# refer to Horizontal and vertical coordinates on your canvas grid. Make sure you have View, Rulers checked in order to see the ruler grid.

When I say "Add to your canvas" I expect that you will copy and paste it as a new layer, unless otherwise state in the tutorial.

This tutorial assumes you have a working knowledge of PSP. It was written using PSP X1, but should work in PSP 8 and up.

**Make sure you've resized this kit using QBD resizing script before attempting this tutorial!**


To begin, open a new raster layers canvas, 800 x 800, flood fill white.

Open SATW_Fuzzy Snowflake. Go to Layers --> Load/Save Mask --> Load Mask from Disk and locate Wee Scots Lass mask 258. Make sure the "fit to canvas" box is checked, then click on "load".

Copy Merged, and add to your canvas, centered.

Open SATW_Distressed Paper, and add to canvas, centered at H300, V250. Free Rotate --> Rotate left, 25 degrees.

Open Snowdrift-01 and resize to 65%. Copy and add to canvas, centered at H400, V450.

Open SATW_Vintage_Bling_Moon, copy and add to canvas, centered at H200, V150.

Open SATW_Frame_Snowflake and resize to 75%. Add to canvas, centered.

Using your magic wand, click anywhere outside the frame layer to select. On the layers pallet, click on the slow bank layer (Raster 3), then press the delete key. This will delete the bits of the snowbank that fall outside the frame boundaries.

Select --> Select None, then click on the frame layer (Raster 5) to activate.

Open PSP14564-SCCrystalex SantaBabywhite and click on the CU1 layer. Copy and add to your main canvas, centered at H400, V380.

On the layers pallet, click on the frame layer (Raster 5) and duplicate. Drag the copy layer on top of your tube layer.

Using your selection tool set to preset selection type: rectangle, mode: replace, select the area from H90, V50 to H710, V330. Delete.

Select --> Select None,

Click on your tube layer (Raster 6), and add to drop shadow of choice to your tube. I am using Offsets Vertical of -5, Horizontal of 5, Opacity of 85, blur of 35, color black (#000000).

Click on the top frame layer (Copy of Raster 5) to activate.

Open SATW_Bow_Snowflake_Fabric and resize to 50%. Copy and add to canvas, centered at H370, V640.

On the materials pallet set your foreground color to transparent and your background color to white (#ffffff). Using font of choice, add the copyright information to your tag. For the Santa Baby White tube that information is:

(c)CrystalexDesigns www.crystalexgraphicdesigns.com Your MPTLicense #

You can now save the artist's copy of your tag as a .pspimage file.

Using font or alpha of choice, add name of choice to tag. I am using Snow Winter Alpha from Designs by Ali. Exact location will vary depending upon length of the name used, but I have mine centered at around H550, V575. I then rotated left, 25 degrees. You can do whatever pleases you. :)

Merge visible, then resize tag to 75% (600 x 600 pxl) and save a .jpg file. Alternately you can drop the white background, merge down, resize and save as a .png file.

That's it, you're all done!

I hope you enjoyed this tutorial. If you should have a problem, please feel free to E-Mail Me and I'll be happy to help you out.
Wednesday, December 23, 2009

Research Tutorial

Research


This tutorial was written by Dianna Richards of Digicats (and Dogs)/Di Before Dawn Tutorials. Any resemblance to any other tutorial, published or unpublished, living, dead or undead, is purely coincidental.

Please do not rebroadcast, redistribute or otherwise claim this tutorial or any part there of as your own work.


Items you will need to complete this project:

The Stalkers taggers kit by Jennie D Designs. This is a PTU kit which may be purchased at Scrapper's Secret.com.

Tube of choice. I am using psp14457-Paige by Keith Garvey. You must have a license to use this tube, which is available at MyPSPTubes.com.

Wee Scots Mask #208 which you can download HERE.

12-17-09 Stalking word art, which is FTU and available for download from Ginger's House.

Font(s) and/or alpha of choice. I am using Impact and Trebuchet MS, both of which are Windows systems fonts, and CAC Champagne, which is available for download from Outlaw by Design.


Note that H# and V# refer to Horizontal and vertical coordinates on your canvas grid. Make sure you have View, Rulers checked in order to see the ruler grid.

When I say "Add to your canvas" I expect that you will copy and paste it as a new layer, unless otherwise state in the tutorial.

This tutorial assumes you have a working knowledge of PSP. It was written using PSP X1, but should work in PSP 8 and up.

To begin, open a new raster layer canvas, 600 x 600 pxls, flood fill white.

Open Paper 15, resize to 88%. Go to layers --> Load/save mask --> Load Mask from Disk and find Wee Scots Lass mask 208. Make sure the "fit to canvas" button is checked, then click on Load.

Copy Merged and add to canvas, centered.

On the Materials pallet, set your foreground color to Medium Gray (#808080), and your background color to transparent.

Activate your text tool, click on the canvas at center, and set your font to Impact, Size 36 Points, Bold, Centered. Type in the word "Research" then click on apply. On your layers pallet, right click on Vector 1 - which is the word you just typed - and select "convert to raster layer".

Image --> Free Rotate --> Rotate left, 90 degrees. using your pick tool, relocate the now Raster 2 layer to H500, V300.

Open paper 13, Selections --> Select all. Edit --> Copy.

Activate your magic wand tool, and click inside each of the letters on Raster 3 to select. (Hold down your shift kit to select multiple areas.)

Edit --> Paste into selection.

Selections --> Select None

Image --> Resize, and resize the layer to 85%, Make sure you UNCHECK the "resize all" box. Relocate layer to H500, V300.

Open Frame7, and add to canvas, centered at H250, V300. Image --> Free Rotate --> Rotate Left, 90 degrees. Recenter the frame back to H250, V300.

Open psp14457-SCGarvey-Paige (or tube of choice) and copy the tube layer. Add to your canvas centered at H250, V300.

On the layers pallet, click on Raster 3 - the frame layer - and duplicate. Drag the copy later over the top of the top layer.

Activate your Selection tool, and preset to rectangle, mode replace. Select from H50,V50 to H450,V350 on the Copy of Raster 3 layer and then press your delete key.

Click on Raster 4 to activate, the select from H100,V500 to H400,V570, and press the delete key again.

Selections --> Select None

Add a drop shadow of choice to your tube layer. I am using Offsets, Horizontal and Vertical of 10 each, Opacity of 80, blur of 35, color black (#000000).

on the layers pallet, click on Copy of Raster 3 to activate.

Open the 12-17-09 Stalking word art. Using a combination of your selection tool and your eraser tool, remove the word "research" from the word art. Resize to 50%, copy and add your canvas, centered at H250, V450.

On the Materials pallet, set your foreground color to Maize (#e0c58d), and then used your flood fill tool to color in the lettering on the word art.

Open eyes blue, resize to 25%, and add to canvas, centered at H130, V460.

Open binoculars 2, resize to 25% and add to canvas centered at H450, V450.

Image --> Free Rotate --> Rotate right, 25 degrees.

On the materials pallet, set your foreground color to transparent and your background color to dark blue (#000040).

Using font of choice, add your copyright information to the tag. I am using Trebuchet MS, 4 points, centered. for the Paige tube, the copyright information is:

(c)Keith Garvey http://garvgraphx.com Your MPTLicense#.

I have located my info at H250, V550. You may now save your artist's copy as a .pspimage file.

If you are using the Champagne font or similar font of choice, set your background color on the materials pallet to dark green (#004000), and add your name of choice.

I am using 26 points, bold, centered and have added the name at H400, V65. Exact location will depend on the length of the name you are using and the size of your font.

Delete the white background layer, merge visible and save your completed tag as a .png file, and your all done.

(Optionally, you may keep the white background layer and save as a .jpg file.)

I hope you enjoyed this tutorial. If you should have a problem, please feel free to E-Mail Me and I'll be happy to help you out.

Rockin' New Year's Bubbly

Rockin New Year


This tutorial was written by Dianna Richards of Digicats (and Dogs)/Di Before Dawn Tutorials. Any resemblance to any other tutorial, published or unpublished, living, dead or undead, is purely coincidental.

Please do not rebroadcast, redistribute or otherwise claim this tutorial or any part there of as your own work.


Items you will need to complete this project:

The Rockin' New Year taggers kit by Nette's NightOwl Works. This is a FTU kit which is available for download on her blog.

Tube of choice. I am using New Year's Bubbly by Denis Rino. You must have a license to use this tube, which is available at MyPSPTubes.com.

Wee Scots Mask #218 which you can download HERE.

Font(s) and/or alpha of choice. I am using Trebuchet MS, which is a windows system font, and the Confetti Alpha by Jos DZigns which may be purchased at Twilight Scraps.


Note that H# and V# refer to Horizontal and vertical coordinates on your canvas grid. Make sure you have View, Rulers checked in order to see the ruler grid.

When I say "Add to your canvas" I expect that you will copy and paste it as a new layer, unless otherwise state in the tutorial.

This tutorial assumes you have a working knowledge of PSP. It was written using PSP X1, but should work in PSP 8 and up.

Open a new raster layers canvas, 800 x 800, flood fill white.

Open Paper4. Go to Layers --> Load/Save Mask --> Load Mask from Disk and locate Wee Scots Lass mask #218. Make sure the "fit to canvas" button is checked, then click on load.

Resized to 115%, copy merged and add to canvas, centered.

Open Works2 and add to canvas, centered.

Open PSP14579-SCRino-NewYearsBubbly, copy the close up tube and add to canvas, centered.

Open Frame and add to canvas, centered. Using your pick tool, scoot the tube layer over to the right so that the tube edge matched up with the frame edge.

Add a drop shadow of choice to your tube layer. I am using Offsets, vertical and horizontal of -10 each, opacity of 80, blur of 25, color black (#000000).

Click on the frame layer again to activate, then using your magic wand tool, click anywhere outside the frame layer.

On the Layers Pallet, click on the Works Layer (Raster 2) then press the delete key. This gets rid of any of the "works" that are outside of the frame area.

Selections -->Select none.

Click on the frame layer again to activate.

Open champagne 2, copy and add to canvas, centered at H100, V600.

Open Cglass1, copy and add to canvas Centered at H150, V660.

On the Materials pallet, set your foreground color to transparent and your background color to Dark Burgundy (#65002a).

Using font of choice, add the copyright info or the tube to your tag. For the New Year's Bubbly tube, that info is:

(c)Denis Rino www.mypsptubes.com YourMPT_License#.

You can now save the artist's copy of your tag as a .pspimage tube.

Using font or alpha of choice, add name of choice to tag. I am using the New Years Confetti Alpha by Jos DZigns, and have centered the name at H250, V675. Actual placement of the name will depend on size and length, and the font or alpha your are using.

Delete your white background layer, and merge visible. Resize your canvas by 75% (to 600 x 600 pxls) and save as a .png file.

I hope you enjoyed this tutorial. If you should have a problem, please feel free to E-Mail Me and I'll be happy to help you out.

Sunday, December 20, 2009

Party Skelly Tutorial

Party Skelly


This tutorial was written by Dianna Richards of Digicats (and Dogs)/Di Before Dawn Tutorials. Any resemblance to any other tutorial, published or unpublished, living, dead or undead, is purely coincidental.

Please do not rebroadcast, redistribute or otherwise claim this tutorial or any part there of as your own work.


Items you will need to complete this project:

The Party Girl taggers kit by Digicats (& Dogs).. This is a PTU kit which is available at Scrapper's Secret.com as well as other fine online boutiques.

Tube of choice. I am using Dapper Skelly by Misty Benson. You must have a license to use this tube, which is available at MyPSPTubes.com.

Wee Scots Mask #354 which you can download HERE.

Font(s) and/or alpha of choice. I am using Trebuchet MS, which is a windows system font, and the New Year Confetti Alpha by JosDZigns which may be purchased at Twilight Scraps.com.


Note that H# and V# refer to Horizontal and vertical coordinates on your canvas grid. Make sure you have View, Rulers checked in order to see the ruler grid.

When I say "Add to your canvas" I expect that you will copy and paste it as a new layer, unless otherwise state in the tutorial.

This tutorial assumes you have a working knowledge of PSP. It was written using PSP X1, but should work in PSP 8 and up.

To begin, open a new raster layer canvas, 800 x 800 pxls, flood filled white.

Open Paper08. Go to layers --> Load/Save Mask --> Load Mask from Disk and locate Wee Scots Lass mask 354. Make sure the fit to canvas box is checked then click on load.

Copy merged and add to canvas, centered.

Open the New Year's Bling Curtain, and add to canvas, centered at H400, V100.

On the Layers pallet, click on the paper layer (Raster 1), then using your magic wand, click anywhere outside the paper area (i.e. somewhere in the white area).

Click on the Bling Curtain layer, then press the delete key. This will erase the potions of the Bling Curtain not on the paper area.

Selections --> Select none.

Open Champagner04, resize by 75% and add to canvas, centered at H150, V400.

Open Holiday Ball04, resize by 75% and add to canvas, centered at H550, V350.

Resize your canvas to 75% (600 x 600 pxls.)

Open psp4024-SCBenson-DapperSkelly. Copy the tube layer, and add to the canvas, centered.

Open Frame07, resize to 75% and add to canvas, centered. Using your magic wand tool, click anywhere on the outside of the frame.

On the layers pallet, click on the tube layer, then press the delete key.

Selections --> Select none.

Click on the frame layer to activate.

Open Champagne Glass04. Resize to 75%, and add to canvas centered at H150, V350.

Open Garland04, and add to canvas centered at H300, V 450. Image --> Free Rotate, rotate left, 15 degrees.

Open Garland05, and add to canvas centered at H300, V 450. Image --> Free Rotate, rotate right, 5 degrees

Open DCD_Music Element04. Resize to 35%, and add to main canvas centered at H300, V450.

On the Materials pallet, set your foreground color to transparent, and your background color to dark green (#284e4e).

Using the font of choice, add the copyright info for the tube to the tag. For the Misty Benson tube, that information is:

(c)Misty Benson www.mistybenson.com Your_MPTLicense#.

You can now save the artist's copy of your tag as a .pspimage.

Using alpha or font of choice, add the name to your tag centered around H400, V450. Image --> free rotate --> rotate left, 10 degrees.

Delete the White background layer, merge visible and save your tag as a .png file.

I hope you enjoyed this tutorial. If you should have a problem, please feel free to E-Mail Me and I'll be happy to help you out.

Saturday, December 19, 2009

Christmas Countdown Tutorial

newwin


This tutorial was written by Dianna Richards of Digicats (and Dogs)/Di Before Dawn Tutorials. Any resemblance to any other tutorial, published or unpublished, living, dead or undead, is purely coincidental.

Please do not rebroadcast, redistribute or otherwise claim this tutorial or any part there of as your own work.


Items you will need to complete this project:

The Last Minute Christmas taggers kit by Gothic Inspirations. This is a PTU kit which is available at Just4Taggers.com as well as other fine online boutiques.

Tube of choice. I am using Holiday Presents by Unholy Vault Designs. This is one of the tubes we received from My PSP Tubes.com as part of our 2009 Christmas gift. You must have a license to use this tube, which is available at MyPSPTubes.com.

Wee Scots Mask #253 which you can download HERE.

Font(s) and/or alpha of choice. I am using Trebuchet MS, which is a windows system font, and the "Furry" alpha by Nutshell Creations which may be purchased at Scrappetizing.com.


Note that H# and V# refer to Horizontal and vertical coordinates on your canvas grid. Make sure you have View, Rulers checked in order to see the ruler grid.

When I say "Add to your canvas" I expect that you will copy and paste it as a new layer, unless otherwise state in the tutorial.

This tutorial assumes you have a working knowledge of PSP. It was written using PSP X1, but should work in PSP 8 and up.

To begin, open a new raster layer canvas, 800 x 800 pxls, flood fill white.

Open Paper4-GI_Last Minute Christmas. Go to Layers --> Load/Save Mask -- Load Mask from Disk and locate Wee Scots Lass mask 253. Make sure the "Fit to canvas" box is checked, then click on load.

Copy Merged and add to your canvas, centered.

Open Mesh and add to canvas, centered at H350, V250. Image --> Free Rotate --> Rotate left 20 degrees.

Open Lyrics-GI_LastMinuteChristmas and add to canvas, centered.

Open Tree-GI_Last Minute Christmas, resize to 75% and add to canvas, centered at H500, V325.

Open UnholyVault-Holiday Presents (or tube of choice); copy the tube layer and add to canvas, centered.

Add shadow of choice to tube layer. I am using offsets vertical and horizontal of 10 each, opacity of 80, blur 35, and color of black #000000.

Open Frame4-GI_Last Minute Christmas and rotate right. Add to canvas, centered.

Duplicate --> Free Rotate --> Rotate Left 10 degrees.

Open Countdown-GI_LastMinuteChristmas, resize to 75% and add to canvas, centered at H200, V575.

On the materials pallet, set your foreground color to transparent and your background color to Dark Green (#3d5c2f). Using font of choice, add the copyright information to your tag. For the Unholy Vault Design tube the info is:

(c)Unholy Vault Designs http://asaenath.deviantart.com YourMPTLicense #.

I am using Trebuchet MS, which is a Windows system font, 4 points, bold, centered. I rotated my text left, 90 degrees and added to the canvas centered at H720, V400.

You may now save your artist's copy as a .pspimage.

Using alpha or font of choice, add the name of choice to your tag. I am using the Furry Alpha by Nutshell Creations.

I have my name centered around V320, H90. Actual location will depend upon length of name and size of font or alpha you are using.

Add a drop shadow to match the one on your tube to your name.

Delete your white background layer, and merge visible. Resize your canvas by 75% (to 600 x 600 pxls) and save as a .png file.

I hope you enjoyed this tutorial. If you should have a problem, please feel free to E-Mail Me and I'll be happy to help you out.

Wednesday, December 16, 2009

Rockin' New Year's Babe tutorial

Rockin' New Year's Babe


This tutorial was written by Dianna Richards of Digicats (and Dogs)/Di Before Dawn Tutorials. Any resemblance to any other tutorial, published or unpublished, living, dead or undead, is purely coincidental.

Please do not rebroadcast, redistribute or otherwise claim this tutorial or any part there of as your own work.


Items you will need to complete this project:

The Rockin New Year sampler from Jennie D Designs. The sampler is FTU, the PTU kit may be purchased at Scrapper's Secret.com.

Tube of choice. I am using psp14558-SCCrystalex-New Years Babe. You must have a license to use this tube, which is available at MyPSPTubes.com.

Wee Scots Mask #283 which you can download HERE.

Font(s) of choice. I am using Trebuchet MS, which is a windows system font, and Champagne, which is a FTU font available at www.outlawbydesign.com.


Note that H# and V# refer to Horizontal and vertical coordinates on your canvas grid. Make sure you have View, Rulers checked in order to see the ruler grid.

When I say "Add to your canvas" I expect that you will copy and paste it as a new layer, unless otherwise state in the tutorial.

This tutorial assumes you have a working knowledge of PSP. It was written using PSP X1, but should work in PSP 8 and up.

To begin, open a raster canvas, 800 x 800 pxls, flood fill white.

Open Paper 4, and resize to 80%. Go to Layers --> Load/Save Mask --> Load Mask from Disk and locate Wee Scots Lass Mask 283. Make sure the fit to canvas box is checked, then click on load.

Copy Merged and add to your main canvas, centered.

Open firework 5, resize to 50% and add to canvas, centered at H500, V300, and again at H300, V500.

Open Pearl curtain 3, and resize to 80%. Add to canvas centered to H400, V0 (top).

On the layers pallet, click on the paper layer (raster 1) and using your magic wand, click anywhere outside the paper (i.e., in any of the white areas).

Click on the Pearl curtain (Raster 4) and hit the delete key. This will erase the parts of the curtain that are outside of the paper area.

Selections --> Select None.

Resize your canvas to 75% (600 x 600 pxls). Make sure the resize all layers box is checked!

Open psp14558-SCCrystalex-New Years Babe (or tube of choice.). Copy the close up tube, and add to your canvas, centered.

Move the tube down to V330. On the layers pallet, click on the paper layer (raster 1) and using your magic wand, click anywhere outside the paper (i.e., in any of the white areas).

Click on the tube layer on the Layers Pallet to activate it (Raster 5) then press the delete key.

Selections --> Select None.

Add a drop shadow of choice to your tube. I am using offsets, Vertical and Horizontal of -4, Opacity of 80, Blur of 25, color black (#000000).

Open Bottle 3 - which is full size - and resize to 15%. Resize it again to 75%. Add to your canvas, centered at H450, V480. Go to Image --> Free Rotate, and rotate right, 25 degrees.

Open Wine Glass 1 - which is also full size - and resize to 15%. Resize it again to 75%. Add to canvas centered at H490, V480.

Open Bow 5, resize to 35% and add to canvas, centered at H300, V550.

On the Materials pallet, set your foreground color to transparent and your background color to white (#ffffff). Using font of choice, add the copyright information to your tag. For the Crystalex tube, the info is

(c)Crystalex Designs www.crystalexgraphicdesigns.com Your_MPT_License#

I am using Trebuchet MS, which is a windows system font, 4 points, bold, and centered and have my information H340, V80.

Open ball 2010, resize to 25% and add ot the canvas, centered at H460, V205.

You can now save your artist's copy as a .pspimage file.

On the Materials pallet, set your background color to a material of choice. I am using a silver gradient, 26 points, bold, centered. Using the Champagne font, add the name of choice to your tag. I have mine centered at H400, V530. Actual placement will depend upon the size and length of the name you are using.

Delete the white background layer, Merge Visible and save your tag as a .png file, and you're all done!

I hope you enjoyed this tutorial. If you should have a problem, please feel free to E-Mail Me and I'll be happy to help you out.

Tuesday, December 15, 2009

New Year's Carnival

New Year's Carnival


This tutorial was written by Dianna Richards of Digicats (and Dogs)/Di Before Dawn Tutorials. Any resemblance to any other tutorial, published or unpublished, living, dead or undead, is purely coincidental.

Please do not rebroadcast, redistribute or otherwise claim this tutorial or any part there of as your own work.


Items you will need to complete this project:

The Rockin New Year taggers kit by Scraps by j0eswife. This is FTU kit that is available on Tanya's blog.

Tube of choice. I am using psp11783-SCVinegar Carnival by Vinegar. You must have a license to use this tube, which is available at MyPSPTubes.com.

Wee Scots Mask #178 which you can download HERE.

Font(s) of choice. I am using Trebuchet MS, which is a windows system font, and Champagne, which is a FTU font available at www.outlawbydesign.com.


Note that H# and V# refer to Horizontal and vertical coordinates on your canvas grid. Make sure you have View, Rulers checked in order to see the ruler grid.

When I say "Add to your canvas" I expect that you will copy and paste it as a new layer, unless otherwise state in the tutorial.

This tutorial assumes you have a working knowledge of PSP. It was written using PSP X1, but should work in PSP 8 and up.

Open a new raster layers canvas, 800 x 800, flood fill white.

Open SBJ_Paper_08, and resized to 80%. Go to Layers --> Load/Save Mask --> Load Mask from Disk and locate Wee Scots Lass Mask #178. Make sure the "Fit to Canvas" box is checked, then click on load.

Copy Merged and add to your main canvas, centered.

Open Sparkles 3 and add to canvas. On the Layer pallet, click on the paper layer to activate. Using you magic wand tool, click anywhere around the the outside of the paper (anywhere in the white area).

On the Layers pallet, click on the sparkles layer to active (Raster 2), then press the delete key. This will get ride of the sparkles that fall outside the paper area.

Selections --> Select None.

Open SBJ_Balloon_1 and add to canvas, centered at H100, V350.
Open SBJ_Balloon_2 and add to canvas, centered at H150, V400.
Open SBJ_Balloon_3 and add to canvas, centered at H200, V375.

Resize canvas to 75% (600 x 600 pxls). Make sure the resize all layers box is checked!

Open psp11783-SCVinegar Carnival (or tube of choice) and add tube layer to your canvas, centered.

Open SBJ_Frame_10, and resize to 80%. Add to canvas, centered.

Using your pick tool, slide the tube over to the left so that it matches up with the inside edge of the frame.

Add a drop shadow of choice to your tube. I am using offsets, vertical and horizontal of -10 each, opacity of 80, blur of 35 and color of dark green (#004000).

Click on the frame layer (Raster 7) to activate.

Open SBJ_PartyHat_1, resize to 65%, and add to canvas, centered at H400, V475.

Open SBJ_Feather_2, and add to canvas, centered at V374, H450. Image --> Free Rotate --> Right, 25 degrees.

Open SBJ_PartyHorn_4. Resize to 65%, but UNCHECK the resize all layers box. Image --> Free Rotate --> Free Rotate right, 44 degrees. Mirror, then add to your main canvas, centered at H400, V520.

On the Materials Pallet, set your foreground color to transparent, and your background color to SeaGreen (#00b4a3). Using font of choice, add the copyright information to your tag. For the Vinegar tube, the information is:

(c) Vinegar www.vinegaria.com Your_MPT_License#

I am using Trebuchet MS, 8 points, bold, and centered.

Save the artist's copy as a .pspimage file.

On the Materials Pallet, set your foreground color to transparent, and your background color to Gold (#c7a253).

Using Font of choice, add the name desired to the tag. I am using the Champagne font, 36 points, Bold, centered and located the name at around H470, V490. Actual location of your name will depend on length and size of font you are using.

Convert the name layer to a raster layer, then go to Effects --> 3D Effects --> Inner Bevel. I am using the following settings:

Bevel: 2, Width: 9, Smoothness: 29, Depth: 26, Ambiance: 0, Shininess: 20, Color: #ffffff, Angle: 355, Intensity: 40, Elevation: 35.

Delete the white background layer, Merge Visible and save your tag as a .png file, and you're all done!

I hope you enjoyed this tutorial. If you should have a problem, please feel free to E-Mail Me and I'll be happy to help you out.

Sunday, December 13, 2009

Wynter Solstice

Wynter Solstice


This tutorial was written by Dianna Richards of Digicats (and Dogs)/Di Before Dawn Tutorials. Any resemblance to any other tutorial, published or unpublished, living, dead or undead, is purely coincidental.

Please do not rebroadcast, redistribute or otherwise claim this tutorial or any part there of as your own work.


Items you will need to complete this project:

The Winter Solstice taggers kit by Nette's NightOwl Works, which is a PTU kit that is available at Stargazer Scraps.

Tube of choice. I am using Morgana Wynter's Tuatha. You must have a license to use this tube, available at MisTakenArt.com.

Wee Scots Mask #241 which you can download HERE.

Alpha and/or font of choice. I am using the Snow Winter Alpha by Designs by Ali. Alternately you can download the "Frosty" Alpha from Krakatuka for free at Krakatuka's Magic Box. It will work equally well for the purposes of this tutorial.


Note that H# and V# refer to Horizontal and vertical coordinates on your canvas grid. Make sure you have View, Rulers checked in order to see the ruler grid.

When I say "Add to your canvas" I expect that you will copy and paste it as a new layer, unless otherwise state in the tutorial.

This tutorial assumes you have a working knowledge of PSP. It was written using PSP X1, but should work in PSP 8 and up.

Open a new raster layer canvas, 800 x 800 pxls, Flood Filled White.

Open npaper3. Go to Layers --> Load/Save Mask --> Load Mask from Disk and find Wee Scots Lass mask # 241. Make sure the "Fit to Canvas" box is checked, then click on load.

Copy Merged and add to your main canvas, centered.

Open Morgana Wynter's Tuatha (or tube of choice) and add to canvas, centered at H350, V350.

Open ornament1, and add to main canvas, H200, V600. Go to Image --> Free Rotate and rotate the image left, 20 degrees.

Open ornament3, and add to main canvas, H400, V550. Go to Image --> Free Rotate and rotate the image right, 20 degrees.

Open ornament4, and add to main canvas, H600, V600. Go to Image --> Free Rotate and rotate the image left, 20 degrees.

Open iceborder, and add to main canvas centered at H250, V400. Duplicate and mirror.

Open flake5, resize to 25%. Add to main canvas centered at H190, V210, and again at H600, V375.

On the Materials pallet, set your foreground color to transparent and your background color to white (#ffffff). Add the copyright information to your tag. For the Morgana Wynter tube, the information is:

(c)Morgana Wynter morganawynter.deviantart.com Your MtA License #

I am using the font Trebuchet MS, 4 points, bold & centered. I typed the copyright information in the middle of the tag, used free rotate to rotate it left, 90 degrees, and relocated it to H100, V400.

Add a drop shadow to the copyright info, I am using offsets, vertical and horizontal of -3 each, opacity of 100, blur of 10, color #000040.

You may now save the artist's copy of your tag as a .pspimage file.

Using Alpha or font of choice, add the name to your tag, centered at H400, V650.

Delete the white background layer, then go to Layers --> Merge --> Merge Visible.

Resize your canvas to 75% (600 x 600 pxls), save as a .png file and your all done.

I hope you enjoyed this tutorial. If you should have a problem, please feel free to E-Mail Me and I'll be happy to help you out.

Saturday, December 12, 2009

Fae Winter Tutorial

Fae Winter


This tutorial was written by Dianna Richards of Digicats (and Dogs)/Di Before Dawn Tutorials. Any resemblance to any other tutorial, published or unpublished, living, dead or undead, is purely coincidental.

Please do not rebroadcast, redistribute or otherwise claim this tutorial or any part there of as your own work.


Items you will need to complete this project:

The Let it Snow taggers kit by Crazed's Creations. This is PTU kit available at Scrappeting.com.

Tube(s) of choice. I am using the Fae tubes included in the kit

Wee Scots Mask #222 which you can download HERE.

Font of choice. I am using Coventry Garden which is a FTU font which may be downloaded from www.OutlawbyDesign.com.


Note that H# and V# refer to Horizontal and vertical coordinates on your canvas grid. Make sure you have View, Rulers checked in order to see the ruler grid.

When I say "Add to your canvas" I expect that you will copy and paste it as a new layer, unless otherwise state in the tutorial.

This tutorial assumes you have a working knowledge of PSP. It was written using PSP X1, but should work in PSP 8 and up.

Open a new raster layers canvas, 800 x 800 pxls, flood filled White.

Open Crazeds_papers9_LIST. Layers --> Load/Save Mask --> Load Mask from Canvas and find Wee Scots Lass mask #222. Make sure the "Fit to Canvas" button is checked, and click on load.

Open Crazeds_frame2_LIST. Resize to 75% and add to canvas, centered at H250, V250. Duplicate and relocate duplicate to H550, V550.

Open Crazeds_fae1_LIST. Add to canvas, centered at H250, V400. On the Layer Pallet, drag the Fae layer under the first frame layer (Raster 2).

Click on the frame layer to activate, then click anywhere outside of the frame with you magic wand.

On the layers pallet, click on the Fae Layer (Raster 3) and then press the delete key. This will erase any part of the Fae tube that is outside the frame area.

Selections --> Select None.

Open Crazeds_fae2_LIST. Image--> Mirror, copy and add to canvas centered at H550, V700.

On the layers pallet, click on the frame #2 layer (Copy of Raster 2) to activate, then click anywhere outside of the frame with you magic wand.

On the layers pallet, click on the Fae 2 Layer (Raster 4) and then press the delete key. Selections --> Select None.

Add drop shadows of choice to your Fae layers. I am using Offsets, vertical and horizontal of -3, opacity of 80, blur of 30, color black (#000000).

Click on Frame #2 (Copy of Raster 2) to activate.

Open Crazeds_sled1_LIST, resize to 75% and add to canvas, centered at H250, V600.

Open Crazeds_branch1_LIST, resize to 75% and add to canvas, centered at H120, V250.

Duplicate --> Image --> Mirror, then relocate the duplicate to H680, V550.

Open Crazeds_bow6_LIST, resize to 75%, and add to canvas, centered at H160, V400.

Duplicate --> Image --> Mirror, then relocate the duplicate to H650, V670.

Open Crazeds_sign1_LIST. On the Materials pallet, set your foreground color to transparent, and your background color to White (#ffffff).

Using font of choice, click on the sign and type in the name you want on you tag. I am using CoventryGarden, which is a FTU font which may be downloaded at www.outlawbydesign.com, 72 Points, Bold, and centered.

Images --> Free Rotate --> Free Rotate Left, 10 Degrees.

Resize the sign to 75%, copy merged and add to your canvas, centered at 250, V550. Add a drop shadow to match the one you used on your tube layers.

Open Crazeds_bird1_LIST, resize to 50%, Mirror and add to canvas, centered at H150, V620. Add a drop shadow to match the one you used on your tube layers.

Open Crazeds_snowflake1_LIST, resize to 50%, and add to canvas, centered at H500, V150, and again at V650, H300.

Open Crazeds_star1_LIST, and add to canvas, centered at H550, V200. Image, free rotate, rotate right, 15 degrees. Add a drop shadow to match the one you used on your tube layers.

If you need to add copyright info to your tag to be copyright compliant, on the materials pallet, set your background color to Medium Dark Blue (#1b507d) and using font of choice, add the information to your tag, centered around H400, V750.

For the Fae tubes, the info is (c) Outlaw by Design www.outlawbydesign.com.

You can now save the artist's copy of your tag as a .pspimage.

Delete the white background layer, then go to Layers --> Merge --> Merge Visible. Resize your canvas to 75% (600 x 600 pxls), then save as a .png file.

Note that if you want to change the name on the tag, you will need to delete the sign layer, redo it and add it back to the main canvas below the bird layer.

I hope you enjoyed this tutorial. If you should have a problem, please feel free to E-Mail Me and I'll be happy to help you out.

Wednesday, December 9, 2009

Christmas Critters Tutorial

Christmas Critters


This tutorial was written by Dianna Richards of Digicats (and Dogs)/Di Before Dawn Tutorials. Any resemblance to any other tutorial, published or unpublished, living, dead or undead, is purely coincidental.

Please do not rebroadcast, redistribute or otherwise claim this tutorial or any part there of as your own work.


Items you will need to complete this project:

The Christmas Critters taggers kit by Crazed's creations. This is PTU kit available at Scrappeting.com.

Tube of choice. I am using psp6778-SCBromley Winter Elf and Deer by Joanna Bromley. You must have a license to use this tube, which is available at MyPSPTubes.com.

Wee Scots Mask #281 which you can download HERE.

Snow overlay, which you may snag HERE.

Alpha and/or font of choice. I am using the Striped Gingerbread Cookie Alpha by Nutshell Creations, which is a PTU alpha available at Scrappetizing.com.


Note that H# and V# refer to Horizontal and vertical coordinates on your canvas grid. Make sure you have View, Rulers checked in order to see the ruler grid.

When I say "Add to your canvas" I expect that you will copy and paste it as a new layer, unless otherwise state in the tutorial.

This tutorial assumes you have a working knowledge of PSP. It was written using PSP X1, but should work in PSP 8 and up.

Open a new raster layer canvas, 800 x 800, flood filled white.

Open Crazed-paper3_CCT. Select Layers --> Load/Save Mask --> Load Mask from Disk and find Wee Scots Lass mask # 281. Make sure the "Fit to Canvas" button is checked, then click on load.

Copy merged, and add to your canvas as a new layer, centered.

Open Crazeds_ornament3_CCT and add to canvas, H300, V250. Image --> Free Rotate --> Free Rotate right, 20 degrees.

Open Crazeds_ornament2_CCT and add to canvas, H150, V400. Image --> Free Rotate --> Free Rotate left, 20 degrees.

Resize your canvas by 75% to 600 x 600 Pxls. Make sure the resize all layers box is checked.

Add the snow overlay to your canvas, centered.

Open psp6778_SCBromley - Winter Elf and Deer. copy the tube layer and add to canvas, centered.

Add a drop shadow of choice to your tube layer. I am using offsets, vertical and horizontal of -10 ear, opacity of 65, blur of 25, color black (#000000),

Open Crazeds-frame5_CCT and add to canvas, centered.

Using your magic wand tool, click anywhere outside the frame to select. On the layers pallet, highlight the tube layer (it should be Raster 4) then click on delete.

Selections --> None.

On the layers pallet, click on the frame layer to activate it.

Open Popcornstring_CCT, resize to 70% and add to canvas, centered at H300, V500.

Open Crazeds_polarbear_CCT, resize to 65% and add to canvas, centered at H165, v420.

Open Crazeds_mouse2_CCT, mirror, resize to 65% and add to canvas centered at H450, V420.

On the Materials pallet, set your foreground color to transparent and your background color to White (#ffffff).

Using font of choice, add copyright info to tag. For the Bromley tube, the information is:

(c) Joanna Bromley http://jbremmers.deviantart.com Your MTPLicense#

I am using Trebucket MS, 4 point, bold, centered. and then converted to raster and manually adjusted using the pick tool.

Save you artist's copy as a .pspimage file.

Using the font or alpha of choice, add your name to the tag centered at around H400, V500. Actual location will depend on the length of the name. I am using the Gingerbread Alpha by Nutshell Creations. This is a full sized alpha I've resized for tagging.

Delete the White background layer, merge visible and save as a .png file and your all done!

I hope you enjoyed this tutorial. If you should have a problem, please feel free to E-Mail Me and I'll be happy to help you out.

Saturday, December 5, 2009

Winter Snowman Tutorial

Winter Snowman


This tutorial was written by Dianna Richards of Digicats (and Dogs)/Di Before Dawn Tutorials. Any resemblance to any other tutorial, published or unpublished, living, dead or undead, is purely coincidental.

Please do not rebroadcast, redistribute or otherwise claim this tutorial or any part there of as your own work.


Items you will need to complete this project:

The Winter Solstice taggers kit by Jennie D Designs, which is part of the December collab kit at Scrapper's Secret and available for purchase exclusively at Scrapper's Secret.com.

Tube of choice. I am using Christmas Snowman by Carlos Cartegena, which is one of the 2009 gift tubes from My PSP Tubes.com. You must have a license to use this tube, which is available at MyPSPTubes.com.

Wee Scots Mask #129 which you can download HERE.

Alpha and/or font of choice. I am using the Iced Alpha by Designs by Ali, which is a PTU font available at Just4Taggers.com.


Note that H# and V# refer to Horizontal and vertical coordinates on your canvas grid. Make sure you have View, Rulers checked in order to see the ruler grid.

When I say "Add to your canvas" I expect that you will copy and paste it as a new layer, unless otherwise state in the tutorial.

This tutorial assumes you have a working knowledge of PSP. It was written using PSP X1, but should work in PSP 8 and up.

Open a new raster layer canvas, 800 x 800 pxls, flood filled white.

Open paper 9 and resize to 80%. Select Layers --> Load/Save Mask --> Load Mask from Disk and locat Wee Scotts Lass mask # 129. Make sure the Fit to Canvas box is checked, then click on load.

Copy merged and add to the main canvas, centered.

Open Frame 5, and add to main canvas, centered.

Open Carlos Cartegena's Christmas Snowman tube and add to main canvas, centered.

Duplicate the Frame 5 layer, then on the layers pallet, drag it over the snowman tube.

Set your selection tool to Selection Type: Rectangle, and mode: Replace. Create a selection on the top frame layer from H100, V20 to H700, V400. Hit the delete button.

Selections --> Select None. Click on the original Frame Layer, Raster 2 to activate it. Usin your magic wand tool, click anywhere outside of the frame in the left lower hand corner.

On the layers pallet, click on the snowman layer, raster 3, then press the delete kit. This erases the part of the scarf that fell outside the frame layer.  

Selections --> Select None.

Click on the snowman, and add a drop shadow of choice. I have using horizontal and vertical offsets of -10 each, opacity of 65, blur of 30, color black (#000000).

Click on Copy of Raster 2, the top frame layer, to activate it.

Selections --> Select None.

Open Star Dangle4 and add to canvas, centered at at H150, V150.

Open Candles 1. Resize to 50%, and add to canvas centered at H225, V600.

On the materials pallet, set your foreground color to transparent and your background color to white (#ffffff). Add the copyright info for the tag along the right side of the frame.

For the Christmas Snowman tube, the copyright info is:

(c) Carlos Cartegena www.carloscartagena.com Your MPTLicense#

You can now save the artist's copy as a .pspimage file.

Using alpha of choice, add name of choice to your tag centered at around H500, V675. Exact location will depend upon the length of the name.

Delete the white background layer, and merge visible. Resize canvas to 75% (600 x 600 pxls). Save as a .png file, and you're all done.

Alternately you can keep the white layers, merge visible, resize and save as a .jgp file.

I hope you enjoyed this tutorial. If you should have a problem, please feel free to E-Mail Me and I'll be happy to help you out.

Friday, December 4, 2009

Candy Cane Elf Tutorial

Candy Cane Elf


This tutorial was written by Dianna Richards of Digicats (and Dogs)/Di Before Dawn Tutorials. Any resemblance to any other tutorial, published or unpublished, living, dead or undead, is purely coincidental.

Please do not rebroadcast, redistribute or otherwise claim this tutorial or any part there of as your own work.


Items you will need to complete this project:

The Holiday Wishes taggers kit by Nette's NightOwl Works, which is a FTU kit.

Tube of choice. I am using Xmas Elf by Joanna Bromley, which is one of the tubes we received as a gift from MPT. You must have a license to use this tube, which is available at MyPSPTubes.com.

Wee Scots Mask #241 which you can download HERE.

Alpha and/or font of choice. I am using the Furry Alpha by Nutshell Creations, which is a PTU alpha available at Scrappetizing.com.


Note that H# and V# refer to Horizontal and vertical coordinates on your canvas grid. Make sure you have View, Rulers checked in order to see the ruler grid.

When I say "Add to your canvas" I expect that you will copy and paste it as a new layer, unless otherwise state in the tutorial.

This tutorial assumes you have a working knowledge of PSP. It was written using PSP X1, but should work in PSP 8 and up.

Open a new raster canvas, 800 x 800, flood filled white.

Open Paper6. Select --> Layers --> Load Save Mask --> Load mask from Disk and locate Wee Scots Lass mask # 241. Make sure the fit to canvas box is checked, then click on load.

Copy Merged and add to main canvas, centered.

Open Tree and add to canvas, centered.

Open Candy Cane and add to main canvas. Select Image --> Free Rotate --> Rotate Right, 30 degrees.

Relocate Candy Cane to H550, V400. Duplicate and mirror.

Open Ornaments, and add to canvas, H400, V500.

Open Box and add to canvas, centered at H200, V525.

Open Xmas Elf tube by Joanna Bromley. Copy the tube layers, and add to canvas,H400, V475.

Add a drop shadow of choice. I am using Vertical and Horizontal offsets of -10 each, Opacity of 65, Blur of 30, color Black (#000000).

Open Lights. Flip. Add to canvas centered at H400, v700.

On the Materials Pallet, set your foreground color to transparent, and your background color to Dark Red (#941f1f).

Using font of choice, add the copyright information to your tag under the row of lights. For the Xmas Elf tube, the copyright info is:

(c)Joanna Bromley http://jbrommers.deviantart.com MyPSPLicense #

I am using Trebucket MS, Size 4 points, bold, and centered.

You may now save the artist's copy as a .pspimage file.

Add name of choice to your tag centered at around H550, V150. Actual location will depend on the length of name.

Delete the white background, and merge visible. Resize your image by 75% (to 600 x 600 pxl), then save as a .png file. Alternately you can keep the white background, merge visible, resize and save as a .jpg file. That's it. You're all done!

I hope you enjoyed this tutorial. If you should have a problem, please feel free to E-Mail Me and I'll be happy to help you out.

Gothic Snowfall Tutorial

Gothic Snowfall


This tutorial was written by Dianna Richards of Digicats (and Dogs)/Di Before Dawn Tutorials. Any resemblance to any other tutorial, published or unpublished, living, dead or undead, is purely coincidental.

Please do not rebroadcast, redistribute or otherwise claim this tutorial or any part there of as your own work.


Items you will need to complete this project:

The Winter Wonderland taggers kit by Gothic Inspirations, which is FTU for a limited time only (until 15 Dec.) and available at the Gothic Inspirations Blog. After 15 December, you may purchase the kit at Just4Taggers.com.

Tube of choice. I am using PSP12316 Gothic Winter by Unholy Vault Designs. You must have a license to use this tube, which is available at MyPSPTubes.com.

Wee Scots Mask #310 which you can download HERE.

Alpha and/or font of choice. I am using the Iced Alpha by Designs by Ali, which is a PTU font available at Just4Taggers.com.


Note that H# and V# refer to Horizontal and vertical coordinates on your canvas grid. Make sure you have View, Rulers checked in order to see the ruler grid.

When I say "Add to your canvas" I expect that you will copy and paste it as a new layer, unless otherwise state in the tutorial.

This tutorial assumes you have a working knowledge of PSP. It was written using PSP X1, but should work in PSP 8 and up.

Open a new raster layer canvas, 800 x 800, flood fill white.

Open Paper6-GI_WinterWonderland. Resize to 95%. Select --> Layers --> Load/Save Mask --> Load Mask from Disk and locate WSL mask # 310. Make sure the fit to canvas box is checked, then click on load.

Copy Merged, and add to your main canvas, centered.

Open Mesh-GI_WinterWonderland, resize to 75% and add to main canvas. Image --> Free Rotate --> Left, 35 Degrees --> OK.

Relocate to H300, V300.

Open ChristmasBall-GI_WinterWonderland. Add to canvas. Image --> Free Rotate --> Right, 35 Degrees --> OK. Relocate on your canvas to H550, V600.

Resize your canvas to 75%, 600 x 600. Make sure the resize all layers box is checked!

Open PSP12316 Gothic Winter and copy the Tube Transparent layer to our main canvas, centered.

Open Frame3-GI_WinterWonderland. Rotate left, and resize to 75%. Add to canvas, centered.

Using your pick took, resize the tube layer to with within the frame. Relocate the tube to the left so the left side of the tube lines up with the frame.

Click on the frame layer to activate.

Open Swirl-GI_Winterwonderland, and add to canvas, centered at H300, V400.

Open WinterPearlLeaves-GI_WinterWonderland, resize to 50%, and add to canvas, centered at H150, V450. Using your eraser tool, erase just the part of the stem that falls into the white area outside of the frame.

Open Snowflake-GI_Winterwonderland, resize to 50% and add to canvas, centered at H124, V475.

Open Snowflake2-GI_WinterWonderland, resize to 35%, and add to canvas, centered at H450, V100.

On the materials pallet, set your foreground color to transparent and your background color to black (#000000). Using font of choice add the copyright information for the tag along the bottom of the frame. For the Gothic Winter tube, the information is:

(c) Unholy Vault Designs http://asaenath.deviantart.com YOUR MPT-License#

I am using Trebucket MS, 4 Points, bold and centered for my information.

You can now save your artist's copy as a .pspimage file.

Using alpha or font of choice add the desired name to your tag, centered around H400, V500. Exact location will depend upon the size of the name. I am using the Iced Alpha by Designs by Ali, which is a PTU alpha.

Delete the white background, merge visible and save as a .png file, or keep the white background, merge visible and save as a .jpg file. That's it. You're all done!

I hope you enjoyed this tutorial. If you should have a problem, please feel free to E-Mail Me and I'll be happy to help you out.

Sunday, November 29, 2009

Kandy Kane Krismas

Ity Bity Christmas


This tutorial was written by Dianna Richards of Digicats (and Dogs)/Di Before Dawn Tutorials. Any resemblance to any other tutorial, published or unpublished, living, dead or undead, is purely coincidental.

Please do not rebroadcast, redistribute or otherwise claim this tutorial or any part there of as your own work.


Items you will need to complete this project:

The Ity Bity Christmas taggers kit by Scrappin with Lil Ole Me, which is available at Just4Taggers.com.

Tube of choice. I am using Kim Drapers Christmas Fairy. You must have a license to use this tube, which is available at MyPSPTubes.com.

Wee Scots Mask #208 which you can download HERE.

Alpha and/or font of choice. I am using the small candy cane alpha and the Santa's Sleigh Full font, both of which are free to use and may be downloaded from www.freedigitalscrapbooking.com.


Note that H# and V# refer to Horizontal and vertical coordinates on your canvas grid. Make sure you have View, Rulers checked in order to see the ruler grid.

When I say "Add to your canvas" I expect that you will copy and paste it as a new layer, unless otherwise state in the tutorial.

This tutorial assumes you have a working knowledge of PSP. It was written using PSP X1, but should work in PSP 8 and up.

Open a new raster layer canvas, 800 x 800, flood filled white.

Open Itybity_P8. Select layers --> Load/Save Mask --> Load Mask from Disk and locate WSL mask # 208. Make sure the fit to canvas button is checked, then click load.

Copy Merged, then add to main canvas, centered.

Open Snowflake Curtain and add to the main canvas, centered.

On the materials pallet, click on the paper layer (raster 1) to activate. Using your magic wand, click in any of the "white" areas around the paper.

On the materials pallet, click on the Snowflake Curtain, (raster 2) to activate, then hit delete. This will remove the snowflakes outside the paper area.

Left click in any of the selected area to deselect.

Open Glittertree1, and resize to 80%. Add to the main canvas, centered at H550, V400.

Select Image --> Resize --> and resize your canvas by 75% (to 600 x 600 pxls). Make sure the resized all layers box is checked.

Open KandyKane2 and resize to 50%. Add to the main canvas, then click Image --> Free Rotate, and rotate left, 35 degrees. Relocate to H150, V400.

Repeat with KandyKane 1, but free rotate right 35 degrees. Center on canvas at H150, V150.

Open Kim Draper's Christmas Fairy, click on the tube layer and copy. Add to your main canvas, centered at H375, V300.

Open Poinsettia and resize to 50%. Add to canvas, centered at H175, V400. Image --> Free Rotate and rotate left, 15 degrees.

Open Lights, resize to 50% and add to canvas, H300, V450.

Open Ity-Bity Bow8, resize to 65% and add to your canvas, centered at H150, V475.

Using font of choice, add the copyright info to your tag. For the Kim Draper tube the info is:

(c) Kim Draper www.kimddesigns.com Your_MPT License #
Scraps by Scrappin with Lil Ol Me

You may now save your artist's copy as a .pspimage file.

Using Alpha or font of choice, add your name to the tube. I am using the small Candy Cane alpha which is a FTU alpha available at www.FreeDigitalScrapbooking.com. Center at around H425, V500. Actual location will vary depending upon size of name.

Delete your white background layer, merge visible and save your tag as a .png file, and you're all done!

I hope you enjoyed this tutorial. If you should have a problem, please feel free to E-Mail Me and I'll be happy to help you out.

Saturday, November 28, 2009

Skelly Solstice Tutorial

Skelly Solstice


This tutorial was written by Dianna Richards of Digicats (and Dogs)/Di Before Dawn Tutorials. Any resemblance to any other tutorial, published or unpublished, living, dead or undead, is purely coincidental.

Please do not rebroadcast, redistribute or otherwise claim this tutorial or any part there of as your own work.


Items you will need to complete this project:

The Winter Solstice kit from Scraps by j0eswife, which is available exclusively at Scrapper's Secrets.

The Skelly Stocking tube by Misty Benson which is available at MyPSPTubes.com. (It was part of the customer Christmas gift sent this year.)

Alpha or Font of choice. I am using the Isle of Misfit Toys Alpha, which is a FTU alpha, available at www.freedigitalscrapbooking.com. A font version of this alpha is also available.


Note that H# and V# refer to Horizontal and vertical coordinates on your canvas grid. Make sure you have View, Rulers checked in order to see the ruler grid.

When I say "Add to your canvas" I expect that you will copy and paste it as a new layer, unless otherwise state in the tutorial.

This tutorial assumes you have a working knowledge of PSP. It was written using PSP X1, but should work in PSP 8 and up.

Open a new raster layer canvas, 800 x 800 pxl, flood fill white.

Open Paper 6, resize to 80%. Select layers --> Load/save mask --> load mask from disk and locate WSL Mask #107. Make sure the fit to canvas box is checked and click on load.

Copy Merged and add to your main canvas.

Open Snowflake 1 and add to canvas centered at H200, V200.

Open Snowflake 3 and add to canvas centered at H600, V600.

Open Misty Benson's Stocking Skelly, copy tube layer and add to your canvas, centered.

Add a drop shadow to your tube. I am using offsets, of Vertical and Horizontal -10 each, opacity of 85, blur of 35, color black (#000000).

Open Frame_05 and add to canvas, centered.

Open Ornament_1, and add to canvas, centered at H150, V500. Image --> Free Rotate, right, 20 degrees.

Open Ornament_2, and add to canvas, centered at H400, V650. Image --> Free Rotate, left, 20 degrees.

Open Ornament 8, and add to canvas, centered at H600, V250.

In the materials pallet, Set your foreground color to transparent and your background color to white (#ffffff). Add the copyright to the tag. For the Misty Benson tube, the copyright is:

(c) Misty Benson www.mistybenson.com Your-MPT-License#

Open candle_3 and add to canvas, centered at H500, V600.

Open candle_4. Resize to 75% and add to canvas, centered at H600, V650.

Save the artists copy as a .pspimage.

Using the font or alpha of choice, add the name desired to the tag. I am using the Isle of Lost Toys alpha, which is a FTU alpha available at www.freedigitalscrapbooking.com.

Center the name around H550, V700. Actual location will depend on length and size of name.

Delete the white background layer, and merge visible. Resize to 75% and save your completed tag as a .png file.

I hope you enjoyed this tutorial. If you should have a problem, please feel free to E-Mail Me and I'll be happy to help you out.

Sunday, October 11, 2009

Pissed off Pussy tutorial

Pissed Off Pussy


This tutorial was written by Dianna Richards of Digicats (and Dogs)/Di Before Dawn Tutorials. Any resemblance to any other tutorial, published or unpublished, living, dead or undead, is purely coincidental.

Please do not rebroadcast, redistribute or otherwise claim this tutorial or any part there of as your own work.


Items you will need to complete this project:

The Trick-or-Treat taggers kit by Grunge and Glitter Scraps, which can be purchased at Sophisti-Scraps or Digital Chaos. This is one of the kits I picked out as a birthday pressie!

Tube of choice. I am using PSP9634 Cat by Keith Garvey. You must have a license to use this tube, which is available for purchase at MyPSPTubes.com.

This is "the look" Miss Diamond gives me when she's ticked off about something.  And yes, she does have little vampire fangs just like that!

Wee Scots Lass Halloween Mask #2 which you can download HERE.

Alpha or Font of choice. I am using the Be Scared Halloween Alpha by Myst Designs, which is a FTU alpha, part of the October Ghost Train. This is a super-sized full sized alpha that I first batch processed through QueenBrats "Resize full size ELEMENTS" (not alpha) and then further resized to 25% while I was constructing the names. It's a great alpha, but it's HUGE!


Note that H# and V# refer to Horizontal and vertical coordinates on your canvas grid. Make sure you have View, Rulers checked in order to see the ruler grid.

When I say "Add to your canvas" I expect that you will copy and paste it as a new layer, unless otherwise state in the tutorial.

This tutorial assumes you have a working knowledge of PSP. It was written using PSP X1, but should work in PSP 8 and up.

Open a new raster canvas, 800 x 800 pxls, flood fill white.

Open GG_OctCollab_Paper 7. Go to Layers --> Load/Save Mask --> Load Mask from Disk and select WSL Halloween Mask 2. Make sure the fit to canvas box is check and click on load.

Edit --> Copy Merged and add to canvas, centered.

Open Bling Back and add to canvas, centered at H400, V300.

Open PSP9634-SCGarvey-Cat. Select the Cat with Glow Tube and add to canvas, centered.

Open Frame 1, and resize to 125%. Go to Image -->Rotate right. Add the frame to the main canvas, centered.

Open tombstone, and resize to 50%. Add to canvas centered at H600, V570.

Open Felt Ghost, resize to 75% and add to canvas, centered at H620, V400. Image --> Free Rotate --> Rotate Right, 20 degrees.

On the layers pallet, drag the ghost layer behind the tombstone layer. Then click on the tombstone layer to activate it.

Open Felt Bat, resize to 25% and add to canvas, centered at H500, V650.

Add a drop shadow of choice to the tube layer. I am using vertical and horizontal offsets of 10 each, opacity of 65, blur of 35, color dark blue (#000080).

Add your copyright info and save the artist version as a .pspimage. For the Garvey tube, the copyright info is.

(c)Keith Garvey http://garvgraphx.com YOUR PSP License #.

Click on the bat layer to activate. Using the Alpha or font of choice, add your name to the canvas, centered at around H220, V100, depending upon the size and length of the name.

On the layers pallet, click on the white background layer, the right click and delete.

Layers --> Merge --> Merge Visible. Image --> Resize to 75%. You can now save your finished tag as a .png file.

I hope you enjoyed this tutorial. If you should have a problem, please feel free to E-Mail Me and I'll be happy to help you out.

Pink Gossamer (BCA) Tutorial

Pink Gossamer Fairy


This tutorial was written for my friend's daughter, Danielle, who at the age of 5 is too young to appreciate either breasts, or breast cancer. She was however, born with a congenial heart defect and has been through two open heart surgeries in her life and faces yet a 3rd, sometime before the age of 12. She can totally sympathize with anyone who has an "ouchie on their chest".

This tutorial was written by Dianna Richards of Digicats (and Dogs)/Di Before Dawn Tutorials. Any resemblance to any other tutorial, published or unpublished, living, dead or undead, is purely coincidental.

Please do not rebroadcast, redistribute or otherwise claim this tutorial or any part there of as your own work.


Items you will need to complete this project:

The BCA Taggers Kit from Gothic Inspirations, which is a FTU kit. (Remember that FTU is not the same is "Free to Share" and please leave a thank you when you download it.)

Tube of choice. I am using Gossamer by MediEvil Creations, which is available at TKO Scraps. According to Medi, Gossamer Fairies roam the Earth making things all nice and sparkly. Danielle is very much into pink AND sparkly!

Wee Scots Mask #202 which you can download HERE.

Alpha or Font of choice. I am using the VintageLicious Alpha by Delicious Scraps, which is a FTU alpha.


Note that H# and V# refer to Horizontal and vertical coordinates on your canvas grid. Make sure you have View, Rulers checked in order to see the ruler grid.

When I say "Add to your canvas" I expect that you will copy and paste it as a new layer, unless otherwise state in the tutorial.

This tutorial assumes you have a working knowledge of PSP. It was written using PSP X1, but should work in PSP 8 and up.

To begin, open a new canvas, 800 x 800 pxls, flood fill white.

Open Paper6-GI_BCA. Select layers --> Load/save mask from Disk --> Load Mask from Disk and find WSL Mask # 202. Make sure the fit to canvas box is check, then click on load.

Edit --> Copy Merged and add to your canvas, centered.

Open Diamond Bling, resize to 75% and add to canvas centered at H200, V350.

Open Flower 1, resize to 50% and add to canvas centered at H200, V550. Duplicate and move the copy to H300, V600.

Open Heart Pink Diamond and add to canvas, centered at H500, V250. Image --> Free Rotate --> Rotate Right, 20 degrees.

Open tube of choice. I am using Gossamer2 by MediEvil Creations. To use the tube, erase Medi's Watermark and resize to 75%. Add to canvas, centered at H350, V380.

Open Gossamer Wing8A, resize to 75%, and add to canvas centered at H335, V300. On the layers pallet, drag the wings under the tube layer.

Click on the tube layer to active, then go to layers --> merge --> merge down to merge the wings with the tube.

Add a drop shadow of choice to the tube. I am using vertical and horizontal offsets of 10 each, opacity of 65%, blur of 35% and color of Raspberry (#c74a74).

Open Dragonfly, and erase the charm ring at the top. Resize to 75% and add to canvas at H600, V600.

Open BCA Ribbon2, resize to 50% and add to canvas, centered at H600, V300. Image --> Free Rotate and rotate right, 20 degrees.

Open Diamond Pin and resize to 25%. Add to canvas, centered at H600, V300. Image --> Free Rotate and rotate right, 20 degrees. Using your eraser tool, erase a small portion of the pin near the center, so that it appears to be stuck through the ribbon.

On the Materials Pallet, set your foreground color to transparent and your background color to #c74a74. Using font of choice (I amusing Trebuchet MS, 4 Points, bold, centered) add the copyright and tagged by watermark to your tag. For the Gossamer tube the copyright info is:

(c) MediEvil Creations http://medievilsaddiction.blogspot.com/

You can now save the artists copy of your tag as a .pspimage.

Using your font or alpha of choice add the name of choice to your tag, centered at around H250, V650, depending upon the length of the name. Image --> Free Rotate and rotate right, 20 degrees. You can add a drop shadow to the name if you wish.

You can either save the tag with the white background as a .jpg file, or without it as a .png file. If you are going to save as a .png file, click on the white background on the layers pallet and choose delete. Otherwise, select Layers --> Merge -- Merge visable. Once you've deleted the white background, you are going to merge visible as well.

Resize the tag to 75% - or 600 x 600 pxls.

Save as either a .jpg file or a .png file and your all finished!

I hope you enjoyed this tutorial. If you should have a problem, please feel free to E-Mail Me and I'll be happy to help you out.

Tuesday, October 6, 2009

A bit of Hocus Pocus


This tutorial was written by Dianna Richards of Digicats (and Dogs)/Di Before Dawn Tutorials. Any resemblance to any other tutorial, published or unpublished, living, dead or undead, is purely coincidental.

Please do not rebroadcast, redistribute or otherwise claim this tutorial or any part there of as your own work.


Items you will need to complete this project:

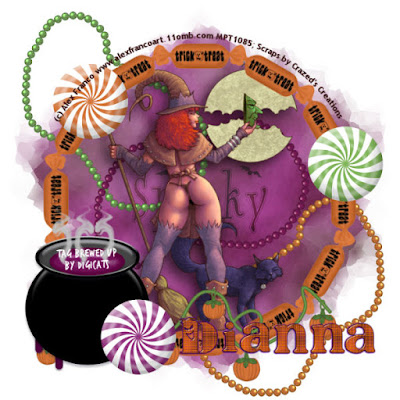
The Hocus Pocus kit by Crazed's Creations which is available for sale at Scrappetizing.

Tube of choice. I am using Alex Franco's Strega (the PG version). You must have a license to use this tube, which is available at MyPSPTubes.com.

Wee Scots Mask #220 which you can download HERE.

Alpha (or alphas) of choice. I am using the Creepy Faced Alpha by Nutshell Creations. For Kate's tag, I am also using the White Gunge Alpha by Dreams Fulfilled, which is a FTU alpha.


Note that H# and V# refer to Horizontal and vertical coordinates on your canvas grid. Make sure you have View, Rulers checked in order to see the ruler grid.

When I say "Add to your canvas" I expect that you will copy and paste it as a new layer, unless otherwise state in the tutorial.

This tutorial assumes you have a working knowledge of PSP. It was written using PSP X1, but should work in PSP 8 and up.

To begin, open a raster canvas, 800 x 800 pxl, flood filled white.

Open Crazeds_paper3_HPT. Select Layers --> Load/Save Mask --> Load Mask from Disk. Locate WSL Mask 220, make sure the fit to canvas box is checked, then click on load.

Edit --> Copy Merged, and add to your main canvas, centered.

Open Crazeds_Beads1, and add to canvas, centered at H230, V220.

Open Crazeds_Beads2, mirror and add to canvas centered at H580, V590.

Open Crazed_Beads3, flip and add to canvas centered at H400, V390. Image --> Free Rotate --> and rotate right, 30 degrees.

Open tube of choice, I am using PSP13697 Strega by Alex Franco. I am using the tube with elements layer and because this is a PG rated tutorial, I'm taking the optional PG thong as well.

Add to canvas centered. Add a drop shadow to your tube. I am using a vertical offset of 10, a horizontal offset of -10, opacity of 65, blur of 35 and color black (#000000).

If you are using the optional thong, you might want to merge it down onto the tube so that it doesn't get lost.

Open Crazeds_Frame1, resize to 125% and add to the canvas, centered.

Open Crazeds_Doodle, resize to 75% and add to the canvas, centered at H380, V670.

Open Crazeds_Candy4, resize to 50% and add to canvas, centered at H690, V330.

Open Crazeds_Candy5, resize to 50% and add to canvas, centered at H180, V200.

Open Crazeds_Cauldron2 and add to canvas, centered at H180, V560.

Open Crazeds_Candy6, resize to 50% and add to canvas, centered at H280, V680.

Add you copyright information and optional watermark and save the artist's copy as a .pspimage.

For the Strega tube, the copyright information is:
(c) Alex Franco www.alexfrancoart.11omb.com YOUR MPT License #

I used Font Trebuchet MS, 4 points, bold and centered, and then a drew a vector circle to the size of the frame, make the line invisible, and used the convert text to path option to run the copyright along the top of the frame.

You may, of course, do it any way you wish.

Using the alpha of choice, compose the name you wish to add to the tag on a separate, transparent raster canvas. Merge visible, and then copy and the past the name as a whole to the main canvas. Resize to taste and locate around H550, V650. Actual location will depend upon the size of the name you are using.

Resize canvas to 75% (600 x 600 pxls.) You may then either delete the white background layer and save it as a .png file, or kit the white background layer and save it as a .jpg. That's it...your Hocus Pocus tag is finished!

I hope you enjoyed this tutorial. If you should have a problem, please feel free to E-Mail Me and I'll be happy to help you out.

Here is a snag for you using the Hocus Pocus kit:


The word art is courtesy of Ginger's House. Enjoy!

Monday, October 5, 2009

Bloody Widow Tutorial

Bloody Widow


This tutorial was written by Dianna Richards of Digicats (and Dogs)/Di Before Dawn Tutorials. Any resemblance to any other tutorial, published or unpublished, living, dead or undead, is purely coincidental.

Please do not rebroadcast, redistribute or otherwise claim this tutorial or any part there of as your own work.


Items you will need to complete this project:

The Boo to You mega taggers kit by Scraps by j0eswife. This kit is available for purchase at Digital Chaos and other fine stores.

Tube of choice. I am using Brandy Everett's Bloody Mary tube, which is available at Mistaken Art. You must have a license to use this tube which can be obtained at Mistaken Art.

Wee Scots Mask #85 which you can download HERE.

Alpha or font of choice. I am using the Bloody alpha by Designs by Sarah Bryan. This is a FTU alpha, part of the Gothic Inspirations Hallows Eve Blog train. You can download it HERE.


Note that H# and V# refer to Horizontal and vertical coordinates on your canvas grid. Make sure you have View, Rulers checked in order to see the ruler grid.

When I say "Add to your canvas" I expect that you will copy and paste it as a new layer, unless otherwise state in the tutorial.

This tutorial assumes you have a working knowledge of PSP. It was written using PSP X1, but should work in PSP 8 and up.

To begin, open a raster layer canvas, 800 x 800 pxls, flood fill white.

Open SBJ_Paper 60. Select Layers --> Load/Save Mask --> Load Mask from Disk and locate WSL Mask 83. Make sure the fit to canvas box is checked, and click on Load.

Edit --> Copy Merged then add to you canvas, centered.

Open Old Paper 1, resize to 60 percent and add to your canvas, centered. Go to Image --> Free Rotate and rotate Left, 15 degrees.

Open the Blood Mary tube by Brandy Everett, copy the tube layer and add to your canvas, centered.

Open Fancy Frame 1, and add to your canvas centered at H400, V360.

Using your eraser tool, erase all the parts of the tube that fall outside of the frame, including all the parts in between the fancy scroll work.

Open Web. Set the foreground color on you materials pallet to white (#ffffff) and using your paint bucket tool, flood fill the web white. Click on the old paper layer to active it.

Resize the web to 75% and add the canvas, centered at H410, V390. Using your eraser tool, erase any parts of the web that show outside of the frame.

Click on the tube later to active it, and add a drop shadow of choice to the tube. I am using a horizontal offset of 10, a vertical offset of -10, opacity of 65, blur of 35, color black (#000000).

Click on the frame layer to activate it, and open Flower 03, resize to 50% and add to canvas, centered at H250, V550. Open Flower 04, resize to 50% and add to canvas, centered at H300, V600.

Open Candle 04, resize to 50% and add to canvas, centered at H250, V550. Add a drop shadow of choice to to the candle. I am using the same setting as for the tube.

Open Spider 03, and add to canvas. Select Image --> Free Rotate and rotate left, 25 degrees. Center the spider at H590, V215.

Open SBJ Drips 1. Using your Selection tool set to rectangle, select the second from last row of drips, and copy. Click on the Old Paper layer to active it, and add the drips to the canvas, centered H520, V590.

On the materials pallet, set your foreground color to red (#C00000). Click on your color change tool and set the tolerance for 15, and the edge softness to 20. Click on the drips to colorize them to red.

On the layers pallet, click on the spider to select it and change the orange spot on his back to red.

Add you copyright info and save your artist's copy as a .pspimage. In adding the copyright, I typed the information out and then used the free rotate option to rotate it left, 15% to match the old paper.

On the materials pallet, I had my foreground color set to transparent and my background color set for white, and I am using Trebuchet MS, Size 4 Points, Bold and align right.

For the Bloody Mary tube, the copyright info is:

(c) Brandy Everett Webster2772.DeviantArt.com YOUR MtA License #

Using the optional alpha of choice, add your name to the tag. I am using the Bloody Alpha created by Designs by Sarah Bryan, which is a FTU alpha, part of the Gothic Inspirations Hallows Eve blog train.

Resize to taste and center around H180, V100 depending upon the length of name you are using.

Delete the white background layer, then select layers --> merge --> merge visible. Resize your tag to 75%, 600 x 600 pxls. and save as a .png file and your all done!

I hope you enjoyed this tutorial. If you should have a problem, please feel free to E-Mail Me and I'll be happy to help you out.