Saturday, June 20, 2009

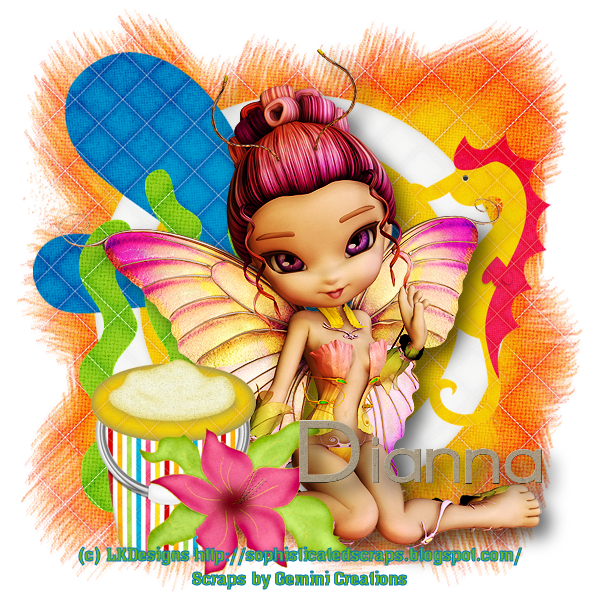
Summer Splash Tutorial

Summer Splash


This tutorial was written by Dianna Richards of Digicats (and Dogs). Any resemblance to any other tutorial, published or unpublished, living, dead or undead, is purely coincidental.

Please do not rebroadcast, redistribute or otherwise claim this tutorial or any part there of as your own work.


Items you will need to complete this project:

The Splish Splash Splosh taggers kit from Gemini Creationz. This kit is available at the Sophisti-Scraps Boutique.

The Cookie - Seasonal Fae from Sophisticated Scraps. This poser pack is exclusive to the Sophisti-Scraps Boutique.

Wee Scots Mask #116, which may be downloaded for free from her website.

Shel Belle's FTU Summer Sun alpha, which may be downloaded from her blog. This is a full sized alpha, I have scripted it down to use for tagging.


Note that H# and V# refer to Horizontal and vertical coordinates on your canvas grid. Make sure you have View, Rulers checked in order to see the ruler grid.

When I say "Add to your canvas" I expect that you will copy and paste it as a new layer, unless otherwise state in the tutorial.

This tutorial assumes you have a working knowledge of PSP. It was written using PSP X1, but should work in most other versions of PSP.

Open a new canvas, 800 x 800, flood filled white.

Open SSS Paper 9. Select Layers --> Load/Save Mask --> Load Mask from Disk. In the drop down box select Wee Scot's Lass Mask 116. Make sure the "Fit to Canvas" box is checked and click on "Load".

Layers --> Merge --> Merge Group; then copy and paste to your canvas, centered.

Repeat with SSS Paper 5, but resize the Paper to 80% before loading the mask.

Open SSS Frame (the white circular frame) and add to canvas, centered.

Select Image --> Resize and resize the canvas to 75% (600 x 600 pxls).

Open SSLisa - Seasonal Faes - Summer 1 and add to canvas, centered.

Open SSS-Water splash, mirror and resize to 75%. On the layer pallet, click on the frame layer to activate it, then add the resized splash to the canvas, centered at H220, V220.

Open sss-Seaweed1, and add to canvas, centered at H175, V350 (behind the Fae, and to the left).

Open SSS Seahorse, and resize by 50%. Add to canvas centered at H480, V280 (behind the Fae and a bit to the upper right).

On the layers pallet, click on the Fae layer to activate and add a drop shadow. I am using Offsets of H10, V10, Opacity 60, Blur 25, Color black.

Open SSS Bucket, resize by 50% and add to the canvas, centered at H170, V460.

Open SSS_flowerfushia, resize by 50% and add to the canvas, centered at H250, V500.

Add your copyright information to the tag. For Lisa's Summer Fae, the information you need to add is:

(c) LKDesigns http://sophisticatedscraps.blogspot.com/
Scraps by Gemini Creations

I have set my foreground color to #0078bc (blue), and my background color to #6eb814 (green), and am using the Archon font set to 12 points, bold, centered.

You may now save the artist's copy as a .pspimage.

Adding a Name: Usually I leave this up to you, but if you wish to use the Summer Sun Alpha, proceed as follows.

The alpha is a full sized one. For the moment, minimize your main canvas and open a new raster canvas, 600 pxls wide, 300 pxls high with a transparent background. You can turn your grid on if you'd like, I just use the little checkerboard pattern on the canvas to line things up.

Open the Summer Sun capital letter of choice. If you have already recripted the alpha to taggers, resize to 50%, add to the canvas. If you've not rescripted it, you may need to reduce it to 15% or 20%. Repeat the procedure with each of the lower case letters in the name you are spelling out. If you have double letters - as in the A and N in my name - you need only do this once as you can use duplicate function to replicate them on the canvas.

Using the pick tool, line the letters up on the new canvas to spell out the name you wish to add to the tag. Note that if you have a LONG name, you may need to make the letters a bit smaller to fit them all onto the canvas.

One you have the name composed to taste, select, Layers --> Merge --> Merge Visible. Edit and copy the name and then reactivate your main canvas. Add the name to the canvas, with the Verticle center at around 450. The exact location will depend on the size of the name you are adding. Once you have added it to the canvas, use your pick tool to resize and relocate it to taste.

Just on a side note, you should always place your name somewhere over the image in you tags, as that helps to prevent piracy of your work. Yes, believe it or not, there are tag pirates out there too!

Just for fun, I've added a drop shadow to the name as well. The detail are the same as for the Fae tube.

You are now ready to merge the image, and save the finished tag as .jpg or .png file. If you want to save it as a .jpg, simply select layers --> Merge --> Merge Visible, and save and your all done.

To save as a .png, you will need to delete the bottom, white layer before merging visible and saving.

I hope you enjoyed this tutorial. If you have any questions or get stuck, please feel free to E-Mail me.
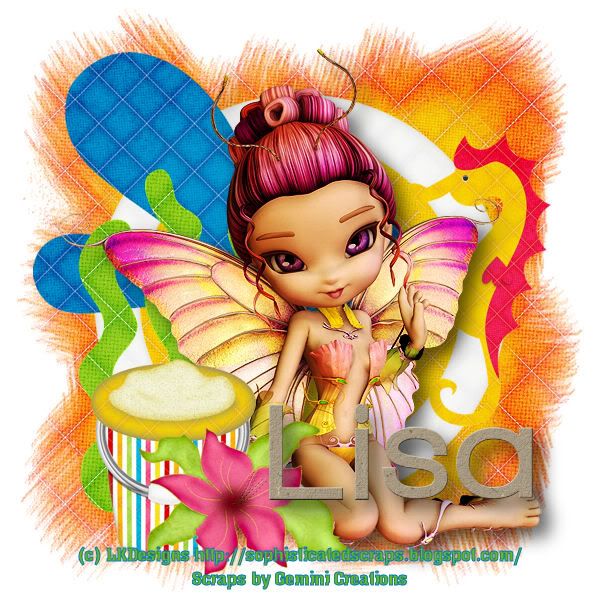
Summer Splash
Alternate .jpg version

Friday, June 19, 2009

Splash Tutorial


This tutorial was written by Dianna Richards of Digicats (and Dogs). Any resemblance to any other tutorial, published or unpublished, living, dead or undead, is purely coincidental.

Please do not rebroadcast, redistribute or otherwise claim this tutorial or any part there of as your own work.


Items you will need to complete this project:

The Splish Splash Splosh kit by Heartbeatz Creationz which is available at the Heartbeatz Creationz Boutique as well as other fine Digi-Scrap Shops. Consult Jay's Blog for details.

Tube of Choice. I am using PSP4805 Siren by Cane Hoyer. You must have a license to use this tube, which may be obtained at www.mypsptubes.com.

Cameron's Ocean Mask # 5 which may be downloaded from her website (Hint: It's the third icon from the end in the top row.)

Shel Belle's FTU Summer Sun alpha, which may be downloaded from her blog. This is a full sized alpha, I have scripted it down to use for tagging.


Note that H# and V# refer to Horizontal and vertical coordinates on your canvas grid. Make sure you have View, Rulers checked in order to see the ruler grid.

When I say "Add to your canvas" I expect that you will copy and paste it as a new layer, unless otherwise state in the tutorial.

This tutorial assumes you have a working knowledge of PSP. It was written using PSP X1, but should work in most other versions of PSP.

To begin, open a new canvas, 800 x 800 pxl, flood fill white.

Open SSS Paper 14, and add to canvas.

Open SSS Paper 6. Select Layers --> Load/Save Mask --> Load Mask from Disk. Locate Cameron's Ocean Mask 5 on the drop down list. Make sure the Fit to canvas box is checked and click on load.

Select --> Layers --> Merge --> Merge Group, then copy and paste the merged group to your canvas.

Open SSS Frame 2 and add to canvas, centered.

Select SSS-Element 1, resize 75% and add to canvas, centered at H550, V370.

Open sss Element12. Click on the Ocean Mask layer on the layers pallet to active it, the add the element to canvas centered at H200, V200.

Select Image --> Resize --> and resize your canvas to 75% (600 x 600) pxls.

Open PSP4805 tube - Siren by Cane Hoyer, and copy the "siren" layer.

Returning to you main canvas, click on the palm tree layer on the layers pallet to activate it, then paste the siren to your canvas, centered. Select Image --> Mirror. Adjust the tube to center at H240, V270.

Returning to the tube, select the "Tail Poison Siren" layer, copy it and paste it to your main canvas. Mirror it, then use your pick tool to adjust it so that it aligns properly with your siren. (Be sure to make it visible!)

Select Layers --> Merge --> Merge Down.

Repeat the process using both the Shell Bra and Necklace Layers from the Siren Tube.

Add a drop shadow to you Siren tube. I am using Offsets of Vertical and Horizontal 10, Opacity of 50, Blur of 24, color black.

Open sss Element10, resize by 50% and add to the canvas, centered at H420, V430.

Open sss element 9, resize by 50% and add to the canvas, centered at H140, V475.

Add your copyright information to the tag. I have added mine near the top of the tag as I will be add the name to the lower right hand corner by the crab.

For the Siren tube, the copyright information is:
(c) Cane Hoyer www.canehoyer.com YOUR LICENSE NUMBER

I have my foreground color set to #ffc440 (Sunny Orange Yellow) and my background color set to #ce0012 Fishy Red and I am using the font Archon, which is my new favorite font, set to 14 Points, bold, centered.

After you've added your copyright info, you can save the artists copy of the tag as a .pspimage.

Adding a Name: Usually I leave this up to you, but if you wish to use the Summer Sun Alpha, proceed as follows.

The alpha is a full sized one. For the moment, minimize your main canvas and open a new raster canvas, 600 pxls wide, 300 pxls high with a transparent background. You can turn your grid on if you'd like, I just use the little checkerboard pattern on the canvas to line things up.

Open the Summer Sun Capital letter of choice. If you have already recripted the alpha to taggers, resize to 50%, add to the canvas. If you've not rescripted it, you may need to reduce it to 15% or 20%. Repeat the procedure with each of the lower case letters in the name you are spelling out. If you have double letters - as in the A and N in my name - you need only do this once as you can use duplicate function to replicate them on the canvas.

Using the pick tool, line the letters up on the new canvas to spell out the name you wish to add to the tag. Note that if you have a LONG name, you may need to make the letters a bit smaller to fit them all onto the canvas.

One you have the name composed to taste, select, Layers --> Merge --> Merge Visible. Edit and copy the name and then reactivate your main canvas. Add the name to the canvas, down near the crab. The exact location will depend on the size of the name you are adding. Once you have added it to the canvas, use your pick tool to resize and relocate it to taste.

Just on a side note, you should always place your name somewhere over the image in you tags, as that helps to prevent piracy of your work. Yes, believe it or not, there are tag pirates out there too!

Just for fun, I've added a drop shadow to the name as well. The detail are the same as for the siren tube.

You are now ready to merge the image, and save the finished tag as .jpg file.

I hope you enjoyed this tutorial. If you have any questions or get stuck, please feel free to E-Mail me.

Thursday, June 11, 2009

Sleepover Sweetie Tutorial

Sleepover Sweetie


This tutorial was written by Dianna Richards of Digicats (and Dogs). Any resemblance to any other tutorial, published or unpublished, living, dead or undead, is purely coincidental.

Please do not rebroadcast, redistribute or otherwise claim this tutorial or any part there of as your own work.


This is a mostly FTU Tutorial. The items you will need to complete this tutorial are Aquarius Design's Sweetness taggers Kit, which is available for FREE at Sophisti-Scraps.

Tube of your choice. I am using one of Sophisticated Scraps Sweetdreams Cookies which are available at Sophisti-Scrap. You may, if you wish, substitute one of Sophisticated Scraps Cutiepie posers which are available for FREE at Sophisti-Scraps.

The AMD Mothers Love Alpha by Aleah's Mommy Designs which is available for FREE at Sophisti-Scraps.

(Shameless plug: While you're raiding the freebie area, be sure to snag by Beachcombers Element Pack - you won't want to tag at the beach without it - and be sure to check out all the fab sales and specials going on at Sophisti-Scraps!)

Wee Scots Lass Mask # 143 which is available for download (FREE) HERE.

Optional, Cameron Mask # 131, which is available for download (FREE) HERE (It is in with the zip available from the third icon in the second row).

Font of choice.


Note that H# and V# refer to Horizontal and vertical coordinates on your canvas grid. Make sure you have View, Rulers checked in order to see the ruler grid.

When I say "Add to your canvas" I expect that you will copy and paste it as a new layer, unless otherwise state in the tutorial.

This tutorial assumes you have a working knowledge of PSP. It was written using PSP X1, but should work in most other versions of PSP.

To begin, open a new raster canvas, 800 x 800 pxl, flood fill white.

Open AD Sweetness Paper 10, and add to canvas.

Open AD Sweetness Paper 4, resize to 70%.

Select Layers --> Load Save Mask --> Load Mask from Disk. Select WSL 143. Be sure the Fit to Canvas box is checked, and click on Load.

Select Layers --> Merge -- Merge Group and then copy and paste the merged file to your canvas, centered.

Open Frame 1, resize by 80% and add to canvas, centered.

Open Ruffled Trim 3 (ruffeld trim3) and add to canvas centered at H400, V680.

Open SSLisa's Sweet Dreams Cookie 4b & add to canvas, centered. This should put the poser's legs over the ruffled trim. If not, adjust the trim to taste.

Add a drop shadow to your the Sweet Dreams Cookie. I am using a Vertical Offset of 10, and a matching Horizontal offset, Opacity 60, Blur 25, color black.

Open Sweetness Butterfly 2, resize by 50% and add to canvas, centered at H200, V500. On the Layer pallet, drag the butterfly layer under the Cookie Layer.

Click on the Cookie layer to activate it.

Open Fragile Flowers 1 and 4, and resize them both by 50%. Scatter several of each along the bottom of the tag around the Cookie Poser.

Open Blog freebie Tag 3. Note that there are two versions of the Blog freebie zipped in the file. One is full sized, one is tagger sized. You want to open the tagger sized one.

(Unless you have a need for the full sized version, you can safely delete it as all the same elements are in the tagger size version.)

On the Materials Pallet, set your foreground color to #8887c1 (which is a shade of purple) and your background color to Black (#000000).

Using the font of your choice, type the copyright info on the tag. I am using Mistral, 14 points, bold, center, and then I use the drag boxes to enlarge the text to take up most of the room on the tag.

Select Layers --> Merge --> Merge Visible. Resize the tag to 75% and copy.

On the layers pallet of your main canvas, click on the frame layer to activate it. Paste the tag onto your canvas, and center it at H600, V250.

Using your pick tool, rotate the tag to the right so that it's angled along the side of the frame and you can see the copyright info.

You can now save your artist's copy as a .pspimage.

Open a new raster canvas, 800 pxl wide by 400 pxl high, transparent background. Using AMD's Mother's Love alpha, compose the name in the blank canvas that you want to appear on your tag.

Once you have finished, merge visible, and then copy the alpha over to your main canvas. If it's not on top of the tag, right click on the alpha layer on the layer pallet and select Arrange --> Bring to top.

Resize and rotate to taste. You may position it where ever you wish, I recommend the lower right hand corner.

Select Layers --> Merge --> Merge Visible. Now, you may either Merge Visible, resize to 75% (600 x 600 pxl) and save as a .jpg or...

Select Layers --> Load Save Mask --> Load Mask from Disk. Select Cameron Mask 131. Make sure both the Fit to Canvas and the "Invert transparency" boxes are checked and hit load.

Select Layer --> Merge --> Merge Down.

Resize your tag by 75% (600 pxl x 600 pxl) and save as a .png file.

I hope you enjoyed this tutorial. If you have any questions or get stuck, please feel free to E-Mail me.

Optional .jpg version:

Sleepover Sweetie .jpg version

Friday, June 5, 2009

Texas Rose Tutorial

Sexy Cowgirl


This tutorial was written by Dianna Richards of Digicats (and Dogs). Any resemblance to any other tutorial, published or unpublished, living, dead or undead, is purely coincidental.

Please do not rebroadcast, redistribute or otherwise claim this tutorial or any part there of as your own work.


Items you will need to complete this project:

The Cowgirl Sexy taggers kit by A Taggers Scrap. This is a charity kit which includes over 50 Mbs of goodies and it is available for purchase at Sophisti-Scraps.

Western tube of choice. I am using psp10067 Lone Star by Ismael Rac which is available at MyPSPTubes.com. You must have a license to use this tube.

Wee Scot's Lass Mask #222 which may be downloaded HERE.

The fonts "Harlow Solid Italic" & "Figaro MT" which are both MS Windows System fonts and which should be available on your system. If you do not have them you can download them for free from Font Trader


Note that H# and V# refer to Horizontal and vertical coordinates on your canvas grid. Make sure you have View, Rulers checked in order to see the ruler grid.

When I say "Add to your canvas" I expect that you will copy and paste it as a new layer, unless otherwise state in the tutorial.

This tutorial assumes you have a working knowledge of PSP. It was written using PSP X1, but should work in most other versions of PSP.

To begin, open a new raster canvas, 800 x 800, Flood fill White.

Open Paper 2. Open Rope Background 8. Add Rope Background 8 to Paper 2, the Select Layers --> Merge --> Merge Down.

Next select layers, load/save mask and load mask from disk. Select WSM #222, and make sure the "Fit to canvas box is checked. Click on Load.

Layers --> Merge --> Merge Group. Copy and paste the merged image to your main canvas, centered. (Do not save changes to paper 2.)

Open Cowhide Frame, and select Image, Rotate Right. Resize to 70%, and then copy and paste to main canvas, centered. Activate your pick tool, and rotate the frame about 20 degrees to the left.

Select Image --> Resize and resize your canvas to 75% (600 x 600 pxl).

Open psp10067 SCRac - LoneStar. Click on the "Close" layer and copy and paste to your canvas, centered. Use your pick tool to turn the tube slightly to the left, matching the angle of the frame. Also resize the tube slightly to the Horizontal edges line up with the Horizonal edges on the frame.

On the layers pallet, click on the tube layer (Raster 3) and drag it under the frame layer (Raster 2). Position the tube to taste in the frame.

On the layers pallet, click on the frame layer to activate it.

In PSP10067 SCRAc - Lonestar, click on the tube layer and copy, then paste as a new image. Mirror the new image and resize to 35%. Copy and paste to your main canvas, centered at H490, V430.

Going back to the kit, open "grass" and mirror it. Paste to your canvas centered at H280, V320.

Click on the frame layer on the pallet menu again to active it, then take your eraser and erase the bit of the frame that is showing below the grass layer. (Don't worry about the background that shows, leave that as is.)

Click on the grass layer on the pallet menue to active it.

Open Heart Rope 1, resize to 60% copy and paste to your canvas, centered at V370, H440

Open Rose 5, resize to 50%, and add to canvas centered at H150, V460. (Note, you can substitute a one of the other roses if you prefer a different color.)

On the materials pallet, set your foreground color to black (#000000), and your background color to Dark Brown (#4f302e).

Activate your text tool and select the "Harlow Solid Italic" font, 20 points, bold, and centered. Click above the top of the frame and add the copyright info for the tube:

(c) Ismael Rac www.xeracx.com

Do not add your license number just yet. Activate your pick tool and use the drag boxes to limit the size of the copyright into match the horizontal edge of the frame and also turn it slightly to the left to match the angle of the top of the frame.

Open "badge". Activate your text tool and select font: Figaro MT, 48 points, Bold, Centered. Click under the word "Sherrif" on the badge and type your LICENSE number. Readjust the text to taste, the select Layers --> Merge --> Merge Visible.

Reized your badge to 60%, then copy it. Using your pick tool, click anywhere on the masked paper layer to activate it. Copy your badge to the main canvas, and center at H470, V130. Make sure the licensing number is visible.

You can now save the artists copy of the tag as a pspimage.

Open a new canvas, 600 W by 300 H, with a transparent background. Using the alpha enclosed in the kit, compose your name, or the name you wish to appear on the tag, in the new canvas.

Select Layers --> Merge --> Merge Visible. Click on the rose layer on the Layers pallet to activate it, then copy and paste the name to the main canvas.

Using your pick tool, use the drag boxes to resize the name to taste, and place it in the lower right hand corner, on or under the line for the heart rope. You may wish to rotate it slightly, about 10 or 20%.

Optionally, you can then activate the text tool again, and using the Harlow Solid Italic (8 points, center, bold) add the tagged by info under your name. Use the pick tool and drag boxes to locate and resize to taste.

You may then keep the white background in place, merge the layers and save as a .jpg, or you can drop the white background, merge visible, and save as a .png.

I hope you enjoyed this tutorial. If you have any questions or get stuck, please feel free to E-Mail me.