Friday, February 19, 2010

Aces & Eights Tutorial

Aces & Eights


This tutorial was written by Dianna Richards of Digicats (and Dogs)/Di Before Dawn Tutorials. Any resemblance to any other tutorial, published or unpublished, living, dead or undead, is purely coincidental.

Please do not rebroadcast, redistribute or otherwise claim this tutorial or any part there of as your own work.


Items you will need to complete this project:

The Sin City sampler by Gothic Inspirations. This is a FTU kit through February 28th, which may be downloaded from Jessica's blog.

Tube of choice. I am using SC_NoLimit by Street Scenes. You must have a license to use this tube, which is available at MyPSPTubes.com.

Wee Scots Mask #350 which you can download HERE.

Font(s) and/or alpha of choice. I am using Trebuchet MS which is a windows system font, and the Satin Gold alpha by Maria Stones. This is a full size, FTU alpha that can be downloaded from Free Digital Scrapbooking.com.


Note that H# and V# refer to Horizontal and vertical coordinates on your canvas grid. Make sure you have View, Rulers checked in order to see the ruler grid.

When I say "Add to your canvas" I expect that you will copy and paste it as a new layer, unless otherwise state in the tutorial.

This tutorial assumes you have a working knowledge of PSP. It was written using PSP X1, but should work in PSP 8 and up.

To begin, open a new raster layer canvas, 800 x 800, flood filled white.

Open Paper2-GI_SinCitySampler. Layers --> Load/Save Mask --> Load mask from disk and locate WSL mask #350. Make sure the fit to canvas box is checked then click on load.

Copy merged and add to your main canvas, centered.

Open Mesh-GI_SinCitySampler, and add to main canvas, centered. Image --> Free Rotate --> Rotate Left, 36 degrees.

Open Tabs-GI_SinCitySampler and add to main canvas centered at H500, V400. Duplicate and mirror, then relocate the mirrored copy to H300, V250.

Open Money-GI_SinCitySampler, rotate right, and add to canvas centered at H400, V550.

Open SCSeiStreetScenes_NoLimit, copy the tube layer and add to your main canvas, centered.

Add a drop shadow of choice to your tube. I am using offsets, vertical and horizontal of 8 each, opacity of 75%, blur of 35%, color black (#000000).

Open Frame-GI_SinCitySampler and add to main canvas, centered. Image --> free rotate --> rotate left 10 degrees.

Open PokerChips-GI_SinCitySampler, resize to 75% and add to main canvas centered at H300, V660.

On the material pallet, set your foreground color to transparent and your background color to black (#000000). Using font of choice, add the copyright information to your tag, For the No Limits tube, that information is:

(c)Necio 2007 www.ceistickers.com Your_MPTLicense#

I am using Trebuchet MS, 4 points, bold, and centered and then I free rotate it left, 10 degrees to match the frame.

You can now save the artist's copy of your tag as a .PSPImage file.

Using font or alpha of choice, add name of choice to tag. I am using the Satin Gold Alpha by Marie Stones. I have located my name at H500, V600, and then free rotates it 10 degrees to match the frame.

Actual location may vary depending upon the size and length of the name you are using.

Add a drop shadow to your name to match the one on the tube.

Delete the white background layer and merge visible. Resize to 75% (600 x 600 pxls) and save your tag as a .png file and you're all done!

I hope you enjoyed this tutorial. If you should have a problem, please feel free to E-Mail Me and I'll be happy to help you out.

Wednesday, February 17, 2010

Queen o' the Green Tutorial

Queen o' the Green


This tutorial was written by Dianna Richards of Digicats (and Dogs)/Di Before Dawn Tutorials. Any resemblance to any other tutorial, published or unpublished, living, dead or undead, is purely coincidental.

Please do not rebroadcast, redistribute or otherwise claim this tutorial or any part there of as your own work.


Items you will need to complete this project:

The St. Patrick's Charm taggers kit by Gothic Inspiriations. This is a PTU kit which may be purchased at Just4Taggers.com.

Tube of choice. I am using psp13029-KissMe by Bam Bam. You must have a license to use this tube, which is available at MyPSPTubes.com.

Wee Scots Mask #307 which you can download HERE.

Font(s) and/or alpha of choice. I am using Trebuchet MS which is a windows system font, and the Satin Gold alpha by Maria Stones. This is a full size, FTU alpha that can be downloaded from Free Digital Scrapbooking.com.


Note that H# and V# refer to Horizontal and vertical coordinates on your canvas grid. Make sure you have View, Rulers checked in order to see the ruler grid.

When I say "Add to your canvas" I expect that you will copy and paste it as a new layer, unless otherwise state in the tutorial.

This tutorial assumes you have a working knowledge of PSP. It was written using PSP X1, but should work in PSP 8 and up.

Open a new raster layer canvas, 600 x 600 pxl, flood filled white.

Open PaperTexture16-GI_StPats. Layers --> Load/Save Mask --> Load Mask from Disk and locate WSL mask #307. Make sure the fit to Canvas box is checked, then click on load.

Copy Merged and add to you main canvas, centered.

Open JewelCluster3GI_StPats and add to main canvas, centered.

Open Frame3-wRibbonTie1-GI_StPats resize by 65% and add to main canvas, centered.

Open PSP13029_SCBam-Kiss Me. Copy the Tube later and add to you main canvas, centered. Shift the tube up until the bottom of the tube is within the frame boundry.

On the layers pallet, duplicate the frame layer (Raster 3), then drag the copy over the top of the tube layer (Raster 4).

Set your selection tool to Rectangle, replace, and select the upper half of the frame copy (Copy of Raster 3). Hit the delete key to erase.

Selection --> select none.

If you have a bit of frame hanging over the tube's arm, use your eraser to get rid of it.

Add a drop shadow of choice to your tube. I am using offsets, vertical and horizontal of 7 each, opacity of 65, blur of 35, color black (#000000).

Make sure you reactivate your copy of raster 3 layer before proceeding.

Open Lucky Charms3-GI_STPats and add to main canvas, centered at H110, V330.

Open Bow3-GI_StPats, resize to 35% and add to main canvas centered at H100, V170.

Open ButterflyChrome2_GI_STPats and mirror. Copy and add to main canvas centered at H480, V120.

On the materials pallet, set your foreground color to transparent and your background color to dark green (#004000). Using font of choice, add the copyright information to your tag.

For the Kiss Me tube that information is:

(c)Bam Bam www.bambabes.co.uk Your_MPT_License#

I am using Trebuchet MS, 4 points, bold and centered.

You can then save the artist's copy of your tag as a .pspimage.

Using font or alpha of choice add name of choice to tag.

Layers --> Merge --> Merge Visible, then save at a .jpg file and you're all done!

I hope you enjoyed this tutorial. If you should have a problem, please feel free to E-Mail Me and I'll be happy to help you out.
Wednesday, February 10, 2010

KnC Mardi Gras

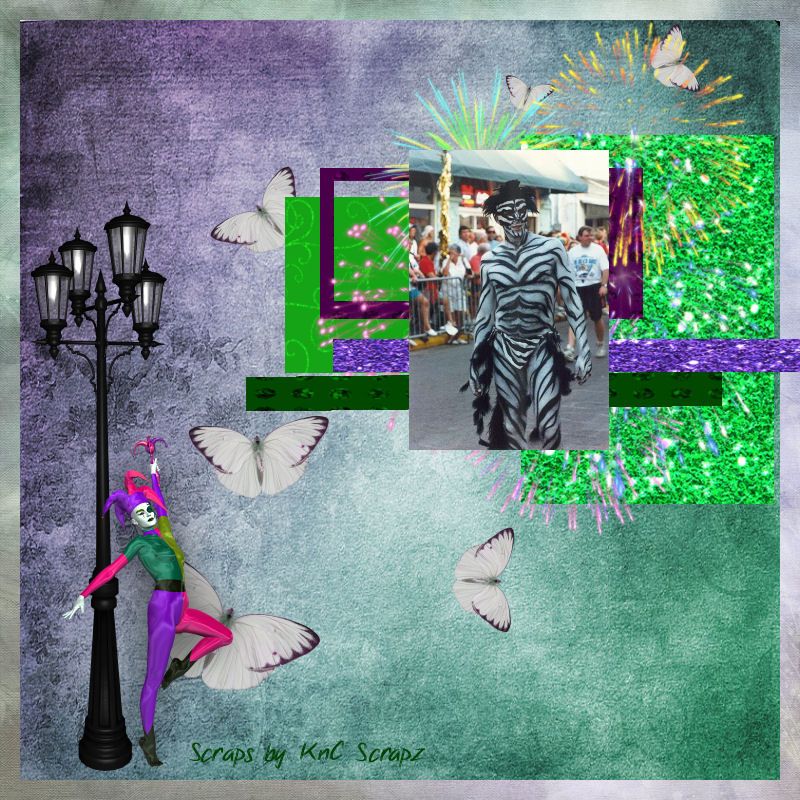
I didn't realize this was a full sized kit, which is what I get for not reading the descriptions. So I had to dust off my scrapbooking skills a bit.

I'm still gonna try a tag, though, with this kit (after I resize it, of course).

KNC Mardi Gras


I am using the Mardi Gras kit from KnC Scraps. The layout is from a template by Aquarius Designs.

The picture dates from 1994 I think. I haven't been to the Big Easy since before Katrina hit. And no, I've no idea who zebra man is.

Thanks for letting me use the kit. Hope you like.

Thursday, February 4, 2010

Get Lucky tutorial

Get Lucky


This tutorial was written by Dianna Richards of Digicats (and Dogs)/Di Before Dawn Tutorials. Any resemblance to any other tutorial, published or unpublished, living, dead or undead, is purely coincidental.

Please do not rebroadcast, redistribute or otherwise claim this tutorial or any part there of as your own work.


Items you will need to complete this project:

The Get Lucky taggers kit by Jennie D Designs. This is a PTU kit which is part of the February collab at Scrapper's Secret.com. This collab is free with a $6.00 purchase.

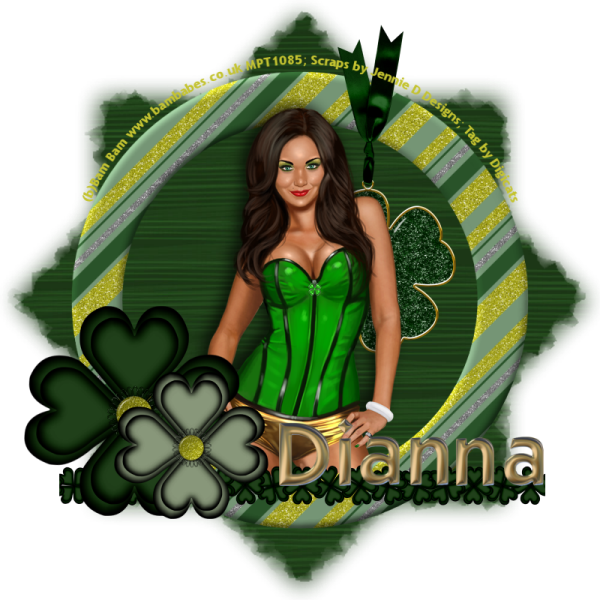
Tube of choice. I am using psp13028-IrishEyes by Bam Bam. You must have a license to use this tube, which is available at MyPSPTubes.com.

Wee Scots Mask #129 which you can download HERE.

Font(s) and/or alpha of choice. I am using Trebuchet MS which is a windows system font, and the Satin Gold alpha by Maria Stones. This is a full size, FTU alpha that can be downloaded from Free Digital Scrapbooking.com.


Note that H# and V# refer to Horizontal and vertical coordinates on your canvas grid. Make sure you have View, Rulers checked in order to see the ruler grid.

When I say "Add to your canvas" I expect that you will copy and paste it as a new layer, unless otherwise state in the tutorial.

This tutorial assumes you have a working knowledge of PSP. It was written using PSP X1, but should work in PSP 8 and up.

To begin, open a new raster layer canvas, 800 x 800 pxl, flood fill white.

Open paper11.jpg, and resize to 80%. Go to Layers --> Load/Save Mask --> Load Mask from Disk and locate WSL mask # 129. Make sure the fit to canvas button is checked, then click on load.

Image --> resize --> resize to 115%. Make sure the "resize all layers" box is UNCHECKED, as you only want to resize the mask layer.

Edit --> Copy merged and add to the main canvas, centered.

Open Frame1, resize to 85% and add to main canvas, centered.

Open Shamrock Charm1, resize to 25% and add to canvas, centered at H500, V250.

Open psp13028-SCBam-IrishEyes. Copy the tube layer, then add to main canvas, centered

Duplicate Frame1, then, on the layers pallet, drag the copy over the tube layer.

Set your selection tool to Selection Type: Rectangle, Mode: Replace and select the top half of Copy of Raster 2. Press the delete key to erase it.

Selections --> Select None

Open Clover line 3, which is a full size element, resize to 18% and add to canvas centered at H400, V650.

Open Flower 1, resize to 50% and add to canvas, centered at H180, F550.

Open Flower 3, resize to 35%, and add to canvas centered at H200, V600.

On the layers pallet, click on the tube layer (Raster 4) to activate, and add a drop shadow of choice. I am using offsets, vertical and horizontal of -7 each, opacity of 65%, and blur of 25, color black (#000000).

Click on the top layer flower 3 to activate.

On the materials pallet, set your foreground color to transparent and your background color to Greenish-Yellow (#c5c431). Using font of choice, add the copyright information to your tag. for the Irish Eyes tube, that information is:

(b)Bam Bam www.bambabes.co.uk Your-MPT-License#

I am using Trebuchet MS, 4 points, font style bold, alignment center, and have fitted text to path to match the outside of the frame. It is beyond the scope of this tutorial to explain how to do that, although I promise to write a tutorial on fitting text to path soon.

You can now save the artist's version of your tag as a .pspimage file.

Using font or alpha of choice, add name of choice to tag. I am using the Satin Gold alpha and have located my name at H550, V600. Actual location will vary depending upon the size and length of the name you are using.

Delete the white background layer, and merge visible. Resize your tag to 75% (600 x 600 pxl - make sure the "Resize all layers" box is checked). You can then save the finished version of your tag as a .png file.

I hope you enjoyed this tutorial. If you should have a problem, please feel free to E-Mail Me and I'll be happy to help you out.

Tuesday, February 2, 2010

Amethyst Elf tutorial


This tutorial was written just after amethyst midnight by Dianna Richards of Digicats (and Dogs)/Di Before Dawn Tutorials. Any resemblance to any other tutorial, published or unpublished, living, dead or undead, is purely coincidental.

Please do not rebroadcast, redistribute or otherwise claim this tutorial or any part there of as your own work.


Items you will need to complete this project:

The Amethyst Folly Mega Taggers Kit by A Taggers Scrap. This is a PTU kit which may be purchased exclusively at Sophisti-Scrap.com.

Tube of choice. I am using psp14860-Elven by David Saavedra. You must have a license to use this tube, which is available at MyPSPTubes.com.

Wee Scots Mask #117 which you can download HERE.

Font(s) and/or alpha of choice. I am using Trebuchet MS which is a windows system font, and the Scythe font, which is a FTU font that can be downloaded from Outlaw by Design.


Note that H# and V# refer to Horizontal and vertical coordinates on your canvas grid. Make sure you have View, Rulers checked in order to see the ruler grid.

When I say "Add to your canvas" I expect that you will copy and paste it as a new layer, unless otherwise state in the tutorial.

This tutorial assumes you have a working knowledge of PSP. It was written using PSP X1, but should work in PSP 8 and up.

To begin, open a new raster layer canvas, 800 x 800 pxls, flood filled white.

Open paper4. Open edgeoverlay5, and add to paper4, centered at H100, V400. Merge down.

Layers --> Load/Save Mask --> Load Mask from Disk and locate WSL mask #117. Make sure the "Fit to canvas" button is checked, then click on load. Edit-->Copy Merged, then add to your main canvas a new raster layer.

Open SequinSpill, and add to main canvas, centered.

Open SilverTree and add to main canvas, centered at H550, V400.

Open unicorn and add to main canvas, centered at H500, V450.

On the materials pallet, click on the paper layer (Raster 1) to activate. Using your magic wand, click anywhere outside the paper to select.

On the materials Pallet, click on the unicorn layer (Raster 4) and press delete. This erases the parts of the unicorn that fall outside the paper area.

Selections --> Select none.

Open psp14860-SCSaavedra-Elven. copy the Arwen layer and add to your main canvas, centered.

Open Leaf4 and resize to 75%, Add to your main canvas. Image --> free rotate --> left, 25 degrees. Relocate to center at H200, V600. Duplicate and mirror.

Open greenery2 and resize to 75%, add to your main canvas, centered at H200, V600. Use your eraser tool to erase the parts of the stem (only) that fall outside the masked paper area. (Leave the leaves intact.)

Open Satinflower and add to canvas, centered at H400, V650. Using your eraser tool, erase the stem bits of the leaf4s that show below the flower.

On the Layers pallet, click on the tube layer (Raster 3) to active, then add a drop shadow of choice to the tube. I am using offsets horizontal and vertical of -7, opacity of 65, blur of 25, color very dark purple (#400040).

Open Gem and add to canvas, centered at H600, V690.

On the materials pallet, set your foreground color to very dark purple (#400040) and your background color to white (#ffffff). Using font of choice, add the copyright information to your tag. For the David Saavedra tube that information is:

(c)David Saavedra www.fantasexies.es Your_MPTLicense#

I am using Trebuchet MS, which is a windows system font, 4 points, Bold and centered and located the information centered at H400, V80.

You can now save the artist's copy of your tag as a .pspimage file.

On your layers pallet, make sure you top layer, the Satin Rose layer, is active. if not, click on it to activate. Using font or alpha of choice, add name of choice to tube.

I am using Scythe, 22 points, bold and centered and have my foreground color set to transparent on the materials pallet, and the Metal Steel gradient set as my background color for the lettering.

I centered my name at H200, V600. Actual location will vary depending upon the size and length of name you are using.

Merge visible, resize to 75% (600 x 600) and save your file as a .jpg file and you're all done. Alternately you can drop the white background layer before you merge and resize and save a .png.

As I'm sure someone at Photoprude will take offense to the semi-clothed state of the artwork I'm using, I've stored this tube on Picasa so we'll stick with .jpg.

I hope you enjoyed this tutorial. If you should have a problem, please feel free to E-Mail Me and I'll be happy to help you out.