
Monday, February 28, 2011

Oceana (PTU) tutorial

Oceana - Dianna


This tutorial was written by Dianna Richards of Digicats (and Dogs)/Di Before Dawn Tutorials. Any resemblance to any other tutorial, published or unpublished, living, dead or undead, is purely coincidental.

Please do not rebroadcast, redistribute or otherwise claim this tutorial or any part there of as your own work.


Items you will need to complete this project:

The Tranquility taggers kit by Gothic Inspirations, This is a PTU kit which is available at Gothic Inspirations.com.

Tube of choice. I am using Mersm, by Karen M. Koski. This is a PTU tube, and you must have a license to use this tube, which is available at My Tubed Art.

Mask of choice. I am using the Bubbleburst mask by Nik's Scripts & Scraps which is part of her PSP Masks Mega Pack.

Font(s) and/or alpha of choice. I am using Century Gothic which is a Windows System font. If you do not have it, you can download it HERE.

I am also using the Summer Sun alpha by Shell Belle Scraps. This was a freebie alpha but the download link has expired, so please use a font, or different alpha that you like.


Note that H# and V# refer to horizontal and vertical coordinates on your canvas ruler grid. Make sure you have View -> Rulers checked in order to see the ruler grid.

When I say "Add to your canvas" I expect that you will copy and paste it as a new layer, unless otherwise stated in the tutorial.

This tutorial assumes you have a working knowledge of PSP. It was written using PSP X3, but should work in PSP 8 and up.

To begin, open a new raster layer canvas, 800 x 800 pxl, flood fill white.

Open paper of choice. I am using Paper5-GI_Tranquility. Resize to 800 x 800 pixels, then go to Layers -> Load/Save Mask -> Load Mask from Disk and select mask of choice. I am using Bubblebust by Nik's Scripts and Scraps. Make sure the fit to canvas box is checked, then click on load.

Edit -> Copy Special -> Copy Merged and add to main canvas, centered.

Open Spill-GI_Tranquility and add to main canvas, centered.

Open Netting-GI_Tranquility and add to main canvas, centered at H450, V600.

Open Frame6-GI_Tranquility and resize to 75%. Add to main canvas, centered.

Open Cloud-GI_Tranquility, and resize to 75%. Add to main canvas, centered at H450, V600.

Open tube of choice. I am using Mersm by Karen M Koski. Copy the tube layer, and add to main canvas, centered.

With your selection tool set to rectangle, replace, select the top art of the frame down to V350. On the layers pallet, right click on the frame layer, Raster 4, and "Promote Selection to Layer". Right click on Promoted selection and go to Arrange -> Bring to Top.

Selections -> Select None.

Open Leaves1-GI_Tranquility, and add to main canvas, centered at H350, V350.

Open RainDrops-GI_Tranquility and resize to 50%. Add to main canvas, centered at H600, V300.

Open Bottle-GI_Tranquility, and resize to 50%. Click on the frame layer, Raster 4 to active, then add to the bottle to the main canvas, centered at H600, V550.

Return to top layer.

Open Tag-GI_Tranquility and rotate left. On the materials pallet, set both your background and your foreground colors to dark teal (#004040). Using font of choice, add the copyright information to the tag. For the Mersm tube, that information is:

©Karen M. Koski EnchantedCanvas.com MtA-(License@)

I am using Century Gothic, 3 points, bold and centered. I manually adjusted the location of my text to match the angle of the tag and located it accordingly. I also added the optional background credit and tagged by information at this point.

Layers -> Merge Visible, the rotate the tag right again. Copy and add to your main canvs, centered at H150, V350.

With your selection tool set to rectangle, replace, select a bit of the netting on the left and side where it is covered by the string. Right click on the netting on your layers pallet, and "Promote Selection to Layer". Right click on the Promoted Selection 1 and go to Arrange - Bring to top.

Selections -> Select None.

It should end up looking, more or less like the string is looped over the netting.

Starting with Raster 2 on the layers pallet and working upward, add a drop shadow of choice to each of the elements on the main canvas, except for the promoted selections.

I am using offsets - vertical and horizontal - of 5 each, opacity of 75, blur of 15 and color dark teal (#004040).

Open GlitterTrail-GI_Tranquility and mirror. Add to main canvas, centered.

You should now save the artist's copy of your tag as a .pspimage file.

Using font or alpha of choice, add desired name to tag. I am using the Summer Sun alpha by Shel Belle Scraps. I have my name centered at H250, V150, and have added a drop shadow to match the rest of the elements on the main canvas.

Drop the white background layer, and merge visible. Resize to 75% (600 x 600 pixels) and save as a .png file and you are all done.

I hope you enjoyed this tutorial. If you should have a problem, please feel free to E-Mail Me and I'll be happy to help you out.
Sunday, February 27, 2011

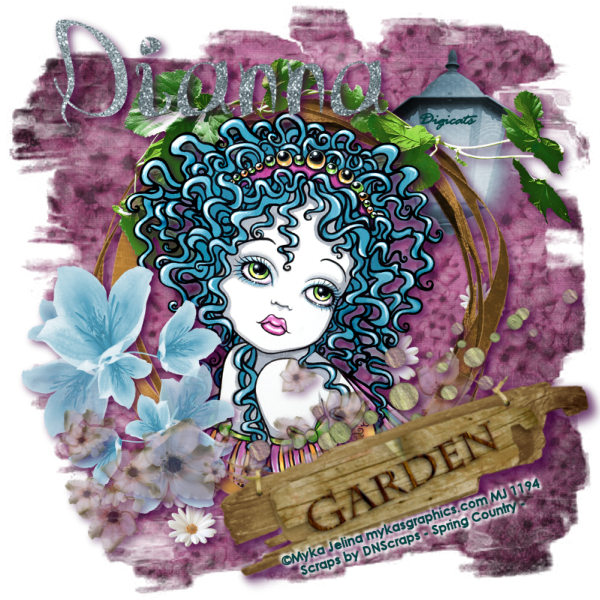
Spring Garden (PTU) Tutorial

Spring Country - Dianna


This tutorial was written by Dianna Richards of Digicats (and Dogs)/Di Before Dawn Tutorials. Any resemblance to any other tutorial, published or unpublished, living, dead or undead, is purely coincidental.

Please do not rebroadcast, redistribute or otherwise claim this tutorial or any part there of as your own work.


Items you will need to complete this project:

The Spring Country taggers kit by DN Scraps which is a PTU kit available at Scrappetizing.com.

Tube of choice. I am using Buttercup, by Myka Jelina. You must have a license to use this tube which can be obtained at Myka's Graphics.

Mask of choice. I am using the BrickTrim mask by Nik's Scripts & Scraps which is part of her PSP Masks Mega Pack.

Font(s) and/or alpha of choice. I am using Century Gothic which is a windows system font. If you do not have it, you can download it HERE.

I am also using the Alpha Tibo (2) by Digiscrap.ch. This is a FTU alpha that may be downloaded HERE.


Note that H# and V# refer to horizontal and vertical coordinates on your canvas ruler grid. Make sure you have View -> Rulers checked in order to see the ruler grid.

When I say "Add to your canvas" I expect that you will copy and paste it as a new layer, unless otherwise stated in the tutorial.

This tutorial assumes you have a working knowledge of PSP. It was written using PSP X3, but should work in PSP 8 and up.

To begin, open a new raster layer canvas, 800 x 800 pxl, flood fill white.

Open paper of choice. I am using countrypaper21. Go to Layers -> Load/Save Mask -> Load Mask from Disk and select mask of choice. I am using BrickTrim by Nik's Scripts and Scraps. Make sure the fit to canvas box is checked, then click on load.

Edit -> Copy Special -> copy Merged and add to main canvas, centered.

Open springcountryflowers2 and resize to 75%. Add to main canvas, centered at H400, V550.

Open springcountrysropeframe and resize to 75%, Add to main canvas, centered.

Open tube of choice. I am using Buttercup by Myka Jelina. Copy Layer 4 and add to main canvas, centered.

On the Layers pallet, right click on the frame layer, Raster 3, and duplicate. Right click again on the Copy of Raster 3, and go to arrange, Bring to Top.

With your selection tool set to rectangle, replace, select the top half of the frame layer copy (Copy of Raster3) and delete.

Selections -> Select none.

Using your eraser tool, erase the bits of the tube that fall outside the frame on the bottom half.

Return to top layer.

Open springcountrysweetflowers2 and resize to 25%. Add to main canvas, centered at H175, V525.

Open springcountryflowers3 and resize to 75%. Add to main canvas, centered at H400, V600.

Open springcountrylight3 and resize to 50%. On the layers pallet, click on the paper layer to activate, then add the light centered at H600, V200.

Return to top layer.

Open springcoutrystones2, resize to 75%, and add to main canvas, centered at H550, V500.

Open springcoutryleafs. Click on Raster 3, the frame layer and add the leafs to the top of the frame, centered at H400, V215. Using your eraser tool, erase the bit of the leaf stem that is hanging off on the left hand side.

Open springcountrygarden and erase the rope hanger. Resize to 75%, and add to main canvas, centered at H550, V600. Image -> Free Rotate -> Rotate left, 17 degrees.

On the Materials pallet, set both your foreground and your background colors to dark teal (#004040). Using font of choice, add copyright information to the tube. For the Buttercup tube, that information is:

©Myka Jelina mykasgraphics.com (License#)

I am using Century Gothic, 4 points, bold and centered. I then free rotated my text left, 17 degrees and located it under the garden sign at H550, V700. I also added the optional background credits and tagged by information at this point.

Using the following settings, add a white drop shadow to the text: offsets 3 each, opacity of 100%, blur of 15 and color #ffffff. Repeat using offsets of -3 each, while leaving all other settings the same.

Starting with the light layer and working upward on your layers pallet, add a drop shadow of choice to each of the elements on the main canvas except for the frame copy, Copy of Raster 3. I am using offsets - vertical and horizontal - of 5 each, opacity of 75%, blur of 15 and color of dark purple (#400040).

You should now save the artist's copy of your tag as a .pspimage file.

Using font or alpha of choice add desired name to tag. I am using Alpha Tibo (2) by Digiscrap.ch. I have centered my name at H300, V100 and have added a drop shadow to match the rest of the tag.

Drop the white background layer and merge visible. Resize to 75% (600 x 600 pixels) and save as a .png file and you are all done.

I hope you enjoyed this tutorial. If you should have a problem, please feel free to E-Mail Me and I'll be happy to help you out.
(Great - now I've got hayfever to go along with my cold!)

Friday, February 25, 2011

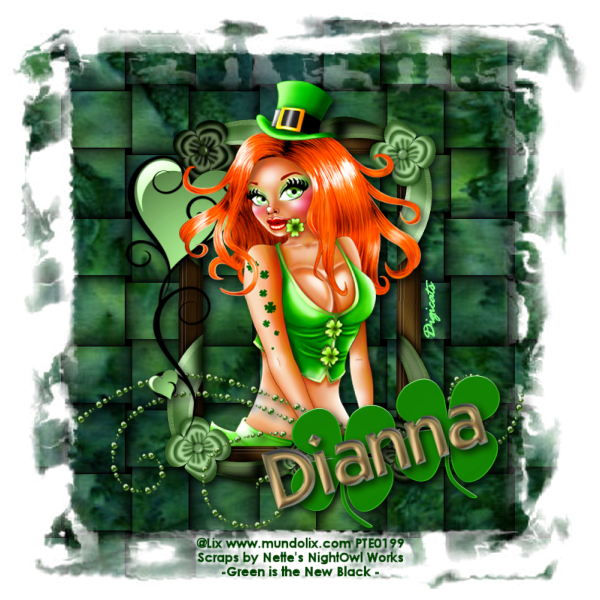
Shamrock Babe (PTU) Tutorial

New Black - Dianna


This tutorial was written by Dianna Richards of Digicats (and Dogs)/Di Before Dawn Tutorials. Any resemblance to any other tutorial, published or unpublished, living, dead or undead, is purely coincidental.

Please do not rebroadcast, redistribute or otherwise claim this tutorial or any part there of as your own work.


Items you will need to complete this project:

The Green is the New Black taggers kit by Nette's Nightowl Works which is a PTU kit available at Butterfly Blush Designs.

Tube of choice. I am using Patricia, by Lix. You must have a license to use this tube, which is available at PSP Tubes Emporium.

Mask of choice. I am using the Boiling Point2 mask by Nik's Scripts & Scraps which is part of her PSP Masks Mega Pack.

Font(s) and/or alpha of choice. I am using Century Gothic which is a windows system font. If you do not have it, you can download it HERE.

I am also using the Satin Gold alpha by Marie Stones. This is a FTU alpha that may be downloaded at Free Digital Scrapbooking.com.


Note that H# and V# refer to horizontal and vertical coordinates on your canvas ruler grid. Make sure you have View -> Rulers checked in order to see the ruler grid.

When I say "Add to your canvas" I expect that you will copy and paste it as a new layer, unless otherwise stated in the tutorial.

This tutorial assumes you have a working knowledge of PSP. It was written using PSP X3, but should work in PSP 8 and up.

To begin, open a new raster layer canvas, 800 x 800 pxl, flood fill white.

Note that that this is one of Nette's "hybrid" kits with both full and taggers size elements in it.

Open paper of choice, I am using tsp4. Go to Layers -> Load/Save Mask -> Load Mask from disk and select mask of choice. I am using Boiling Point2 by Nik's Scripts and Scraps. Make sure the fit to canvas box is checked, then click on load.

Edit copy special -> copy merged and add to main canvas, centered.

Open frame1 and resize to 800 x 800 pixels. Copy and add to you main canvas, centered.

Open tube of choice, I am using Patricia by Lix. Copy Layer1, and add to main canvas, centered at H400, V370.

On the layers pallet, right click on Raster 2 and duplicate it. Right click on the Copy of Raster 2 and go to Arrange -> Bring to top.

With your selection tool set to rectangle, replace, select the top half of the copy of Raster 2 and delete.

Selections -> Select None.

Open DS_Pearls3 and resize to 75%. Add to main canvas, centered at H400, V600.

Open Clovers and resize to 300 x 300 pixels. Copy and add to main canvas, centered at H525, V600.

Open DCFS809_by_Kansas and resize to 75%. Add to main canvas centered at H250, V400.

With your selection tool set to rectangle, replace, Select the area of the tube that is covered by the doodle. Right click on the Raster3 and "Promote Selection to Layer", then right click on the promoted selection and to go Arrange -> Bring to Top.

Selections -> Select None.

On the materials pallet, set both the foreground and background color to dark green (#004000). Using font of choice add copyright information to the tag. for the Lix tube that information is:

@Lix www.mundolix.com PTE(License#)

I am using Century Gothic, 4 points, bold and centered. I have my credits centered at H400, V740. I also added the optional background credits and tagged by information at this point.

Using the following settings, add a white drop shadow to the text: Offsets of 3 each, opacity of 75%, blur of 5 and color #ffffff. Repeat using offsets of -3 each and leaving all other settings the same.

Starting with the frame layer, Raster 2 and working upward on the layers pallet, add a drop shadow of choice to each of the elements on the main canvas, except for the frame layer copy, copy of Raster 2. I am using offsets, vertical and horizontal of 5 each, opacity of 75%, blur of 15 and color black (#000000).

You should now save the artist's copy of your tag as a .pspimage file.

Using font or alpha of choice, add desired name to tag. I am using the Satin Gold Alpha by Marie stones. I have centered my name at H500, V600, then free rotated it left, 17 degrees. Finally, I added a drop shadow to match the rest of the elements on the main canvas.

Drop the white background layer and merge visible. Resize to 75% (600 x 600 pixels) and save as a .png file and you are all done.

I hope you enjoyed this tutorial. If you should have a problem, please feel free to E-Mail Me and I'll be happy to help you out.

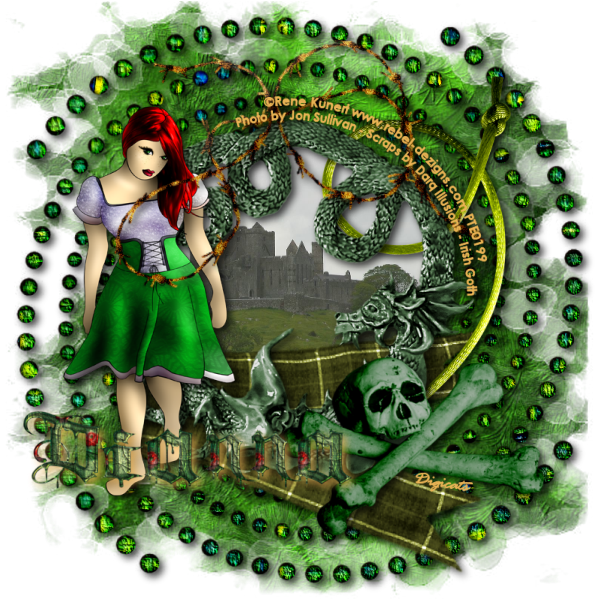
Irish Goth (PTU) tutorial

Irish Goth - Dianna


This tutorial was written by Dianna Richards of Digicats (and Dogs)/Di Before Dawn Tutorials. Any resemblance to any other tutorial, published or unpublished, living, dead or undead, is purely coincidental.

Please do not rebroadcast, redistribute or otherwise claim this tutorial or any part there of as your own work.


Items you will need to complete this project:

The Irish Goth taggers kit by Darq Illusions which is a PTU kit available at Butterfly Blush Designs.

The Rock of Chasel Castle Ruins photo, which is a public domain image, what can be downloaded HERE. Note that because you are using a tube on the tag you CAN NOT use a copyrighted photo as well. If you choose to use a different photo it must be something you have taken personally, or an image that has been placed in the Public Domain. DO NOT simply grab and image off the internet and use it as such an image is likely copyrighted. It must be specifically in Public Domain.

Tube of choice. I am using Irish Lovey, by Rene Kunert. You must have a license to use this tube, which is available at PSP Tubes Emporium.

Mask of choice. I am using the Bacteria mask by Nik's Scripts & Scraps which is part of her PSP Masks Mega Pack.

Font of choice. I am using Century Gothic which is a windows system font. If you do not have it, you can download it HERE.


Note that H# and V# refer to horizontal and vertical coordinates on your canvas ruler grid. Make sure you have View -> Rulers checked in order to see the ruler grid.

When I say "Add to your canvas" I expect that you will copy and paste it as a new layer, unless otherwise stated in the tutorial.

This tutorial assumes you have a working knowledge of PSP. It was written using PSP X3, but should work in PSP 8 and up.

To begin, open a new raster layer canvas, 800 x 800 pxl, flood fill white.

Open paper of choice. I am using DI_irishgoth_paper18. Go to Layers -> Load/Save Mask -> Load Mask from Disk and select mask of choice. I am using Bacteria by Nik's Scripts and Scraps. Make sure the fit to canvas box is checked, then click on load.

Edit -> Copy Special -> Copy Merged and add to main canvas, centered.

Open DI_irishgoth_element53. Add to main canvas, centered.

Open DI_irishgoth_frame4 and add to main canvas, centered.

Open Rock of Cashel photo and resize to 50%. Click on Raster 2, the beads element, then copy can add the castle to your main canvas, centered.

Using your pick tool manually adjust the placement of the castle in the frame.

Once you are happy with the placement of your photo, activate your magic wand, and click anywhere outside of the frame layer on Raster 3 to select. With the area still selected, click on Raster 4 on the layers pallet and hit the delete key.

Use your eraser tool to clean up the edges, then return to top layer.

Open Irish Lovey by Rene Kunert and activate Layer 4. Image -> Mirror, then copy and add to main canvas, centered at H200, V400.

Open DI_irishgoth_element43 and add to main canvas, centered at H400, V225.

Open DI-Irishgoth_element33 and add to main canvas, centered at H400, V600.

Open DI_Irishgoth_element61 and mirror. Click on Raster 7 - the ribbon layer - to activate, then add to main canvas centered at H550, V350.

Return to top.

Open DI_Irishgoth_element36 and resize to 75%, Add to main canvas, centered at H550, V600.

On the materials pallet, set both your foreground color and your background color to Goldenrod (#ecb556). Using font of choice, add the copyright information to the tag. For the Irish Lovey tube that information is:

©Rene Kunert www.rebel-dezigns.com PTE(License#)

I am using Century Gothic, 4 points, bold and centered, and have fit my text to path to match the outside of the frame. It is beyond the scope of this tutorial to explain how to do this, a separate tutorial on the subject is available HERE.

I also added the optional background credits and tagged by information at this time. For the Cashal Castle photo, the credit is "Photo by Jon Sullivan".

Starting with the beads layer - Raster 2 - and working upward on the layers pallet, add a drop shadow of choice to each of the elements on the main canvas except for the photo layer, Raster 4. I am using offsets - vertical and horizontal of 5 each - opacity of 75, blur of 15 and color black (#000000).

You should now save the artist's copy of your tag as a .pspimage file.

Using font or alpha of choice add desired name to tag. I am using the alpha included in the kit. I have my name centered at H250, V600, and have added a drop shadow to it to match the rest of the tag except that I have changed the shadow color to Goldenrod (#ecb556).

Drop the white background layer and merge visible. Resize to 75% (600 x 600 pixels) and save as a .png file, and you are all done.

I hope you enjoyed this tutorial. If you should have a problem, please feel free to E-Mail Me and I'll be happy to help you out.

Shamrocks (PTU) Tutorial

Shamrocks - Dianna


This tutorial was written by Dianna Richards of Digicats (and Dogs)/Di Before Dawn Tutorials. Any resemblance to any other tutorial, published or unpublished, living, dead or undead, is purely coincidental.

Please do not rebroadcast, redistribute or otherwise claim this tutorial or any part there of as your own work.


Items you will need to complete this project:

TheGet your Shamrocks Off taggers kit by Digicats (& Dogs). This is a PTU kit that is available at Butterfly Blush Designs.

Tube of choice. I am using Leprechaun, by Keith Garvey. This is a PTU tube, and you must have a license to use this tube, which is available at PSP Tubes Emporium.

Mask of choice. I am using the Amoeba 2 mask by Nik's Scripts & Scraps which is part of her PSP Masks Mega Pack.

Font(s) and/or alpha of choice. I am using Century Gothic which is a Windows System font. If you do not have it, you can download it HERE.

I am also using the Luck of the Irish alpha by Crazed's Creations. This is a FTU alpha that is available for download HERE.


Note that H# and V# refer to horizontal and vertical coordinates on your canvas ruler grid. Make sure you have View -> Rulers checked in order to see the ruler grid.

When I say "Add to your canvas" I expect that you will copy and paste it as a new layer, unless otherwise stated in the tutorial.

This tutorial assumes you have a working knowledge of PSP. It was written using PSP X3, but should work in PSP 8 and up.

To begin, open a new raster layer canvas, 800 x 800 pxl, flood fill white.

Open Paper of choice. I am using DCD_Paper01. Go to layers -> Load/Save Mask -> Load Mask from Disk and select mask of choice. I am using Amoeba 2 by Nik's Scripts and scraps. Make sure the fit to canvas box is checked, then click on load.

Edit -> Copy Special -> Copy Merged and add to main canvas, centered.

Open DCD_Rainbow02 and add to main canvas, centered at H350, V300.

Open DCD_Frame07 and resize to 65%. Add to main canvas, centered.

Open tube of choice. I am using Leprechaun by Keith Garvey. Copy the tube layer and add to main canvas, centered.

With your selection tool set to rectangle, replace, select the area of the frame down on the bottom where the tube overlays. Right click on Raster 3 on the layers pallet, and -> Promote Selection to Layer. Right click on the Promoted Selection layer and go to Arrange -> Bring to Top.

Selections -> Select None.

Open DCD_Sharmrock Swirl02 and resize to 75%. Add to main canvas, centered at H400, V600.

Open DCD_WA_Kiss Me and resize to 75%. On the layers pallet click on the frame layer, Raster 3, to activate the add the word art centered at H400, V100.

Return to top layer. Open DCD_Shamrock Necklace02 and resize to 75%. Add to main canvas, centered at H650, V410. (It should end up looking like it is looped over the bottom of the Letter E in the word art.

Open DCD_Guitar04 and resize to 65%. Add to main canvas, centered at H200, V550. Image -> Free Rotate -> Rotate Left, 20 degrees.

Open DCD_Guitar Pick03 and resize to 75%, Add to main canvas, centered at H150, V600.

On the Materials pallet, set both your foreground and your background color to white (#ffffff). Using font of choice add copyright information to the tag. For the Leprechaun tube, that information is:

©Keith Garvey garvgraphx.com PTE(License#)

I am using the font Century Gothic, 4 points, bold and centered. I then bound my text to patch to match the inside of the frame, and then rotate around so it is against the right hand inside of the frame.

It is beyond the scope of this tutorial to explain how to do that, but you may find a tutorial on the procedure HERE.

I have also added the optional background credits and tagged by information at this point.

Starting with Raster3 and working upward on the layers pallet, add a drop shadow of choice to each of the elements on the main canvas except for the Promoted Selection layer. I am using offsets - vertical and horizontal - of 5 each, opacity of 75%, blur of 15 and color black.

You should now save the Artist's Copy of your tag as a .pspimage file.

Using font or alpha of choice, add name of choice to tag. I am using Luck of the Irish alpha by Crazed's Creations. I have located my name centered at H500, V650, and add a drop shadow to match the rest of the tag.

Drop the white background layer and merge visible, resize to 75% (600 x 600 pixels) and save as a .png file and you are all done.

I hope you enjoyed this tutorial. If you should have a problem, please feel free to E-Mail Me and I'll be happy to help you out.

Thursday, February 24, 2011

Drama Queen (PTU) Tutorial

Drama Queen - Dianna


This tutorial was written by Dianna Richards of Digicats (and Dogs)/Di Before Dawn Tutorials. Any resemblance to any other tutorial, published or unpublished, living, dead or undead, is purely coincidental.

Please do not rebroadcast, redistribute or otherwise claim this tutorial or any part there of as your own work.


Items you will need to complete this project:

The Save the Drama taggers kit by Laura's Designz which is a PTU kit available at Butterfly Blush Designs.

Tube of choice. I am using Scarletta, by Sky Scraps. This is a PTU tube and you must have a license to use this tube, which is available at Scraps and the City.com.

Mask of choice. I am using the Nik_021208_111 mask by Nik's Scripts & Scraps which is part of her PSP Masks Mega Pack.

Font(s) and/or alpha of choice. I am using Century Gothic which is a windows system font. If you do not have it, you can download it HERE.

I am also using the I am a Star 3 Alpha by Digiscrap.ch. This is a FTU Alpha that may be downloaded HERE.


Note that H# and V# refer to horizontal and vertical coordinates on your canvas ruler grid. Make sure you have View -> Rulers checked in order to see the ruler grid.

When I say "Add to your canvas" I expect that you will copy and paste it as a new layer, unless otherwise stated in the tutorial.

This tutorial assumes you have a working knowledge of PSP. It was written using PSP X3, but should work in PSP 8 and up.

To begin, open a new raster layer canvas, 800 x 800 pxl, flood fill white.

Open paper of choice. I am using LD_STD_Paper5. Go to Layers -> Load/Save Mask -> Load Mask from Disk and select mask of choice, I am using Nik_021208_111. Make sure the fit to canvas, box is checked, then click on load.

Edit -> Copy Special -> Copy Merged and add to main canvas, centered.

Open LD_STD_Element6 and add to main canvas, centered.

Open tube of choice, I am using Scarletta by SkyScraps. Open Scarletta3CU, resize to 75% and add to main canvas, centered.

On the layers pallet, right click on Raster 2, the frame layer, and duplicate. Right click on Copy of Raster 2 and go to Arrange -> Bring to Top.

With your selection tool set to rectangle, replace, select the top half of the frame copy and delete.

Selections -> Select None.

Using your eraser tool, erase the bits of the tube that fall outside the bottom half of the frame.

Return to top layer.

Open LD_STD_Element34. Resize to 75%, and add to main canvas, centered at H400, V550.

Open LD_STD_Element35. Resize to 50%, and add to main canvas, centered at H500, V600.

Open LD_STD_Element24. Resize to 75%. On the layers pallet, click on the paper layer, Raster 1 to active, then add the Drama Queen sign, centered at H200, V200.

Image -> Free Rotate -> Rotate left, 17 degrees.

Return to top layer.

Open LD_STD_Element28, resize to 75%. Add to main canvas, centered at H280, V610.

On the materials pallet, set your foreground and your background colors each to black (#000000). Using font of choice, add the copyright information to the tag. For the Scarletta tube, that information is:

©SkyScraps www.scrapsandthecity.com (License#)

I am using Century Gothic, 4 points, bold and centered and have located my credits at H400, V730.

Using the following settings, add a white drop shadow to the text: offsets of 3 each, opacity of 100, blur of 5 and color #ffffff. Repeat using offsets of -3 each, leaving all other settings the same.

Starting with the Drama Queen sign (Raster 7) and working upward, add a drop shadow to each of the elements on the main canvas, except for the frame layer copy, Copy of Raster 2, and the credits. I am using offsets - vertical and horizontal - of 5 each, opacity of 75, blur of 15 and color black (#000000).

You should now save the artist's copy of your tag as a .pspimage file.

Using font or alpha of choice add desired name to tag. I am using the I am a Star (3) alpha by Digiscrap.ch. I have added noise (Adjust -> Add/Remove Noise -> Add Noise -> Guassian, 85%) and centered my name at H250, V550. I then added a drop shadow using the same settings as were used on the rest of the tab, but changing the color to #ff80ff.

Drop the white background layer and merge visible. Resize to 75% (600 x 600 pixels) and save as a .png file and you are all done.

I hope you enjoyed this tutorial. If you should have a problem, please feel free to E-Mail Me and I'll be happy to help you out.
Cherry Bomb (PTU) Tutorial

Cherry Bomb - Dianna


This tutorial was written by Dianna Richards of Digicats (and Dogs)/Di Before Dawn Tutorials. Any resemblance to any other tutorial, published or unpublished, living, dead or undead, is purely coincidental.

Please do not rebroadcast, redistribute or otherwise claim this tutorial or any part there of as your own work.


Items you will need to complete this project:

The Cherry Bomb taggers kit by Tammy's Scraps. This is a PTU kit which is available at Stargazer Scraps.

Tube of choice. I am using Abigail, by Myka Jelina. You must have a license to use this tube, which is available at Myka's Graphics.com.

Mask of choice. I am using the Nik-021208_102 mask by Nik's Scripts & Scraps which is part of her PSP Masks Mega Pack.

Font(s) and/or alpha of choice. I am using Century Gothic which is a windows system font. If you do not have it, you can download it HERE.

I am also using the Gothique Romance Alpha Red by Whispy's D'zines. This alpha is no longer available, so please choose something else you like instead.


Note that H# and V# refer to horizontal and vertical coordinates on your canvas ruler grid. Make sure you have View -> Rulers checked in order to see the ruler grid.

When I say "Add to your canvas" I expect that you will copy and paste it as a new layer, unless otherwise stated in the tutorial.

This tutorial assumes you have a working knowledge of PSP. It was written using PSP X3, but should work in PSP 8 and up.

To begin, open a new raster layer canvas, 800 x 800 pxl, flood fill white.

Open paper of choice. I am using Cherry Bomb Paper 2. Go to Layers -> Load/Save Mask -> Load Mask from Disk and select mask of choice. I am using I am using Nik-021208_102. Make sure the fit to canvas box is checked, then click on load.

Edit -> Copy Special - Copy Merged and add to main canvas, centered.

Open Cherry Bomb Doodle 3 and add to main canvas, centered.

Open Cherry Bomb Frame2 and add to main canvas, centered. Image - Free Rotate -> Rotate Left, 25 degrees.

Open Cherry Bomb Sticker 1 and resize to 65%. Add to main canvas, centered at H475, V160.

Open Cherry Bomb Interlaced Hearts 1 and resize to 75%. Add to main canvas, centered. Image -> free rotate -> rotate left, 25 degrees. Relocate to H470, V560, right over the inside bottom edge of the frame.

Open Cherry Bomb Bow 7 and mirror. Add to main canvas, centered at H250, V400.

Open tube of choice. I am using Abigail by Myka Jelina. Copy Layer 1, and add to main canvas. centered.

Open Cherry Bomb Cherry Blossom 2 and add to main canvas, centered at H200. V400. Image - Free Rotate -> Rotate left, 12 degrees

With your selection tool set to rectangle, replace, select the part of the bow what is below the tube's hand & tail. Right click on Raster 4 on the layers pallet and Promote Selection to Layer.

Selections -> Select None

Open Cherry Bomb Bunny 1 and resize to 50%. Add to main canvas, centered at H225, V475.

Open Cherry Bomb Flower with Stitching and add to main canvas, centered at H500, V450. Using your eraser tool, erase the bits of the stitching that fall over the tube layer.

Open Cherry Bomb Heart With Wings, and resize to 35%. Add to main canvas, centered at H600, V275. Image -> Free rotate -> Free Rotate left, 20 degrees.

Open Cherry Bomb Tag 1. On the materials pallet, set your foreground & background colors to black (#000000). Using font of choice add copyright information the tag. For the Abigail tube that information is:

©Myka Jelina mykasgraphics.com (License #)

I am using Century Gothic, 12 point, bold and centered. I then free rotated my text right, 42 degrees to match the angle of the tag. I also added the optional background credits and tagged by information at this point.

Merge visible, then resize the tag to 75% On the layers pallet, click on the promoted selection layer to activate, then add to main canvas, centered at H257, V600. Erase the large red unused portion on the right of the tag with your eraser tool. Also erase the portion of the stitching where it overlaps the tag.

Starting with the doodle layer, raster 2 and working upward, add a drop shadow of choice to each of the elements on your main canvas, except for the Promoted Selection. I am using offsets - vertical and horizontal - of 5 each, opacity of 75%, blur of 15 and color black (#000000).

You can now save the artist's copy of your tag as a .pspimage file.

Using font or alpha of choice, add name of choice to tag. I am using the Gothique Romance Alpha Red by Whispy's D'zines. I located my name at H550, V500, then free rotated it left, 25 degrees to match the angle of the frame. Finally I added a drop shadow, using the same settings as for the rest of the tag, but changing the color to white (#ffffff).

Drop the white background layer and merge visible. Resize to 75% (600 x 600 pixels) and save as a .png file and you are all done.

I hope you enjoyed this tutorial. If you should have a problem, please feel free to E-Mail Me and I'll be happy to help you out.
Wednesday, February 23, 2011

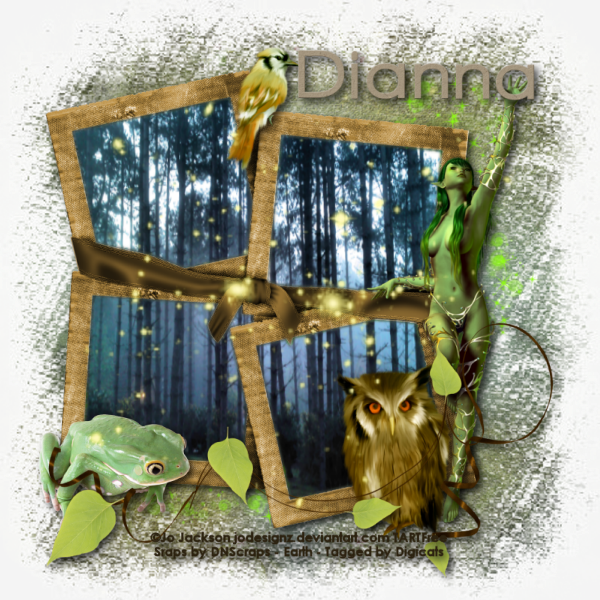
Earth (PTU) Tutorial

Earth - Dianna


This tutorial was written by Dianna Richards of Digicats (and Dogs)/Di Before Dawn Tutorials. Any resemblance to any other tutorial, published or unpublished, living, dead or undead, is purely coincidental.

Please do not rebroadcast, redistribute or otherwise claim this tutorial or any part there of as your own work.


Items you will need to complete this project:

The Earth taggers kit by DN Scraps which is a PTU kit available at Butterfly Blush Designs.

Photo tube of choice. I am using JoJackson 8 Free, by Jo Jackson. This is a FTU photo that may be download from My Tag Art. When using this photo, you must you the license # "TARTFree" on your creation.

Mask of choice. I am using the Smudged mask by Nik's Scripts & Scraps which is part of her PSP Masks Mega Pack.

Font(s) and/or alpha of choice. I am using Century Gothic which is a windows system font. If you do not have it, you can download it HERE.

I am also using the Summer Sun alpha by Shel Belle Scraps. This was a FTU alpha but the download link has expired. (Sorry!) Please use a font or alpha you like instead.


Note that H# and V# refer to horizontal and vertical coordinates on your canvas ruler grid. Make sure you have View -> Rulers checked in order to see the ruler grid.

When I say "Add to your canvas" I expect that you will copy and paste it as a new layer, unless otherwise stated in the tutorial.

This tutorial assumes you have a working knowledge of PSP. It was written using PSP X3, but should work in PSP 8 and up.

To begin, open a new raster layer canvas, 800 x 800 pxl, flood fill white.

Open paper of choice. I am using earthpaper25. Layers -> Load/Save Mask -> Load Mask of Disk and select mask of choice. I am using Smudged by Nik's Scripts and Scraps. Make sure the fit to canvas box is checked, then click on load.

Edit -> Copy Special -> Copy Merged and add to main canvas, centered.

Open Earth Swirls and add to main canvas, centered.

Open earthframedouble2 and add to main canvas, centered at H350, V400.

Open phototube of choice. I am using JoJackson 8 Free. Copy the photo. Hold down your shift key and using your magic wand, select each of the inside of the frame pains on the main canvas. Edit -> Paste into selection.

Selections -> Select None.

Open earthposer2 and resize to 75%. Add to main canvas centered at H600, V400.

Open Earthowl and resize to 35%. Add to main canvas, centered at V525, H600.

Open earthframefrog2 and add to main canvas, centered at H150, V625.

Open earthleafs2 and add to main canvas, centered at H400, V600.

Open earthbird2 and resize to 25%. Add to main canvas, centered at H250, V150.

Open earthsparkes2 and add to main canvas, centered.

On the materials pallet, set both your foreground and your background color to brown (#2c2210). Using font of choice add copyright to the tag. For the Jo Jackson photo, that information is:

©Jo Jackson jodesignz.deviantart.com TARTFree

Remember that since this is a free photo, you must use the TARTFree license on your tag.

I am using Century Gothic, 4 points, bold and centered and have located my copyright at H400, V725. I also added the optional background credits and tagged by information at this point.

Starting with the frame layer, Raster 3, and working upward on the layers pallet, add a drop shadow of choice to each of the elements on the main canvas, except for the sparkles. I am using offsets - vertical and horizontal - of 5 each, opacity of 75%, blur of 15 and color black (#000000).

You should now save the artist's copy of your tag as a .pspimage file.

Using font for alpha of choice add desired name to tag. I am using the Summer Sun alpha by Shel Belle Scraps. I have centered my name at H550, V100 and added a drop shadow to match the rest of the items on the main canvas.

Drop the white background layer and merge visible. Resize to 75% (600 x 600 pixels) and save as a .png file and you are all done.

I hope you enjoyed this tutorial. If you should have a problem, please feel free to E-Mail Me and I'll be happy to help you out.
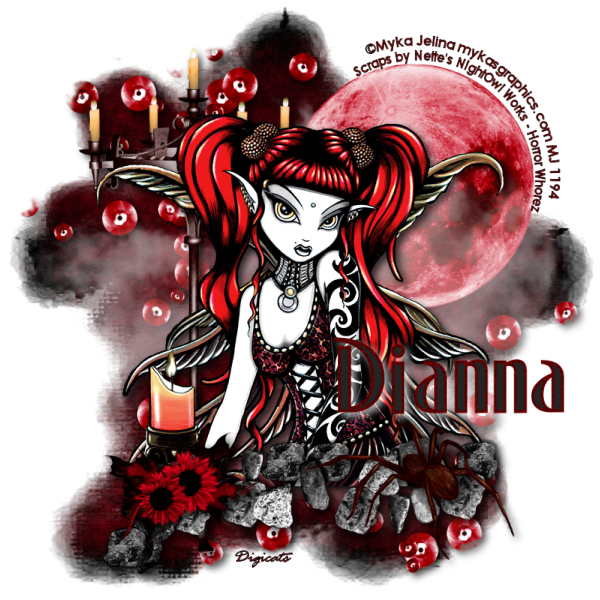
Gothic Nights (FTU) Tutorial

Gothic Nights - Dianna


This tutorial was written by Dianna Richards of Digicats (and Dogs)/Di Before Dawn Tutorials. Any resemblance to any other tutorial, published or unpublished, living, dead or undead, is purely coincidental.

Please do not rebroadcast, redistribute or otherwise claim this tutorial or any part there of as your own work.


Items you will need to complete this project:

The Horror Whorez taggers kit by Nette's Nightowl Works. This is a free to use kit which may be downloaded at the link provided.

Tube of choice. I am using Terra , by Myka Jelina. You must have a license to use this tube, which is available at Myka's Graphics.com.

Mask of choice. I am using the Sloth mask by Nik's Scripts & Scraps which is part of her PSP Masks Mega Pack.

Font(s) and/or alpha of choice. I am using Century Gothic which is a windows system font. If you do not have it, you can download it HERE.

I am also using the Gothique Romance Alpha Black by Whispy's D'zines. This alpha is no longer available, so please choose something else you like instead.


Note that H# and V# refer to horizontal and vertical coordinates on your canvas ruler grid. Make sure you have View -> Rulers checked in order to see the ruler grid.

When I say "Add to your canvas" I expect that you will copy and paste it as a new layer, unless otherwise stated in the tutorial.

This tutorial assumes you have a working knowledge of PSP. It was written using PSP X3, but should work in PSP 8 and up.

To begin, open a new raster layer canvas, 800 x 800 pxl, flood fill white.

Open paper of choice. I am using nnw hwpaper4. Resize to 800 x 800 pixels, then go to Layers -> Load/Save Mask -> Load Mask from Disk and select mask of choice. I am using Sloth by Nik's Scripts and Scraps. Make sure the fit to canvas box is checked, then click on load.

Edit -> Copy Special - Copy Merged and add to main canvas, centered.

Open nnw hw sequins, and resize to 85%. Add to main canvas, centered.

Using your magic wand tool, click anywhere outside the masked paper area on Raster 1 to select. With the area still selected, click on Raster 2 to active, then press the delete key.

Selections - Select None

Open NNw hw bloodredmoon and resize to 45%. Add to main canvas, centered at H550, V350.

Open nnw hw fog and add add to main canvas, centered.

Open nnw hw candlestand and resize to 75%. Add to main canvas, centered at H250, V400.

Open tube of choice, I am using Terra by Myka Jelina. Copy the Terra Medium layer and add to your main canvas, centered.

Open nnw hw pebbles and rotate left. Resize to 65%, and add to main canvas, centered at H400, V675.

Open nnw hw spider and resize to 75%. Add to main canvas, centered at H550, V650.

Open nnw hw wings and resize to 25%. Add to main canvas, centered at H250, V650.

On the materials pallet, set your foreground color to black (#000000) and your background color to red (#800000). Using font of choice add copyright information to the tag. For the Terra tube that information is:

©Myka Jelina mykasgraphics.com MJ (License #)

I am using Century Gothic, 4 points, bold and centered and have fit my text to path to curve around the moon. It is beyond the scope of this tutorial to explain how to do this, but you may find a tutorial on the subject HERE.

I also added the optional background credits and tagged by information at this point.

using the following settings add a white drop shadow to your text: offsets of 3 each, opacity of 100%, blur of 5 and color #ffffff. Repeat using offsets of -3 each and leaving all other settings the same.

Starting with the sequin layer - raster 2 - and working upward, add a drop shadow of choice to each of the elements on your main canvas, except for the fog layer and the copyright layer. I am using offsets, vertical and horizontal of 5 each, opacity of 75%, blur of 15 and color black (#000000).

You should now save the artist's copy of your tag as a .pspimage file.

Using font or alpha of choice, add desired name to tag. I am using the Gothique Romance Alpha Black by Whispy's D'zines. I have centered my name at H600, V500 and have added a white drop shadow, using the same settings as I used on the tag, only changing the color.

Drop the white background layer and merge visible. Resize to 75% (600 x 600 pixels) and save as a .png file and you are all done.

I hope you enjoyed this tutorial. If you should have a problem, please feel free to E-Mail Me and I'll be happy to help you out.

Tuesday, February 22, 2011

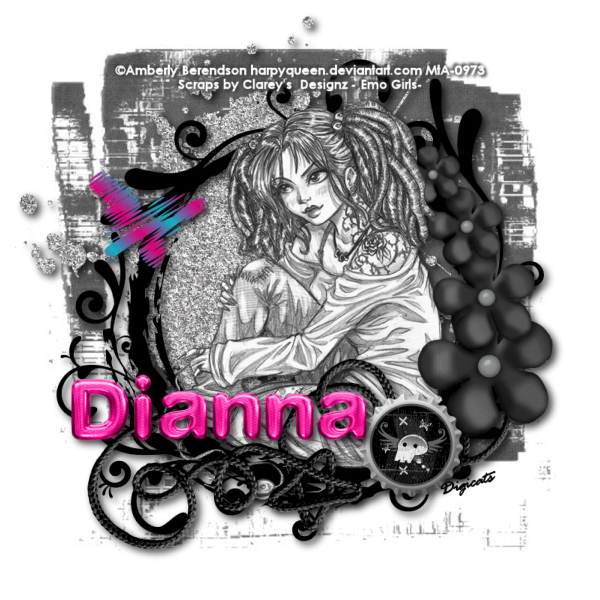
My Black & White World (PTU) Tutorial

Emo Girls - Dianna


This tutorial was written by Dianna Richards of Digicats (and Dogs)/Di Before Dawn Tutorials. Any resemblance to any other tutorial, published or unpublished, living, dead or undead, is purely coincidental.

Please do not rebroadcast, redistribute or otherwise claim this tutorial or any part there of as your own work.


Items you will need to complete this project:

The Emo Girls taggers kit by Clareys Designz which is a PTU kit that is available at Stargazer Scraps and other fine online stores.

Tube of choice. I am using Smiley, by Amberly Berendson. This is a PTU tube, and you must have a license to use this tube, which is available at My Tubed Art.

Mask of choice. I am using the Erosion3 mask by Nik's Scripts & Scraps which is part of her PSP Masks Mega Pack.

Font(s) and/or alpha of choice. I am using Century Gothic which is a windows system font. If you do not have it, you can download it HERE.

I am also using the Goth Chicks alpha by Sarah Bryan. This is a FTU alpha that is available for download at Pimp my Tag with Scraps.


Note that H# and V# refer to horizontal and vertical coordinates on your canvas ruler grid. Make sure you have View -> Rulers checked in order to see the ruler grid.

When I say "Add to your canvas" I expect that you will copy and paste it as a new layer, unless otherwise stated in the tutorial.

This tutorial assumes you have a working knowledge of PSP. It was written using PSP X3, but should work in PSP 8 and up.

To begin, open a new raster layer canvas, 800 x 800 pxl, flood fill white.

Open paper of choice. I am using clarey_emogirls_paper4. Go to Layers -> Load/Save Mask -> Load Mask from Disk and select mask of choice. I am using Erosion 3 by Nik's Scripts and Scraps. Make sure the fit to canvas box is checked, then click on load.

Edit -> Copy Special -> Copy Merged and add to main canvas, centered.

Open clarey_emogirls_largesplat-glitter and add to main canvas, centered at H350, V350.

Open Clarey_emogirls_swirlyframe1 and add to main canvas, centered.

Open tube of choice. I am using Smily by Amberly Berendson. Copy Layer 1, and add to main canvas, centered.

Open Clarey_emogirls_string3 and rotate left. Add to main canvas centered at H400, V600.

Open Clarey_Emogirls_Flower2. On the materials pallet, set your foreground color to light gray (#c0c0c0). Then, using your color changer tool, change the color of the flower center to light gray.

Copy and add to main canvas, centered at H650, V500. Right click on the flower and duplicate. Resize duplication to 75%. Move the copy to H650, V400.

Right click on the flower copy and duplicate. Resize to duplication to 75% and relocate it toH630, V300.

Repeat the duplication/resize, one last time and relocate to H580, V230.

With your selection tool set to rectangle, replace, select the tube's hair where it is covered by the flower petals. Right click on the tube layer, Raster 4, and promote selection to layer.

Right click on the promoted selection and go to Arrange -> bring to top.

Open Clarey_emogirls_bottlecap3 and add to main canvas, centered at H550, V600.

Open Clarey_emogirls_butterflysketch4 and resize to 25%. Add to main canvas, centered at H300, V200.

On the materials pallet, set your foreground and background colors to white. Using font of choice, add copyright information to tag. For the Smiley tube, that information is:

©Amberly Berendson harpyqueen.deviantart.com MtA-(License#)

I am using Century Gothic, 4 points, bold and centered and have added the optional background credits and tagged by information at this point. I have located my credits at H400, V100.

Using the following settings, add a gray drop shadow to your credit text: offsets 3 each, opacity of 100, blur of 15, and color of #404040. Repeat using offsets of 3 each and leaving all other settings the same.

Starting with Raster 2, the glitter splat and working upward on your layers pallet, add a drop shadow of choice to each of the elements on your canvas except for the promoted selection and the credits.

I am using offsets, vertical and horizontal of 5 each, opacity of 75%, blur of 15 and color of black #000000.

You should now save the artist's copy of your tag as a .pspimage file.

Using font or alpha of choice, add desired name to tag. I am using the Goth Chick alpha by Sarah Bryan, but I have recolored it using the manual color correction tool to match the pink in the butterfly. I located my name at H300, V550, and added a drop shadow to match the rest of the tag.

Drop the white background layer, and merge visible. Resize to 75% (600 x 600 pixels) and save as a .png file and you are all done.

I hope you enjoyed this tutorial. If you should have a problem, please feel free to E-Mail Me and I'll be happy to help you out.
Monday, February 21, 2011

So Sweet (PTU) Tutorial

So Sweet - Dianna


This tutorial was written by Dianna Richards of Digicats (and Dogs)/Di Before Dawn Tutorials. Any resemblance to any other tutorial, published or unpublished, living, dead or undead, is purely coincidental.

Please do not rebroadcast, redistribute or otherwise claim this tutorial or any part there of as your own work.


Items you will need to complete this project:

The Sweeeeeeeeeeeeeet taggers kit Created by Jill which is a PTU kit that is available at Stargazer Scraps.

Tube of choice. I am using Sharlot, by Elias Chatzoudis. This is a PTU tube, and you must have a license to use this tube, which is available at PSP Tubes Emporium.

Mask of choice. I am using Wee Scots Mask #261 which you can download HERE.

Font(s) and/or alpha of choice. I am using Century Gothic which is a windows system font. If you do not have it, you can download it HERE.

I am also using the Pink Paisley Swirl alpha by Lady Noelle. This is a PTU alpha, please refer to Lady Noelle's blog for places where it can be purchased.


Note that H# and V# refer to horizontal and vertical coordinates on your canvas ruler grid. Make sure you have View -> Rulers checked in order to see the ruler grid.

When I say "Add to your canvas" I expect that you will copy and paste it as a new layer, unless otherwise stated in the tutorial.

This tutorial assumes you have a working knowledge of PSP. It was written using PSP X3, but should work in PSP 8 and up.

To begin, open a new raster layer canvas, 800 x 800 pxl, flood fill white.

Open Paper of choice. I am using S_paper02_cbj. Open S_papercircles_cbj and add to paper 2, then go to Merge -> Merge Down.

Layers -> Load/Save Mask -> Load Mask from Disk and select mask of choice. I am using Wee Scots Lass mask #261. Make sure the fit to canvas box is checked, then click on load.

Edit -> Copy special - Copy Merged and add to main canvas, centered.

Open S-frame6-cbj and add to main canvas, centered. Image -> Free Rotate -> Rotate Left, 20 degrees.

Open tube of choice. I am using Sharlot by Elias Chatzoudis. Copy Raster 1, the close up layer and add to main canvas, centered.

With your selection tool set to rectangle, replace, select the bottom half the frame, Raster 2. Right Click on Raster 2 on the Layers pallet and Promote Selection to Layer. Right click on the promoted selection and go to Arrange -> Bring to Top.

Using your eraser tool, erase the bit of the tube that shows outside the frame on the side.

Return to top layer.

Open S-glitterhearts_cbj and resize to 75%. Add to main canvas, centered at H400, V600.

Open S-Hearts_cbj and add to main canvas, centered at H200, V400.

Open S_heartswirl_cbj and add to main canvas, centered. Image -> Free rotate -> Rotate Right, 75 degrees. Relocate to H600, V400.

Open S-buttefly_cbj and resize to 75%. Add to main canvas, centered at H250, V650.

On the materials pallet, set your foreground and background color to pink (#eb5197). Using font of choice, add copyright information to the tag. For the Sharlot tube that information is:

©Elias Chatzoudis www.elias-design.gr PTE(License#)

I am using Century Gothic, 4 points, bold and centered. I free rotated my text left, 20 degrees to match the angle of the frame and then located my text at H300, V100. I also added the optional background credits and tagged by information at this point.

Using the following settings, add a white drop shadow to the text, offsets, vertical and horizontal of 3 each, opacity of 100%, blur of 5 and color #ffffff. Repeat using offsets of -3 each, and leaving all other settings the same.

Starting with the frame layer, raster 2 on the layers pallet and working upward, add a drop shadow of choice to each of the elements on the main canvas, except for the Promoted Selection (frame copy), and the copyright layer. I am using offsets, vertical and horizontal of 5 each, opacity of 75, blur of 15 and color dark gray (#404040).

You should now save the artist's copy of your tag as a .pspimage file.

Using font or alpha of choice, add desired name to tag. I am using the Pink Paisley Swirl Alpha by Lady Noelle. I have my name centered at H550, V650, and added a drop shadow to match the rest of the tag.

Drop the white background layer and merge visible. Resize to 75% (600 x 600 pixels) and save a .png file and you are all done!

I hope you enjoyed this tutorial. If you should have a problem, please feel free to E-Mail Me and I'll be happy to help you out.
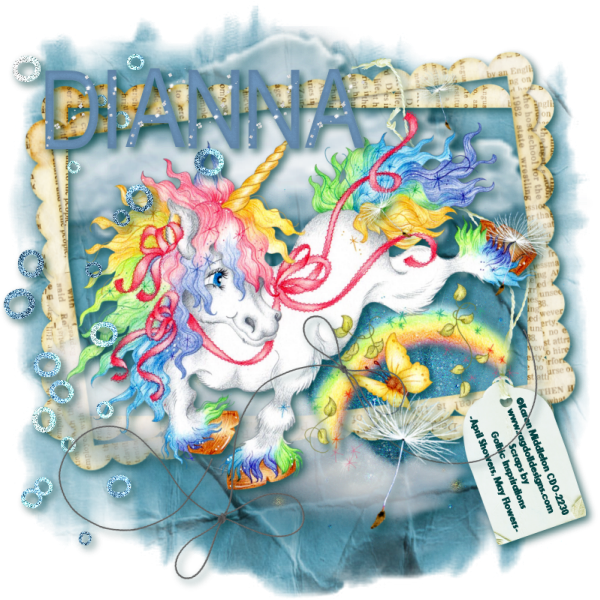
Rainy Day Fun (PTU) Tutorial

Rainy Day Fun - Dianna


This tutorial was written by Dianna Richards of Digicats (and Dogs)/Di Before Dawn Tutorials. Any resemblance to any other tutorial, published or unpublished, living, dead or undead, is purely coincidental.

Please do not rebroadcast, redistribute or otherwise claim this tutorial or any part there of as your own work.


Items you will need to complete this project:

The April Showers Brings May Flowers taggers kit by Gothic Inspirations, This is a PTU kit which is available at Gothic Inspirations.com.

Tube of choice. I am using Rainbow-corn, by Karen Middleton. This is a PTU tube, and you must have a license to use this tube, which is available at Creative Design Outlet.

Mask of choice. I am using the Primer mask by Nik's Scripts & Scraps which is part of her PSP Masks Mega Pack.

Font(s) and/or alpha of choice. I am using Century Gothic which is a Windows System font. If you do not have it, you can download it HERE.

I am also using the April Showers by Aleahs Mommy Designs. This was a freebie alpha but the download link appears not to be working anymore, so please use a font, or different alpha that you like.


Note that H# and V# refer to horizontal and vertical coordinates on your canvas ruler grid. Make sure you have View -> Rulers checked in order to see the ruler grid.

When I say "Add to your canvas" I expect that you will copy and paste it as a new layer, unless otherwise stated in the tutorial.

This tutorial assumes you have a working knowledge of PSP. It was written using PSP X3, but should work in PSP 8 and up.

To begin, open a new raster layer canvas, 800 x 800 pxl, flood fill white.

Open paper of choice. I am using Paper2-GI_AprilShowers. Go to Layers -> Load/Save Mask -> Load Mask from Disk and select mask of choice. I am using Primer by Nik's Scripts and Scraps. Make sure the fit to canvas box is checked, then click on load.

Resize to 800 x 800 pixels. Edit -> Copy Special -> Edit Copy Merged and to main canvas, centered.

Open Cloud2-GI_AprilShowers and add to main canvas, centered at H400, V300.

Open GlitterBling-GI_AprilShowers and add to main canvas, centered at H500, V500.

Open Frame1-GI_AprilShowers, and add to main canvas, centered at H400, V350.

Open Cloud-GI_AprilShowers and add to main canvas, centered at H400, V600. Set opacity to 80%.

Open tube of choice, I am using Rainbow-corn by Karen Middleton. Copy the tube layer, Raster1, and add to main canvas, centered.

Open Bling-GI_AprilShowers and add to main canvas, centered at H150, V400. Adjust -> Add/Remove Noise -> Add Noise -> Gaussian -> 85%.

Open String-GI_AprilShowers and rotate left. Copy and paste to main canvas, centered at H400, V600.

Open Dandelions-GI_AprilShowers and add to main canvas, centered at H600, V400.

Open Tag2-GI_AprilShowers and rotate left. On the materials pallet, set your foreground and background colors to dark teal (#004040). Using font of choice, add copyright information to the tag. For the Karen Middleton tube, that information is:

©Karen Middleton www.ragdolldesigns.com CDO-(License#)

I am using Century Gothic, 3 points, bold and centered and free rotated my text left, 22 degrees to match the angle of the tag. I also added the optional background credits and tagged by information at this point.

Layers -> Merge -> Merge visible, then rotate right. On the layers pallet, click on the frame layer to activate, then add the tag to the main canvas, centered at H625, V400.

Starting with the cloud layer, Raster 2, on your layers pallet and working upward, add a drop shadow of choice to each of the element on the main canvas, except for the GlitterBling (Raster 3) layer. I am using offsets, vertical and horizontal of 5 each, opacity of 75, blur of 15 and color of dark teal (#004040).

You should now save the artist's copy of your tag as a .pspimage file.

Using font or alpha of choice, add desired name to tag. I am using the April Showers alpha by Aleahs Mommy Designs. I have my name centered at H275, V150, and have added a drop shadow to match the one used on the rest of the elements.

Drop the white background layer, and merge visible. Resize to 75% (600 x 600 pixels) and save as a .png file and you are all done.

I hope you enjoyed this tutorial. If you should have a problem, please feel free to E-Mail Me and I'll be happy to help you out.

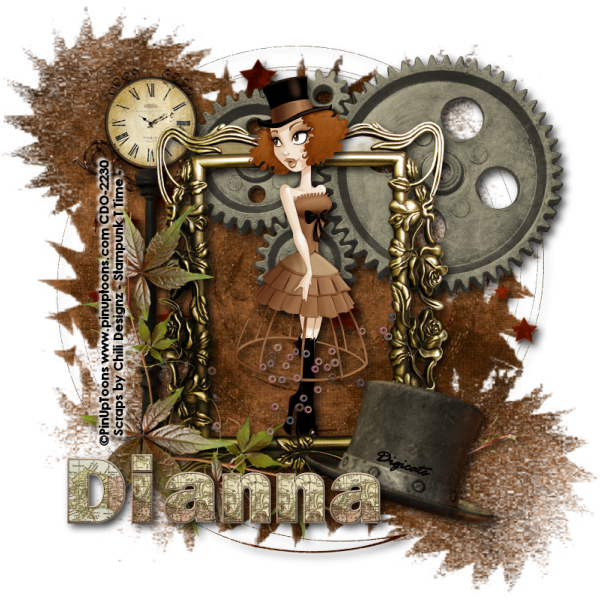
Steampunk Time (PTU) Tutorial

Steampunk Time - Dianna


This tutorial was written by Dianna Richards of Digicats (and Dogs)/Di Before Dawn Tutorials. Any resemblance to any other tutorial, published or unpublished, living, dead or undead, is purely coincidental.

Please do not rebroadcast, redistribute or otherwise claim this tutorial or any part there of as your own work.


Items you will need to complete this project:

The Steampunk Time taggers kit by Chili Designz which is a PTU kit that is available at Stargazer Scraps and other fine online stores.

Tube of choice. I am using 93-3 Top Hat, by Pin Up Toons. This is a PTU tube, and you must have a license to use this tube, which is available at Creative Design Outlet.

Mask of choice. I am using the Sprockets and Gears mask by Nik's Scripts & Scraps which is part of her PSP Masks Mega Pack.

Font(s) and/or alpha of choice. I am using Century Gothic which is a windows system font. If you do not have it, you can download it HERE.

I am also using the Voyager Alpha by Lady Noelle, which is a PTU alpha. Please consult Lady Noelle's blog for places where it may be purchased.


Note that H# and V# refer to horizontal and vertical coordinates on your canvas ruler grid. Make sure you have View -> Rulers checked in order to see the ruler grid.

When I say "Add to your canvas" I expect that you will copy and paste it as a new layer, unless otherwise stated in the tutorial.

This tutorial assumes you have a working knowledge of PSP. It was written using PSP X3, but should work in PSP 8 and up.

To begin, open a new raster layer canvas, 800 x 800 pxl, flood fill white.

Open paper of choice. I am using CHILI_DESIGNZ_SteamPunk_Time_paper7. Go to Layers -> Load/Save Mask -> Load Mask from Disk and select mask of choice. I am using Sprockets & Gears by Nik's Scripts and Scraps. Make sure the fit to canvas box is checked, then click on load.

Resize to 800 x 800 pixels. Edit -> Copy Special -> Copy Merged and add to main canvas, centered.

Open CHILI_DESIGNZ_SteamPunk_Time_stars and add to main canvas, Centered

Open CHILI_DESIGNZ_SteamPunk_Time_Gear2 and add to main canvas, centered at H500, V250.

Open CHILI_DESIGNZ_SteamPunk_Time-watch2 and resize to 75% Add to main canvas, centered at H200, V350.

Open CHILI_DESIGNZ_SteamPunk_Time-frame3 and rotate right. Add to main canvas, centered.

Open tube of choice. I am using 93-3 Top Hat by Pin Up Toons. Copy Raster 1 - the full body layer - and add to main canvas, centered at H350, V400.

Set your selection tool to rectangle, replace and select the bottom half of Raster 5, the frame layer. Right click and promote selection to layer. Right click on the promoted selection and go to Arrange -> Bring to Top.

Selections -> Select None.

Open CHILI_DESIGNZ_SteamPunk_Time-greenery and rotate left. Resize to 75%, and add to main canvas, centere at H400, V450. Using your eraser tool, erase the bit of the stem on the top part of the greenery, down to the top leaf.

Open CHILI_DESIGNZ_SteamPunk_Time-beads and add to main canvas, centered at H400, V500.

Open CHILI_DESIGNZ_SteamPunk_Time-Hat and resize to 75%. Add to main canvas, centered at H550, V600. Image - free rotate - rotate right, 17 degrees.

On the materials pallet, set both your foreground and your background colors to black (#000000). Using font of choice, add copyright information to the tag. For the Top Hat tube that information is:

©PinUpToons www.pinuptoons.com CDO-(License#)

I am using Century Gothic, 4 points, bold and centered and have free rotated my text left, 90 degrees. I then located it centered at H150, V400. I also added the optional background credits and tagged by information at this point.

Using the following settings, add a white drop shadow to your credits: offsets of 3 each, opacity of 100%, blur of 5 and color #ffffff. Repeat using offsets of -3 each, leaving all other settings the same.

Starting with Raster 2, the stars layer, and working upward on you layers pallet, add a drop shadow of choice to each of the elements on your main canvas, except for the promoted selection and the copyright. I am using offsets of 5 each, opacity of 75, blur of 15, color black (#000000).

You should now save the artist's copy of your tag as a .pspimage file.

Using font or alpha of choice, add desired name to tag. I am using the Voyager alpha by Lady Noelle. I have my name centered at H300, V650, and have added a drop shadow to match the rest of the elements on the canvas.

Drop the white background layer, and merge visible. Resize to 75% (600 x 600 pixels) and save as a .png file and you are all done.

I hope you enjoyed this tutorial. If you should have a problem, please feel free to E-Mail Me and I'll be happy to help you out.

Sunday, February 20, 2011

Celtic Babe (PTU) Tutorial

Celtic Babe - Dianna


This tutorial was written by Dianna Richards of Digicats (and Dogs)/Di Before Dawn Tutorials. Any resemblance to any other tutorial, published or unpublished, living, dead or undead, is purely coincidental.

Please do not rebroadcast, redistribute or otherwise claim this tutorial or any part there of as your own work.


Items you will need to complete this project:

An Irish Jig taggers kit by Digicats (& Dogs), This is a PTU kit that is part of the new collab at StargaZer Scraps. It is free with a $10 purchase, or you can purchase the collab outright for $12.50.

Tube of choice. I am using Celtic Babe, by Keith Garvey. This is a PTU tube, and you must have a license to use this tube, which is available at PSP Tubes Emporium.

Mask of choice. I am using the Grunge16 mask by Nik's Scripts & Scraps which is part of her PSP Masks Mega Pack.

Font(s) and/or alpha of choice. I am using Century Gothic which is a Windows System font. If you do not have it, you can download it HERE.

I am also using the Satin Gold alpha by Marie Stones. This is a FTU alpha that can be downloaded from Free Digital Scrapbooking.com.


Note that H# and V# refer to horizontal and vertical coordinates on your canvas ruler grid. Make sure you have View -> Rulers checked in order to see the ruler grid.

When I say "Add to your canvas" I expect that you will copy and paste it as a new layer, unless otherwise stated in the tutorial.

This tutorial assumes you have a working knowledge of PSP. It was written using PSP X3, but should work in PSP 8 and up.

To begin, open a new raster layer canvas, 800 x 800 pxl, flood fill white.

Open paper of choice. I am using DCD_IrJi_Paper02. Layers -> Load/Save Mask -> Load mask from disk and select mask of choice. I am using Grunge16 by Nik's Script and Scraps. Make sure the fit to canvas box is checked, then click on load.

Edit -> Copy Special -> Copy Merged and add to main canvas, centered.

Open DCD_IrJi_Diamond Rain, and resize to 75%. Add to main canvas, centered.

Open DCD_IrJi_Rainbow, and add to main canvas, centered at H400, V300.

Open vFrame06 and add to main canvas, centered.

Open tube of choice. I am using Celtic Babe by Keith Garvey. Copy the close up layer, Layer 2, and add to main main canvas, centered.

On the layers pallet, right click on Raster 4, the frame layer and duplicate. Right click on Copy of Raster 4, and go to Arrange -> Bring to top.

With your selection tool set to rectangle, replace, select the top half of the Copy of Raster 4, and delete.

Open DCD_IrJi_Butterfly Bling and add to main canvas, centered at H525, V400.

Open DCD_IrJi_Ribbon02 and resize to 75%. Add to main canvas, centered at H650, V400.

Open DCD_IrJi_Lucky Horse Shoe, and resize to 75%. Add to main canvas, centered at H550, V550.

Image -> Free Rotate -> Left, 17 degrees.

Using your eraser tool, erase the bits of the frame, butterflies, et al, (but not the horseshoe) that fall below the ribbon layer on the main canvas.

Return to top layer.

On the materials pallet, set both your foreground and background colors to Orange (#fb6600). Using font or alpha of choice, add copyright information to the tag. For the Celtic Babe tube, that information is:

©Keith Garvey http://garvgraphx.com PTE(License#)

I am using Century Gothic, 4 points, bold and centered and have located my copyright at H400, V720. I also added my optional background credits and tagged by information at this point.

Using the following settings add a drop shadow to your credits: Offsets of 3 each, opacity of 100%, blur of 5, color dark green (#004000). Repeat using offsets of -3 each and leaving all other settings the same.

Starting with the diamond rain layer and working upward, add a drop shadow of choice to each of the elements on your main canvas, except for the rainbow layer and the Copy of Raster 4, the frame copy layer. I am using offsets, vertical and horizontal of 5 each, opacity of 75%, blur of 5, and color of black (#000000).

You should now save the Artist's Copy of your tag as a .pspimage file.

Using font or alpha of choice, add desired name to the tag. I am using the Satin Gold alpha by Marie Stones and have centered my name at H275, V575. I then added a drop shadow to match the rest of the elements on the main canvas.

Drop the white background layer and merge visible, resize to 75% (600 x 600 pixels) and save as a .png file and you are all done.

I hope you enjoyed this tutorial. If you should have a problem, please feel free to E-Mail Me and I'll be happy to help you out.

An Irish Jig Quick Page

An Irish Jig Quick Page


Okay...keeping in mind that I don't to layouts much...here's an attempt at a quick page using An Irish Jig from Bunchie's Bin. You can snag the quick page HERE.

The pictures of Miss Diamond are NOT included. LOL!

Dearg-due (PTU) Tutorial

Dearg-due - Dianna


This tutorial was written by Dianna Richards of Digicats (and Dogs)/Di Before Dawn Tutorials. Any resemblance to any other tutorial, published or unpublished, living, dead or undead, is purely coincidental.

Please do not rebroadcast, redistribute or otherwise claim this tutorial or any part there of as your own work.


Items you will need to complete this project:

An Irish Jig taggers kit by Gothic Inspriations, This is a PTU kit that is part of the new collab at StargaZer Scraps. It is free with a $10 purchase, or you can purchase the collab outright for $12.50.

Tube of choice. I am using Raven, by Karen M. Koski. This is a PTU tube, and you must have a license to use this tube, which is available at My Tubed Art.

Mask of choice. I am using the Ghostbusters mask by Nik's Scripts & Scraps which is part of her PSP Masks Mega Pack.

Font(s) and/or alpha of choice. I am using Century Gothic which is a Windows System font. If you do not have it, you can download it HERE.

I am also using the Plaid alpha by Jen's Sweet Temptations, which is a PTU alpha.


Note that H# and V# refer to horizontal and vertical coordinates on your canvas ruler grid. Make sure you have View -> Rulers checked in order to see the ruler grid.

When I say "Add to your canvas" I expect that you will copy and paste it as a new layer, unless otherwise stated in the tutorial.

This tutorial assumes you have a working knowledge of PSP. It was written using PSP X3, but should work in PSP 8 and up.

To begin, open a new raster layer canvas, 800 x 800 pxl, flood fill white.

Open paper of choice. I am using Paper2-GI_AnIrishJig. Layers -> Load/Save Mask -> Load mask from disk and select mask of choice. I am using Ghostbusters by Nik's Scripts and Scraps. Make sure the fit to canvas box is checked, then click on load.

Resize to 800 x 800 pixels. Edit -> Copy Special -> Copy Merged and add to main canvas, centered.

Open Clover Shower-GI_AnIrishJig, and add to main canvas, centered.

Open Rainbow-GI_AnIrishJig and add to main canvas, centered at H400, V250.

Open Frame1-GI_AnIrishJig, and resize to 600 x 600 pixels. Copy and add to main canvas, centered.

Open tube of choice. I am using Raven, by Karen M Koski. Copy the tube layer and add to main canvas, centered.

On the layers pallet, right click on the frame layer, Raster 4, and duplicate. Right click on the frame copy, Copy of Raster 4 and go to Arrange -> Bring to top.

With your selection tool set to rectangle, replace select the top half of the frame layer copy and delete.

With your eraser tool, erase the bits of the tube that fall below the frame layer on the bottom.

Open Tules-GI_AnIrishJig and resize to 65%. Add to main canvas, centered at H430, V500.

Return to top layer.

Open Dried Flower-GI_AnIrishJig and resize to 65%. Add to main canvas, centered at H600, V400.

Open Ribbon1-GI_AnIrishJig and resize to 65%. Add to main canvas, centered at H400, V475.

Open Bow1-GI_AnIrishJig and resize to 65%. Add to main canvas, centered at H625, V500.

On the layers pallet, click on Copy of Raster 4 - the frame layer copy. With you selection tool set to rectangle replace, select an area from H150, V450 to V220, H580. Right click and "promote selection to layer".

Selections -> Select None.

Going back to copy of Raster 4, select another area from H310, V690 to H440, V690. Right click and promote selection to layer.

Selections -> Select None.

Click on the top of the two promoted selection on the layer pallet, then go to Layers -> Merge Visible -> Merge Down.

Right click on the merged Promoted Selections and to to Arrange -> Bring to Top.

Open Tab-GI_AnIrishJig and resize to 45%. On the Material pallet, set your foreground color to lime green (#4f890c) and your background color to old gold (#b09c5f). Using font of choice at the copyright information to the tab. For the Raven tube, that information is:

©Karen M. Koski EnchantedCanvas.com MtA-(License #)

I am using Century Gothic, 4 points, bold and centered. I also added the optional background credits and tagged by information at this point. Merge visible, then copy and add the tab to the main canvas, centered at H225, V675.

Starting with the Clover Shower layer - Raster 2- and working upward, add a drop shadow of choice to each of the elements on the main canvas, except for the rainbow layer, the frame layer copy (Copy of Raster 4), and the promoted selections. I am using offsets, vertical and horizontal of 5 each, opacity of 65, blur of 15 and color black (#000000).

You should now save the Artist's Copy of your tag as a .pspimage file.

Using font or alpha of choice, add desired name to the tag. I am using the plaid alpha by Jen's Sweet Temptations. I have centered my name at H550, V100, and added a drop shadow to match the one used on the rest of the elements on the canvas.

Drop the white background layer and merge visible, resize to 75% (600 x 600 pixels) and save as a .png file and you are all done.

I hope you enjoyed this tutorial. If you should have a problem, please feel free to E-Mail Me and I'll be happy to help you out.
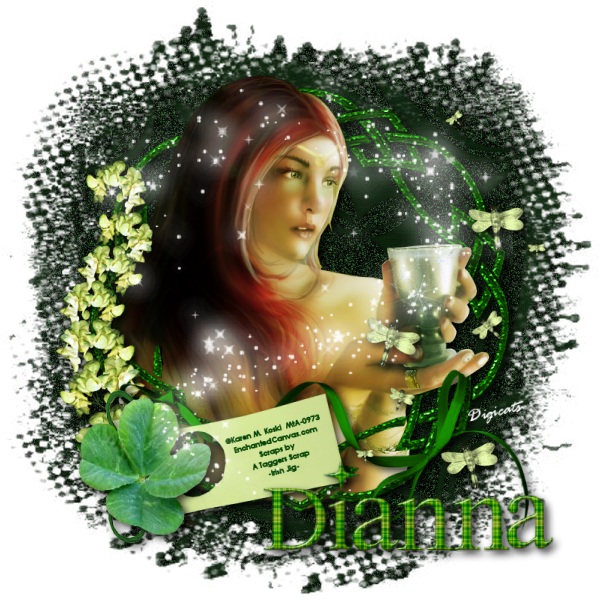
Saturday, February 19, 2011

Irish Gypsy (PTU) Tutorial

Irish Gypsy - Dianna


This tutorial was written by Dianna Richards of Digicats (and Dogs)/Di Before Dawn Tutorials. Any resemblance to any other tutorial, published or unpublished, living, dead or undead, is purely coincidental.

Please do not rebroadcast, redistribute or otherwise claim this tutorial or any part there of as your own work.


Items you will need to complete this project:

An Irish Jig taggers kit by A Taggers Scrap, This is a PTU kit is part of the new collab at StargaZer Scraps. It is free with a $10 purchase, or you can purchase the collab outright for $12.50 (but with all the fabulous designs in the shop, why would you want to purchase it when you can get it for free?)

Tube of choice. I am using Gypsy, by Karen M. Koski. This is a PTU tube, and you must have a license to use this tube, which is available at My Tubed Art.

Mask of choice. I am using the Grunge121 mask by Nik's Scripts & Scraps which is part of her PSP Masks Mega Pack.

Font(s) and/or alpha of choice. I am using Century Gothic which is a Windows System font. If you do not have it, you can download it HERE.

I am also using the Plaid alpha by Jen's Sweet Temptations, which is a PTU alpha.


Note that H# and V# refer to horizontal and vertical coordinates on your canvas ruler grid. Make sure you have View -> Rulers checked in order to see the ruler grid.

When I say "Add to your canvas" I expect that you will copy and paste it as a new layer, unless otherwise stated in the tutorial.

This tutorial assumes you have a working knowledge of PSP. It was written using PSP X3, but should work in PSP 8 and up.

To begin, open a new raster layer canvas, 800 x 800 pxl, flood fill white.

Open paper of choice. I am using paper6. Edit -> Load/Save Mask -> Load Mask from disk and select mask of choice. I am using Grunge121 by Nik's Scripts and Scraps. Make sure the fit to canvas box is checked, then click on load.

Edit -> Copy Special - Copy Merged and add to main canvas, centered.

Open Frame1, and add to main canvas, centered.

Open tube of choice. I am using Gypsy by Karen M. Koski. copy the tube layer and add to main canvas, centered.

On the layers pallet, right click on the frame layer, Raster2 and duplicate. Right click again on the Copy of Raster 2 layer and go to Arrange -> Bring to top.

With your selection tool set to rectangle, replace, select the top half of the frame copy layer and delete.

Using your eraser tool, erase the bits of the tube that fall below the frame layer on the bottom.

Return to top layer.

Using your eraser tool, erase the bits of the frame layer copy that are covering the parts of the tube around the hands and the hair, to make it look like it flowing more natural into the image.

Open Greenery2, and add to the main canvas, centered at H150, V450.

Open ribbon3, and add to the main canvas, centered at H400, V600.

Open clover and add to main canvas, centered at H200, V625.

Open Tag and rotate left. On your materials pallet, set your foreground and your background colors to dark green (#004000). Using font or alpha of choice add copyright information to the tag. For the Gypsy tube, that information is:

©Karen M. Koski EnchantedCanvas.com MtA-(License#)

I am using Century Gothic, 10 points, bold and centered. I then free rotated the text left, 15 degrees to match the angel of the tag. I also added the optional background credits and tagged by information at this point.

Using your eraser tool, erase the long ribbons on the tag, leaving only the bow and the tag.

Layers -> Merge -> Merge visible, then copy and past the tag to the main canvas at H300, V500, or right over the clover on the main canvas.

On the layers pallet, right click on the clover, Raster 6, and to to arrange, bring to top.

Open Dragonflies, and add to main canvas, centered at H600, V400.

Starting with Raster 2, the frame layer, add a drop shadow of choice to the each items on the main canvas except for the frame layer copy. I am using offsets, vertical and horizontal of 5 each, opacity of 75, blur of 15, and color of black #000000.

Open fairy dust and add to main canvas, centered.

You can now save the artist's copy of your tag as a .pspimage file.

Using font or alpha of choice, add desired name to the tag. I am using the plaid alpha by Jen's Sweet Temptations. I have centered the name at H550, V675, and added a drop shadow to match the one used on the rest of the elements on the main canvas.

Drop the white background layer and merge visible, resize to 75% (600 x 600 pixels) and save as a .png file and you are all done.

I hope you enjoyed this tutorial. If you should have a problem, please feel free to E-Mail Me and I'll be happy to help you out.