Tuesday, December 28, 2010

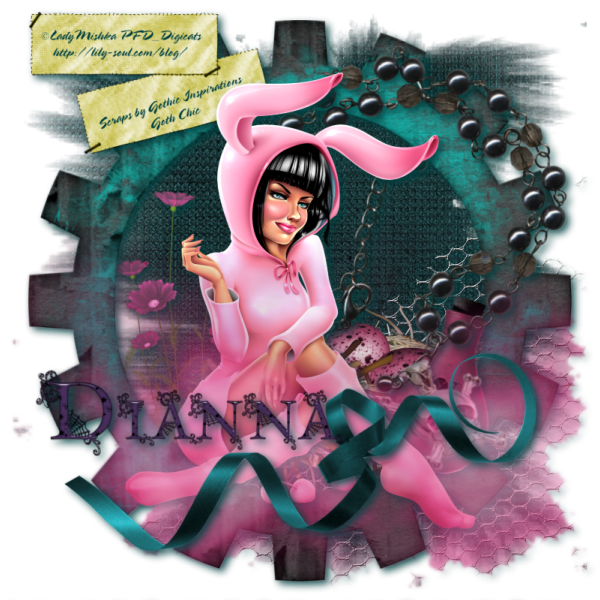
Goth Chic (PTU) Tutorial

Goth Chic - Dianna


This tutorial was written by Dianna Richards of Digicats (and Dogs)/Di Before Dawn Tutorials. Any resemblance to any other tutorial, published or unpublished, living, dead or undead, is purely coincidental.

Please do not rebroadcast, redistribute or otherwise claim this tutorial or any part there of as your own work.


Items you will need to complete this project:

The Goth Chic taggers kit by Gothic Inspirations, which is a PTU kit that is available at Gothic Inspiration.com.

Tube of choice. I am using psp-Catherine, by Lady Mishka. You must have a license to use this tube, which is available at Pics for Design.

Mask of choice. I am using the Frizzies mask by Nik's Scripts & Scraps which is part of her PSP Masks Mega Pack.

Font(s) and/or alpha of choice. I am using the font Spring, which is a FTU font that you can download HERE. I am also using the Goth Chic alpha by Whispy's D'zines, which is a FTU alpha you may download at whispysdzines.blogspot.com.


Note that H# and V# refer to Horizontal and vertical coordinates on your canvas grid. Make sure you have View, Rulers checked in order to see the ruler grid.

When I say "Add to your canvas" I expect that you will copy and paste it as a new layer, unless otherwise state in the tutorial.

This tutorial assumes you have a working knowledge of PSP. It was written using PSP X3, but should work in PSP 8 and up.

To begin, open a new raster layer canvas, 800 x 800 pxl, flood fill white.

Open Paper of choice. I am using Paper1-GI_GothChic. Layers -> Load/Save Mask -> Load Mask from Disk and select mask of choice. I am using Frizzies by Nik's Scripts and Scraps. Make sure the Fit to Canvas box is checked, then click on load.

Resize to 90%. Edit -> Copy Special -> Copy Merged and add to main canvas, centered.

Open Tules and add to main canvas, centered at H400, V500. Click on Raster 1 on your layers pallet and with your magic wand tool, click anywhere outside the masked paper area to select. Leaving the area selected, click on Raster 2 on the layers pallet and then tap the delete key.

Selections -> Select None.

Open Frame4, and resize to 85% Add to main canvas, centered.

Open tube of choice. I am using psp-Catherine by Lady Mishka. Resize to 40%. With the Pink and the 00 layers active and the rest turned off, Copy Special -> Copy Merged and add to main canvas, centered.

Open Nest. on the Materials pallet click on the Tules layer, Raster 2. Add the next to you main canvas, centered at H500, V550. Using your eraser tool, erase the bits of the nest showing outside the frame area.

Open Flowers and resize to 75%. Add to main canvas, centered at H250, V450.

Return to top layer. Open Mist and add to main canvas, centered at H400, V550.

Turn off Raster 8 for a moment. Open you magic wand tool and check the "Use all Layers" box on the tool bar. Click anywhere in the white background layer to select.

Leaving the area selected turn Raster 8 back on, and hit your delete key.

Selections -> Select none.

Open Ribbon2 and add to main canvas, centered at H400, V600.

Open Potion and resize to 50%. Click on the frame layer, Raster 3 and add the potion to the main canvas, centered at H600, V500.

Image -> Free Rotate -> Right, 17 degrees.

Open Beads2, and resize to 75%. Add to main canvas, centered at H500, V350. Image -> Free Rotate -> Left, 25 degrees.

On the Materials Pallet, set you foreground color to Transparent and your background color to Dark Teal (#004040).

Open Tabs. Using font of choice add the copyright information to the the tabs. For the Catherine tube, that information is:

©LadyMishka http://lily-soul.com/blog/ Your PFD_License#

You should also add the background credits and tagged by information at this time.

I am using the font Spring, 6 points, bold and centered. I free rotated the text on the bottom tab Left, 18 degrees to get it to match up with the angle of the tab. Make sure you put the text on the bottom tag on it's own Vector layer, or you will end up free rotating both sets of text.

Merge Visible. Resize the Tabs to 75% and add to main canvas, centered at H200, V110.

Starting with Raster 2 on the layers pallet and working upward, add a drop shadow of choice to the each of the items on your main canvas except for the mist layer, Raster 8. I am using offsets, vertical and horizontal of 5 each, opacity of 85, blur of 15 and color of Dark Teal (#004040).

You can now save the artist's copy of your tag as a .pspimage file.

Using font or alpha of choice add desired name to the tag. I am using the Goth Chic Alpha by Whispy's D'zines. I have my name centered between H250 and H300, at V550, and have added drop shadow to match the rest of the tag.

Drop the white background layer and merge visible. Resize to 75% (600 x 600 pixels) and save as a .png file and you are all done.

Note that if you are planning on using the tag on Facebook, you may wish to save it as a .jpg as Facebook does not handle .pngs well.

I hope you enjoyed this tutorial. If you should have a problem, please feel free to E-Mail Me and I'll be happy to help you out.
A Dark Romance (PTU) Tutorial

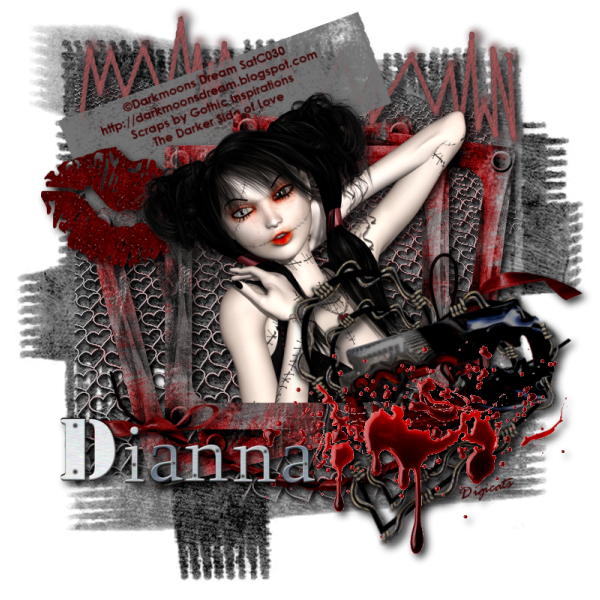
Darker Side of Love - Dianna


This tutorial was written by Dianna Richards of Digicats (and Dogs)/Di Before Dawn Tutorials. Any resemblance to any other tutorial, published or unpublished, living, dead or undead, is purely coincidental.

Please do not rebroadcast, redistribute or otherwise claim this tutorial or any part there of as your own work.


Items you will need to complete this project:

The Darker Side of Love taggers kit by Gothic Inspirations, which is a PTU kit that is available at Gothic Inspiration.com.

Tube of choice. I am using My Lil Dollie, by Darkmoon's Dream. You must have a license to use this tube, which is available at Scraps and the City.com.

Mask of choice. I am using the Grunge36 mask by Nik's Scripts & Scraps which is part of her PSP Masks Mega Pack.

Font(s) and/or alpha of choice. I am using the font century Gothic, which is a Windows System font and the Metal Alpha by Katrin's Design.


Note that H# and V# refer to Horizontal and vertical coordinates on your canvas grid. Make sure you have View, Rulers checked in order to see the ruler grid.

When I say "Add to your canvas" I expect that you will copy and paste it as a new layer, unless otherwise state in the tutorial.

This tutorial assumes you have a working knowledge of PSP. It was written using PSP X3, but should work in PSP 8 and up.

To begin, open a new raster layer canvas, 800 x 800 pxl, flood fill white.

Open paper of choice. I am using Paper11-GI_TDSideOfLove. Layers -> Load/Save Mask -> Load Mask from Disk and select mask of choice. I am using Grunge36 by Nik's Scripts and Scraps. Make sure the fit to canvas button is checked, then click on load.

Resize to 90%. Edit -> Copy Special -> Copy Merged and add to main canvas, centered.

Open HeartMesh-GI_TDSideOfLove and add to main canvas, centered.

Open Frame2-GI_TDSideOfLove, and add to main canvas, centered.

Open tube of choice. I am using MyLiLDollie03 by Dark Moon Dreams. Resize to 35% and add to main canvas, centered.

Right click on Raster 4, the frame layer on the layers pallet, and duplicate. Drag the duplication over the tube layer on the layers pallet.

With you selection tool set to rectangle-replace, select the top half of the frame copy and press your delete key.

Selections -> Select none.

With your eraser tool, erase the bits of the tube that fall below the frame layer on the bottom.

Return to the top layer. Open Ribbon-GI_TDSideOfLove and add to main canvas, centered at H450, V500.

On the layers pallet, click on the mesh layer, raster 3, to activate. Open Heartline-GI_TDSideOfLove, and add to main canvas centered at H400, V100. Return to top layer, Raster 6.

Open BarbedHeart-GI_TDSideOfLove and resize to 75%. Add to main canvas, centered at H550, V550. Image -> Free Rotate -> Rotate right, 14 degrees.

On the layers pallet, right click on the barbedheart, Raster 8 and duplicate. Resize the duplication (only) to 75%. Using your pick tool, center the duplication inside the original.

Open Razor-GI_TDSideOfLove and resize to 75%. Add to main canvas, centered at H600, V550. Image -> Free Rotate -> Rotate left, 17 degrees.

Open BloodSplater-GI_TDSideOfLove and add to main canvas, centered at H550, V600.

On the materials pallet, set your foreground color to transparent and your background color to Dark Red (#400000).

Open Tape2-GI_TDSideOfLove, and resize to 50%. Using font of choice add the copyright information for the tag to Tape2. For the My Lil Dollie tube, that information is:

©Darkmoon's Dream http://darkmoonsdream.blogspot.com Your SatC_License@

I am using the font Century Gothic, 6 point, bold and centered. Make sure your text is near the top of the tape. You should also add the background credits and tagged by information at this point.

Merge visible than resize to 65%. On your layers pallet, click on the heartline layer, Raster 7. Add the tape to the main canvas, centered at H300, V150. Image -> Free Rotate -> Rotate Left, 20 degrees.

Duplicate and then go to Layers -> Merge Down.

Open Kiss-GI_TDSideOfLove and resize to 40%. On the layers pallet, click on the frame layer, Raster 4, to activate. Add the kiss to the main canvas, centered at H150, V275.

Starting with the heartline layer, Raster 7, and working upward, add a drop shadow of choice to each of the elements on your main canvas except for the frame copy layer, Copy of Raster 4, and the tape layer, Raster 11. I am using offsets, vertical and horizontal of 5 each, opacity of 85%, blur of 15, and color black (#000000).

You can now save the Artist's Copy of your tag as a .pspimage file.

Using font or alpha of choice, add name of choice to tag. I am using the Metal Alpha by Katrin's Design, and have centered my name at H200, V600. (H250 for the longer names). Adjust according to the length of the name you are using. Add drop shadow to name to match the rest of the tag.

Drop the white background layer, and merge visible. Resize to 75% (600 x 600 pixels) and save as a .png file and you are all done!

Note that if you are planning on using the tag on Facebook, you may wish to save it as a .jpg as Facebook does not handle .pngs well.

I hope you enjoyed this tutorial. If you should have a problem, please feel free to E-Mail Me and I'll be happy to help you out.

Cryptic Corner (PTU) Tutorial

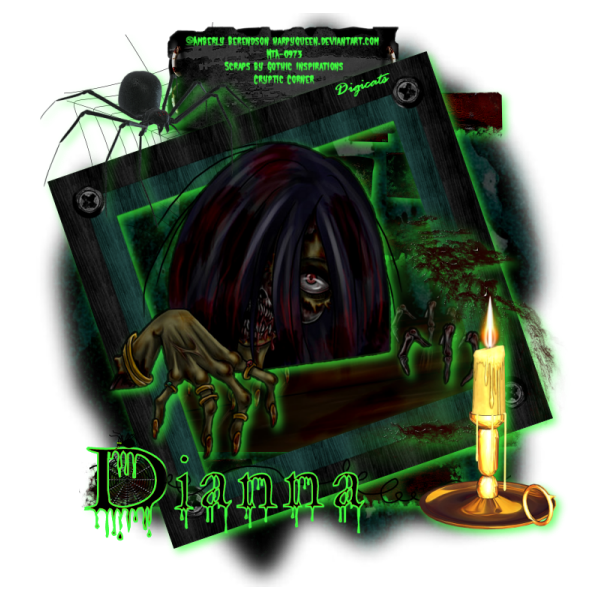
Cryptic Corner - Dianna


No, it's not Halloween. It's um...Gothic! Yeah, that's it! Gothic!

This tutorial was written by Dianna Richards of Digicats (and Dogs)/Di Before Dawn Tutorials. Any resemblance to any other tutorial, published or unpublished, living, dead or undead, is purely coincidental.

Please do not rebroadcast, redistribute or otherwise claim this tutorial or any part there of as your own work.


Items you will need to complete this project:

The Cryptic Corner taggers kit by Gothic Inspirations, which is a PTU kit that is available at Gothic Inspiration.com.

Tube of choice. I am using From the Crypt, by Amberly Berendson. You must have a license to use this tube, which is available at My Tubed Art.com.

Mask of choice. I am using the NiksMask16 mask by Nik's Scripts & Scraps which is part of her PSP Masks Mega Pack.

Font(s) and/or alpha of choice. I am using the font Castle Dracustein, which is a FTU font that may be dowloaded HERE, and the Creepy Alpha by Winter's Loft.


Note that H# and V# refer to Horizontal and vertical coordinates on your canvas grid. Make sure you have View, Rulers checked in order to see the ruler grid.

When I say "Add to your canvas" I expect that you will copy and paste it as a new layer, unless otherwise state in the tutorial.

This tutorial assumes you have a working knowledge of PSP. It was written using PSP X3, but should work in PSP 8 and up.

To begin, open a new raster layer canvas, 800 x 800 pxl, flood fill white.

Open paper of choice. I am using Paper4-GI_CrypticCorner. Layers -> Load/Save Mask -> Load Mask from Disk and select mask of choice. I am using NikMask16 by Nik's Scripts and Scraps. Make sure the fit to canvas box is checked, then click on load.

Resize to 90%. Edit -> Copy Special -> Copy Merged and add to main canvas, centered.

Open Brick-GI_CrypticCorner and add to main canvas, centered.

Open tube of choice. I am using From the Crypt by Amberly Berendson. Copy Layer 1, and add to the main canvas, centered.

Open Frame2-GI_CrypticCorner, and resize to 80%. Add to main canvas, centered. Image -> Free Rotate -> Rotate left, 19 degrees.

Going back to the tube, copy Layer 2 and add to main canvas, centered. It should, automatically line up with Raster 3. If it doesn't use your pick tool to make the necessary adjustments.

Using your eraser tool, erase the parts of Raster 3 that are visible outside the frame layer.

Return to the top layer. Open String-GI_CrypticCorner and resize to 600 pixels wide. Add to the main canvas, centered at H400, V650.

Open Candle and resize to 75%. Add to main canvas, centered at H650, V550.

On the layer pallet, click on Raster 1, the paper layer to active. Open Web-GI_CrypticCorner and resize to 50%. Add to the main canvas, centered at H250, V200. Return to top layer, Raster 7.

Open Spider-GI_CrypticCorner and resize to 75%. Image -> Mirror. Add to main canvas, centered at H200, V200.

Click on Raster 4, the frame layer to activate. Open Splatter-GI_CrypticCorner and resize to 75%. Add to main canvas, centered at H600, V450.

On the layers pallet, click on the web layer, Raster 8. Starting with that layer and working upward, add a drop shadow to the elements on your main canvas except for the first tube layer, Raster 3. I am using offsets, vertical and horizontal of 5 each, opacity of 75, blur of 15 and color of bright lime green (#40ff40).

Open Tab. Using font of choice add copyright information to the tag. For the From the Crypt tube, that information is:

©Amberly Berendson harpyqueen.deviantart.com Your MTA_License#

I am using Castle Dracustein, 4 points, bold and centered and color of #40ff40, which should match the drop shadow. You should add the background credits and tagged by line at this time as well.

Put the info up near the top of the tag, as the bottom part is going to be covered. And make sure it's large enough to read once the tag is resized.

Merge Visible, then resize the tag to 75%. On the Main Canvas, click on Raster 2, the brick layer, to activate. Add the tag to your main canvas, centered at H380, V110 (or there abouts). Make sure none of the copyright information is covered up.

You can now save the artist's copy of your tag as a .pspimage file.

Using font or alpha of choice, add desired name to tag. I am using the Creepy alpha and, once I'd composed the name on a separate canvas, used the color changer to get the creepy stuff to match the rest of the the tag.

I have the name centered at H300, V650. Given the alpha I'm using, I didn't need to add a drop shadow to it, but if necessary, add a matching drop shadow to the name.

Drop the white background layer and merge visible. Resize to 75%, 600 x 600 pixels, and save as a .png file and you are all done!

Note that if you are planning on using the tag on Facebook, you may wish to save it as a .jpg as Facebook does not handle .pngs well.

I hope you enjoyed this tutorial. If you should have a problem, please feel free to E-Mail Me and I'll be happy to help you out.

Resolutions Tutorial - Free Scraps

Resolutions - Dianna


This tutorial was written by Dianna Richards of Digicats (and Dogs)/Di Before Dawn Tutorials. Any resemblance to any other tutorial, published or unpublished, living, dead or undead, is purely coincidental.

Please do not rebroadcast, redistribute or otherwise claim this tutorial or any part there of as your own work.


Items you will need to complete this project:

The Resolutions Sampler taggers kit by Gothic Inspirations, which is a FTU kit available for download at the Gothic Inspirations Blog. Be sure to leave a thank you if you download.

If you enjoy working with this sampler, please consider purchasing the PTU kit, which is available at Gothic Inspiration.com.

Tube of choice. I am using Queen of Spades, by Eugene Rzhevskii. You must have a license to use this tube, which is available at Pics for Design.

Mask of choice. I am using the Rope Burns mask by Nik's Scripts & Scraps which is part of her PSP Masks Mega Pack.

Font(s) and/or alpha of choice. I am using the font Century Gothic, which is a windows system font, and the Satin Gold Alpha which is a FTU alpha available at Free Digital Scrapbooking.com.


Note that H# and V# refer to Horizontal and vertical coordinates on your canvas grid. Make sure you have View, Rulers checked in order to see the ruler grid.

When I say "Add to your canvas" I expect that you will copy and paste it as a new layer, unless otherwise state in the tutorial.

This tutorial assumes you have a working knowledge of PSP. It was written using PSP X3, but should work in PSP 8 and up.

To begin, open a new raster layer canvas, 800 x 800 pxl, flood fill white.

Open paper of choice. I am using Paper4_GI_ResolutionsSampler. Layers -> Load/save Mask -> Load Mask from Disk and select mask of choice. I am using Rope Burns by Nik's Scripts and Scraps. Make sure the fit to canvas box is checked, then click on load.

Resize to 90%, then Edit -> Copy Special -> Copy Merged and add to main canvas, centered.

Open Fireworks, resize to 75%, and add to main canvas, centered at H250, V300. Duplicate, and relocate the Copy of Raster 2 to H500, V500.

Open Mesh, and resize to 85%. Add to main canvas, centered. Image -> Free Rotate -> Rotate Left, 18 degrees.

Open Frame2 and resize to 75%. Add to main canvs, centered, Image -> Free Rotate -> Rotate Right, 18 degrees.

Open Word Art, and rotate Left. Add to main canvas centered at H200, V350. Image -> Free Rotate -> Rotate Right, 18 degrees.

Open tube of choice. I am using Queen of Spades by Eugene Rzhevskii. Open the face layer and resize to 75%. Mirror, then copy and add to the main canvas, centered at H450, V350.

On the layers pallet, right click on the frame layer, Raster 4, and duplicate. Then right click on the Copy of Raster 4 -> Arrange -> Bring to Top.

With your selection tool set to rectangle - replace, select the an area of Copy of Raster from from H100, V100 to H600, V500. Tap your delete key.

Selections -> Select none.

Using your eraser tool, erase the bits of the tube that fall below the frame layer.

On the layers pallet, return to the top layer, Copy of Raster 4. Open Ribbon3 and add to main canvas centered at H450, V700. Using your eraser tool, erase the bit of the ribbon that is turned downward.

Open Bubbles and resize to 75%. add to main canvas, centered at H600, V350.

Open Champagne and resize to 50%. Add to main canvas, centered at H650, V575.

Open Bow2 and resize to 35%. Add to main canvas, centered at H660, V650.

Starting with the Mesh layer, Raster 3, on the layers pallet, Add a drop shadow of choice to each of the elements on the main canvas, except for the frame layer copy, Copy of Raster 4 and the word art layer, Raster 5.

I am using offsets, vertical and horizonal of -5 each, opacity of 75, blur of 15 and color of black (#000000).

On the materials pallet, set your foreground color to transparent and your background color to very Dark Red (#341113). This should match the background. Using font of choice, add the copyright information to your tag. For the Queen of Spades tube, that information is:

©Eugene Rzhevskii www.picsfordesign.com Your PFD_License#.

You should also add the background credits and tagged by line at this time. I am using Century Gothic, 4 points, bold and centered. I free rotated the text left, 73 degrees to get it match up to the frame angel.

You can now save the artist's copy of your tag as a .pspimage file.

Using font or alpha of choice, add name of choice to tag. I am using the Satin Gold alpha and have my name centered at H300, V600. Add matching drop shadow to the name.

Drop the white background layer and merge visible. Resize to 75% (600 x 600 pixels) and save as a .png file and you are all done!

Note that if you are planning on using the tag on Facebook, you may wish to save it as a .jpg as Facebook does not handle .pngs well.

I hope you enjoyed this tutorial. If you should have a problem, please feel free to E-Mail Me and I'll be happy to help you out.

Sunday, December 26, 2010

Sweet Dreams (PTU) tutorial

Sweet Dreams - Dianna


This tutorial was written by Dianna Richards of Digicats (and Dogs)/Di Before Dawn Tutorials. Any resemblance to any other tutorial, published or unpublished, living, dead or undead, is purely coincidental.

Please do not rebroadcast, redistribute or otherwise claim this tutorial or any part there of as your own work.


Items you will need to complete this project:

The Darkness Before the Dawn taggers kit Created by Jill, which is a PTU kit that can be purchased exclusively at Digital Chaos.

Tube of choice. I am using The Mansons, by Sky Scraps. This is a PTU tube, and you must have a license to use this tube, which is available at Scraps and the City.

Mask of choice. I am using Grunge97 by Nik's Scripts & Scraps which is part of her PSP Masks Mega Pack.

Font(s) and/or alpha of choice. I am using Century Gothic, which is a Windows system font and the Magik font, which can be downloaded HERE. I am also using the Brushed Metal Alpha by Nettie B. Sadly this alpha is no longer for sale, so use whatever strikes your fancy.


Note that H# and V# refer to Horizontal and vertical coordinates on your canvas grid. Make sure you have View, Rulers checked in order to see the ruler grid.

When I say "Add to your canvas" I expect that you will copy and paste it as a new layer, unless otherwise state in the tutorial.

This tutorial assumes you have a working knowledge of PSP. It was written using PSP X3, but should work in PSP 8 and up.

To begin, open a new raster layer canvas, 800 x 800 pxl, flood fill white.

Open Paper of Choice. I am using DBD_Paper06_cbj. Layers -> Load/Save Mask -> Load Mask from Disk and select mask of choice. I am using Grunge97 by Nik's scripts and Scraps. Make sure the fit to canvas box is checked, then click on load.

Edit -> Copy Special -> Copy Merged and add to main canvas, centered.

Open DBD_gitter1_cbj and add to main canvas, centered.

Open DBD_Frame05_cbj and add to main canvas, centered.

Open tube of choice. I am using the Mansons by Sky Scraps. Resize to 75%, and copy Calque2. Add to main canvas, centered at H350, V400.

Click on the glitter layer to active. Going back the Mansons tube, turn everything off except Calque1. Reset the opacity to 100% on that layer. Using your selection tool, set to rectangle - replace, select the right hand figure - Marilyn - copy and add to main canvas, centered at H600, V475.

With your selection tool, copy the left hand figure - is that supposed to be Rose? Didn't they break up again? - and add to main canvas, centered at H200, V475.

Using your eraser tool, erase the bits of the tubes that fall outside the frame layer, including the bottom of the main tube along the frame. Return to the top layer when you are finished.

Open DBD-Heart01-cbj, resize to 50%, and add to main canvas, centered at H650, V650. Image -> Free Rotate -> Right Right, 15 degrees.

Open DBD_Ribbon01-cbj and add to main canvas, centered at H400, V600.

For the word fall, I wrote the words out on separate canvas, pasted them over one by one, free rotated them at random and merged visible. I use the font Magik, 20 pixels, bold, and centered with the foreground color set to dark purple (#400040) and the background color set to a silver gradient.

To make it easier on you, I've saved my work as a separate image, and you can snag the word fall HERE and just add it the main canvas, centered.

Open DBD-dragonfly-cbj. Resize to 75% and mirror. Add to main canvas, centered at H150, V300.

Click on the frame layer, Raster 3 to activate. Open DBD-bling-cbj and resize to 75%. Add to main canvas, centered at H400, V275. Drag under the frame layer on the layers pallet.

On the materials pallet, set your foreground color to transparent and your background color to white (#000000). Using font of choice, add the copyright information to the tag. For The Mansions tube, that information is:

©SkyScraps www.scrapsandthecity.com Your SatC_License#

You can also add the background credits and tagged my info at this point.

I am using Century Gothic, 4 points, bold and centered and have my credits centered at H350, V675.

Starting with Raster 2 and working upward add a drop shadow to each of the elements on your canvas. I am using offsets, vertical and horizontal of 5 each, opacity of 85%, blur of 15 and color of dark purple (#1b031d).

You can now save the artist's copy of your tag as a .pspimage file.

Using font or alpha of choice, add desired name to the tag. I must really be into word art today because I am using the brushed metal alpha by Nettie B. You can place it where ever you'd like on the tag, depending upon the size and length of name.

Add a matching drop shadow to the name.

Drop the white background layer and merge visible. Resize to 75% (600 x 600 pixels) and save as a .png file and you are all done.

If you are planning on using the tag on Facebook, you might want to save it as a .jpg file, as Facebook's handling of .pngs has changed and the tags look better with the white background on them. For forum use, resize it to 75% again (480 x 480 pixels).

I hope you enjoyed this tutorial. If you should have a problem, please feel free to E-Mail Me and I'll be happy to help you out.
Vampiric Lust (PTU) Tutorial

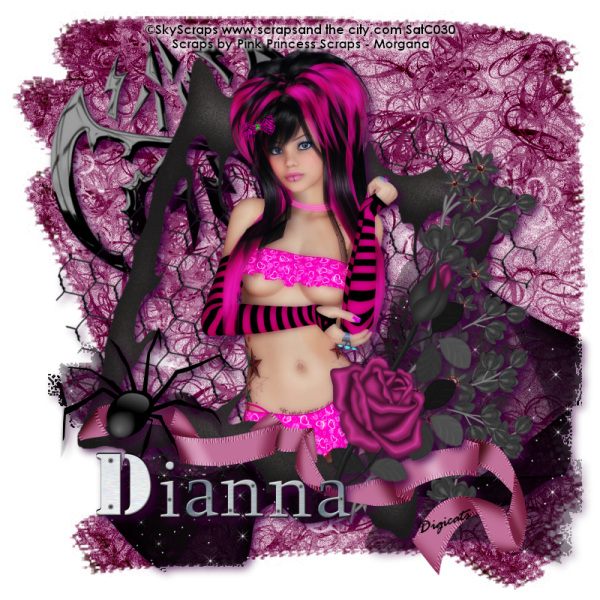
Vampiric Lust - Dianna


This tutorial was written by Dianna Richards of Digicats (and Dogs)/Di Before Dawn Tutorials. Any resemblance to any other tutorial, published or unpublished, living, dead or undead, is purely coincidental.

Please do not rebroadcast, redistribute or otherwise claim this tutorial or any part there of as your own work.


Items you will need to complete this project:

The Vampire Lust taggers kit by Gemini Creationz, which is a PTU kit that can be purchased at GeminiCreationz.com.

Tube of choice. I am using Misfit Vampiric, by Sky Scraps. This is a PTU tube, and you must have a license to use this tube, which is available at Scraps and the City.

Mask of choice. I am using Lightning Bolts by Nik's Scripts & Scraps which is part of her PSP Masks Mega Pack.

Font(s) and/or alpha of choice. I am using Century Gothic, which is a Windows system font and the Bloody Mess alpha, which is a FTU alpha that can be downloaded at Free Digital Scrapbooking.com.


Note that H# and V# refer to Horizontal and vertical coordinates on your canvas grid. Make sure you have View, Rulers checked in order to see the ruler grid.

When I say "Add to your canvas" I expect that you will copy and paste it as a new layer, unless otherwise state in the tutorial.

This tutorial assumes you have a working knowledge of PSP. It was written using PSP X3, but should work in PSP 8 and up.

To begin, open a new raster layer canvas, 800 x 800 pxl, flood fill white.

Open paper of choice. I am using gcz-vl-paper-9. Layers -> Load/Save Mask -> Load Mask from Disk and select mask of choice. I am using Lightning Bolts by Nik's Scripts and Scraps. Make sure the fit to canvas box is checked, then click on load.

Edit -> Copy Special -> Copy Merged and add to main canvas, centered.

Open gcz-vl-sequins and add to main canvas, centered at H400, V600.

Open gcz-vl-moon-stars and resize to 75%. Add to main canvas, centered at H300, V250.

Open gcz-vl-mesh heart and add to main canvas, centered.

Open gcz-vl-blood, and resize to 75%. Add to main canvas, centered at H400, V300.

Open gcz-vl-Winged heart and add to main canvas, centered at H500, V200. Image -> Free Rotate - Rotate Right, 20 degrees.

Open gcz-vl-frame-3 and add to main canvas, centered.

Open tube of choice. I am using Raster 3 from the Misfit Bundle by ©Sky Scraps. Resize to 75%, and add to main canvas, centered.

Using your eraser tool, erase the tube on bottom to match up with the frame edge.

Open gcz-vl-glitter doodle and add to main canvas, centered at h400, V650.

Open gcz-vl-beaded string and add to main canvas, centered at H400 V550.

Starting with sequin layer, Raster 2, on the layers pallet and working upward, add a drop shadow of choice to each of the elements on your main canvas, except for the moon-stars layer. I am using offsets, vertical and horizontal of 5 each, opacity of 85, blur of 15 and color of dark red (#400000).

On the material pallet, set your foreground color to transparent and you background color to white (#ffffff). Using font of choice, add the copyright information to the tag. For the Misfit Vampiric tube, that information is:

©SkyScraps www.scrapsandthecity.com SatC030

I am using Century Gothic, 4 points, bold and centered and then fit my text to path to match the frame. It is beyond the scope of this tutorial to teach you to do that, but if you do not know how to do this, you can find a tutorial for it HERE.

I have my copyright centered at H400, V375.

Using the following settings, add a drop shadow to the copyright text: Offsets of 3 each, opacity of 100%, blur of 5 and color dark red (#400000). Repeat using offsets of -3 each while leaving all other settings the same.

You can now save the artist's copy of your tag as a .pspimage file.

Using font or alpha of choice, add name of choice to the tag. I am using the Bloody Alpha and have my name located at H300, V550. Add a drop shadow shadow matching the rest of the tag (not the copyright) to the name.

Drop the white background layer and merge visible. Resize to 75% (600 x 600 pixels) and save as a .png and you are all done.

If you are planning on using the tag on Facebook, you might want to save it as a .jpg file, as Facebook's handling of .pngs has changed and the tags look better with the white background on them. For forum use, resize it to 75% again (480 x 480 pixels).

I hope you enjoyed this tutorial. If you should have a problem, please feel free to E-Mail Me and I'll be happy to help you out.
Saturday, December 25, 2010

Morgana (PTU) tutorial

Morgana - Dianna


This tutorial was written by Dianna Richards of Digicats (and Dogs)/Di Before Dawn Tutorials. Any resemblance to any other tutorial, published or unpublished, living, dead or undead, is purely coincidental.

Please do not rebroadcast, redistribute or otherwise claim this tutorial or any part there of as your own work.


Items you will need to complete this project:

The Morgana taggers kit by Pink Princess Scraps, which is a PTU kit that can be purchased at Scraps and the City.

Tube of choice. I am using Pink, by Sky Scraps. This is a PTU tube, and you must have a license to use this tube, which is available at Scraps and the City.

Mask of choice. I am using Messy Mesh by Nik's Scripts & Scraps which is part of her PSP Masks Mega Pack.

Font(s) and/or alpha of choice. I am using Century Gothic, which is a Windows systems font, and the Metal Alpha by Katrin's Design.


Note that H# and V# refer to Horizontal and vertical coordinates on your canvas grid. Make sure you have View, Rulers checked in order to see the ruler grid.

When I say "Add to your canvas" I expect that you will copy and paste it as a new layer, unless otherwise state in the tutorial.

This tutorial assumes you have a working knowledge of PSP. It was written using PSP X3, but should work in PSP 8 and up.

To begin, open a new raster layer canvas, 800 x 800 pxl, flood fill white.

Open paper of choice. I am using PP4. Layers -> Load/Save Mask -> Load mask from disk and select mask of choice. I am using Meshy Mess by Nik's Scripts and Scraps.

Edit -> Copy special -> Copy Merged and add to main canvas centered.

Open ele44 and add to main canvas, centered. Image -> Free Rotate -> Rotate Left, 17 degrees.

Open ele5 and add to main canvas, centered. Imge -> Free Rotate -> Rotate Right, 17 degrees.

Open tube of choice. I am using Pink2 by Sky Scraps. Resize to 75% and add to main canvas, centered at H400, V350.

On the layers pallet, right click on the frame layer, Raster 3, and duplicate. Right click on the Copy of Raster 3 -> Arrange ->Bring to top.

With you selection tool set to rectangle - replace, select the top half of the Copy of Raster 3 and delete.

Selections -> Select None.

Using your eraser tool, erase the the bit of the tube layer that is showing below the bottom of the frame. Then return to the top layer.

Open ele20 and add to canvas, centered at H575, V450.

Click on the paper layer, Raster 1 to activate.

Open ele39 and add to main canvas, centered at H400, V550. Using your magic wand tool, click anywhere outside of the masked area on the paper layer, Raster 1. Leaving the area selected, click on the Raster 6 and delete.

Open ele17 and resize to 75%. Add to main canvas, H250, V200. Free rotate -> Rotate Left, 17 degrees.

Click on Raster 5, the top layer, to active. Open ele24 and add to main canvas, centered at H400, V650.

Open ele27 and resize to 75%. Add to main canvas, centered at H500, V550. Use your eraser tool to erase the little bit of the stem (but not the leaves) that is on top of the ribbon

Open ele35 and add to main canvas, centered at H200, V550.

Starting with Raster 6 on the layer pallet and working upward add a drop shadow of choice to each of the elements on the main pallet except for the frame layer copy, Copy of Raster 3. I am using offsets, vertical and horizontal of 5 each, opacity of 85, blur or 15 and color of Dark Purple (#400040).

On the materials pallet, set your foreground color to transparent and your background color to black (#000000). Using font of choice, add copyright information to the tag. For the Pink tube, that information is:

©SkyScaps www.scrapsandthecity.com Your SatC_License#

You may also add the background credits and tagged by info at this point as well.

I am using Century Gothic, 4 points bold and centered, and have my credits centered at H400, V50. Using the following settings, add a white drop shadow to the credits: Offsets of 3 each, opacity of 100%, blur of 5 and color white (#ffffff). Repeat using offsets of -3 each, leaving all other settings unchanged.

You can now save the Artist's Copy of your tag as a .pspimage file.

Using font or alpha of choice, add name of choice to tag. I am using the Metal Alpha by Katrin's Design. I have my name centered at H300, V650, and I have added a drop shadow to it to match the rest of the tag.

Drop the white background layer, and merge visible. Resize to 75% (600 x 600 pixels) and save as a .png file, and you are all done!

If you are planning on using the tag on Facebook, you might want to save it as a .jpg file, as Facebook's handling of .pngs has changed and the tags look better with the white background on them. For forum use, resize it to 75% again (480 x 480 pixels).

I hope you enjoyed this tutorial. If you should have a problem, please feel free to E-Mail Me and I'll be happy to help you out.
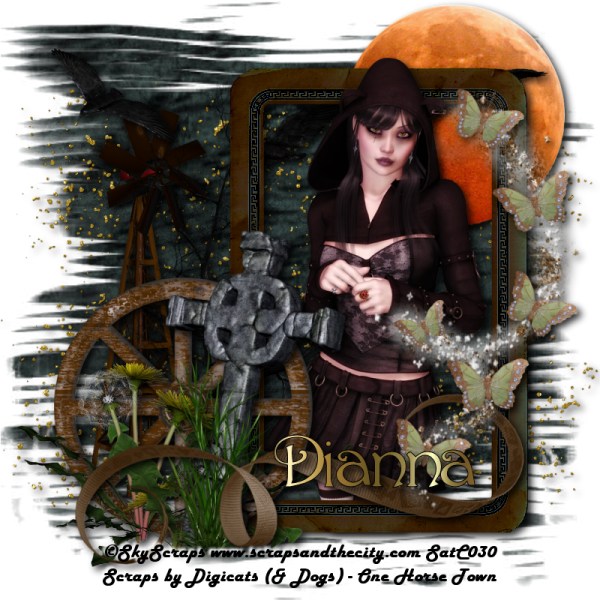
Gold Dust Woman (PTU) Tutorial

Gold Dust Woman - Dianna


This tutorial was written by Dianna Richards of Digicats (and Dogs)/Di Before Dawn Tutorials. Any resemblance to any other tutorial, published or unpublished, living, dead or undead, is purely coincidental.

Please do not rebroadcast, redistribute or otherwise claim this tutorial or any part there of as your own work.


Items you will need to complete this project:

The One Horse Town taggers kit by Digicats (& Dogs), which is a PTU kit that can be purchased at Country Corner Creations.

Tube of choice. I am using Sarah, by Sky Scraps. This is a PTU tube, and you must have a license to use this tube, which is available at Scraps and the City.

Mask of choice. I am using Razor Cuts by Nik's Scripts & Scraps which is part of her PSP Masks Mega Pack.

Font(s) and/or alpha of choice. I am using the fonts Harlow Solid Italic, which you can download from free HERE, and Harrington, which you can snag for free HERE. These are two great fonts to have on hand for your western tags.


Note that H# and V# refer to Horizontal and vertical coordinates on your canvas grid. Make sure you have View, Rulers checked in order to see the ruler grid.

When I say "Add to your canvas" I expect that you will copy and paste it as a new layer, unless otherwise state in the tutorial.

This tutorial assumes you have a working knowledge of PSP. It was written using PSP X3, but should work in PSP 8 and up.

To begin, open a new raster layer canvas, 800 x 800 pxl, flood fill white.

Open paper of choice. I am using DCD_OHT_Paper12. Layers -> Load/Save Mask -> Load Mask from Disk and select mask of choice. I am using Razor Cuts by Nik's Scripts and Scraps. Make sure the fit to canvas box is checked, then click on OK.

Edit -> Copy Special -> Copy Merged and add to main canvas, centered.

Open DCD_OHT_Gold Rush Glitter and add to main canvas, centered.

Open DCD_OHT_Frame07, and rotate right. Add to main canvas centered at H500, V400.

Open tube of choice. I am using Sarah2 by SkyScraps. Resize to 75%, and add to main canvas, centered at H500, V400.

On the layers pallet, right click on the frame layer, Raster 3, and duplicate. Drag Copy of Raster 3 over the tube layer.

With your selection tool set to rectangle - replace, select the top half of Copy of Raster 3 and delete.

Selections -> Select none

Click on Raster 2, the Gold Dust Layer to activate. Open DCD_OHT_Dead Tree, and add to canvas centered at H350, V400.

Click on the frame copy layer, Copy of Raster 3, to activate. Open DCD_OHT_Wagon Wheel02, and resize to 65%. Add to main canvas, centered at H250, V550.

Open DCD_OHT_Wildflower02 and add to main canvas, centered at H250, V625.

Activate Raster 2, the Gold Dust layer again, and open DCD_OHT_Full Moon. Resize to 50%, and add to the main canvas, centered at H600, V150.

Open DCD_OHT_Windmill, and resize to 75%. Add to main canvas, centered at H200, V400.

Open DCD_OHT_Flying Ravens, and add to main canvas, centered at H400, V150.

Activate the Wildflower layer, Raster 7. Open DCD_OHT_Tombstone, and resize to 75%. Add to main canvas, centered at H325, V525.

Open DCD_OHT_Ribbon05, and resize to 75%. Add to main canvas, centered at H400, V650.

Open DCD_OHT_Butterfly Bling and resize to 75%. Add to main canvas, centered at H630, V400.

Starting with Raster 2, the Gold Dust layer and working upward, add a drop shadow of choice to each of the elements in your tag, exept the frame copy, Copy of Raster 3. I am using offsets, vertical and horizontal of 5 each, opacity of 85%, blur of 15 and color black (#000000).

Using font of choice, add the copyright information to the tube. For the Sarah tube, that information is:

©SkyScraps www.scrapsandthecity.com Your SatC_License#

I am using the font Harlow Solid Italic, 6 points, bold and centered and have the copyright centered at H400, V750. You can also add the background credits and tagged by line at this time.

Add white drop shadow to your copyright using the following settings: Offsets 3 each, opacity of 100%, blur of 5 and color white (#ffffff). Repeat using offsets of -3 each and leaving all other settings the same.

You can now save the artists copy of your tag as a .pspimage file.

On the materials pallet, set your foreground color to black (#000000) and your background color to a Metal Brass or Gold Gradient. Using font of choice add desired name to tag.

I am using Harrington, 24 points, bold and centered and have the name centered at H500, V650. Adjust placement to taste. Add a black drop shadow to match the rest of the tag.

Delete the White background layer, and merge visible. Resize to 75% (600 x 600), and save as a .png file and you are all done.

If you are planning on using the tag on Facebook, you might want to save it as a .jpg file, as Facebook's handling of .pngs has changed and the tags look better with the white background on them. For forum use, resize it to 75% again (480 x 480 pixels).

I hope you enjoyed this tutorial. If you should have a problem, please feel free to E-Mail Me and I'll be happy to help you out.
Friday, December 24, 2010

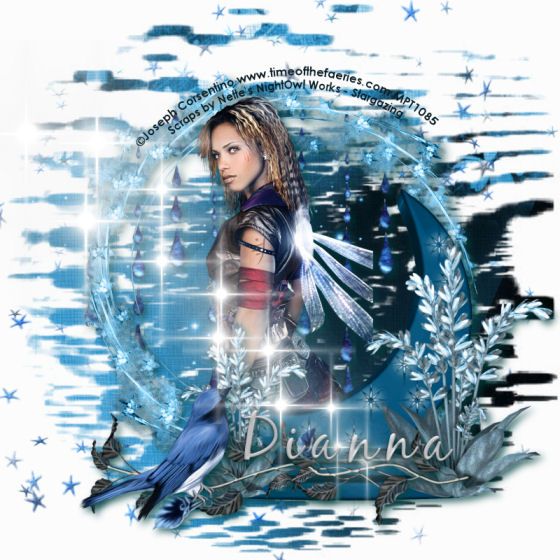
Blue Moon (PTU) Tutorial

Blue Moon - Dianna


This tutorial was written by Dianna Richards of Digicats (and Dogs)/Di Before Dawn Tutorials. Any resemblance to any other tutorial, published or unpublished, living, dead or undead, is purely coincidental.

Please do not rebroadcast, redistribute or otherwise claim this tutorial or any part there of as your own work.


Items you will need to complete this project:

The Stargazing taggers kit by Nette's Nightowl Work which is a PTU kit available at Stargazer Scraps.

Tube of choice. I am using Myst, by Joseph Corsentino. Mr. Corsinto has left MyPSPTube.com as of this writing, so his tubed are is no longer available. However, this tube was written to work with just about any mid-close up tube, so you should have no problem finding something suitable to drop in there.

Mask of choice. I am using the Moon Reflection mask by Nik's Scripts & Scraps which is part of her PSP Masks Mega Pack.

Font(s) and/or alpha of choice. I am using Century Gothic which is a windows system font and the Metallic Gel alpha, which is a FTU alpha that you can download from Free Digital Scrapbooking.


Note that H# and V# refer to horizontal and vertical coordinates on your canvas ruler grid. Make sure you have View -> Rulers checked in order to see the ruler grid.

When I say "Add to your canvas" I expect that you will copy and paste it as a new layer, unless otherwise stated in the tutorial.

This tutorial assumes you have a working knowledge of PSP. It was written using PSP X3, but should work in PSP 8 and up.

To begin, open a new raster layer canvas, 800 x 800 pxl, flood fill white.

Open Paper of choice. I am using NNW sg paper1. Layers -> Load/Save Mask -> Load Mask from Disk and select mask of choice. I am using Moon Reflection by Nik's Scripts and Scraps. Make sure the fit to canvas box is checked, then click on load.

Image -> Resize -> 90%.

Edit -> Copy special -> Copy merged and add to main canvas, centered.

Open nnw sg dark raindrops, resize to 90% and add to main canvas, centered.

Open nnw sg star circle and add to main canvas, centered.

Open Tube of choice. I am using psp12483-SCCorsentino-Myst. Copy the tube layer and add to main canvas, centered.

Right click on the frame layer, Raster 3 and duplicate. Drag the copy of Raster 3 over the tube layer.

with your selection tool set to Rectangle - Replace, select the top half of the frame copy and delete.

Selections -> Select none.

Using your eraser tool, erase the bits of the tube that fall the below the frame layer on the bottom.

Click on Raster 3 to activate. With your magic wand tool, click anywhere outside the frame layer to select. Leaving the area selected, click on Raster 2, the raindrops layer, and delete.

Click on copy of Raster 3 to activate.

Open nnw sg moon flowers, and resize to 60%. Add to main canvas, centered at H525, V500.

Open nnw sg vine and rotate left. Resize to 600 pixels. Add to canvas, centered at H400, V675.

open nnw sg blue bird and resize to 25% Add to main canvas, centered at H225, V650.

open nnw sg whitish sparkles and add to main canvas, centered at H250, V400.

Click the white background layer to activate. Open nnw star bling and add to canvas as a new layer, centered.

Starting with Raster 2, the rain layer, add a drop shadow to the elements on your main canvas except the frame layer copy, copy of Raster 3, and the Whitish Sparkles.

I am using offsets, vertical and horizontal of 5 each, opacity of 75%. blur of 15 and color of dark teal (#004040).

on the materials pallet, set your foreground color to transparent and your background color to #091c23 (dark teal green). Using font of choice, add copyright information to the tag. For the Myst tube, that information is:

©Joseph Corsentino www.timeofthefaeries.com Your MPT_License#

I am using Century Gothic, 4 points, bold and centered. I then fit the text to patch to match the frame. It is beyond the scope of this tutorial to explain how to do that, but you can find a tutorial for it HERE.

You can now save the artist's copy of your tag as a .pspimage file.

Using font or alpha of choice, add name of choice to tag. I am using the Metal Gel alpha and have my name centered at H500, V625. Add a matching drop shadow to the name.

Merge visible and resize to 75% (600 x 600 pixles). Save as a .jpg file, and you are all done!

I hope you enjoyed this tutorial. If you should have a problem, please feel free to E-Mail Me and I'll be happy to help you out.
Thursday, December 23, 2010

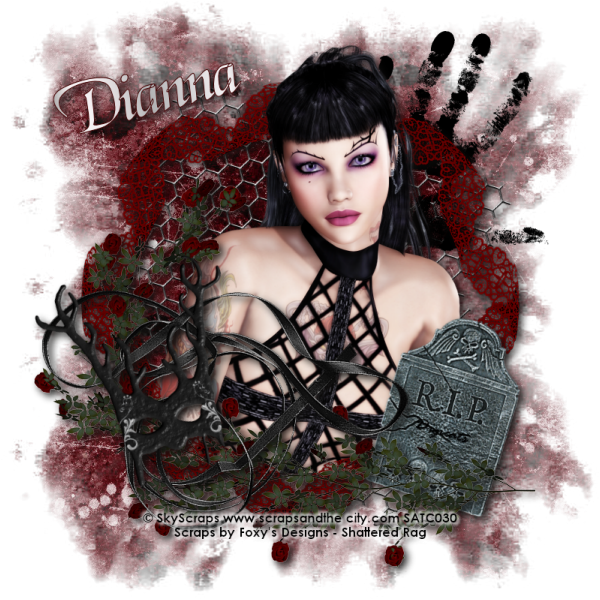
Shattered Rage (PTU) tutorial

Shattered Rage - Dianna


This tutorial was written by Dianna Richards of Digicats (and Dogs)/Di Before Dawn Tutorials. Any resemblance to any other tutorial, published or unpublished, living, dead or undead, is purely coincidental.

Please do not rebroadcast, redistribute or otherwise claim this tutorial or any part there of as your own work.


Items you will need to complete this project:

The Shattered Rage taggers kit by Foxy's Designs which is a PTU kit available at Stargazer Scraps.

Tube of choice. I am using Erica, by Sky Scraps. This is a PTU tube, and you must have a license to use this tube, which is available at ScrapsandtheCity.com.

Mask of choice. I am using the MysticalFog mask by Nik's Scripts & Scraps which is part of her PSP Masks Mega Pack.

Font(s) and/or alpha of choice. I am using Century Gothic which is a windows system font and Magik, which is a FTU font that can be download HERE.


Note that H# and V# refer to horizontal and vertical coordinates on your canvas ruler grid. Make sure you have View -> Rulers checked in order to see the ruler grid.

When I say "Add to your canvas" I expect that you will copy and paste it as a new layer, unless otherwise stated in the tutorial.

This tutorial assumes you have a working knowledge of PSP. It was written using PSP X3, but should work in PSP 8 and up.

To begin, open a new raster layer canvas, 800 x 800 pxl, flood fill white.

Open paper of choice. I am using Paper3_FD. Layers -> Load/Save Mask -> Load Mask from Disk and select mask of choice. I am using MysticalFog by Nik's Scripts and Scraps. Make sure the fit to canvas button is checked, then click on load.

Edit -> copy special -> copy merged and add to main canvas, centered.

Open Mesh_FD and add to main canvas, centered. Image -> Free Rotate -> Rotate right, 17 degrees.

Open Hand_FD and resize to 50%. Add to main canvas, centered at H600, V200.

Open Frame3_FD and add to main canvas, centered.

Open SkyScraps-Erica-CU and resize to 75%. Add to main canvas, centered at H375, V350.

On the layers pallet duplicate the frame layer - Raster 4 - and drag the copy over the tube layer.

With your selection tool set to Rectangle - Replace, highlight the top of the frame and delete.

Selections -> Select none.

Using your eraser tool, erase the bits of the tube that fall beyond the frame on the lower left hand side.

Open Roses2_FD and rotate right. Image -> Mirror. Add to main canvas, centered at H375, V500.

Open Ribbon3_FD and resize to 75%. Add to main canvas, centered at H300, V550.

Open Mask1-FD, and resize to 15%. Add to main canvs, centered at H200, V500. Image -> Free Rotate -> Rotate left, 15 degrees.

On the layers pallet, click on the frame copy layer - Copy of Raster 5. Open Tombstone_FD and resize to 75%/ add to main canvas, centered at H600, V550.

Image -> Free Rotate -> Rotate Right, 17 degrees.

Starting with Raster 2, the chain link layer and working upward, add a drop shadow to each of the elements on the main canvas, except for the hand print, Raster 3, and the Frame copy, Copy of Raster 4.

I am using offsets, vertical and horizontal of 5 each, opacity of 75, blur of 15 and color black (#000000).

On the materials pallet, set your foreground color to transparent, and your background color to black (#000000). Using font of choice, add the copyright information to the tag. For the Erica tube, that information is:

©SkyScraps www.scrapsandthecity.com Your SatC_License#.

I am using Century Gothic, 4 points, bold and centered and have the copyright centered at H400, V700 on my main canvas. You can also add the background credits and tagged by information at this point.

Using the following settings add a drop shadow to the credits: offsets of 3 each, opacity of 100%, blur of 5, color white (#ffffff). Repeate using offsets of -3 each but leaving all other settings the same.

You can now save the artist's copy of your tag as a .pspimage file.

Using font or alpha of choice add name of choice to tag. I am using the font Magik, 14 points, bold and centered, and have my foreground color set to dark red (#400000) and my background color set to a metallic gradient.

I centered the name at H200, V150, then free rotated left, 15 degrees. Finally I add a drop shadow to match the rest of the tag.

Drop the white background layer and merge visible. Resize to 75% (600 x 600 pixels) and save as a .png file and you are all done.

Note that if you are planning on using the tag on Facebook, you may wish to save it as a .jpg as Facebook does not handle .pngs well.

I hope you enjoyed this tutorial. If you should have a problem, please feel free to E-Mail Me and I'll be happy to help you out.
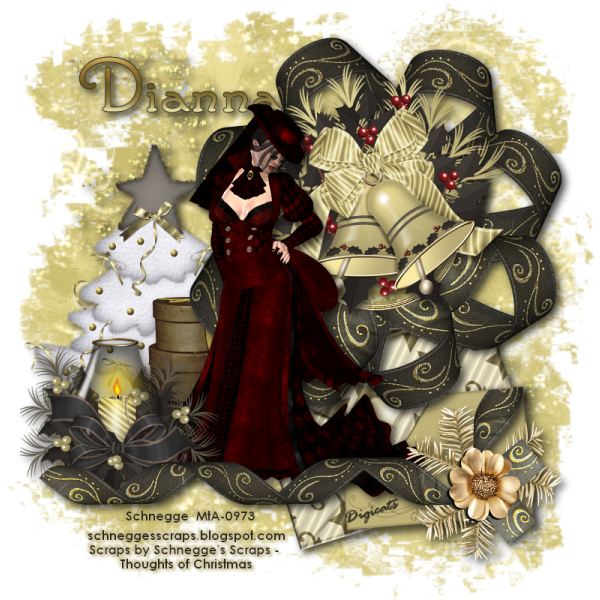
An Elegant Christmas

An Elegant Christmas - Dianna


This tutorial was written by Dianna Richards of Digicats (and Dogs)/Di Before Dawn Tutorials. Any resemblance to any other tutorial, published or unpublished, living, dead or undead, is purely coincidental.

Please do not rebroadcast, redistribute or otherwise claim this tutorial or any part there of as your own work.


Items you will need to complete this project:

The very beautiful Thoughts of Christmas taggers kit by Schnegge's Scraps. This is a PTU taggers kit that is available exclusively at My Tubed Art.

Tube of choice. I am using Morgan1 by Schnegge. This is a PTU tube and you must have a license to use it, which is available at My Tubed Art.

Mask of choice. I am using the Pixelated Edges mask by Nik's Scripts & Scraps which is part of her PSP Masks Mega Pack.

Font(s) choice. I am using Century Gothic, which is a windows system font, and Santa's Sleigh which is a FTU font that be downloaded from Free Digital Scrapbooking.


Note that H# and V# refer to horizontal and vertical coordinates on your canvas grid. Make sure you have View -> Rulers checked in order to see the ruler grid.

When I say "Add to your canvas" I expect that you will copy and paste it as a new layer, unless otherwise state in the tutorial.

This tutorial assumes you have a working knowledge of PSP. It was written using PSP X3, but should work in PSP 8 and up.

Open a new raster layers canvas, 800 x 800 pxls, flood filled White.

Open Paper of choice. I am using P10_TOC_Schnegge. Layers -> Load/Save Mask -> Load mask from disk and select mask of choice. I am using Pixelated Edges by Nik's Scripts and scraps. Make sure the fit the canvas box is checked, then click on load.

Resize to 115%. Edit -> Copy Special -> Edit Copy Merged and add to main canvas, centered.

Open Fairydust_TOC_Schnegge and add to main canvas, centered.

Open Card01_TOC_Schnegge and add to main canvas, centered at H550, V600. Image -> Free Rotate -> Rotate left, 17 degrees.

Open Tree03_TOC_Schnegge, and add to main canvas, centered at H200, V400.

Open Present01_TOC_Schnegge, and resize to 50%. Add to main canvas, centered at H250, V500.

Open Frame04_TOC_Schnegge, and add to main canvas, centered at H500, V300.

Open BellsAndHollies_TOC_Schnegge and resize to 75%. Add to main canvas, centered at H500, V250.

Open Schnegge-Morgan1 Copy the tube layer and add to main canvas, centered at H350, V400.

Open Candle01_TOC_Schnegge and resize to 75%. Add to main canvas, centered at H160, V560.

Open Ribbon02_TOC_Schnegge and add to main canvas, centered. With your selection tool set to rectangle - replace, select the part of the ribbon that is going up the right hand side of the main canvas, from V510 to the top. Delete.

Selections -> Select none.

Use your eraser tool to erase just enough of the stub of the ribbon to make it match the top of card01.

Starting with Raster 2 on your layers pallet and working upward, add a drop shadow of choice to each of the elements on your main canvas. I am using offsets, vertical and horizontal of 5 each, opacity of 85, blur of 15 and color of #11100f.

On your materials pallet, set your foreground color to transparent and your background color to #2e2a21. Using font of choice, add copyright information to your tag. For the Morgan1 tube, that informations is:

©Schnegge schneggesscraps.blogspot.com Your MtA_License#

You may also add the background credits and tagged by information at this time. I am using Century Gothic, 4 points, bold and centered. My credits are centered at H250, 720.

Using the following settings, add a drop shadow to your credits: Offsets of 3 each, opacity 100%, blur 5, color #bcb078. Repeat using offsets of -3 each with all other settings remaining the same.

You can now save the Artist's Copy of your tag as a .PSPImage file.

Using font or alpha of choice, add desired name to tag. I using the font Santa's Sleigh. I have my foreground color set to #2e2a21 and my background color set to a Metallic Brass gradient. I am using 24 points, bold and center, and I have the name centered at H250, V125.

Add a matching drop shadow to the name.

Drop the white background layer, and merge visible. Resize to 75% (600 x 600 pixels) and save as a .png file and you are all done.

Please note that if you are planning on using this tag on Facebook you may want to save it as a .jpg file with a white background, as Facebook does not handle .pngs well.

I hope you enjoyed this tutorial. If you should have a problem, please feel free to E-Mail Me and I'll be happy to help you out.

Wednesday, December 22, 2010

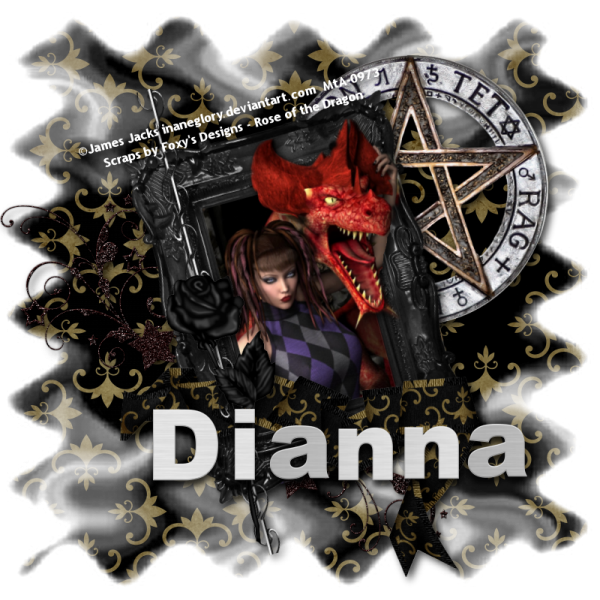
Queen of Dragons (PTU) tutorial

Queen of Dragons - Dianna


This tutorial was written by Dianna Richards of Digicats (and Dogs)/Di Before Dawn Tutorials. Any resemblance to any other tutorial, published or unpublished, living, dead or undead, is purely coincidental.

Please do not rebroadcast, redistribute or otherwise claim this tutorial or any part there of as your own work.


Items you will need to complete this project:

The Rose of the Dragon taggers kit by Foxy's Designs which is a PTU kit available at Stargazer Scraps.

Tube of choice. I am using And you wanted, by James Jacks. This is a PTU tube, and you must have a license to use this tube, which is available at My Tubed Art.

Mask of choice. I am using the SmokeBeforeFire mask by Nik's Scripts & Scraps which is part of her PSP Masks Mega Pack.

Font(s) and/or alpha of choice. I am using Trebuchet MS which is a windows system font and the Brushed Metal alpha by Nettie B. This is an alpha I've had for quite a few years, and it is no longer available, so please find something that you like and use that.


Note that H# and V# refer to horizontal and vertical coordinates on your canvas ruler grid. Make sure you have View -> Rulers checked in order to see the ruler grid.

When I say "Add to your canvas" I expect that you will copy and paste it as a new layer, unless otherwise stated in the tutorial.

This tutorial assumes you have a working knowledge of PSP. It was written using PSP X3, but should work in PSP 8 and up.

To begin, open a new raster layer canvas, 800 x 800 pxl, flood fill white.

Open Paper of choice. I am using Paper7_FD. Layers -> Load/Save Mask -> Load Mask from Disk and select mask of choice. I am using SmokeBeforeFire by Nik's Scripts and Scraps. Make sure the fit to canvas box is checked, then click on load.

Edit -> Copy Special -> Copy Merged and add to main canvas, centered.

Open tube of choice. I am using "And you wanted" by James Jacks. Copy Background, resize to 50%, copy and paste as a new image.

Image -> Free Rotate -> Rotate Left, 15 degrees.

Open Frame1_FD and add to main canvas, centered. Image -> Free Rotate -> Rotate Left, 15 degrees.

Using your pick tool resize the tube to fit to the outside (not the inside) edges of the frame. Use your eraser tool to erase any bits of the tube that appear outside the frame on the left and bottom sides.

Click the eye next to the frame to make it invisible. Set your magic lasso (freehand selection) tool to Edge Seeker - Replace. Careful select the dragon's head and the girl's arm with the tool. Don't worry. If you screw up you can use your eraser tool to erase the bits back in if need be.

Once you have finished selecting the dragon's head, go to Selections -> Promote selection to layer.

Selections -> Select None.

Click on the eye next to raster 3 and use your eraser tool at this point to make any adjustments necessary to the head.

On the layers pallet, right click on the Promoted Selection layer and go to Arrange -> Bring to top.

Turn on the tube layer and the frame layer. It should look like the dragon is now coming out of the frame.

Add to drop shadow to the Promoted Selection layer only. I am using offsets, vertical and horizontal of 5 each, opacity of 75, blur of 15 and color black (#000000).

Hide the background layer and the paper layer (Raster 1) and to to Layers -> Merge -> Merge visible. Then turn the background and paper layer back on. Relocate your merged tube to the center of the canvas, as it likely drifted a bit off center during all of that.

Click on the paper layer (Raster 1). Open Doodle2_FD, and add to main canvas centered at H300, V500.

Open Pent_FD, and resize to 75%. Add to main canvas, centered at H550, V250.

Click on the Merged layer to activate. Open Ribbon1_FD, and resize to 75%. Copy and add to main canvas, centered at H400, V625.

Open Wire_FD and rotate right. Add to main canvas, centered at H280, V430. Image -> Free Rotate -> Rotate Left, 15 degrees.

Open Rose1_FD and resize to 75%. Add to main canvas centered at H300, V550.

Starting with the doodle layer (which should be Raster 2) and working upward add a drop shadow to each of the elements on the main canvas. Use the same settings you used on the dragon head, earlier.

On the materials pallet, set your foreground color to transparent and your background color to white (#ffffff). Using font of choice add the copyright information to the tag. For the James Jacks tube, that information is:

©James Jacks inaneglory.deviantart.com Your MtA-License#

I am using Trebuchet MS, 4 points, bold and centered. I then free rotated them left, 15 degrees and located the copyright at H310, V160, right along the top of the frame. Add a matching drop shadow to the credits.

You can now save the artist's Copy of your tag as a .pspimage file.

Using font or alpha of choice, add name of choice to the tag. I am using the Brushed Metal Alpha by Nettie B. I've had this one for several years now and it is, unfortunately no longer available, so pick something that works for you.

I have my name centered at H550, V600 for the longer names and H500, V600 for the shorter names. Once you have added the name, add a matching drop shadow.

Drop the white background layer and merge visible. Resize to 75% (600 x 600 pixels) and save as a .png file and you are all done!

Note that if you are planning on using the tag on Facebook, you may wish to save it as a .jpg as Facebook does not handle .pngs well.

I hope you enjoyed this tutorial. If you should have a problem, please feel free to E-Mail Me and I'll be happy to help you out.

Lil Winter Friends (PTU) tutorial

Lil Winter Friends - Dianna


This tutorial was written by Dianna Richards of Digicats (and Dogs)/Di Before Dawn Tutorials. Any resemblance to any other tutorial, published or unpublished, living, dead or undead, is purely coincidental.

Please do not rebroadcast, redistribute or otherwise claim this tutorial or any part there of as your own work.


Items you will need to complete this project:

The Lil Winter Girl taggers kit by Schnegge's Scraps. This is a PTU taggers kit that is available at My Tubed Art, Twilight Scraps and Dreaming Scrappers.

I am using one of the poser tubes included in the kit, so you don't need a tube, unless you desire one.

Wee Scots Mask #117 which you can download HERE.

Font(s) choice. I am using Santa's Sleigh which is a FTU font that be downloaded from Free Digital Scrapbooking.

The Les Reves de l'Hiver alpha by Digiscrap.ch, which is a free to use alpha (full size and comes in 11 different varieties), which you can download from the link provided.


Note that H# and V# refer to horizontal and vertical coordinates on your canvas grid. Make sure you have View -> Rulers checked in order to see the ruler grid.

When I say "Add to your canvas" I expect that you will copy and paste it as a new layer, unless otherwise state in the tutorial.

This tutorial assumes you have a working knowledge of PSP. It was written using PSP X3, but should work in PSP 8 and up.

Open a new raster layers canvas, 800 x 800 pxls, flood filled White.

Open paper of choice. I am using p06_LWG_Schnegge. Edit -> Load/Save Mask -> Load Mask from Disk and select Wee Scot Lass mask #117. Make sure the fit to canvas box is check, then click on load.

Edit -> Copy Special -> Copy Merged and add to main canvas, centered.

open icicles_LWG_Schnegge and add to main canvas, centered at H400, V250.

With your magic wand, click anywhere outside the masked paper are on Raster 1 to select. Leaving the area select, activate Raster 2 - the icicle layer - and press delete.

Selections -> Select none.

Open glitter_LWG_Schnegge and add to main canvas, centered. Right click on the glitter layer (Raster 3) and select arrange -> move down.

Open frame4_LWG_Schnegge and add to main canvas, centered.

Click on Raster 2 to activate. Open WinterGirl03_LWG_Schnegge and add to main canvas, centered at H400, V425.

Open bear_LWG_Schnegge and resize to 75%. Add to main canvas centered at H500, V525.

Open your magic lasso and set it for Edge Seeker, replace. Make the Bear invisible by clicking on the little eye icon, then click on Raster5.

Using your magic lasso, carefully select the girl's arm where it would be hidden by the bear. Once you have finished selecting it, go to selections -> promote selection to lay.

Do the same with the fur cuff and boot of the winter girl.

Selections -> select none.

Make the bear visible again and right lick on the layer (Raster 6). Go to Arrange -> Move down. Repeat.

If you need to, use your eraser tool to fine tune the selections so the girl appears to be holding the bear.

Open Skater_LWG_Schnegge and resize to 75%. Click on the frame layer, Raster 4 to activate, then add the skater to your main canvas, centered at H250, V400.

Open Tree01_LWG_Schnegge, and resize to 75%. Add to main canvas, centered at H600, V400.

Open Ribbon01_LWG_Schnegge and rotate right. Click on the top layer (One of the Promoted layers) on your layers pallet. Add the ribbon to your main canvs, centered at H400, V650.

Open Flower01_LWG_Schnegge and resize to 75%. Add to main canvas, centered at H650, V600.

Open Twig_LWG_Schnegge and go to Image -> Mirror. Resize to 75%. On the layers pallet, click on Raster 8 - the tree layer to activate. Add the twig to the main canvas, centered at H300, V500.

Starting with Raster 4 on the layers pallet and working upward add a drop shadow to choice to the elements on your main canvas. I am using offsets, vertical and horizontal of 5 each, opacity ot 75, blur of 15 and color dark teal (#004040).

Using font of choice, add copyright information to the tag. That information is:

©Schnegge schneggesscraps.blogspot.com Your MtA_License# (if you purchased this kit from MtA).

I am using Santa's Sleigh, 6 points, bold and centered and have the foreground color set to transparent on my materials pallet, and the background color set to Dark Teal (#004040).

I then free rotate the text 90 degrees left and have it centered on the right hand side of the tag at H700, V350.

Add a drop shadow to the text with the following settings. Offsets of 3 each, opacity of 100, blur of 3, color white (#ffffff). Repeat using offsets of -3 each with all other settings remaining the same.

Open flakes_n_sparkles_LWG_Schnegge and add to main canvas, centered at H200, V400. Add a drop shadow to match the rest of the tag.

You can now save the artist's copy of your tag as a .pspimage file.

Using font or alpha of choice add name of choice to tag. I am using the Les Reves de l'Hiver alpha, which is a FTU alpha.

I have the name centered at H400, V125, although it would work just as well down at the bottom of the tag. placement is up to you.

Open paw print_LWG_Schnegge and resize to 25%. Add to the main canvas so that is lines up on the first letter of the name you are using. Free rotate -> Rotate Right, 15 degrees.

Right click it on the layers pallet and go to Arrange -> Move down (or drag it under the name on the layers pallet).

Add a matching drop shadow to the paw print and the name.

Drop the white background layer and merge visible. Resize to 75% (600 x 600 pixels) and save as a .png file. Please note that if you are planning on using this tag on Facebook you may want to save it as a .jpg file with a white background, as Facebook does not handle .pngs well.

I hope you enjoyed this tutorial. If you should have a problem, please feel free to E-Mail Me and I'll be happy to help you out.
Snowball Fight (PTU) tutorial

Snowball Fight - Dianna


This tutorial was written by Dianna Richards of Digicats (and Dogs)/Di Before Dawn Tutorials. Any resemblance to any other tutorial, published or unpublished, living, dead or undead, is purely coincidental.

Please do not rebroadcast, redistribute or otherwise claim this tutorial or any part there of as your own work.

Note: this is a rewrite of a tutorial I did on 12 December, 2009, using a different kit. You can view the original tutorial HERE.


Items you will need to complete this project:

The Kiss of Winter 2 taggers kit by Schnegge's Scraps. This is a FTU taggers kit that you may download from Schnegge's Blog, HERE.

Tube(s) of choice. I am using Winter Girl, also by Schnegge's Scraps. This is a PTU commercial use pack that is available at My Tubed Art.

Wee Scots Mask #222 which you can download HERE.

Font(s) choice. I am using MS Gothic which is a Windows System font. If you do not have it, you can download it HERE.

The Les Reves de l'Hiver alpha by Digiscrap.ch, which is a free to use alpha (full size and comes in 11 different varieties), which you can download from the link provided.


Note that H# and V# refer to horizontal and vertical coordinates on your canvas grid. Make sure you have View -> Rulers checked in order to see the ruler grid.

When I say "Add to your canvas" I expect that you will copy and paste it as a new layer, unless otherwise state in the tutorial.

This tutorial assumes you have a working knowledge of PSP. It was written using PSP X1 (and re-written in PSP X3), but should work in PSP 8 and up.

Open a new raster layers canvas, 800 x 800 pxls, flood filled White.

Open paper of choice, I am using p14_KOW_Schnegge. Layers -> Load/Save Mask -> Load Mask from Canvas and find Wee Scots Lass mask #222. Make sure the "Fit to Canvas" button is checked, and click on load.

Open WinterGirl13. Resize to 50% and add to canvas, centered at H250, V325.

Open Snowflake_KOW_Schnegge and add to Main canvas, centered at H600, 150.

Using your magic wand, click anywhere outside the masked area of Raster 1, the paper layer to select. With the area still selected, click on Raster 3, the snowflake layer, and press the delete key.

Open snowtree_KOW-Schnegge and resize to 45%. Add to the main canvas, centered at H250, V560.

Open Frame03_KOW_Schnegge and add to main canvas, centered at H250, V300.

Click on the frame layer to activate, then click anywhere outside of the frame with your magic wand.

With the area still selected, click on the WinterGirl13 layer (Raster 3) on the layers pallet, and then press the delete key. This will erase any part of the WinterGirl tube that is outside the frame area.

Selections -> Select None.

On the layers pallet, right click on the frame layer and duplicate. Relocate duplicate to H550, V5250.

Open WinterGirl14_Schnegge. Image -> Mirror, then resize to 50%. Add to main canvas, centered at H550, V550. On the Layer Pallet, drag the frame layer copy (Copy of Raster 6) over the Winter Girl, Raster 7.

Click on the frame layer to activate, then click anywhere outside of the frame with your magic wand.

With the area still selected, click on the WinterGirl14 layer (Raster 7) on the layers pallet, and then press the delete key. This will erase any part of the WinterGirl tube that is outside the frame area.

Selections -> Select None.

On the layers pallet, click on the Frame Copy layer (Copy of Raster 6) to activate.

Open penguin_KOW_Schnegge, and add to canvas, centered at H300, V580.

Open bells_KOW_Schnegge, and add to canvas, centered at H415, V220.

Erase the bit of the bell ribbon that falls about the masked part of the paper layer, raster 1.

On the materials pallet, set your foreground color to the transparent and the background color to Dark Blue (#000040). Using font of choice, add the copyright information to the tube. For the Winter Girls, that information is:

©Schnegge schneggesscraps.blogspot.com Your MtA_License#.

You can also add the background credits and tagged by info at this time. I am using MS Gothic, 4 points centered and bold. I then free rotate the text 90 to the left and centered my credits at H70, V450.

Starting with layer 2 - the WinterGirl13 layer - on the layer pallet and working upward, add a drop shadow of choice to the elements on your main canvas (except for the copyright).

I am using offsets, vertical and horizontal of 5 each, opacity of 85, blur of 15 and color of Blue Black (#01010f).

You can now save the artist's copy of your tag as a .pspimage.

Using font or alpha of choice add desired name to the tag. I am using the "Les Reves de l'Hiver" alpha by Digiscrap.ch. I have the named centered at H400, V375, and add a matching drop shadow to the name.

Drop the white background layer and merge visible. Resize to 75% (600 x 600 pixels) and save as a .png file. Please note that if you are planning on using this tag on Facebook you may want to save it as a .jpg file with a white background, as Facebook does not handle .pngs well.

I hope you enjoyed this tutorial. If you should have a problem, please feel free to E-Mail Me and I'll be happy to help you out.

Tuesday, December 21, 2010

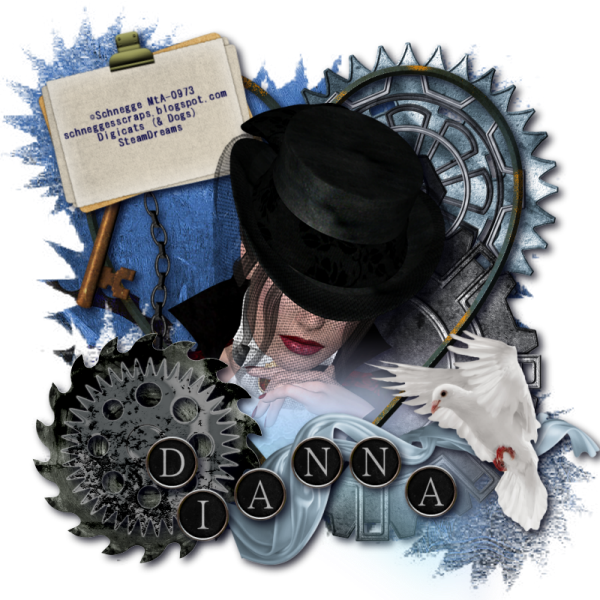
Steam Dreams (PTU) tutorial

Steam Dreams - Dianna


This tutorial was written by Dianna Richards of Digicats (and Dogs)/Di Before Dawn Tutorials. Any resemblance to any other tutorial, published or unpublished, living, dead or undead, is purely coincidental.

Please do not rebroadcast, redistribute or otherwise claim this tutorial or any part there of as your own work.


Items you will need to complete this project:

My Steam Dreams taggers kit. This is my new PTU kit that can be purchased Exclusively at Stargazer Scraps.

Tube of choice. I am using Black Hat, by Schnegge. This is a PTU tube, and you must have a license to use this tube, which is available at My Tubed Art.

Mask of choice. I am using Spockets&Gears by Nik's Scripts & Scraps which is part of her PSP Masks Mega Pack.

Font(s) choice. I am using MS Gothic which is a Windows System font. If you do not have it, you can download it HERE.

The Black Typewriter Keys alpha by Rachael Hudnall.


Note that H# and V# refer to Horizontal and vertical coordinates on your canvas grid. Make sure you have View, Rulers checked in order to see the ruler grid.

When I say "Add to your canvas" I expect that you will copy and paste it as a new layer, unless otherwise state in the tutorial.

This tutorial assumes you have a working knowledge of PSP. It was written using PSP X3, but should work in PSP 8 and up.

To begin, open a new raster layer canvas, 800 x 800 pxl, flood fill white.

Open paper of choice. I am using DCD_StDr_Paper10. Layers -> Load/Save Mask -> Load Mask from Disk and select mask of choice. I am using the Sprockets & Gears mask from Nik's Scripts and Scraps. Make sure the fit to canvas button is checked, then click on load.

Edit -> Copy Special -> Copy Merged and add to main canvas, centered.

Open DCD_StDr_Cog03 and add to main canvas, centered at H550, V250.

Open DCD_StDr_Cog01 and add to main canvas, centered at H500, V500.

Open DCD_StDr_Frame12 and add to main canvas, centered.

Open tube of choice. I am using Black Hat by Schnegge. Copy Layer 1, and add to main canvas, centered at H350, V400.

On the layers pallet, right click on the frame layer (Raster 4) and duplicate. Drag over the frame layer copy (Copy of Raster 4) over the tube layer.

With your selection tool set to rectangle, replace, select the top half of the frame copy and delete.

Selections -> Select none.

Using your eraser tool, erase the bits of the tube to either side of frame.

Stay on the tube layer. Open DCD_StDr_Aurora01, and resize to 75%. Add to main canvas, centered at H400, V700.

Click on frame copy layer (Copy of Raster 4) to activate.

Open DCD_StDr_Sawblade, and resize to 50%. Add to main canvas, centered at H200, V600.

Open DCD_StDr_Gear02, and resize to 50%. Add to main canvas, centered at H200, V600.

Open DCD_StDr_Ribbon06, resize to 65%, and add to main canvas, centered at H550, V650.

Open DCD_StDr_Dove, and resize to 75%. Add to main canvas, centered at H600, V575.

Open DCD_StDr_Tag02. On the materials pallet, set your foreground color to transparent and your background color to dark blue (#000040). Using font of choice, add copyright information to the tag. I am using MS Gothic, 6 points, bold and centered.

For the Black Hat tube that information is:

©Schnegge schneggesscraps.blogpsot.com Your MtA-License#

You may also add the background credits and tagged by information at this point. Merge down and resize your tag to 75%.

on the layers pallet, click on the frame layer (Raster 4) to active. Copy the modified DCD_StDr_Tag02, and add to main canvas, centered at H200, V50. Image -> Free Rotate -> Rotate Left -> 15 degrees.

Starting with Raster 2 on the layers pallet and working upward, add a drop shadow of choice to each of the elements on your main tag except for the Aurora layer and the Frame copy layer (Copy of Raster 4).

I am using offsets, vertical and horizontal of 5 each, opacity of 85%, blur of 15, and color Blue Black (#01010f).

You can now save the Artist's Copy of your tag as a .pspimage file.

Using font or alpha of choice, add desired name to the tag. I used the Black Typerwriter Key Alpha. Once I had composed the name, I used Adjust -> Brightness and Contrast -> Brightness/Contrast -> Brightness -35, Contrast 11 to darked the keys and make them look bolder.

I have the name centered at H400, V650, and have added a matching Drop Shadow to the name.

Delete the White Background layer, and merge Visible. Resize to 75% (600 x 600 pixels), and save as a .png file and you are all done.

If you are planning on using the tag on Facebook, you might want to save it as a .jpg file, as Facebook's handling of .pngs has changed and the tags look better with the white background on them.

I hope you enjoyed this tutorial. If you should have a problem, please feel free to E-Mail Me and I'll be happy to help you out.