Tuesday, July 26, 2011

Too Sweet! PTU tutorial


This tutorial was written by Dianna Richards of Digicats (and Dogs)/Di Before Dawn Tutorials. Any resemblance to any other tutorial, published or unpublished, living, dead or undead, is purely coincidental.

Please do not rebroadcast, redistribute or otherwise claim this tutorial or any part there of as your own work.


Items you will need to complete this project:

The Ice Cream Shoppe taggers kit by Nette's NightOwl Works. This is part of the Ice Cream Shoppe Collab at Stargazer Scraps, which is free with a $6.50 purchase at the store through July 31st, 2010. It will be available for purchase at other fine online stores there after.

Tube of choice. I am using Maya, by ZeBrush. This is a PTU tube, and you must have a license to use this tube, which is available at Pics for Design.com.

Mask of choice. I am using Wee Scots Mask #122 which you can download HERE.

Font(s) and/or alpha of choice. I am using Century Gothic which is a Windows System font. If you do not have it, you can download it HERE.

I am also using the Chocolate alpha by Creative Intentionz. This is a PTU alpha that is available at Twilight Scraps.


Note that H# and V# refer to horizontal and vertical coordinates on your canvas ruler grid. Make sure you have View -> Rulers checked in order to see the ruler grid.

When I say "Add to your canvas" I expect that you will copy and paste it as a new layer, unless otherwise stated in the tutorial.

This tutorial assumes you have a working knowledge of PSP. It was written using PSP X3, but should work in PSP 8 and up.

To begin, open a new raster layer canvas, 800 x 800 pxl, flood fill white.

Open paper of choice. I am using nnw icspaper12. Resize to 90%. Layers -> Load/Save Mask -> Load mask from disk and select mask of choice. I am using Wee Scots Lass Mask 122. Make sure the "Fit to Canvas" box is checked, then click on load.

Edit -> Copy Special -> Copy Merged and add masked paper to main canvas, centered.

Open nnw icscirclescatter and resize to 65%. Add to main canvas, centered.

Open nnw icschair and resize to 70%. Add to main canvas, centered at H450, V400.

Open nnw icsbowlcream and resize to 35%. Add to main canvas, centered at H250, V550.

Open tube of choice. I am using Maya by Zebrush. Resize to 65%. Select the colors and options you want to use on the girl, then Copy Merged and add to the main canvas, centered.

Open nnw ics2sweet and resize to 50%. Add to main canvas, centered at H550, V625.

Open nnw icslabel and resize to 35%. Add to main canvas, centered at H620, V600. Image -> Free Rotate -> Rotate left, 12 degrees.

Open nnw icsscatters and resize to 70%. Add to main canvas, centered at H150, V400.

Open nnw icsstring and resize to 70%. Add to main canvas, centered at H400, V675.

Starting with the Star Scatter layer, Raster 2 and working upward on the Layers pallet, add a drop shadow of choice to each of the elements on your main canvas. I am using offsets - vertical and horizontal - of 5 each, opacity of 75%, blur of 15, and color Chocolate (#49373c).

On the materials pallet, set your foreground and background colors to chocolate (#49373c). Using font of choice, add copyright information to the tag. for the Zebrush tube, that information is:

©Zebrush www.picsfordesign.com PFD_License#

I am using Century Gothic, 4 points, bold and centered, and have centered my copyright information at H400, V725. I have also added the optional background credits and tagged by information at this point.

Open nnw icssparkle and resize to 90%. Add to main canvas, centered at H400, V650.

You should now save the artist's copy of your tag as a .pspimage file.

On the layer pallet, click on the chair layer, Raster 3 to activate. Using font or alpha of choice, add desired name to tag. I am using the Chocolate alpha by Creative Intentionz. I have centered my name at H250, V75. I then added a drop shadow to match the one used on the rest of the tag.

Drop the white background layer and merge visible. Resize to 75% (600 x 600 pixels) and save a .png file, and you are all done.

I hope you enjoyed this tutorial. If you should have a problem, please feel free to E-Mail Me and I'll be happy to help you out.

Skully Girl So (PTU) Tutorial


This tutorial was written by Dianna Richards of Digicats (and Dogs)/Di Before Dawn Tutorials. Any resemblance to any other tutorial, published or unpublished, living, dead or undead, is purely coincidental.

Please do not rebroadcast, redistribute or otherwise claim this tutorial or any part there of as your own work.


Items you will need to complete this project:

The Skully Girl So taggers kit by DN Scraps which is a PTU kit available at Butterfly Blush Designs.

Tube of choice. I am using EMOlution 9, by VeryMany. This is a PTU tube, and you must have a license to use this tube, which is available at Pics for Design.

Mask of choice. I am using the Grunge126 mask by Nik's Scripts & Scraps which is part of her PSP Masks Mega Pack.

Font of choice. I am using Century Gothic which is a windows system font. If you do not have it, you can download it HERE.

I am also using the Goth Chick alpha by Sarah Bryan. This is a FTU alpha that is available at the link provided.


Note that H# and V# refer to horizontal and vertical coordinates on your canvas ruler grid. Make sure you have View -> Rulers checked in order to see the ruler grid.

When I say "Add to your canvas" I expect that you will copy and paste it as a new layer, unless otherwise stated in the tutorial.

This tutorial assumes you have a working knowledge of PSP. It was written using PSP X3, but should work in PSP 8 and up.

To begin, open a new raster layer canvas, 800 x 800 pxl, flood fill white.

Open paper of choice. I am using skullgirlsopaper27. Layers -> Load/Save mask -> Load mask from Disk and select mask of choice. I am using Grunge126 by Nik's Scripts and Scraps. Make sure the "Fit to Canvas" box is checked, then click on load.

Edit -> Copy special -> Copy merged and add to main canvas, centered.

Open skullgirlsoskullskullframe4 and resize to 75%. Add to main canvas, centered.

Open skullgirlsoskullstars2 and resize to 75%. Add to main canvas, centered at H500, V300. Image -> Free Rotate -> Rotate right, 20 degrees.

Open skullgirlsoskullpiano and add to main canvas, centered at H400, V600.

Open tube of choice. I am using EMOlution 9 by VeryMany. Resize to 65%. Copy the girl layer, and add to main canvas, centered,

Open skullgirlsoskullskullbeadstring2 and resize to 75%. Add to main canvas, centered at H200, V400.

Open skullgirlsoskullskulls and resize to 25%. Add to main canvas, centered at H175, V200. Image -> Free Rotate -> Rotate left, 17 degrees.

Open skullgirlsoskullbear2 and resize to 25%. Add to main canvas, centered at H600, V525.

Open skullgirlsoskullswordart and resize to 65%. Add to main canvas, centered at H500, V600.

Starting with your frame layer, raster 2 and working upward on the layer pallet, add a drop shadow of choice to each of the elements on the main canvas. I am using offsets - Vertical and horizontal - of 5 each, opacity of 75%, blur of 15 and color of dark purple (#400040).

On the materials pallet, set both your foreground and background colors to white (#ffffff). Using font of choice, add the copyright information to the tag. For the EMOlution tube that informat is:

©VeryMany www.picsfordesign.com PFD_License#

I am using Century Gothic, 4 points, bold and centered. I have also added the optional background credits and tagged by information at this point. I have my credits centered around H400, V675, underneath the piano keys.

You should now save the artist's copy of your tag as a .pspimage file.

Using font or alpha of choice, add desired name to tag. I am using the Goth Chick alpha by Designs by Sarah. I have my name centered at H550, V125, and I added a drop shadow to it to match the one used on the rest of the tag.

Drop the white background layer and merge visible. Resize to 75% (600 x 600 pixels) and save as a .png file and you are all done.

I hope you enjoyed this tutorial. If you should have a problem, please feel free to E-Mail Me and I'll be happy to help you out.

Saturday, July 23, 2011

Emo Rock (PTU) Tutorials


This tutorial was written by Dianna Richards of Digicats (and Dogs)/Di Before Dawn Tutorials. Any resemblance to any other tutorial, published or unpublished, living, dead or undead, is purely coincidental.

Please do not rebroadcast, redistribute or otherwise claim this tutorial or any part there of as your own work.


Items you will need to complete this project:

The 2 Tix 2 Paradyce taggers kit by Digicats (& Dogs). This is a FTU Kit that is available on the Digicats (& Dogs) blog, at the link provided.

Tube of choice. I am using EMOlution 2, by VeryMany. This is a PTU tube, and you must have a license to use this tube, which is available at Pics for Design.

Mask of choice. I am using the Grunge36 mask by Nik's Scripts & Scraps which is part of her PSP Masks Mega Pack.

Font(s) and/or alpha of choice. I am using Century Gothic which is a Windows System font. If you do not have it, you can download it HERE.

I am also using the Goth Chick alpha by Sarah Bryan. This is a FTU alpha that is available at the link provided.


Note that H# and V# refer to horizontal and vertical coordinates on your canvas ruler grid. Make sure you have View -> Rulers checked in order to see the ruler grid.

When I say "Add to your canvas" I expect that you will copy and paste it as a new layer, unless otherwise stated in the tutorial.

This tutorial assumes you have a working knowledge of PSP. It was written using PSP X3, but should work in PSP 8 and up.

To begin, open a new raster layer canvas, 800 x 800 pxl, flood fill white.

Open paper of choice. I am using DCD_2T2P_Paper13. Layers -> Load/Save Mask -> Load mask from disk and select mask of choice. I am using Grunge36 by Nik's Scripts and Scraps. Make sure the "Fit to Canvas" box is checked, then click on load.

Edit -> Copy Special -> Copy Merged and add to main canvas, centered.

Open DCD_2T2P_ Party Flags and resize to 75%. Add to main canvas, centered at H400, V100.

Open DCD_2T2P_ Frame08 and add to main canvas, centered. Image -> Free Rotate -> Rotate left, 15 degrees.

Open DCD_2T2P_ Doodle and add to main canvas, centered at H250, V450.

Open DCD_2T2P_ Flower03 and resize to 75%. Add to main canvas, centered at H250, V550.

Open DCD_2T2P_ Chaotic Heart and resize to 75%. Add to main canvas, centered at H200, V250.

Open DCD_2T2P_ Guitar and resize to 75%. Add to main canvas, centered at H600, V350.

Open tube of choice. I am using EMOlution 2 by VeryMany. Resize to 60%, and copy the girl layer. Add to main canvas, centered.

Open DCD_2T2P_ Ribbon03 and rotate right. Copy and add to the main canvas at H400, V650.

Open DCD_2T2P_ Bottle Cap01 and resize to 75%. Add to main canvas, centered at H600, V625.

Open DCD_2T2P_ Heart Deco and add to main canvas, centered at H300, V600.

Starting with the Party Flag layer and working upward, add a drop shadow of choice to each of the elements on the main canvas. I am using offsets - vertical and horizontal - of 5 each, opacity of 75%, blur of 15, and color of dark blue (#000040).

Open DCD_2T2P_ Sparkles and add to main canvas, centered at H300, V450.

On the materials pallet, set your foreground color to white (#ffffff) and your background color to dark blue (#000040). Using font of choice, add copyright information to the tag. For the Very Many tube, that information is:

©VeryMany www.picsfordesign.com PFD_License#

I am using Century Gothic, 4 points, bold and centered. I have my copyright centered at H400, V725. I have also added the optional background credits and tagged by information at this point.

You should now save the artist's copy of your tag as a .pspimage file.

Using font or alpha of choice, add desired name to tag. I am using the Goth Chick alpha by Sarah Bryan. I have my name centered at H550, V100. You may wish to add a matching drop shadow to your name, I did not.

Drop the white background layer and merge visible. Resize to 75% (600 x 600 pixels), and save as a .png file and you are all done.

I hope you enjoyed this tutorial. If you should have a problem, please feel free to E-Mail Me and I'll be happy to help you out.

Friday, July 22, 2011

Rock Vixen (PTU) Tutorial


This tutorial was written by Dianna Richards of Digicats (and Dogs)/Di Before Dawn Tutorials. Any resemblance to any other tutorial, published or unpublished, living, dead or undead, is purely coincidental.

Please do not rebroadcast, redistribute or otherwise claim this tutorial or any part there of as your own work.


Items you will need to complete this project:

The Blah Blah Baby taggers kit by A Taggers Scrap. This is a PTU kit which is available at Stargazer Scraps and other fine online stores.

Tube of choice. I am using Meow Meow Meow, by Alfadesire. This is a PTU tube, and you must have a license to use this tube, which is available at Pics for Design.

Mask of choice. I am using the Grunge82 mask by Nik's Scripts & Scraps which is part of her PSP Masks Mega Pack.

Font(s) and/or alpha of choice. I am using Century Gothic which is a Windows System font. If you do not have it, you can download it HERE.

I am also using the Goth Chick alpha by Sarah Bryan. This is a FTU alpha that is available at the link provided.


Note that H# and V# refer to horizontal and vertical coordinates on your canvas ruler grid. Make sure you have View -> Rulers checked in order to see the ruler grid.

When I say "Add to your canvas" I expect that you will copy and paste it as a new layer, unless otherwise stated in the tutorial.

This tutorial assumes you have a working knowledge of PSP. It was written using PSP X3, but should work in PSP 8 and up.

To begin, open a new raster layer canvas, 800 x 800 pxl, flood fill white.

Open paper of choice. I am using paper3a. Layers -> Load/Save Mask -> Load Mask from Disk and select mask of choice. I am using Grunge82 by Nik's Scripts and Scraps. Make sure the fit to canvas box is checked, then click on load.

Edit -> Copy special -> Copy Merged and add to main canvas, centered.

Open glitter stars and add to main canvas, centered at H500, V400.

Open frame3 and rotate right. Add to main canvas, centered.

Open tube of choice. I am using Meow Meow Meow by Alfadesire. Select options of choice. Resize to 45%, copy merged, and add to main canvas, centered.

Open chain and add to main canvas, centered at H200, V400.

Open curlyribbon1, and resize to 75%. Add to main canvas, centered at H400, V650.

Open chickenwire and resize to 65%. Add to main canvas, centered at H250, V600.

Open bottlecap1 and add to main canvas, centered at H200, V650.

Open note3 and add to main canvas, centered at H500, V150. Open additional notes of choice and add along the left side of frame to taste.

Open label1, and add to main canvas, centered at H450, V650. Image -> free rotate -> rotate left -> 17 degrees.

Open lights2 and add to main canvas, centered at H250, V300.

Open splatter4, and add to main canvas, centered at H550, V400.

Starting with Raster3 on the main canvas, and working upward, add a drop shadow of choice to each of the elements on the main canvas, except for the Lights layer. I am using offsets - horizontal and vertical - of 5 each, opacity of 75%, blur of 15, and color of off black (#202020).

On the materials pallet, set your foreground color to transparent, and your background color to silver (#cdcdcd). Using font of choice, add copyright information to the tag. For the Alfadesire tube, that information is:

©alfadesire www.PicsForDesign.com PFD_License#

I am using Century Gothic, 4 point, bold and centered. I added the optional background credits and tagged by information at this time. I have my credits centered at H450, V600, and then I free rotated them right, 17 degrees to match the angle of the label.

Effects -> Inner Bevel. I am using Bevel 2. See the box below for the rest of the settings.


Open sparkles and add to main canvas, centered.

You should now save the artist's copy of your tag as a .pspimage file.

Using font or alpha of choice, add desired name to tag. I am using the Goth Chick alpha by Sarah Bryan. I have my name centered at H550, V250. A drop shadow is optional depending upon the font or alpha you are using. I did not use one.

Drop the white background layer and merge visible. Resize to 75% (600 x 600 pixels) and save as a .png file, and you are all done.

I hope you enjoyed this tutorial. If you should have a problem, please feel free to E-Mail Me and I'll be happy to help you out.

Thursday, July 21, 2011

Panda Girl (PTU) Tutorial


This tutorial was written by Dianna Richards of Digicats (and Dogs)/Di Before Dawn Tutorials. Any resemblance to any other tutorial, published or unpublished, living, dead or undead, is purely coincidental.

Please do not rebroadcast, redistribute or otherwise claim this tutorial or any part there of as your own work.


Items you will need to complete this project:

The Emotionally Yours taggers kit by A Taggers Scrap. This is part of the Emotionally Yours Collab at Twilight Scraps, which is free with a $10.00 purchase at the store.

Tube of choice. I am using Panda Girl, by Alfadesire. This is a PTU tube, and you must have a license to use this tube, which is available at Pics for Design.com.

Mask of choice. I am using the Grunge80 mask by Nik's Scripts & Scraps which is part of her PSP Masks Mega Pack.

Font(s) and/or alpha of choice. I am using Century Gothic which is a Windows System font. If you do not have it, you can download it HERE.

I am also using the Goth Chick alpha by Sarah Bryan. This is a FTU alpha that is available at the link provided.


Note that H# and V# refer to horizontal and vertical coordinates on your canvas ruler grid. Make sure you have View -> Rulers checked in order to see the ruler grid.

When I say "Add to your canvas" I expect that you will copy and paste it as a new layer, unless otherwise stated in the tutorial.

This tutorial assumes you have a working knowledge of PSP. It was written using PSP X3, but should work in PSP 8 and up.

To begin, open a new raster layer canvas, 800 x 800 pxl, flood fill white.

Open paper of choice. I am using Paper 12. Layers -> Load/Save Mask -> Load Mask from disk and select mask of choice. I am using Grunge80 by Nik's Scripts and Scraps. Make sure the "Fit to Canvas" box is checked, then click on load.

Open wire and add to main canvas, centered.

Open Frame 1, and add to main canvas, centered. Using your magic wand, click anywhere outside the frame to select. On the layers pallet, click on the wire layer, raster 2, then hit delete. This will remove any excess wire from around the outer edge of the frame.

Selections -> Select None. Return to top layer.

Open tube of choice. I am using "I'm a Panda" by Alfadesire. Select the option you'd like (I turned off the tattoo & piercings). Using your selection tool set to Rectangle, Replace, select the top part of the tube (to about 600 on the vertical rule), then Copy Merged. Add to main canvas, centered at H350, V350.

Using your selection tool set to rectangle, replace, select the bottom half the frame layer, raster 3. On the Layers pallet, right click on the frame layer and "Promote selection to layer".

Right click on the Promoted Selection and bring to top. Selections -> Select none.

Using your eraser tool, erase the bits of the tube that fall outside the frame layer and also along the right hand side on the girl's arm that overlap the inner edge of the frame near the cut.

Return to top layer.

Open Skull Chain 2 and resize to 75%. Add to main canvas, centered at H400, V600.

Open boots2 and resize to 75%. Add to main canvas, centered at H250, V550.

Opwn skateboard and add to main canvas, centered at H550, V450. Image -> Free Rotate -> Rotate right, 25 degrees.

Open Bow 6 and add to main canvas, centered at H600, V500.

Open Deco 1 and add to main canvas, centered at H225, V600.

Starting with the wire layer, raster 2, and working upward, add drop shadow of choice to each of the elements on the main canvas, except for the promoted selection. I am using offsets, vertical and horizontal of 5 each, opacity of 75%, blur of 15, and color of dark purple (#400040).

On the materials pallet, set your foreground color to transparent and your background color to Off Black (#202020). Using font of choice, add the copyright information to the tag. For the Alfadesire tube, that information is:

©alfadesire www.PicsForDesign.com PFD_Digicats

I am using Century Gothic, 4 points, bold and centered. I also added the optional background credits and and tagged by information at this point. I have my credits centered at H400, V700. If this seems far down, that is fine, as I'm going to add the name above it.

Open Glitter and add to main canvas, centered.

You should now save the artist's copy of your tag as a .pspimage file.

Using font or alpha of choice, add name of choice to tag. I am using the Goth Chick alpha by Sarah Bryan. I have located my name at H300, V625. I did not add a drop shadow, but that is optional if it will make the name stand out more.

Drop the white background layer and merge visible. Resize to 75% (600 x 600 pixels) and save as a .png file, and you are all done.

I hope you enjoyed this tutorial. If you should have a problem, please feel free to E-Mail Me and I'll be happy to help you out.

Wednesday, July 20, 2011

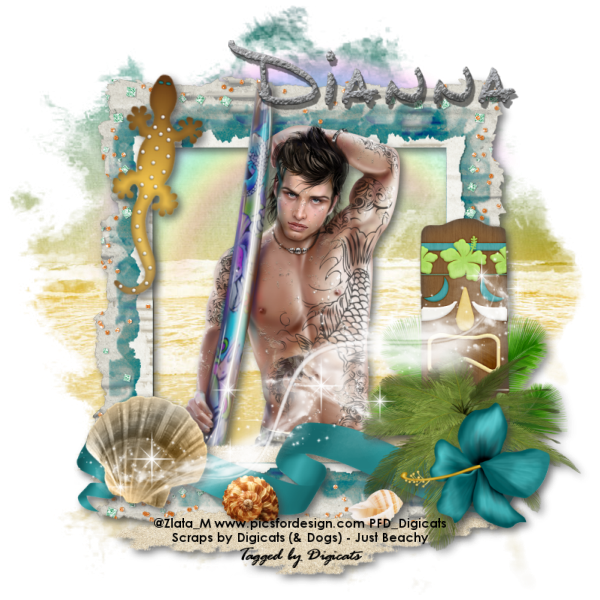
Caribbean Dream (PTU) Tutorial

Caribbean Dream - Dianna


This tutorial was written by Dianna Richards of Digicats (and Dogs)/Di Before Dawn Tutorials. Any resemblance to any other tutorial, published or unpublished, living, dead or undead, is purely coincidental.

Please do not rebroadcast, redistribute or otherwise claim this tutorial or any part there of as your own work.


Items you will need to complete this project:

The Just Beachy taggers kit by Digicats (& Dogs), This is a PTU kit that is available for purchase at TKO Scraps and other fine online stores.

Tube of choice. I am using Surfer, by Zlata M. This is a PTU tube, and you must have a license to use this tube, which is available at Pics for Design.

Mask of choice. I am using the Grunge47 mask by Nik's Scripts & Scraps which is part of her PSP Masks Mega Pack.

Font(s) and/or alpha of choice. I am using Century Gothic which is a Windows System font. If you do not have it, you can download it HERE.

I am also using the Dreams Beach alpha by Digiscrap.ch. This is a free to use alpha that may be downloaded at the link provided.


Note that H# and V# refer to horizontal and vertical coordinates on your canvas ruler grid. Make sure you have View -> Rulers checked in order to see the ruler grid.

When I say "Add to your canvas" I expect that you will copy and paste it as a new layer, unless otherwise stated in the tutorial.

This tutorial assumes you have a working knowledge of PSP. It was written using PSP X3, but should work in PSP 8 and up.

To begin, open a new raster layer canvas, 800 x 800 pxl, flood fill white.

Open paper of choice. I am using DCD_JB_Paper12. Layers -> Load/Save Mask -> Load Mask from Disk and select mask of choice. I am using Grunge47 by Nik's Scripts and Scraps. Make sure the fit to canvas box is checked, then click on load.

Edit -> Copy Special -> Edit Copy Merged. Add to main canvas, centered.

Open DCD_JB_Rainbow and add to main canvas, centered at H400, V250.

Open frame of choice. I am using DCD_JB_Frame05. Add to main canvas, centered.

Open tube of choice. I am using Surfer by Zlata M. Select the options you want to use, then resize tube to 40%. Copy Merged and add to main canvas, centered.

With your selection tool set to rectangle, replace, select the bottom half of the frame. On the layers pallet, right click on Raster 3, the frame layer and Promote Selection to Layer.

Selections -> Select none.

Open DCD-JB_Sand and add to main canvas, centered at H400, V650.

Right click on the Promoted Selection and go to Arrange -> Bring to top.

Open DCD_JB-Ribbon05 and add to main canvas, centered at H400, V625.

Open DCD_JB_Tiki Mask02 and add to main canvas, centered at H624, V450.

Open DCD_JB_Palms and resize to 50%. Add to main canvas, centered at H625, V600.

Open DCD_JB_Hibiscus01 and resize to 50%. Add to main canvas, centered at H630, V620.

Open DCD_JB_SeaShell01 and resize to 75%. Add to main canvas, centered at H200, V600. Image -> Free Rotate -> Rotate right, 15 degrees.

Open DCD_JB_SeaShell02 and resize to 25%. Add to main canvas, centered at H330, V660.

Open DCD_JB_SeaShell03 and resize to 25%. Add to main canvas, centered at H500, V680.

Open DCD_JB_Gecko02 and resize to 75%. Add to main canvas, centered at H200, V250. Image -> Free Rotate -> Rotate right, 12 degrees.

Open DCD_JB_Glitter and add to main canvas, centered at H400, V500.

Starting with the frame layer, raster 3 and working upward, add a drop shadow of choice to each of the elements on the main canvas, except for the "Promoted Selection" layer and the glitter layer. I am using offsets - horizontal and vertical - of 5 each, opacity of 75, blur of 15 and color of charcoal gray (#404040).

Return to top layer.

On the materials pallet, set your foreground color to transparent and your background color to Charcoal Gray (#404040). Using font of choice, add the copyright information to the tag. For the surfer tube, that information is:

@Zlata_M www.picsfordesign.com PFD_License#

I am using Century Gothic, 4 points, bold and centered. I have also added the optional background credits and tagged by information at this point. I have my credits centered at H400, V725.

You should now save the artist's copy of your tag as a .pspimage file.

Using font or alpha of choice, add desired name to tag. I am using the Dreams Beach alpha by Digiscrap.ch. As this alpha already has a built in shadow, I did not add another one. You may wish to add a drop shadow to match the rest of the tag depending up the font or alpha you use. I have my name centered at H500, V100.

Drop the white background layer and merge visible. Resize to 75% (600 x 600 pixels), and save as a .png file and you are all done.

I hope you enjoyed this tutorial. If you should have a problem, please feel free to E-Mail Me and I'll be happy to help you out.
Wicked Little Jo (PTU) Tutorial

Wicked Little Girl - Dianna


This tutorial was written by Dianna Richards of Digicats (and Dogs)/Di Before Dawn Tutorials. Any resemblance to any other tutorial, published or unpublished, living, dead or undead, is purely coincidental.

Please do not rebroadcast, redistribute or otherwise claim this tutorial or any part there of as your own work.


Items you will need to complete this project:

The Original Sin taggers kit by A Taggers Scrap. This is a PTU kit which is available at Stargazer Scraps and other fine online stores.

Tube of choice. I am using Natalie, by Lady Mishka. This is a PTU tube, and you must have a license to use this tube, which is available at Pics for Design.

Mask of choice. I am using the Grunge53 mask by Nik's Scripts & Scraps which is part of her PSP Masks Mega Pack.

Font(s) and/or alpha of choice. I am using Century Gothic which is a Windows System font. If you do not have it, you can download it HERE.

I am also using the Black Epoxy Alpha alpha by Marie Stones. This is a free to use alpha that may be downloaded at the link provided.


Note that H# and V# refer to horizontal and vertical coordinates on your canvas ruler grid. Make sure you have View -> Rulers checked in order to see the ruler grid.

When I say "Add to your canvas" I expect that you will copy and paste it as a new layer, unless otherwise stated in the tutorial.

This tutorial assumes you have a working knowledge of PSP. It was written using PSP X3, but should work in PSP 8 and up.

To begin, open a new raster layer canvas, 800 x 800 pxl, flood fill white.

Open paper of choice. I am using paper17. Layers -> Load/Save Mask -> Load Mask from Disk and select mask of choice. I am using Grunge53 by Nik's Scripts and Scraps. Make sure the fit to canvas box is checked, then click on load.

Edit -> Copy Special -> Copy Merged and add to main canvas, centered.

Open Glitter Skull Scatter and add to main background, centered.

Open frame3 and add to main canvas, centered at H450, V400.

Open crop1 and add to main canvas, centered at H450, V400

Open corset3 and add to main canvas, centered at H350, V425.

Open Candle3 and add to main canvas, centered at H475, V450.

Open boot and mirror. Add to main canvas, centered at H550, V450.

Right click on Raster 3, the frame layer on the layers pallet and go to Arrange -> Bring to top.

Open bear2 and mirror. Add to main canvas, centered at H400, V500.

Open tube of choice. I am using Natalie by Lady Mishka. Resize to 50%, then copy the top layer - the semi-close up - and add to main canvas. centered at H200, V350.

Open mask and add to main canvas, centered at H500, V600.

Open Ribbon3 and add to main canvas, centered at H400, V650.

On the materials pallet, set your foreground color to transparent, and your background color to black (#000000). Using font of choice, add copyright information to the tag. For the Natalie tube, that information is:

©LadyMishka www.PicsForDesign.com PFD_License#

I am using Century Gothic, 4 points, bold and centered. I have also added the optional background credits and tagged by information. I then fit text to path to match the outside of the frame. It is beyond the scope of this tutorial to explain this procedure to you, but you can find a separate tutorial on the subject HERE.

Starting with Raster 4, the crop layer, and working upward, add a drop shadow of choice to each of the elements on the main canvas except for the copyright layer. I am using offsets - vertical and horizontal - of 5 each, opacity of 75, blur of 15 and color black (#000000).

Open sparkles and add to main canvas, centered.

You should now save the artist's copy of your tag as a .pspimage file.

Using font or alpha of choice, add desired name to tag. I am using the Black Epoxy alpha by Marie Stones. I have my name centered at H250, V700. You may add a shadow to it to match the rest of the tag if you wish, I did not.

Delete the white background layer and merge visible. Resize to 75% (600 x 600 pixels) and save as a .png file and you are all done.

I hope you enjoyed this tutorial. If you should have a problem, please feel free to E-Mail Me and I'll be happy to help you out.

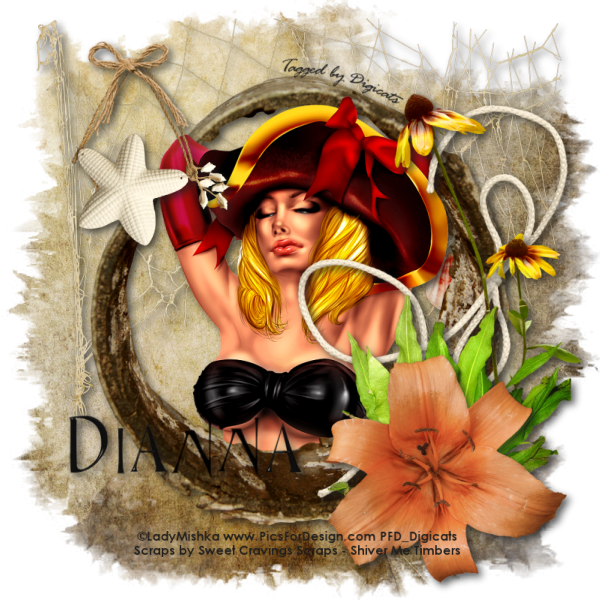
Shiver Me Timbers (PTU) Tutorial

Shiver Me Timbers - Dianna


This tutorial was written by Dianna Richards of Digicats (and Dogs)/Di Before Dawn Tutorials. Any resemblance to any other tutorial, published or unpublished, living, dead or undead, is purely coincidental.

Please do not rebroadcast, redistribute or otherwise claim this tutorial or any part there of as your own work.


Items you will need to complete this project:

The Shiver Me Timbers taggers kit by Sweet Cravings Scraps. This is a PTU kit that is available at TKO Scraps and other fine online stores.

Tube of choice. I am using Pirate, by Lady Mishka. This is a PTU tube, and you must have a license to use this tube, which is available at Pics for Design.

Mask of choice. I am using the Grunge80 mask by Nik's Scripts & Scraps which is part of her PSP Masks Mega Pack.

Font(s) and/or alpha of choice. I am using Century Gothic which is a Windows System font. If you do not have it, you can download it HERE.

I am also using the Black Epoxy Alpha alpha by Marie Stones. This is a free to use alpha that may be downloaded at the link provided.


Note that H# and V# refer to horizontal and vertical coordinates on your canvas ruler grid. Make sure you have View -> Rulers checked in order to see the ruler grid.

When I say "Add to your canvas" I expect that you will copy and paste it as a new layer, unless otherwise stated in the tutorial.

This tutorial assumes you have a working knowledge of PSP. It was written using PSP X3, but should work in PSP 8 and up.

To begin, open a new raster layer canvas, 800 x 800 pxl, flood fill white.

Open paper of choice. I am using SCS_ShiverMeTimbers_Paper4. Layers -> Load/Save Mask -> Load Mask from Disk and select mask of choice. I am using Grunge80 from Nik's Scripts and Scraps. Make sure the "Fit to canvas" box is checked, then click on load.

Edit -> Copy Special -> Copy Merged and add to main canvas, centered.

Open SCS_ShiverMeTimbers_FishingNet1 and add to main canvas, centered at H400, V300.

Open tube of choice. I am using Pirate by Lady Mishka. Resize to 75%, then copy the 01 tube layer and add to main canvas, centered.

Open frame of choice, I am using SCS_ShiverMeTimbers_Frame6. Resize to 80%, and add to main canvas, centered.

Using your selection tool set to rectangle, replace, select the portion of the tube that falls below the frame layer and delete.

Selections -> Select none.

Using your pick tool, drag the tube down so that the pirate is within the frame area. I dropped my pirate down about 25 pixels so that the new center is at H400, V425.

Right click on Raster 3 and go to Arrange -> Bring to top

Using your selection tool, select the lower half the frame layer, raster 4, the right click on the layer on the layer pallet and "promote selection to layer". Right click on the promoted selection and go to Arrange -> Bring to top.

Selections -> Select none.

Using your eraser tool, erase the bits of the tube that fall below the frame layer. Return to top (Promoted Selection) layer.

Open SCS_ShiverMeTimbers_String1 and resize to 75%. Add to main canvas centered at H575, V400.

Open SCS_ShiverMeTimbers_Flower 10 and resize to 75%. Add to main canvas, centered at H650, V350.

Open SCS_ShiverMeTimbers_Plant1 and resize to 65%. Add to main canvas, centered at H600, V550.

Open SCS_ShiverMeTimbers_Flower5 (or flower of choice) and resize to 65%. Add to main canvas, centered at H600, V625.

Open SCS_ShiverMeTimbers_HangingStarfish and resize to 50%. Add to main canvas, centered at H200, V200.

Open bow of choice, I am using SCS_ShiverMeTimbers_Bow2, and resize to 25%. Add to main canvas, right at the top of the arch of the hanging starfish rope. Image -> Free Rotate -> rotate left, 5 degrees.

On the materials pallet, set your foreground color to transparent and your background color to off black (#202020). Using font of choice, add the copyright information to the tag. For the Lady Mishka tube, that information is:

©LadyMishka www.PicsForDesign.com PFD_Digicats

I am using Century Gothic, 4 points, bold and centered. I have my copyright centered at H400, V725. I also added the optional background credits and tagged by information at this point.

Starting with the fish net layer and working upward, add a drop shadow of choice to each of the elements on your tag except for the Promoted Selection and the credits layer. I am using offsets, vertical and horizontal of 5 each, opacity of 75%, blur of 15 and color of off black (#202020).

You should now save the artist's copy of your tag as a .pspimage file.

Using font or alpha of choice, add name of choice to tag. I am using the Black Epoxy alpha by Marie Stones. I have my name centered at H250, V600, and have added a drop shadow to match the one used on the rest of the tag.

Drop the white background layer and merge visible. Resize to 75% (600 x 600 pixels) and save as a .png file and you are all done.

I hope you enjoyed this tutorial. If you should have a problem, please feel free to E-Mail Me and I'll be happy to help you out.
Tuesday, July 19, 2011

Sitting Pretty (PTU) Tutorial

Sitting Pretty - Dianna


This tutorial was written by Dianna Richards of Digicats (and Dogs)/Di Before Dawn Tutorials. Any resemblance to any other tutorial, published or unpublished, living, dead or undead, is purely coincidental.

Please do not rebroadcast, redistribute or otherwise claim this tutorial or any part there of as your own work.


Items you will need to complete this project:

The Ice Cream Shoppe taggers kit by Digicats (& Dogs), This is a PTU kit that is part of the new Ice Cream Shoppe collab at StargaZer Scraps. It is free with a $6.50 purchase at the shop, or you can purchase the collab outright for $10.

Tube of choice. I am using Emma, by Vika Misticheskaya. This is a PTU tube, and you must have a license to use this tube, which is available at Pics for Design.

Mask of choice. I am using the Layered Wings mask by Nik's Scripts & Scraps which is part of her PSP Masks Mega Pack.

Font(s) and/or alpha of choice. I am using Century Gothic which is a Windows System font. If you do not have it, you can download it HERE.

I am also using the Chocolate alpha by Creative Intentionz. This is a PTU alpha that is available at Twilight Scraps.


Note that H# and V# refer to horizontal and vertical coordinates on your canvas ruler grid. Make sure you have View -> Rulers checked in order to see the ruler grid.

When I say "Add to your canvas" I expect that you will copy and paste it as a new layer, unless otherwise stated in the tutorial.

This tutorial assumes you have a working knowledge of PSP. It was written using PSP X3, but should work in PSP 8 and up.

To begin, open a new raster layer canvas, 800 x 800 pxl, flood fill white.

Open paper of choice. I am using DCD_ICS_Paper12. Layers -> Load/Save Mask -> Load Mask from Disk and select mask of choice. I am using Layered Wings by Nik's Scripts and Scraps. Make sure the fit to canvas box is checked, then click on load.

Edit -> Copy Special -> Copy Merged then add to main canvas, centered.

Open DCD_ICS_Mesh01 and add to main canvas, centered.

Open DCD_ICS_Frame04 and add to main canvas, centered.

Open DCD_ICS_Doodle and add to main canvas, centered at H250, V400.

Open tube of choice. I am using Emma by Vika Misticheskaya. Hide the license and background info, and the accessories and/or skirt layer if you choose. Resize to 40%, then Copy Merged and add to main canvas, centered.

Open DCD_ICS_Ribbon02 and resize to 75%. Add to main canvas, centered at H400, V600.

Open DCD_ICS_Daisy Chain, and add to main canvas, centered at H500, V600.

Open DCD_ICS_Frangipani and resize to 50%. Add to main canvas, centered at H200, V400.

Open DCD_ICS_Sparkles and resize to 75%. Add to main canvas, centered at H400, V500.

On the materials pallet, set your foreground color to transparent, and your background color to off black (#202020). Using font of choice, add the copyright information for the tag. For the Emma tube, that information is:

©Misticheskaya www.PicsForDesign.com PFD_License#

I am using Century Gothic, 4 points, bold and centered. I also added the optional background and tagged by information at this point, then I fit text to path to wrap it around the outside of the frame. It is beyond the scope of this tutorial to explain that procedure, however you may find a tutorial on it HERE.

Starting with the Mesh layer (Raster 2) and working upward, add a drop shadow of choice to each of the elements on your main canvas except for the sparkles and the copyright layers. I am using offsets, vertical and horizontal, of 5 each, opacity of 75%, blur of 15, and color of charcoal gray (#404040).

You should now save the artist's copy of your tag as a .pspimage file.

Using font or alpha of choice, add name of choice to tag. I am using the Chocolate alpha by Creative Intentionz. I have my name centered at H250, V600.

Using the following settings, add a drop shadow to the name (if necessary): Offsets of 3 each, opacity of 100%, blur of 5, and color pale yellow (#dbc48e). Repeat using offsets of -3 each, leaving all other settings the same.

Open DCD_ICS_Chocolate Drops and resize to 50%. Add to main canvas, centered at H250, V675, or just under the name. Add a drop shadow to match the one used on the rest of the tag (not the one used on the name).

Drop the white background layer and merge visible. Resize to 75% (600 x 600 pixels) and save as a .png file and you are all done!

I hope you enjoyed this tutorial. If you should have a problem, please feel free to E-Mail Me and I'll be happy to help you out.

Aftermath of an Ice Cream Social (PTU) Tutorial

Ice Cream Social - Dianna


This tutorial was written by Dianna Richards of Digicats (and Dogs)/Di Before Dawn Tutorials. Any resemblance to any other tutorial, published or unpublished, living, dead or undead, is purely coincidental.

Please do not rebroadcast, redistribute or otherwise claim this tutorial or any part there of as your own work.


Items you will need to complete this project:

The Ice Cream Shoppe taggers kit by Gothic Inspirations. This is part of the Ice Cream Shoppe Collab at Stargazer Scraps, which is free with a $6.50 purchase at the store.

Tube of choice. I am using Diana, by Misticheskaya. This is a PTU tube, and you must have a license to use this tube, which is available at Pics for Design.

Mask of choice. I am using the Lots of Dots mask by Nik's Scripts & Scraps which is part of her PSP Masks Mega Pack.

Font(s) and/or alpha of choice. I am using Century Gothic which is a Windows System font. If you do not have it, you can download it HERE.

I am also using the Chocolate alpha by Creative Intentionz. This is a PTU alpha that is available at Twilight Scraps.


Note that H# and V# refer to horizontal and vertical coordinates on your canvas ruler grid. Make sure you have View -> Rulers checked in order to see the ruler grid.

When I say "Add to your canvas" I expect that you will copy and paste it as a new layer, unless otherwise stated in the tutorial.

This tutorial assumes you have a working knowledge of PSP. It was written using PSP X3, but should work in PSP 8 and up.

To begin, open a new raster layer canvas, 800 x 800 pxl, flood fill white.

Open paper of choice. I am using Paper5_GI_IceCreamShoppe. Resize to 95%. Layers -> Load/Save Mask -> Load Mask from disk and select mask of choice. I am using Lots of Dots by Nik's Scripts and Scraps. Make sure the fit to canvas box is checked, then click on load.

Edit -> Copy Special -> Copy Merged, then add to main canvas, centered.

Open Mesh_GI_IceCreamShoppe. Layers -> Load/Save Mask -> Load Mask from disk and select the same mask you used above. Load as above, then Copy Merged and add to main canvas, centered.

Resize the mesh layer only by 90%.

Open WordArt_GI_IceCreamShoppe, and add to main canvas, centered at H400, V175.

Open Flags_GI_IceCreamShoppe. Add to main canvas, centered at H400, V250.

Open tube of choice. I am using Diana by Vika Misticheskaya. Hide the license and background and resize to 40%. Copy Merged and add to main canvas, centered.

Open Pattern_GI_IceCreamShoppe and add to main canvas, centered at H400, V650.

Open Ribbons_GI_IceCreamShoppe and resize to 90%. Add to main canvas, centered at H150, V400. On the layers pallet, drag the ribbons, Raster 7, under the Word Art layer, Raster 3.

Return to top layer.

Open Flower2_GI_IceCreamShoppe and resize to 35%. Add to main canvas, centered at H150, V600.

Open Cherries_GI_IceCreamShoppe and resize to 35%. Add to main canvas, centered at H250, V650.

Open Tab and resize to 45%. On your materials pallet, set your foreground color transparent, and your background color to off black (#202020). Using font of choice, add the credits to the tag. For the Diana tube, that information is:

©Misticheskaya www.PicsForDesign.com PFD_License#

I am using Century Gothic, 4 points, bold and centered. I also added the optional background credits and tagged by information at this point.

Copy Merged. On the layers pallet, click on Raster 3, the word art layer to activate. Add the tab into the main canvas, centered at H550, V320.

Starting with the Mesh layer, Raster 2 and working upward. add a drop shadow of choice to each of the elements on your main canvas. I am using offsets, vertical and horizontal of 5 each, opacity of 75%, blur of 15 and color of dark green (#004000).

Open bling_GI_IceCreamShoppe and add to main canvas, centered.

You should now save the artist copy of your tag as a .pspimage file.

Using font or alpha of choice, add name of choice to tag. I am using the Chocolate alpha by Creative Intentionz. I have my name centered at H550, V650, and have added a drop shadow to match the one used on the rest of the tag.

Drop the white background layer, and merge visable. Resize to 75% (600 x 600 pixels) and save as a .png file and you are all done.

I hope you enjoyed this tutorial. If you should have a problem, please feel free to E-Mail Me and I'll be happy to help you out.

Lemonade with Friends (PTU) tutorial

Lemonade - Dianna


This tutorial was written by Dianna Richards of Digicats (and Dogs)/Di Before Dawn Tutorials. Any resemblance to any other tutorial, published or unpublished, living, dead or undead, is purely coincidental.

Please do not rebroadcast, redistribute or otherwise claim this tutorial or any part there of as your own work.


Items you will need to complete this project:

The Ice Cream Shoppe taggers kit by A Taggers Scrap. This is part of the Ice Cream Shoppe Collab at Stargazer Scraps, which is free with a $6.50 purchase at the store.

Tube of choice. I am using Life is Love, by Alfadesire. This is a PTU tube, and you must have a license to use this tube, which is available at Pics for Design.com.

Mask of choice. I am using the NikMask27 mask by Nik's Scripts & Scraps which is part of her PSP Masks Mega Pack.

Font(s) and/or alpha of choice. I am using Century Gothic which is a Windows System font. If you do not have it, you can download it HERE.

I am also using the Chocolate alpha by Creative Intentionz. This is a PTU alpha that is available at Twilight Scraps.


Note that H# and V# refer to horizontal and vertical coordinates on your canvas ruler grid. Make sure you have View -> Rulers checked in order to see the ruler grid.

When I say "Add to your canvas" I expect that you will copy and paste it as a new layer, unless otherwise stated in the tutorial.

This tutorial assumes you have a working knowledge of PSP. It was written using PSP X3, but should work in PSP 8 and up.

To begin, open a new raster layer canvas, 800 x 800 pxl, flood fill white.

Open paper of choice. I am using Paper8. Layers -> Load/Save Mask -> Load mask from disk and select mask of choice. I am using NikMask27 by Nik's Scripts and Scraps. Make sure the fit to canvas box is checked, then click on load.

Edit -> Copy Special -> Copy Merged and add to main canvas, centered.

Open brackets and add to main canvas, centered. Image -> Free Rotate -> Rotate left, 17 degrees.

Open flower2 and add to main canvas, centered at H400, V250.

Open flower1 and add to main canvas, centered at H500, V400.

Open flower3 and add to main canvas, centered at H550, V250.

Open sparkles and add to main canvas, centered at H350, V350.

Open tube of choice. I am using Life is Love (Waiting for You) by Alfadesire. Selected desired options, then resize to 35%. Edit -> Copy Special -> Copy Merged and add to main canvas, centered.

Open lemonade and resize to 75%. Add to main canvas, centered at H250, V650.

Open bow4 and add to main canvas, centered at H450, V700.

Starting with the bracket layer, raster 2 and working upward, add a drop shadow of choice to each of the elements on the main canvas. I am using offsets, vertical and horizontal of 5 each, opacity of 75, blur of 15 and color of dark brown (#311b0d).

On the materials pallet, set your foreground color to off black (#202020) and your background color to dark brown (#311b0d). Using font of choice, add copyright information to the tag. For the Alfadesire tube, that information is:

©alfadesire www.PicsForDesign.com PFD_License#

(Note: Make sure you use the "Pics for Design" website in your copyright or Julia Anderson, the copyright bitch will jump down your throat for it.)

I am using Century Gothic, 4 points, bold and centered. I first free rotated the text right, 90 degrees, then left, 17 degrees to match the angle on the bracket. I then located my text along the outside right edge of the bracket frame.

I also added the optional background credits and tagged by information at this point.

You should now save the artist's copy of your tag as a .pspimage file.

Using font for alpha of choice, add desired name to tag. I am using the Chocolate alpha by Creative Intentionz. I have my name centered at H500, V75, and have added a drop shadow to match the rest of the tag. I also located the name behind the tube layer, so that it would not cover the tube.

Drop the white background layer and merge visible. Resize to 75% (600 x 600 pixels) and save as a .png file, and you are all done.

I hope you enjoyed this tutorial. If you should have a problem, please feel free to E-Mail Me and I'll be happy to help you out.

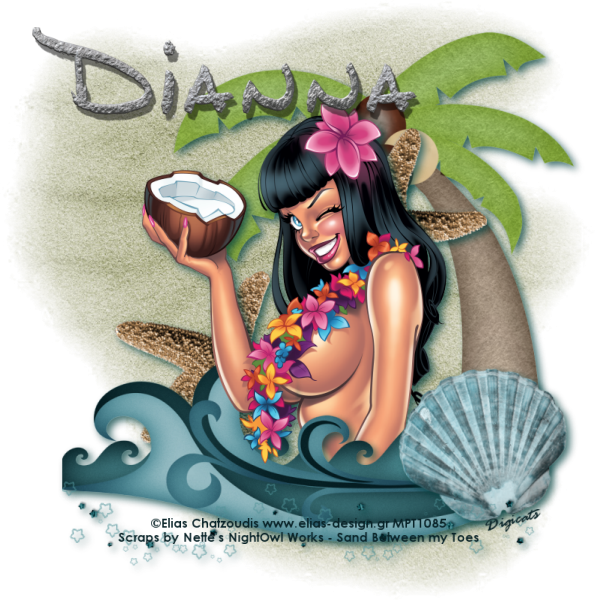
Hawaiian Sand (PTU) Tutorial

Hawaiian Sand - Dianna


This tutorial was written by Dianna Richards of Digicats (and Dogs)/Di Before Dawn Tutorials. Any resemblance to any other tutorial, published or unpublished, living, dead or undead, is purely coincidental.

Please do not rebroadcast, redistribute or otherwise claim this tutorial or any part there of as your own work.


Items you will need to complete this project:

The Sand Between my Toes taggers kit by Nette's NightOwl Works. This is a PTU kit that is available at TKO Scraps and other fine online stores.

Tube of choice. I am using Hawaiian Babe, by Elias Chatzoudis. This is a PTU tube, and you must have a license to use this tube, which is available at PSP Tubes Emporium.

Mask of choice. I am using the Plastered mask by Nik's Scripts & Scraps which is part of her PSP Masks Mega Pack.

Font(s) and/or alpha of choice. I am using Century Gothic which is a Windows System font. If you do not have it, you can download it HERE.

I am also using the Dreams Beach alpha by Digiscrap.ch. This is a free to use alpha that may be downloaded at the link provided.


Note that H# and V# refer to horizontal and vertical coordinates on your canvas ruler grid. Make sure you have View -> Rulers checked in order to see the ruler grid.

When I say "Add to your canvas" I expect that you will copy and paste it as a new layer, unless otherwise stated in the tutorial.

This tutorial assumes you have a working knowledge of PSP. It was written using PSP X3, but should work in PSP 8 and up.

To begin, open a new raster layer canvas, 800 x 800 pxl, flood fill white.

Open paper of choice and resize to 90%. I am using nnw sand paper5. Layers -> load/save mask -> load mask from disk and select mask of choice. I am using plastered by Nik's Scripts and Scraps. Make sure the fit to canvas box is checked, then click on load.

Edit -> Copy Special -> Copy Merged and add to main canvas, centered.

Open nnw stb palm and resize to 70%. Mirror, and add to main canvas, centered at H500, V350.

Open NNw sbtstarfish and resize to 70%. Add to main canvas, centered.

Open tube of choice. I am using Hawaiian Babe by Elias Chatzoudis. Copy Closeup 2 and add to main canvas, centered.

Open nnw stb sea and resize to 70%, Add to main canvas, centered at H600, V400.

On the layers pallet, click on Raster 4, the tube layer, to select. With your selection tool set to rectangle, replace, select the front part of the girl where the lei is covered by the sea. (from about H270, V450 to H400, V600. Right lick on Raster 4 on the Layers pallet and "Promote selection to layer".

Right click on the promoted selection and go to Arrange -> Bring to top.

Selections -> Select none.

Open nnw stb shell and resize to 25%. Copy and add to the main canvas, at H650, V600. Image -> Free Rotate -> Rotate left, 15 degrees.

Open nnw sbtstarscatter and resize to 70%, Add to main canvas, centered at H400, V700.

Starting with Raster 2, the Palm layer and working upward, add a drop shadow of choice to each of the elements on the main canvas, except for the Promoted Selection. I am using offsets of 5 each, opacity of 75%, blur of 15, and the color dark teal (#004040).

On the materials pallet, set your foreground color to transparent, and your background color to very dark teal (#092328). Using font of choice, add copyright information to the tag. For the Elias Chatzoudis tag, that information is:

©Elias Chatzoudis www.elias-design.gr PTE_License#

I am using the font Century Gothic, 4 points, bold and centered, and have located my copyright at H400, V700. I have also added the optional scraps credit and tagged by information.

You should now save your tag as a .pspimage file.

Using font or alpha of choice, add desired name to tag. I am using the Dream Beach alpha by digiscrap.ch. I have my name centered at H100, V300. As the alpha already has a drop shadow built in, I did not add another one to it, but you may wish to add one to match the rest of the tag.

Drop the white background layer and merge visible. Resize to 75% (600 x 600 pixels), and save as a .png file and you are all done.

I hope you enjoyed this tutorial. If you should have a problem, please feel free to E-Mail Me and I'll be happy to help you out.