Thursday, March 31, 2011

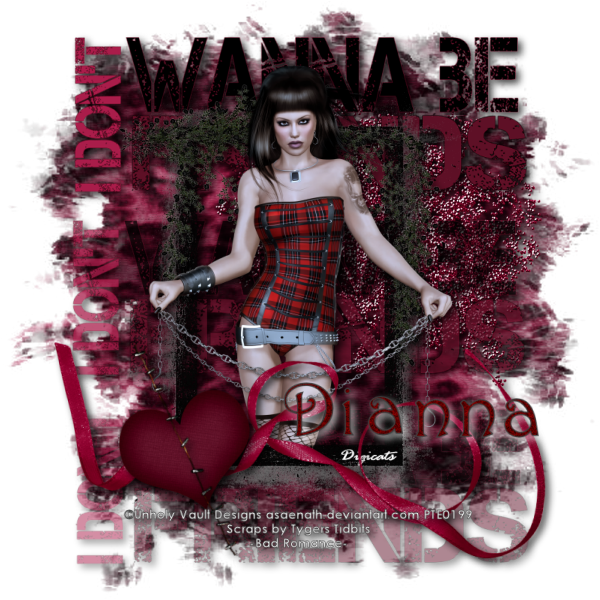
I don't want to be friends (PTU) Tutorial

Bad Romance - Dianna


This tutorial was written by Dianna Richards of Digicats (and Dogs)/Di Before Dawn Tutorials. Any resemblance to any other tutorial, published or unpublished, living, dead or undead, is purely coincidental.

Please do not rebroadcast, redistribute or otherwise claim this tutorial or any part there of as your own work.


Items you will need to complete this project:

The Bad Romance taggers kit by Tyger's Tidbits. This is a PTU kit which is available at Stargazer Scraps.

Tube of choice. I am using Lady Torture, by Unholy Vault Designs. You must have a license to use this tube, which is available at PSP Tubes Emporium.

Mask of choice. I am using the Grunge74 mask by Nik's Scripts & Scraps which is part of her PSP Masks Mega Pack.

Font(s) and/or alpha of choice. I am using Century Gothic which is a windows system font. If you do not have it, you can download it HERE.

I am also using the Gothique Romance Alpha Red by Whispy's D'zines. This alpha is no longer available, so please choose something else you like instead.


Note that H# and V# refer to horizontal and vertical coordinates on your canvas ruler grid. Make sure you have View -> Rulers checked in order to see the ruler grid.

When I say "Add to your canvas" I expect that you will copy and paste it as a new layer, unless otherwise stated in the tutorial.

This tutorial assumes you have a working knowledge of PSP. It was written using PSP X3, but should work in PSP 8 and up.

To begin, open a new raster layer canvas, 800 x 800 pxl, flood fill white.

Open paper of choice. I am using tt_BR_Paper08. Layers -> Load/Save Mask -> Load Mask from Disk and select mask of choice. I am using Grunge74 by Nik's Scripts and Scraps. Make sure the fit to canvas box is checked, then click on load.

Edit -> Copy Special -> Copy Merged and add to main canvs, centered.

Open tt_BR_glitzy and add to main canvas, centered at H500, V300.

Open tt_BR-wordart3 and resize to 72%. Add to main canvas, centered at H400, V150. Duplicate and move the duplication to H400, V400. Duplicate again, and move the 3rd copy to H400, V650.

Change the opacity on the second duplication of the word art to 75%. Change the opacity on the 3rd duplication of the word are to 50%.

Open tt_BR_grungyframe2 and add to main canvas, centered.

Open tt_BR_blackrosecorner and add to main canvas, centered at H370, V300.

Open tube of choice. I am using Lady Torture by Unholy Vault Design. Add to main canvas, centered at H400, V350.

With your selection tool set to rectangle, replace, select the bottom part of the frame layer. Right click on Raster 3 on you layers pallet and -> Promote selection to layer. Right click on the promoted selection and go to Arrange -> Bring to Top.

Selections -> Select none.

Open tt_BR_ribbon and resize to 75%. Add to main canvas, centered at H400, V600.

Open tt_BR-heart and resize to 75%. Add to main canvas, centered at H250, V600.

Open tt_BR_crudestapled and resize to 75%. Add to main canvas, centered at H250, V600. Image -> Free Rotate -> Rotate Left, 25 degrees.

On the materials pallet, set your foreground color to charcoal gray (#404040) and your background color to white (#000000). Using font of choice, add the copyright information to the tag. For the unholy Vault tube, that information is:

©Unholy Vault Designs asaenath.deviantart.com PTE0199

I am using Century Gothic, 4 points, bold and centered. I have also added the optional background credits and tagged by information at this point. I have my credits centered at H400, V700.

Starting with the glitzy layer, Raster 2, on the layers pallet and working upward, add a drop shadow of choice to each of the elements on your main canvas, except for the Promoted Selection. I am using offsets - Vertical and Horizontal - of 5 each, opacity of 75, blur if 15 and color Black (#000000).

You should now save the artist's copy of your tag as .pspimage file.

Using font or alpha of choice, add name of choice to tag. I am using the Gothique Romance Alpha Red by Whispy's D'zines. I located my name at H550, V550. I then added a drop shadow, using the same settings as for the rest of the tag, but changing the color to white (#ffffff).

Drop the white background layer and merge visible. Resize to 75% (600 x 600 pixels) and save as a .png file and you are all done.

I hope you enjoyed this tutorial. If you should have a problem, please feel free to E-Mail Me and I'll be happy to help you out.
Wednesday, March 30, 2011

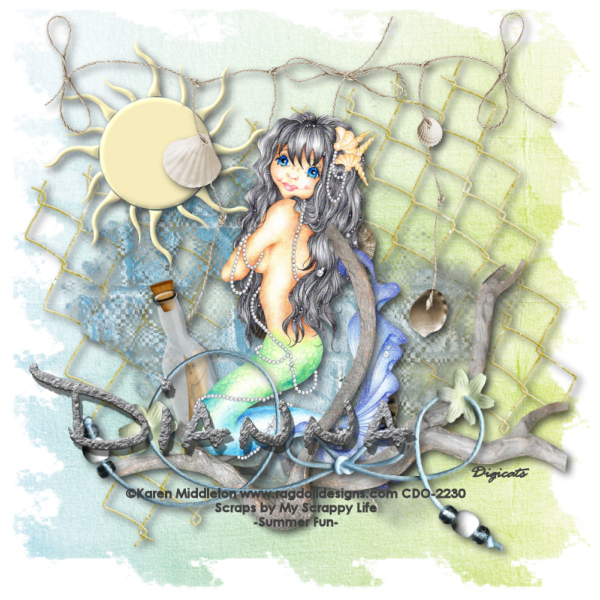
Summer Splash (PTU) Tutorial

Summer Splash - Dianna


This tutorial was written by Dianna Richards of Digicats (and Dogs)/Di Before Dawn Tutorials. Any resemblance to any other tutorial, published or unpublished, living, dead or undead, is purely coincidental.

Please do not rebroadcast, redistribute or otherwise claim this tutorial or any part there of as your own work.


Items you will need to complete this project:

The Summer Fun taggers kit by My Scrappy Life. This is a PTU kit that is available at Stargazer Scraps.

Tube of choice. I am using Sea Splash, by Karen Middleton. You must have a license to use this tube, which is available at Creative Design Outlet.

Mask of choice. I am using the Shark Fins mask by Nik's Scripts & Scraps which is part of her PSP Masks Mega Pack.

Font(s) and/or alpha of choice. I am using Century Gothic which is a Windows System font. If you do not have it, you can download it HERE.

I am also using the Dreams Beach alpha by Digiscrap.ch. This is a free to use alpha that may be downloaded at the link provided.


Note that H# and V# refer to horizontal and vertical coordinates on your canvas ruler grid. Make sure you have View -> Rulers checked in order to see the ruler grid.

When I say "Add to your canvas" I expect that you will copy and paste it as a new layer, unless otherwise stated in the tutorial.

This tutorial assumes you have a working knowledge of PSP. It was written using PSP X3, but should work in PSP 8 and up.

To begin, open a new raster layer canvas, 800 x 800 pxl, flood fill white.

Open paper of choice. I am using MSL_Paper6. Layers -> Load/Save Mask -> Load Mask from Disk and select mask of choice. I am using SharkFins by Nik's Scripts and Scraps. Make sure the "Fit to canvas" box is checked, then click on load.

Edit -> Copy Special -> Copy Merged and add to main canvas, centered.

Open MSL_Element12 and resize to 75%. Add to main canvas, centered. Image -> Free Rotate -> Rotate Left, 17 degrees.

Open MSL_Element16 and add to main canvas, centered.

Open MSL_ELement41 and resize to 75%. Add to main canvas, centered at H200, V200.

Open MSL_Element18 and add to main canvas, centered at H400, V350.

Open MSL_Element6 and resize to 50%. Add to main canvas, centered at H250, V500. Image -> Free Rotate -> Rotate Left, 17 degrees.

Open tube of choice, I am using Sea Splash by Karen Middleton. Add to main canvas, centered.

Open MSL_Element19, and add to main canvas, centered at H450, V500.

Open MSL_Element42 and resize to 85%, Add to main canvas, centered at H400, V600.

On the materials pallet, set both your foreground and background colors to Charcoal Gray (#404040). Using font of choice, add copyright information to the tag. For the Sea Splash tube, that information is:

©Karen Middleton www.ragdolldesigns.com CDO-(License #)

I am using Century Gothic, 4 points, bold and centered. I have also added the optional background credits and tagged by information. I have my copyright centered at H400, V675.

Starting with the mesh layer, Raster 2, on the layers pallet and working upward, add a drop shadow of choice to each of the elements on your tag except for the copyright layer. I am using offsets, vertical and horizontal of 5 each, opacity of 75%, blur of 15 and color off black (#202020).

You should now save the artist's copy of your tag as a .pspimage file.

Using font or alpha of choice add desired name to tag. I am using the Dreams Beach alpha (1 & 2) by Digiscrap.ch. I have my name centered at H300, V550. As the alpha comes with a built in drop shadow, I did not add another one. If you are using a different alpha or a font, you will want to add a drop shadow to match the one used on the rest of the tag.

Drop the white background layer and merge visible, resize to 75% (600 x 600 pixels) and save as a .png file and you are all done.

I hope you enjoyed this tutorial. If you should have a problem, please feel free to E-Mail Me and I'll be happy to help you out.
Tuesday, March 29, 2011

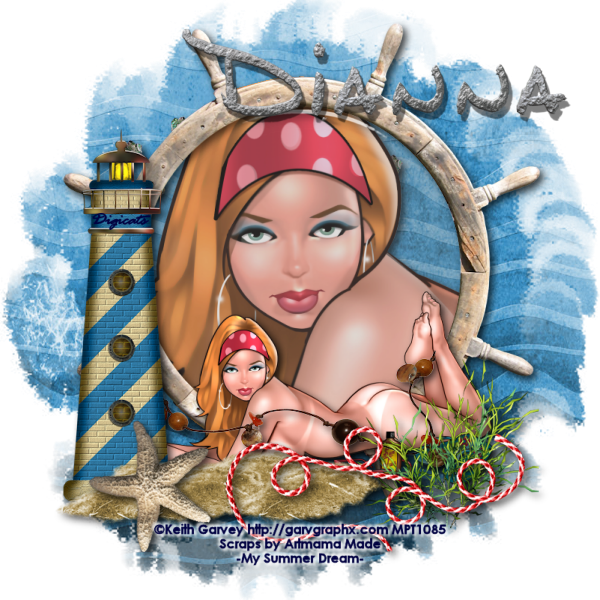
My Summer Dream (PTU) Tutorial

My Summer Dream - Dianna


This tutorial was written by Dianna Richards of Digicats (and Dogs)/Di Before Dawn Tutorials. Any resemblance to any other tutorial, published or unpublished, living, dead or undead, is purely coincidental.

Please do not rebroadcast, redistribute or otherwise claim this tutorial or any part there of as your own work.


Items you will need to complete this project:

The My Summer Dream taggers kit by Artmama Made, This is a PTU kit that is available at Stargazer Scraps.

Tube of choice. I am using Tan Lines, by Keith Garvey. This is a PTU tube, and you must have a license to use this tube, which is available at PSP Tube Emporium.

Mask of choice. I am using the Nik-021208-72 mask by Nik's Scripts & Scraps which is part of her PSP Masks Mega Pack.

Font(s) and/or alpha of choice. I am using Century Gothic which is a Windows System font. If you do not have it, you can download it HERE.

I am also using the Dreams Beach alpha by Digiscrap.ch. This is a free to use alpha that may be downloaded at the link provided.


Note that H# and V# refer to horizontal and vertical coordinates on your canvas ruler grid. Make sure you have View -> Rulers checked in order to see the ruler grid.

When I say "Add to your canvas" I expect that you will copy and paste it as a new layer, unless otherwise stated in the tutorial.

This tutorial assumes you have a working knowledge of PSP. It was written using PSP X3, but should work in PSP 8 and up.

To begin, open a new raster layer canvas, 800 x 800 pxl, flood fill white.

Open Paper of choice. I am using AM-My Summer Dream 02. Layers -> Load/Save mask -> Load mask from disk and select mask of choice. I am using Nik-021208-72 by Nik's Scripts and Scraps. Make sure the fit to canvas box is checked, then click on load.

Edit -> Copy Special -> Copy Merged and add to main canvas, centered.

Open AM-My Summer Dream embellie16 and add to main canvas, centered at H350, V300.

Open tube of choice. Tan Lines by Keith Garvey. Copy Layer2 and add to main canvas, centered at H350, V400.

Open AM-My Summer Dream embellie05 and add to main canvas, centered at H350, V400.

Using your eraser, erase the bits of the tube that fall outside the frame layer. Return to top (frame) layer.

Copy tube Layer1 and add to main canvas, centered at H400, V525.

Open AM-My Summer Dream embellie26 and add to main canvas, centered at H400, V550.

Open AM-My Summer Dream embellie51 and add to main canvas, centered at H600, V600.

Open AM-My Summer Dream embellie10 add add to main canvas, centered at H150, V425.

Open AM-My Summer Dream embellie17 and add to main canvas, centered at H300, V650.

Open AM-My Summer Dream embellie32 and add to main canvas, centered at H500, V650.

Open AM-My Summer Dream embellie40, and add to main canvas, centered at H200, V650.

On the materials pallet, set both your foreground color your background color to dark blue (#000040). Using font of choice, add the copyright information to the tag. For the Tan Lines tube that information is:

©Keith Garvey garvgraphx.com PTE(License #)

I am using Century Gothic, 4 points, bold and centered. I also added the optional background credits and tagged by information at this point. I have my copyright centered at H400, V725.

Using the following settings, add a white drop shadow to the text: Offsets 3 each, opacity of 100%, blur of 5 and color (#ffffff). Repeat using offsets of -3 each, leaving all other settings the same.

Starting with raster 2, the embellie16 layer, and working upward add a drop shadow of choice to each of the elements on the main canvas, except for the copyright information. I am using offsets, vertical and horizontal of 5 each, opacity of 75%, blur of 15 and color of black (#000000).

You should now save the artist's copy of your tag as a .pspimage file.

Using font or alpha of choice add desired name to tag. I am using the Dreams Beach alpha (1 & 2) by Digiscrap.ch. I have my name centered at H500, V100. As the alpha comes with a built in drop shadow, I did not add another one. If you are using a different alpha or a font, you will want to add a drop shadow to match the one used on the rest of the tag.

Drop the white background layer and merge visible, resize to 75% (600 x 600 pixels) and save as a .png file and you are all done.

I hope you enjoyed this tutorial. If you should have a problem, please feel free to E-Mail Me and I'll be happy to help you out.
Saturday, March 26, 2011

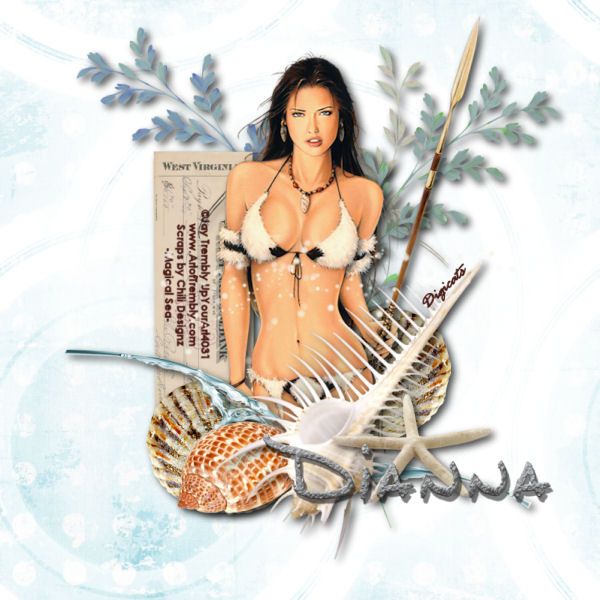
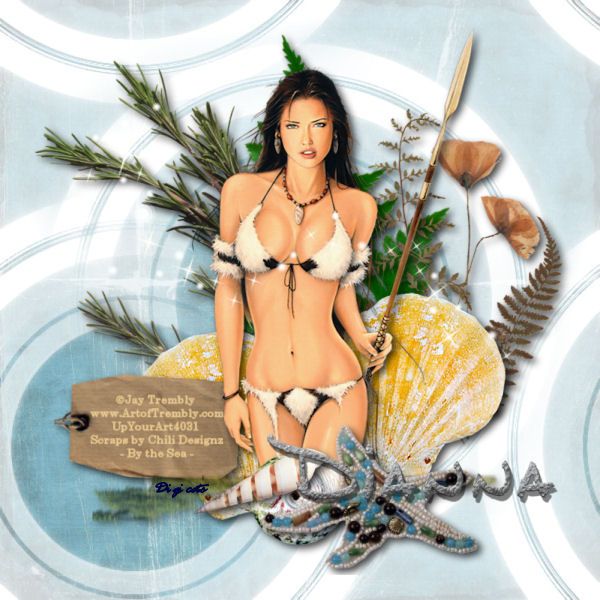
Magical Sea (PTU) Tutorial

Magical Sea - Dianna


This tutorial was written by Dianna Richards of Digicats (and Dogs)/Di Before Dawn Tutorials. Any resemblance to any other tutorial, published or unpublished, living, dead or undead, is purely coincidental.

Please do not rebroadcast, redistribute or otherwise claim this tutorial or any part there of as your own work.


Items you will need to complete this project:

The Magical Sea taggers kit by Chili Designz, This is a PTU kit that is available at Stargazer Scraps.

Tube of choice. I am using Blue Lagoon, by Jay Trembly. This is a PTU tube, and you must have a license to use this tube, which is available at Up Your Art.

The Oceans 6 mask by Cameron. This is a free to use mask that may be download from Cameron Tags. (Resources -> Masks -> Ocean collection).

Font(s) and/or alpha of choice. I am using Century Gothic which is a Windows System font. If you do not have it, you can download it HERE.

I am also using the Dreams Beach alpha by Digiscrap.ch. This is a free to use alpha that may be downloaded at the link provided.


Note that H# and V# refer to horizontal and vertical coordinates on your canvas ruler grid. Make sure you have View -> Rulers checked in order to see the ruler grid.

When I say "Add to your canvas" I expect that you will copy and paste it as a new layer, unless otherwise stated in the tutorial.

This tutorial assumes you have a working knowledge of PSP. It was written using PSP X3, but should work in PSP 8 and up.

To begin, open a new raster layer canvas, 800 x 800 pxl, flood fill white.

Open paper of choice. I am using CHILI_DESIGNZ_Magical_Sea_paper6. Resize to 800 x 800 pixels. Layers -> Load/Save Mask -> Load mask from disk and select mask of choice. I am using Mask Cameron Ocean 6. Make sure the fit to canvas box is checked, then click on load.

Edit -> Copy Special -> Copy Merged and add to main canvas, centered.

Open CHILI_DESIGNZ_Magical_Sea_foliage and resize to 75%. Add to main canvas centered at H250, V350.

open CHILI_DESIGNZ_Magical_Sea_foliage2 and resize to 75%. Add to main canvas, centered at H450, V350.

Open CHILI_DESIGNZ_Magical_Sea_foliage3 and resize to 75%. Mirror Add to main canvas, centered at H600, V400.

Open CHILI_DESIGNZ_Magical_Sea_shell3. Flip and mirror. Add to main canvas, centered at H300, V600.

Right click on the shell3 layer on the Layers pallet and duplicate. Mirror. Relocate the mirrored image to H500, V500.

Open tube of choice. I am using Blue Lagoon by Jay Trembly. Copy the Tube JT0040 Blue Lagoon layer and add to main canvas, centered at H450, V350.

Open CHILI_DESIGNZ_Magical_Sea_water and resize to 65%. Mirror, and to main canvas, centered at H400, V675. Using your eraser tool, erase the bits of the tube that fall below the water line. Return to top layer.

Open CHILI_DESIGNZ_Magical_Sea_shell2 and resize to 75%. Add to main canvas, centered at H325, v625

Open CHILI_DESIGNZ_Magical_Sea_shell and resize to 75%. Add to main canvas, centered at H475, V550.

Open CHILI_DESIGNZ_Magical_Sea_starfish and resize to 50%. Add to main canvas, centered at H550, V600.

Open CHILI_DESIGNZ_Magical_Sea_bill and resize to 50%. Rotate right. On your materials pallet, set both your foreground and your background color to brown (#481a14).

Using font of choice, add copyright information to the tag. For the Blue Lagoon tube, that information is:

©Jay Trembly www.ArtofTrembly.com UpYourArt(License#)

I am using Century Gothic, 4 points, bold and centered. I also added the optional background credits and tagged by information at this point.

Layers - Merge visible. Rotate right again. On the layers pallet, click on the foliage3 layer, Raster 4, to activate. Resize to 85%, and add the tag to your main canvas, centered at H270, V380.

Starting with the foliage layer, raster 2 on the your layers pallet and working upward, add a drop shadow of choice to each of the elements on your main canvas. I am using offsets, verticle and horizontal, of 5 each, opacity of 75%, blur of 15, and color black (#000000).

Open CHILI_DESIGNZ_Magical_Sea_sparkles and add to main canvas, centered.

You should now save the artist's copy of your tag as a .pspimage file.

Using font or alpha of choice add desired name to tag. I am using the Dreams Beach alpha (1 & 2) by Digiscrap.ch. I have my name centered at H550, V625. As the alpha comes with a built in drop shadow, I did not add another one. However, if you are using a different font or alpha, you may wish to add a drop shadow to match the rest of the tag.

Merge visible and resize to 75% (600 x 600 pixels). Save as a .jpg file and you are all done.

I hope you enjoyed this tutorial. If you should have a problem, please feel free to E-Mail Me and I'll be happy to help you out.

Blue Lagoon (PTU) Tutorial

Blue Lagoon - Dianna


This tutorial was written by Dianna Richards of Digicats (and Dogs)/Di Before Dawn Tutorials. Any resemblance to any other tutorial, published or unpublished, living, dead or undead, is purely coincidental.

Please do not rebroadcast, redistribute or otherwise claim this tutorial or any part there of as your own work.


Items you will need to complete this project:

The By the Sea taggers kit by Chili Designz. This is one of her older kits. If you do not have it, you can use the Magical Sea kit instead. You can find the same tutorial using the Magical Sea kit HERE.

Tube of choice. I am using Blue Lagoon, by Jay Trembly. This is a PTU tube, and you must have a license to use this tube, which is available at Up Your Art.

The Oceans 6 mask by Cameron. This is a free to use mask that may be download from Cameron Tags. (Resources -> Masks -> Ocean collection).

Font(s) and/or alpha of choice. I am using Century Gothic which is a Windows System font. If you do not have it, you can download it HERE.

I am also using the Dreams Beach alpha by Digiscrap.ch. This is a free to use alpha that may be downloaded at the link provided.


Note that H# and V# refer to horizontal and vertical coordinates on your canvas ruler grid. Make sure you have View -> Rulers checked in order to see the ruler grid.

When I say "Add to your canvas" I expect that you will copy and paste it as a new layer, unless otherwise stated in the tutorial.

This tutorial assumes you have a working knowledge of PSP. It was written using PSP X3, but should work in PSP 8 and up.

To begin, open a new raster layer canvas, 800 x 800 pxl, flood fill white.

Open paper of choice. I am using CHILI_DESIGNZ_By_the_Sea_paper3. Layers -> Load/Save Mask -> Load mask from disk and select mask of choice. I am using Mask Cameron Ocean 6. Make sure the fit to canvas box is checked, then click on load.

Edit -> Copy Special -> Copy Merged and add to main canvas, centered.

Open CHILI_DESIGNZ_By_the_Sea_plant and resize to 75%. Add to main canvas centered at H250, V350.

open CHILI_DESIGNZ_By_the_Sea_fern2 and resize to 75%. Add to main canvas, centered at H450, V350.

Open CHILI_DESIGNZ_By_the_Sea_pressedflowers and resize to 85%. Add to main canvas, centered at H600, V400.

Open CHILI_DESIGNZ_By_the_Sea_shell5 and mirror. Add to main canvas, centered at H300, V600.

Right click on the shell5 layer on the Layers pallet and duplicate. Mirror. Relocate the mirrored image to H550, V550.

Open tube of choice. I am using Blue Lagoon by Jay Trembly. Copy the Tube JT0040 Blue Lagoon layer and add to main canvas, centered at H450, V400.

Open CHILI_DESIGNZ_By_the_Sea_grass and resize to 35%. Add to main canvas, centered at H400, V675.

Open CHILI_DESIGNZ_By_the_Sea_shell3 and resize to 75%. Add to main canvas, centered at H400, v700

Open CHILI_DESIGNZ_By_the_Sea_shell2 and resize to 50%. Add to main canvas, centered at H300, V675.

Open CHILI_DESIGNZ_By_the_Sea_starfish and resize to 50%. Add to main canvas, centered at H500, V675.

Open CHILI_DESIGNZ_By_the_Sea_tag and rotate left. On your materials pallet, set both your foreground and your background color to sandy beige (#eaca91).

Using font of choice, add copyright information to the tag. For the Blue Lagoon tube, that information is:

©Jay Trembly www.ArtofTrembly.com UpYourArt(License#)

I am using Century Gothic, 4 points, bold and centered. I also added the optional background credits and tagged by information at this point.

Layers - Merge visible. Using your eraser tool, erase the strings from the tag - or at least clip them very short. On the layers pallet, click on the pressed flowers layer, Raster 4, to activate. Resize to 85%, and add the tag to your main canvas, centered at H200, V600.

Starting with the plant layer, raster 2 on the your layers pallet and working upward, add a drop shadow of choice to each of the elements on your main canvas. I am using offsets, verticle and horizontal, of 5 each, opacity of 75%, blur of 15, and color black (#000000).

Open CHILI_DESIGNZ_By_the_Sea_sparkles and resize to 75%. Add to main canvas, centered.

You should now save the artist's copy of your tag as a .pspimage file.

Using font or alpha of choice add desired name to tag. I am using the Dreams Beach alpha (1 & 2) by Digiscrap.ch. I have my name centered at H550, V625. As the alpha comes with a built in drop shadow, I did not add another one. However, if you are using a different font or alpha, you may wish to add a drop shadow to match the rest of the tag.

On the layers pallet, set the background layer and the paper layer, Raster 1, to invisible. Merge visible. Using your pick tool, recenter the tag graphic to H400, V400.

Turn the background and paper layers back on, then merge visible again. Resize to 75% (600 x 600 pixels). Save as a .jpg file and you are all done.

I hope you enjoyed this tutorial. If you should have a problem, please feel free to E-Mail Me and I'll be happy to help you out.
Friday, March 25, 2011

Spring in Bloom (PTU) Tutorial

Spring in Bloom - Dianna


This tutorial was written by Dianna Richards of Digicats (and Dogs)/Di Before Dawn Tutorials. Any resemblance to any other tutorial, published or unpublished, living, dead or undead, is purely coincidental.

Please do not rebroadcast, redistribute or otherwise claim this tutorial or any part there of as your own work.


Items you will need to complete this project:

The Spring in Bloom taggers kit by Geogirl Designs which is a PTU kit available at Butterfly Blush Designs.

Tube of choice. I am using Bunny, by PinUp Toons. You must have a license to use this tube, which is available at Creative Design Outlet.

Mask of choice. I am using Wee Scots Mask #143 which you can download HERE.

Font(s) and/or alpha of choice. I am using Century Gothic which is a windows system font. If you do not have it, you can download it HERE.

I am also using the Spring Pink Alpha by Sweet Occasion Designs. This is a PTU alpha that is available for purchase at available at Butterfly Blush Designs.


Note that H# and V# refer to horizontal and vertical coordinates on your canvas ruler grid. Make sure you have View -> Rulers checked in order to see the ruler grid.

When I say "Add to your canvas" I expect that you will copy and paste it as a new layer, unless otherwise stated in the tutorial.

This tutorial assumes you have a working knowledge of PSP. It was written using PSP X3, but should work in PSP 8 and up.

To begin, open a new raster layer canvas, 800 x 800 pxl, flood fill white.

Open paper of choice. I am using GDT~SIB Paper9. Layers -> Load/Save mask -> Load Mask from Disk and select mask of choice. I am using Wee Scot Las Mask #143. Make sure the fit to canvas box is checked, then click on load.

Edit -> Copy Special -> Copy Merged and add to main canvas, centered.

Open GDT~SIB Frame1 and resize to 80%. Add to main canvas, centered.

Open GDT~SIB Element 3 and resize to 50%. Add to main canvas, centered at H200, V200.

Open tube of choice. I am using Bunny by PinUp Toons. Add to main canvas, centered.

With your selection tool set to rectangle, replace (feather 0), select the lower right portion of the frame from about H325, V500 over. On the layers pallet, right click on the frame layer and go to -> Promote selection to layer. Right click on the Promoted Selection and Arrange -> Bring to top.

Selections -> Select none.

Open GDT~SIB Flower4 and resize to 50%. Click on the sun layer, Raster 3, to activate, then add the flower to your main canvas, centered at H315, V420.

Open GDT~SIB Flower 3 and resize to 50%. Add to main canvas, centered at H525, V400.

Open GDT~SIB Grey Bunny wBow and resize to 35%. Add to main canvas, centered at H275, V475.

Return to top layer, the Promoted Selection layer.

On the materials pallet, set both your foreground and background colors to sky blue (#2db6ca). Using font of choice add copyright information to the tag. For the Bunny tube, that information is:

©PinUpToons www.pinuptoons.com CDO-(License #)

I am using Century Gothic, 4 points bold and centered. I also added the optional background credits and tagged by information at this point. I then fit text to path to hug the outside of the frame. It is beyond the scope of this tutorial to explain how to do that, but you may find a tutorial on fitting text to path HERE.

Starting with Raster 2, the frame layer and working upward on your materials pallet, add a drop shadow of choice to each of the elements on your tag except for the promoted selection & the copyright layer. I am using offsets - vertical and horizontal - of 5 each, opacity of 75%, and color of dark gray (#404040).

You should now save the artist's copy of our tag as a .pspimage file.

Using font of alpha of choice, add desired name to tag. I am using the Spring Pink Alpha by Sweet Occasion Designs. I have my name centered at H500, V650 and have added a drop shadow to match the rest of the tag.

Drop the white background layer and merge visible, resize to 75% (600 x 600 pixels) and save as a .png file and you are all done.

I hope you enjoyed this tutorial. If you should have a problem, please feel free to E-Mail Me and I'll be happy to help you out.
Tuesday, March 22, 2011

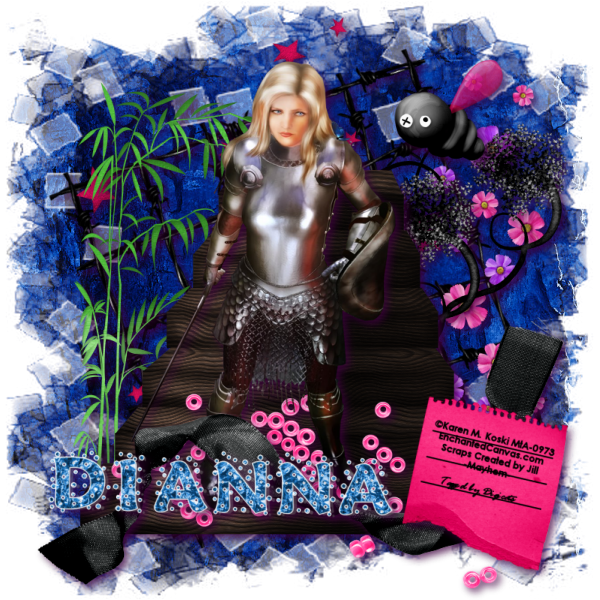
The Jabberwocky's Date (PTU) Tutorial

The Jabberwocky's Date - Dianna


This tutorial was written by Dianna Richards of Digicats (and Dogs)/Di Before Dawn Tutorials. Any resemblance to any other tutorial, published or unpublished, living, dead or undead, is purely coincidental.

Please do not rebroadcast, redistribute or otherwise claim this tutorial or any part there of as your own work.


Items you will need to complete this project:

The Mayhem taggers kit Created by Jill which is a PTU kit that is available at Stargazer Scraps.

Tube of choice. I am using Alice, by Karen M. Koski. This is a PTU tube, and you must have a license to use this tube, which is available at My Tubed Art.

Mask of choice. I am using the Nik_020908_28 mask by Nik's Scripts & Scraps which is part of her PSP Masks Mega Pack.

Font(s) and/or alpha of choice. I am using Century Gothic which is a windows system font. If you do not have it, you can download it HERE.

I am also using the Foil Cap alpha by SnowsMoon's Designs. This alpha is no longer commercial available, so please choose a font or alpha you like instead.


Note that H# and V# refer to horizontal and vertical coordinates on your canvas ruler grid. Make sure you have View -> Rulers checked in order to see the ruler grid.

When I say "Add to your canvas" I expect that you will copy and paste it as a new layer, unless otherwise stated in the tutorial.

This tutorial assumes you have a working knowledge of PSP. It was written using PSP X3, but should work in PSP 8 and up.

Open paper of choice. I am using M_paper05_cbj. Layers -> Load/Save Mask -> Load Mask from Disk and select mask of choice. I am using Nik_020908_28 by Nik's Scripts and Scraps. Make sure the fit to canvas box is checked, then click on load.

Layers -> Copy Special -> Copy Merged and add to main canvas, centered.

Open M-barbwire_cbj and add to main canvas, centered. Image -> Free Rotate -> Rotate Left, 20 Degrees.

Open M-stars_cbj and add to main canvas, centered at H400, V300.

Open M-flowers2_cbj and rotate left. Add to main canvas, centered at H650, V400.

Open M-leaves2_cbj and add to main canvas, centered at H250, V400.

Open M-tree_cbj and add to main canvas, centered at H550, V400.

Open M-stairs_cbj and add to main canvas, centered at H400, V475.

Open M_beads_cbj and add to main canvas, centered at H400, V650.

Open tube of choice. I am using Alice by Karen M Koski. Copy the tube layer, and add to main canvas, centered at H350, V375.

Open M_ribbon4_cbj and add to main canvas, centered at H400, V600.

Open M-bee_cbj and resize to 50%. Add to main canvas, centered at H600, V150.

Open M_journalpaper_cbj. On the materials pallet, set both your foreground and background colors to black (#000000). Using font of choice, add the copyright information to the journal paper. For the Alice tube, that information is:

©Karen M. Koski EnchantedCanvas.com MtA-(License #)

I am using Century Gothic, 8 points, bold and centered. I also added the optional background credits and tagged by information at this point. I then free rotated the text right, 14 degrees to match the angle of the journaling paper.

Layers -> Merge - Merge visible, then resize the journaling paper by 75%. Add to main canvas, centered at H650, V650.

Starting with Raster 2, the barbed wire layer and working upward on the layers pallet, add a drop shadow of choice to each of the elements on the main canvas. I am using offsets of 5 each, opacity of 75, blur or 15 and color dark purple (#400040).

You should now save the artist's copy of your tag as a .pspimage file.

Using font or alpha of choice, add desired name to tag. I am using the Foil Cap alpha by SnowsMoon's Designs. I have my name centered at H300, V650, and added a drop shadow to match the rest of the elements on the canvas.

Drop the white background layer and merge visible, resize to 75% (600 x 600 pixels) and save as a .png file and you are all done.

I hope you enjoyed this tutorial. If you should have a problem, please feel free to E-Mail Me and I'll be happy to help you out.
Monday, March 21, 2011

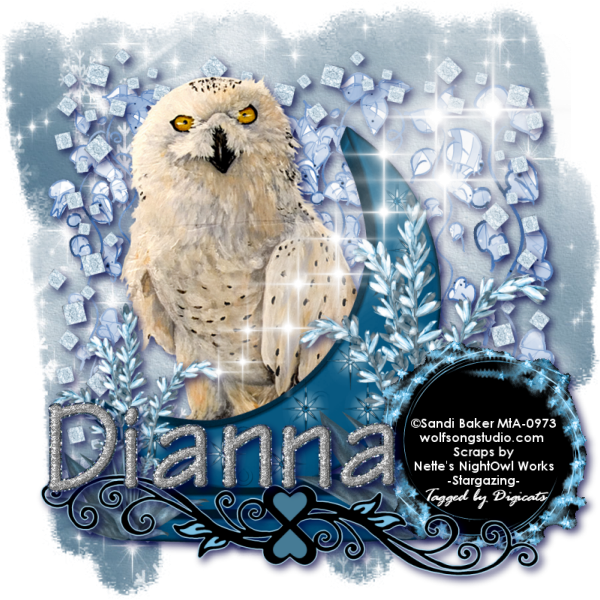
Starlight (PTU) tutorial

Starlight - Dianna


This tutorial was written by Dianna Richards of Digicats (and Dogs)/Di Before Dawn Tutorials. Any resemblance to any other tutorial, published or unpublished, living, dead or undead, is purely coincidental.

Please do not rebroadcast, redistribute or otherwise claim this tutorial or any part there of as your own work.


Items you will need to complete this project:

The Stargazing taggers kit by Nette's NightOwl Works. This is a PTU kit that is available at Stargazers Scraps.

Tube of choice. I am using Snow Owl, by Sandi Baker. This is a PTU tube, and you must have a license to use this tube, which is available at My Tubed Art.

Mask of choice. I am using the Nik_020908_13 mask by Nik's Scripts & Scraps which is part of her PSP Masks Mega Pack.

Font(s) and/or alpha of choice. I am using Century Gothic which is a Windows System font. If you do not have it, you can download it HERE.

The Moonbeam alpha by Julie It Is. This is a free to use alpha that you may download from Julie's blog HERE. Be sure to leave her a thank you if you download.


Note that H# and V# refer to horizontal and vertical coordinates on your canvas ruler grid. Make sure you have View -> Rulers checked in order to see the ruler grid.

When I say "Add to your canvas" I expect that you will copy and paste it as a new layer, unless otherwise stated in the tutorial.

This tutorial assumes you have a working knowledge of PSP. It was written using PSP X3, but should work in PSP 8 and up.

To begin, open a new raster layer canvas, 800 x 800 pxl, flood fill white.

Open paper of choice. I am using nnw sg paper9. Resize to 800 x 800 pixels. Layers -> Load/Save Mask -> Load Mask from Disk. I am using Nik_020908_13. Make sure the fit to canvas box is checked, then click on load.

Edit -> Copy Special -> Copy Merged, then add to main canvas, centered.

Open nnw sg vines and resize to 75%. Add to main canvas, centered at H400, V350.

Open nnw sg diamond border and resize to 75%. Add to main canvas, centered.

Open tube of choice. I am using Snow Owl by Sandi Baker. Copy the tube layer and add to main canvas, centered.

Open nnw sg moon flowers and resize to 75%. Add to main canvas centered at H400, V450.

Using your erase tool, erase the bits of the tube that show to the right and left of the moon flowers element. Return to top layer.

Open a second paper of choice. Use something sort of solid colored - I am using nnw sg paper 6. Open nnw sg star circle and resize to 50%. Copy and paste onto the paper your have just chosen.

using your magic wand (feather set to 0), click anywhere outside the star circle to select. Selections, invert. Selections -> Modify -> Contract 3 pixels Edit -> Copy Special -> Copy Merged, then add to your main canvas, centered at H650, V600.

On the materials pallet, set your foreground color to transparent, and your background color to white (#ffffff). Using font of choice, add the copyright information to the canvas, centering over the Star Circle "tag" you just created. For the Snow Owl tube, that information is:

©Sandi Baker wolfsongstudio.com MtA-0973

I am using Century Gothic, 4 points, bold and centered. I also added the additional background credits and tagged by information at this point. I have my credits centered at H650, V600.

Open nnw sg doodle1 and resize to 75%. Add to main canvas, centered at H400, V700.

Starting with the Vine layer, Raster 2, and working upward, add a drop shadow of choice to each of the elements on your main canvas, except the copyright layer (Vector 1).

I am using offsets - vertical and horizontal - of 5 each, opacity of 75%, blur of 15 and color of dark blue (#000040).

Open nnw sg whitish sparkes and resize to 75%. Mirror. Add to main canvas, centered at H500, V300.

You should now save the artist's copy of your tag was a .pspimage file.

Using font or alpha of choice, add desired name to tag. I am using the Moonbeam Alpha by Julie It Is. I have my name centered at H300, V600, and added a drop shadow to match the rest of the elements on the canvas.

Drop the white background layer and merge visible, resize to 75% (600 x 600 pixels) and save as a .png file and you are all done.

I hope you enjoyed this tutorial. If you should have a problem, please feel free to E-Mail Me and I'll be happy to help you out.
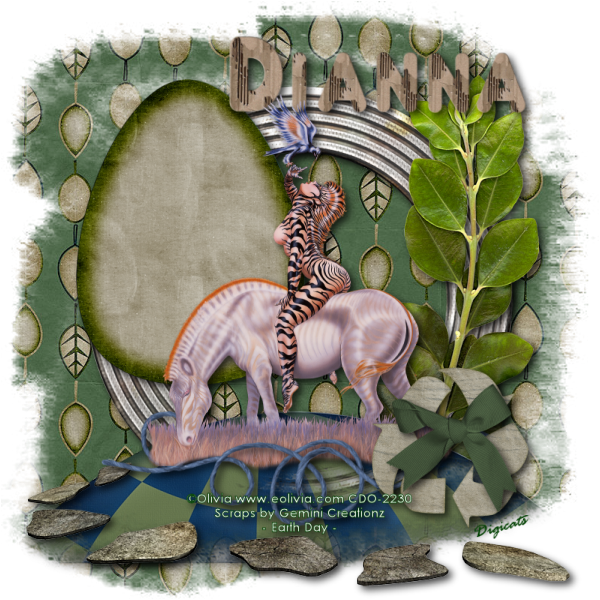
Earth Day (PTU) Tutorial

Earth Day - Dianna


This tutorial was written by Dianna Richards of Digicats (and Dogs)/Di Before Dawn Tutorials. Any resemblance to any other tutorial, published or unpublished, living, dead or undead, is purely coincidental.

Please do not rebroadcast, redistribute or otherwise claim this tutorial or any part there of as your own work.


Items you will need to complete this project:

The Earth Day taggers kit by Gemini Creationz. This is a PTU kit that is part of the new Earth Day collab at Stargazer Scraps. It is free with a $10 purchase, or you can purchase the collab outright for $12.50.

Tube of choice. I am using Zebra Lady, by Olivia. This is a PTU tube, and you must have a license to use this tube, which is available at Creative Design Outlet.

Mask of choice. I am using the Nik_011902_10 mask by Nik's Scripts & Scraps which is part of her PSP Masks Mega Pack.

Font(s) and/or alpha of choice. I am using Century Gothic which is a Windows System font. If you do not have it, you can download it HERE.

I am also using the Corrugated Alpha by Elyne Araujo. This is a PTU alpha. Please check Elyne's blog at the link provided for purchasing information.


Note that H# and V# refer to horizontal and vertical coordinates on your canvas ruler grid. Make sure you have View -> Rulers checked in order to see the ruler grid.

When I say "Add to your canvas" I expect that you will copy and paste it as a new layer, unless otherwise stated in the tutorial.

This tutorial assumes you have a working knowledge of PSP. It was written using PSP X3, but should work in PSP 8 and up.

To begin, open a new raster layer canvas, 800 x 800 pxl, flood fill white.

Open paper of choice. I am using Gemini_EarthDay_paper_02. Layers -> Load/Save Mask -> Load Mask from Disk and select Mask of choice. I am using Nik_011902_10 by Nik's Scrips and Scraps. Make sure the fit to canvas box is checked, then click on load.

Edit -> Copy special -> Copy Merged and add to main canvas, centered.

Open Tree and resize to 65%. Add to main canvas, centered at H250, V350.

Open Earth and add to main canvas, centered at H400, V650. Layers -> Load/Save Mask -> Load Mask from Disk and select the same mask you selected used for the paper layer. Make sure the fit to canvas box is checked, then click on load.

On the layers pallet, click on the mask layer to activate, then go to Layers -> Merge -> Merge Down. Click on Group - Raster 3 to activate.

Open tube of choice. I am using Zebra Lady by Olivia. Copy the Girl Zebra Bird layer and add to main canvas. centered at H400, V375.

Open StoneWalkway and add to main canvas, centered at H400, V700.

Click on Raster 1, the paper layer, to activate. Open metal frame and add to main canvas, centered.

Open EarthDay_Branch_03 and add to main canvas, centered at H600, V400.

Return to top layer.

Open RafiaString and rotate left. Resize to 75%, and add to main canvas, centered at H400, V625.

With your selection tool let to rectangle, replace (feather 0), select the Zebra's nose and grass where it is covered by the string. Right click on Raster 4 on the layers pallet and Promote selection to layer.

Right click on the promoted selection and to go Arrange -> Bring to top. Selections -> Select none.

Open the RecycleSymbol and resize to 50%. Add to main canvas, centered at H600, V600.

Open Bow_01 and resize to 25%. Add to main canvas centered at H600, V600.

On the materials pallet, set your foreground color to dark green (#004000) and your background color to white (#ffffff). Using font of choice, add copyright information to the canvas. For the Olivia tube, that information is:

©Olivia www.eolivia.com CDO-(License#)

I am using Century Gothic, 4 points, bold and centered. I also added the optional background credits and tagged by information at this point. I have my credits centered at H400, V700.

Starting with the frame layer on the your materials pallet and working upward, add a drop shadow of choice to each of the elements on your main canvas, except for the promoted selection. I am using offsets, vertical and horizontal of 5 each, opacity of 75%, blur of 15, and color black (#000000).

You should now save the artist's copy of your tags as a .pspimage file.

On your layers pallet, click on the Earth layer, Raster 3 (Group) to select. Using font or alpha of choice, add desired name to tag. I am using the Corrugated Alpha by Elyne Araujo. I have my name centered at H500, V100, and added a drop shadow to match the rest of the elements on the canvas.

Drop the white background layer and merge visible, resize to 75% (600 x 600 pixels) and save as a .png file and you are all done.

I hope you enjoyed this tutorial. If you should have a problem, please feel free to E-Mail Me and I'll be happy to help you out.
Saturday, March 19, 2011

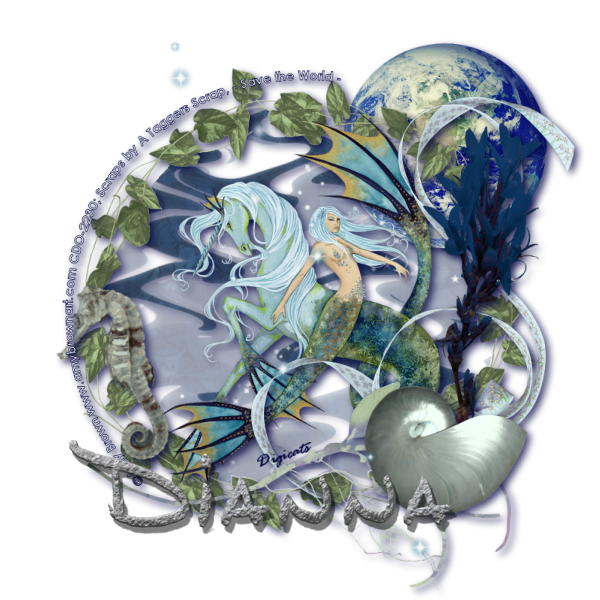
Water, Water Everywhere (PTU) tutorial

Water Water - Dianna


This tutorial was written by Dianna Richards of Digicats (and Dogs)/Di Before Dawn Tutorials. Any resemblance to any other tutorial, published or unpublished, living, dead or undead, is purely coincidental.

Please do not rebroadcast, redistribute or otherwise claim this tutorial or any part there of as your own work.


Items you will need to complete this project:

The Save the World taggers kit by A Taggers Scrap, This is a PTU kit that is part of the new Earth Day collab at Stargazer Scraps. It is free with a $10 purchase, or you can purchase the collab outright for $12.50.

Tube of choice. I am using Aqua Marine, by Amy Brown. This is a PTU tube, and you must have a license to use this tube, which is available at Creative Design Outlet.

The Oceans 1 mask by Cameron. This is a free to use mask that may be download from Cameron Tags. (Resources -> Masks -> Ocean collection).

Font(s) and/or alpha of choice. I am using Century Gothic which is a Windows System font. If you do not have it, you can download it HERE.

I am also using the Dreams Beach alpha by Digiscrap.ch. This is a free to use alpha that may be downloaded at the link provided.


Note that H# and V# refer to horizontal and vertical coordinates on your canvas ruler grid. Make sure you have View -> Rulers checked in order to see the ruler grid.

When I say "Add to your canvas" I expect that you will copy and paste it as a new layer, unless otherwise stated in the tutorial.

This tutorial assumes you have a working knowledge of PSP. It was written using PSP X3, but should work in PSP 8 and up.

To begin, open a new raster layer canvas, 800 x 800 pxl, flood fill white.

On the layers pallet, click on the new layer icon and add new raster layer. (It's the little icon that looks like a couple of pieces of paper directly under the word "Layers" on the Layers pallet.)

Open frame7 and add to main canvas as a new layer, centered.

Open paper of choice. I am using paper 6. Go to layers -> Load/Save Mask -> Load Mask from Disk and select maskcameron_ocean1. Make sure the fit to canvas, box is checked, then click on load.

Edit -> Copy Special -> Copy Merged. Using your magic wand, click anywhere inside the frame to select. With the area still selected, click on Raster 1, the blank layer, on the layers pallet. Edit -> Paste into Selection.

Selections -> Select none.

Open Earth and add to main canvas, centered at H600, V200.

Open fairydust1 and add to main canvas, centered.

Return to the top layer, Raster 2 (the frame layer).

Open tube of choice. I am using Aqua Marine by Amy Brown. Copy the "no Leaves" layer and add to main canvas, centered.

Open bow3 and add to main canvas, centered at H550, V400.

Open leaves4 and add to main canvas, centered at H400, V650.

Open seahorse and add to main canvas, centered at H150, V500. Image -> Free Rotate -> Rotate left, 15 degrees.

Open leaf1 and add to main canvas, centered at h650, V400.

Open shell1 and add to main canvas, centered at H600, V600.

Open bluesparkle and add to main canvas, centered.

On the materials pallet, set your foreground color to dark blue (#000040) and your background color to white (#ffffff). Using font of choice, add copyright information to the tag. For the Aqua Marine tube, that information is:

©Amy Brown www.amybrownart.com CDO-2230

I am using Century Gothic, 4 points, bold and centered. I also added the optional background credits and tagged by information at this point. I then fit text to path to hug the outside of the frame. It is beyond the scope of this tutorial to explain how to do that, but you may find a separate tutorial explaining how to fit text to path HERE.

Starting with the paper layer, Raster 1, andd working upward on the layers pallet, add a drop shadow to each of the elements on your main canvas, except for the fairy dust and blue sparkles layers. I am using offsets, vertical and horizontal, of 5 each, opacity of 75%, blue of 15 and color of dark blue (#000040).

You should now save the artist's copy of your tag as a .pspimage file.

Using font or alpha of choice add desired name to tag. I am using the Dreams Beach alpha (1 & 2) by Digiscrap.ch. I have my name centered at H350, V650. As the alpha comes with a built in drop shadow, I did not add another one.

Drop the white background layer and merge visible, resize to 75% (600 x 600 pixels) and save as a .png file and you are all done.

I hope you enjoyed this tutorial. If you should have a problem, please feel free to E-Mail Me and I'll be happy to help you out.
The Beast Within (PTU) Tutorial

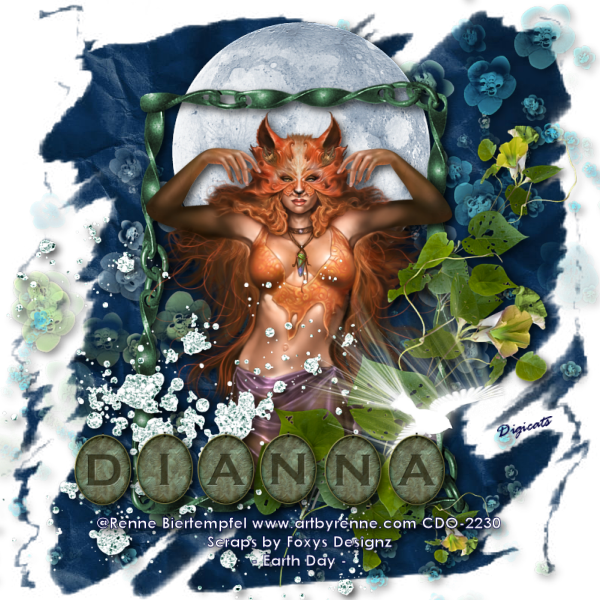
The Beast Within - Dianna


This tutorial was written by Dianna Richards of Digicats (and Dogs)/Di Before Dawn Tutorials. Any resemblance to any other tutorial, published or unpublished, living, dead or undead, is purely coincidental.

Please do not rebroadcast, redistribute or otherwise claim this tutorial or any part there of as your own work.


Items you will need to complete this project:

The Earth Day taggers kit by Foxys Designz, This is a PTU kit that is part of the new Earth Day collab at StargaZer Scraps. It is free with a $10 purchase, or you can purchase the collab outright for $12.50.

Tube of choice. I am using Mask, by Renne Biertempfel. This is a PTU tube, and you must have a license to use this tube, which is available at Creative Design Outlet.

Mask of choice. I am using the Grunge49 mask by Nik's Scripts & Scraps which is part of her PSP Masks Mega Pack.

Font(s) and/or alpha of choice. I am using Century Gothic which is a Windows System font. If you do not have it, you can download it HERE.

I am also using the Charmed alpha by C. Papier. This is a free to use alpha that may be downloaded at the link provided.


Note that H# and V# refer to horizontal and vertical coordinates on your canvas ruler grid. Make sure you have View -> Rulers checked in order to see the ruler grid.

When I say "Add to your canvas" I expect that you will copy and paste it as a new layer, unless otherwise stated in the tutorial.

This tutorial assumes you have a working knowledge of PSP. It was written using PSP X3, but should work in PSP 8 and up.

To begin, open a new raster layer canvas, 800 x 800 pxl, flood fill white.

Open paper of choice. I am using Paper9_FD. Layers -> Load/Save Mask -> Load Mask from Disk and select mask of choice. I am using Grunge49 by Nik's Scripts and Scraps. Make sure the fit to canvas box is checked, then click on load.

Edit -> Copy Special -> Copy Merged and add to main canvas, centered.

Open Element6_FD and add to main canvas, centered.

Open Element11_FD and add to main canvas, centered at H400, V200.

Open Element2_FD and rotate left. Resize to 75%, and add to main canvas, centered.

Open tube of choice. I am using Mask by Renne Biertempfel. Copy the Merged layer, and add to main canvas, centered.

On the layers pallet, right click on the frame layer, Raster 4, and duplicate. Right click on the Copy of Raster 4 and go to Arrange -> Bring to top.

With your selection tool set to rectangle, replace (feather 0), select the top half of the frame layer copy and press delete.

Using your eraser tool, erase the part of the tube dress that hangs beyond the side of the frame to the right. Return to top layer.

Open Element4_FD and resize to 75%. Add to main canvas, centered at H550, V475.

Open Element39_FD and add to main canvas, centered at H250, V550.

Open Element28_FD, and resize to 50%. Add to main canvas, centered at H550, V500.

On the materials pallet, set your foreground color to dark blue (#000040) and your background color to White (#ffffff). Using font of choice, add copyright information to the tag. For the Mask tube that information is:

©Renne Biertempfel www.artbyrenne.com CDO-(License#)

I am using century Gothic, 5 points, bold and centered. I also add the optional background credits and tagged by information at this point. I have my copyright centered at H400, V725.

Starting with Raster 2, the flower layer, and working upward on your layers pallet, add a drop shadow of choice to each of the elements on your main canvas, except for the frame layer copy, and the bird (Raster 8). I am using offsets - vertical and horizontal - of 5 each, opacity of 75, blur of 15 and color black.

You should now save the artist's copy of your tag as a .pspimage file.

Using font or alpha of choice, add desired name to tag. I am using the Charmed alpha by C. Papier. I have my name centered at H300, V625, and added a drop shadow to match the rest of the elements on the canvas.

Drop the white background layer and merge visible, resize to 75% (600 x 600 pixels) and save as a .png file and you are all done.

I hope you enjoyed this tutorial. If you should have a problem, please feel free to E-Mail Me and I'll be happy to help you out.
Friday, March 18, 2011

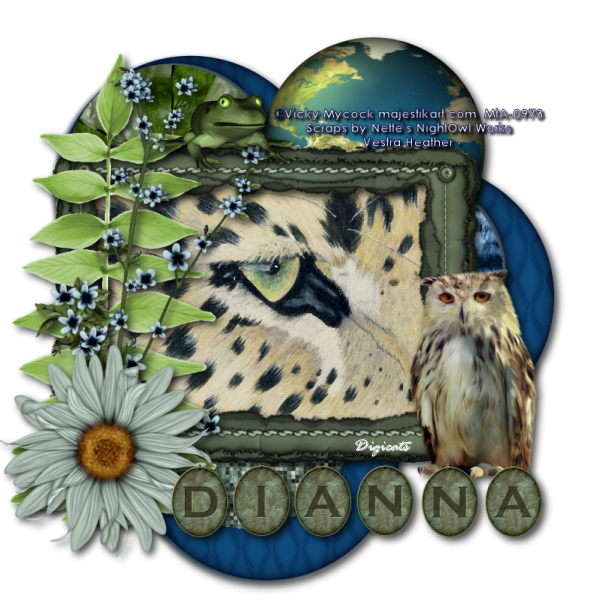
Vanishing Species (PTU) Tutorial

Vanishing Species - Dianna


This tutorial was written by Dianna Richards of Digicats (and Dogs)/Di Before Dawn Tutorials. Any resemblance to any other tutorial, published or unpublished, living, dead or undead, is purely coincidental.

Please do not rebroadcast, redistribute or otherwise claim this tutorial or any part there of as your own work.


Items you will need to complete this project:

The Vestra Heather taggers kit by Nette's NightOwl Works, This is a PTU kit that is part of the new Earth Day collab at Stargazer Scraps. It is free with a $10 purchase, or you can purchase the collab outright for $12.50.

Tube of choice. I am using Watching, by Majestik Art. This is a PTU tube, and you must have a license to use this tube, which is available at My Tubed Art.

Font(s) and/or alpha of choice. I am using Century Gothic which is a Windows System font. If you do not have it, you can download it HERE.

I am also using the Charmed alpha by C. Papier. This is a free to use alpha that may be downloaded at the link provided.


Note that H# and V# refer to horizontal and vertical coordinates on your canvas ruler grid. Make sure you have View -> Rulers checked in order to see the ruler grid.

When I say "Add to your canvas" I expect that you will copy and paste it as a new layer, unless otherwise stated in the tutorial.

This tutorial assumes you have a working knowledge of PSP. It was written using PSP X3, but should work in PSP 8 and up.

To begin, open a new raster layer canvas, 800 x 800 pxl, flood fill white.

Open nnw ed quilted frame and resize to 50%. Copy and add to main canvas three times located at (1) H250, V250, (2) H550, V400, and (3) H300, V600.

Open paper of choice and resize to 50%. I am using nnw ed paper 3. Copy. With your magic wand, click inside frame 1. Selections -> Modify -> Expand, 8 pixels.

Edit -> Paste into selection. Selections - Select none.

Repeat with second and third papers of choice using frames 2 and 3. I am using paper11 and paper5, respectively.

Open nnw ed earth and resize to 50%. Add to main canvas, centered at H500, V200.

Open nnw ed cluster2 and resize to 65%. Add to main canvas, centered at H350, V400.

Open tube of choice. I am using Watching by Majestik Art. Copy the Image layer and add to main canvas, centered at H350, V400. (Right over the frame layer.)

On the layers pallet, right click on the frame layer, Raster 5 and go to Arrange -> Bring to Top.

With your magic wand, click anywhere outside the frame layer to select. On the layers pallet, click on the image layer, Raster 6, and press the delete key.

Selections -> Select none. Return to top layer.

Open nnw ed leaves and resize to 75%. Add to main canvas, centered at H150, V400.

Open nnw ed blossom and mirror. Resize to 75%, and add to main canvas, centered at H200, V400.

Open nnw ed daisy and resize to 35%. Add to main canvas, centered at H150, V600.

Open nnw ed frog and resize to 35%. Add to main canvas, centered at H300, V175.

Open nnw ed owl2 and resize to 35%. Add to main canvas, centered at H625, V500.

On the Materials pallet, set your foreground color to Dark Blue (#000040), and your background color to white (#000000). Using font of choice, add copyright information to the tag. For the watching tube, that information is:

©Vicky Mycock majestikart.com MtA-(License #)

I am using Century Gothic, 4 points, bold and centered. I also added the optional background credits and tagged by information at this point. I have my credits centered at H550, V170.

Using the following settings add a drop shadow to your copyright info: offsets of 3 each, opacity of 100, blur of 5 and color black (#000000).

Starting with Raster 1, the first frame layer, and working upward on your layer pallet, add a drop shadow of choice to each of the elements on your main canvas, except for the tube layer, Raster 6, and the copyright layer. I am using offsets, vertical and horizontal, or 5 each, opacity of 75, blur of 15 and color black (#000000).

You should now save the artist's copy of your tag as a .pspimage file.

Using font or alpha of choice, add desired name to tag. I am using the Charmed alpha by C. Papier. I have my name centered at H475, V670, and added a drop shadow to match the rest of the elements on the canvas.

Drop the white background layer and merge visible, resize to 75% (600 x 600 pixels) and save as a .png file and you are all done.

I hope you enjoyed this tutorial. If you should have a problem, please feel free to E-Mail Me and I'll be happy to help you out.
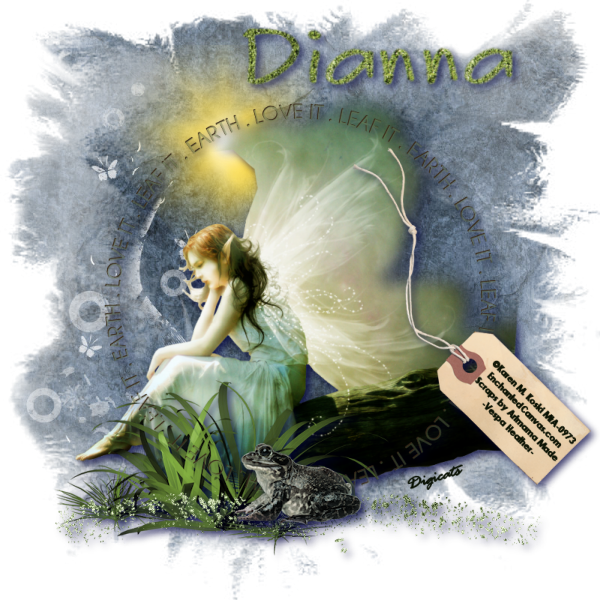
Thursday, March 17, 2011

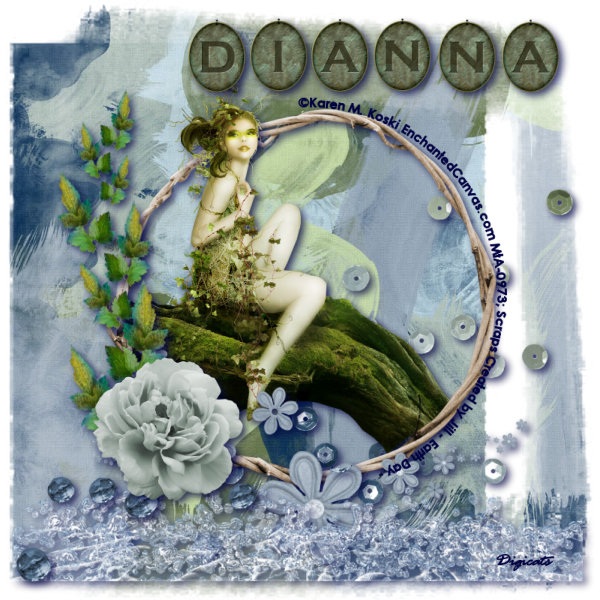
Dryad (PTU) Tutorial

Dryad - Dianna


This tutorial was written by Dianna Richards of Digicats (and Dogs)/Di Before Dawn Tutorials. Any resemblance to any other tutorial, published or unpublished, living, dead or undead, is purely coincidental.

Please do not rebroadcast, redistribute or otherwise claim this tutorial or any part there of as your own work.


Items you will need to complete this project:

The Earth Day taggers kit Created by Jill, This is a PTU kit that is part of the new Earth Day collab at StargaZer Scraps. It is free with a $10 purchase, or you can purchase the collab outright for $12.50.

Tube of choice. I am using Librae, by Karen M. Koski. This is a PTU tube, and you must have a license to use this tube, which is available at My Tubed Art.

Mask of choice. I am using the Grunge6 mask by Nik's Scripts & Scraps which is part of her PSP Masks Mega Pack.

Font(s) and/or alpha of choice. I am using Century Gothic which is a Windows System font. If you do not have it, you can download it HERE.

I am also using the Charmed alpha by C. Papier. This is a free to use alpha that may be downloaded at the link provided.


Note that H# and V# refer to horizontal and vertical coordinates on your canvas ruler grid. Make sure you have View -> Rulers checked in order to see the ruler grid.

When I say "Add to your canvas" I expect that you will copy and paste it as a new layer, unless otherwise stated in the tutorial.

This tutorial assumes you have a working knowledge of PSP. It was written using PSP X3, but should work in PSP 8 and up.

To begin, open a new raster layer canvas, 800 x 800 pxl, flood fill white.

Open paper of choice. I am using CreatedbyJill_EarthDay_paper06. Layers -> Load/Save Mask -> Load Mask from Disk and select mask of choice. I am using Grunge6 by Nik's Scripts and Scraps. Make sure the fit to canvas box is checked then click on load.

Edit -> Copy Special -> Copy Merged, then add to main canvas, centered.

Open CreatedbyJill_EarthDay_sequins and add to main canvas centered at H450, V500.

Open CreatedbyJill_EarthDay_frame5 and resize to 75%. Add to main canvas, centered.

Open tube of choice, I am using Librae by Karen M. Koski. Copy the tube layer and add to the main canvas, centered.

On the layers pallet, right click on Raster 3 and duplicate. Right click on the copy of Raster 3 and go to Arrange -> Bring to top.

With your selection tool set to rectangle, replace (feather 0), select the top half of the frame layer copy and delete.

Selections -> Select None. Using your eraser tool, erase the bits of the tree trunk that fall below the frame layer on the bottom half of the frame.

Return to top layer.

Open CreatedbyJill_EarthDay_flowers 1 and resize to 80%. Add to main canvas, centered at H400, V600.

Open CreatedbyJill_EarthDay_foliage1 and resize to 80%. Add to main canvas, centered at H400, V150.

Open CreatedbyJill_EarthDay_water border and resize to 95%. Add to main canvas, centered at H400, V710

Open CreatedbyJill_EarthDay_beads and add to main canvas, centered at H250, V625. Using your eraser tool, erase the beads the are inside the frame area.

Open CreatedbyJill_EarthDay_flower1 and resize to 50%. Add to main canvas, centered at H225, V675.

On the materials pallet, set both your foreground and your background color to dark blue (#000040). Using font or alpha of choice, add copyright information to the tag. For the Librae tube, that information is:

©Karen M. Koski EnchantedCanvas.com MtA-(License#)

I am using Century Gothic, 4 points, bold and centered. I also added the optional background credits and tagged by information at this point. I then fit text to path to hug the outside of the frame. It is beyond the scope of this tutorial to explain how to do that, but you may find a separate tutorial on fitting text to path HERE.

Starting with Raster 2, the sequin layer and working upward, add a drop shadow of choice to each of the elements on your main canvas, except for the frame layer copy, Copy of Raster 3, and the copyright. I am using offsets - vertical and horizontal - of 5 each, opacity of 75%, blur of 15 and color dark blue (#000040).

You should now save the artist's copy of your tag as a .pspimage file.

Using font or alpha of choice, add desired name to tag. I am using the Charmed alpha by C. Papier. I have my name centered at H500, V75, and added a drop shadow to match the rest of the elements on the canvas.

Drop the white background layer and merge visible, resize to 75% (600 x 600 pixels) and save as a .png file and you are all done.

I hope you enjoyed this tutorial. If you should have a problem, please feel free to E-Mail Me and I'll be happy to help you out.
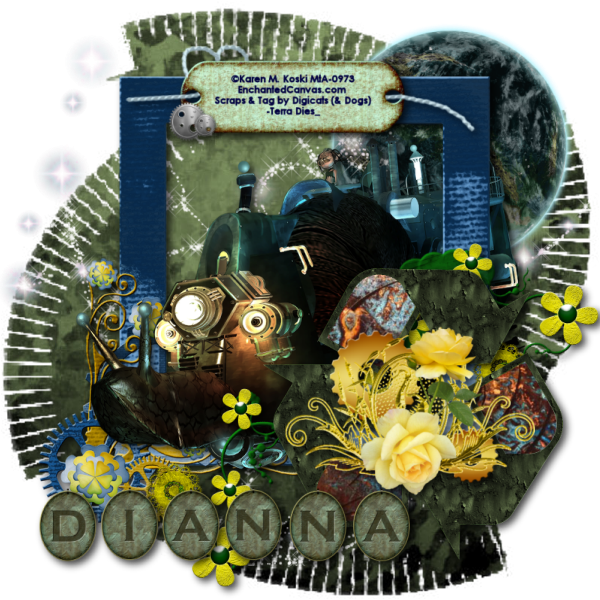
Friends (PTU) Tutorial

Friends - Dianna


This tutorial was written by Dianna Richards of Digicats (and Dogs)/Di Before Dawn Tutorials. Any resemblance to any other tutorial, published or unpublished, living, dead or undead, is purely coincidental.

Please do not rebroadcast, redistribute or otherwise claim this tutorial or any part there of as your own work.


Items you will need to complete this project:

The Vespa Heather taggers kit by Artmama Made, This is a PTU kit that is part of the new Earth Day collab at StargaZer Scraps. It is free with a $10 purchase, or you can purchase the collab outright for $12.50.

Tube of choice. I am using Friends, by Karen M. Koski. This is a PTU tube, and you must have a license to use this tube, which is available at My Tubed Art.

Mask of choice. I am using the Grunge77 mask by Nik's Scripts & Scraps which is part of her PSP Masks Mega Pack.

Font(s) and/or alpha of choice. I am using Century Gothic which is a Windows System font. If you do not have it, you can download it HERE.

I am also using the Parfum Printemps alpha by Digiscrap.ch. This is a free to use alpha that may be downloaded at the link provided.


Note that H# and V# refer to horizontal and vertical coordinates on your canvas ruler grid. Make sure you have View -> Rulers checked in order to see the ruler grid.

When I say "Add to your canvas" I expect that you will copy and paste it as a new layer, unless otherwise stated in the tutorial.

This tutorial assumes you have a working knowledge of PSP. It was written using PSP X3, but should work in PSP 8 and up.

To begin, open a new raster layer canvas, 800 x 800 pxl, flood fill white.

Open paper of choice. I am using AM-Vespa Heather06. Layers -> Load/Save Mask -> Load mask from disk and select mask of choice. I am using Gunge77 by Nik's Scripts and Scraps. Make sure the fit to canvas box is checked, then click on load.

Edit -> Copy Special -> Copy Merged and add to main canvas, centered.

Open AM-Vespa Heather embellie04 and add to main canvas, centered at H300, V200.

Open tube of choice. I am using Friends by Karen M. Koski. Copy the tube layer and add to main canvas, centered.

Open AM-Vespa Heather embellie16 and add to main canvas, centered aht H300, V625.

Open AM-Vespa Heather embellie24 and add to main canvas, centered at H400, V700.

Open AM-Vespa Heather embellie11 and add to main canvas, centered.

Open AM-Vespa Heather embellie07 and add to main canvas, centered at H400, V650.

On the materials pallet, set both your foreground and your background colors to very dark green (#091102).

Open AM-Vespa Heather embellie12 and rotate left. Using font of choice, add copyright information. for the Friends tube, that information is:

©Karen M. Koski EnchantedCanvas.com MtA-(License #)

I am using Century Gothic, 3 points, bold and centered. I then free rotated my text left, 45 degrees to match the angle of the tag and located it to fit (H350, V85). I also added the optional background credits and tagged by information at this point.

Merge visible, the rotate right. Add to main canvas, centered at H630, V420.

Starting with Raster 3, the tube layer, on your layers pallet and working upward, add a drop shadow of choice to the elements on your main canvas. I am using offsets - vertical and horizontal - of 5 each, opacity of 75%, blur of 15 and color of dark blue (#000040).

You should now save the artist's copy of your tag as a .pspimage file.

Using font or alpha of choice add desired name to tag. I am using the Parfum Printemps alpha (1 & 3) by Digiscrap.ch. I have my name centered at H500, V75, and have added a drop shadow to it to match the rest of the tag.

Drop the white background layer and merge visible, resize to 75% (600 x 600 pixels) and save as a .png file and you are all done.

I hope you enjoyed this tutorial. If you should have a problem, please feel free to E-Mail Me and I'll be happy to help you out.
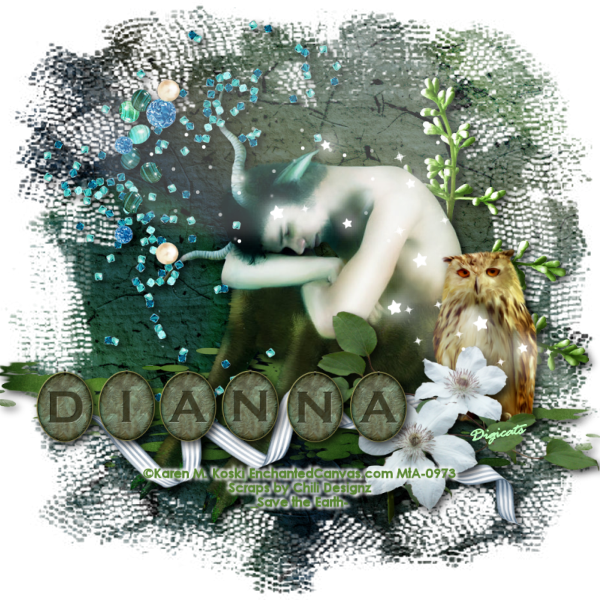
Tuesday, March 15, 2011

The Future Past (PTU) Tutorial

Future Past - Dianna


This tutorial was written by Dianna Richards of Digicats (and Dogs)/Di Before Dawn Tutorials. Any resemblance to any other tutorial, published or unpublished, living, dead or undead, is purely coincidental.

Please do not rebroadcast, redistribute or otherwise claim this tutorial or any part there of as your own work.


Items you will need to complete this project:

The Terra Dies taggers kit by Digicats (& Dogs), This is a PTU kit that is part of the new Earth Day collab at StargaZer Scraps. It is free with a $10 purchase, or you can purchase the collab outright for $12.50.

Tube of choice. I am using Who Knew 2, by Karen M. Koski. This is a PTU tube, and you must have a license to use this tube, which is available at My Tubed Art.

Mask of choice. I am using the Train Tracks mask by Nik's Scripts & Scraps which is part of her PSP Masks Mega Pack.

Font(s) and/or alpha of choice. I am using Century Gothic which is a Windows System font. If you do not have it, you can download it HERE.

I am also using the Charmed alpha by C. Papier. This is a free to use alpha that may be downloaded at the link provided.


Note that H# and V# refer to horizontal and vertical coordinates on your canvas ruler grid. Make sure you have View -> Rulers checked in order to see the ruler grid.

When I say "Add to your canvas" I expect that you will copy and paste it as a new layer, unless otherwise stated in the tutorial.

This tutorial assumes you have a working knowledge of PSP. It was written using PSP X3, but should work in PSP 8 and up.

To begin, open a new raster layer canvas, 800 x 800 pxl, flood fill white.

Open paper of choice. I am using DCD_TeDi_Paper17. Layers -> Load/Save Mask -> Load Mask from Disk and select mask of choice. I am using Train Tracks by Nik's Scripts and Scraps. Make sure the fit to canvas box is checked, then click on load.

Edit -> Copy Special -> Copy Merged and add to main canvas, centered.

Open DCD_TeDi_Planet and resize to 75%. Add to main canvas, centered at H600, V200.

Open DCD_TeDi_Glitters and add to main canvas, centered.

Open DCD_TeDi_Frame02 and add to main canvas, centered at H350, V400.

Open tube of choice. I am using WhoKnew2 by Karen M. Koski. Copy the tube layer, and add to main canvas, centered.

Right click on the frame layer, Raster 4, and duplicate. Right click on the copy of Raster 4 and go to Arrange -> Bring to Top.

With your selection tool set to Rectangle, Replace (Feather 0), Select the left half the frame copy, Copy of Raster 4 and delete.

Selections -> Select None. Select the bottom of the frame copy, Copy of raster 4, and delete as well.

Selection -> Select None. Open DCD_TeDi_Spring Doodle and add to main canvas, centered at H500, V550.

Open DCD_TeDi_Recycle Logo 2 and resize to 50%. Add to main canvas, centered at H550, V550.

Open DCD_TeDi_Flower Cluster and resize to 75%. Add to main canvas, centered at H550, V550.

Open Tag06. On the materials pallet, set your foreground and background colors to dark blue (#000040). Using font of choice, add copyright information to the tag. For the Who Knew 2 tube, that information is:

I am using Century Gothic, 4 points bold and centered. I also added the optional background credits and tagged by information at this point. I centered my information more or less in the center of Tag06.

Merge visible and resize to 75%. Add to main canvas centered at H400, V125.

Starting with Raster 4, the frame layer and working upward on the layers pallet, add a drop shadow of choice to each of the elements on the main canvas except for the frame layer copy, Copy of Raster 4. I am using offsets, vertical and horizontal, of 5 each, opacity of 75%, blur of 15, and color black (#000000).

You should now save the artist's copy of your tag as a .pspimage file.

Using font or alpha of choice, add desired name to tag. I am using the Charmed alpha by C. Papier. I have my name centered at H300, V700, and added a drop shadow to match the rest of the elements on the canvas.

Drop the white background layer and merge visible, resize to 75% (600 x 600 pixels) and save as a .png file and you are all done.

I hope you enjoyed this tutorial. If you should have a problem, please feel free to E-Mail Me and I'll be happy to help you out.
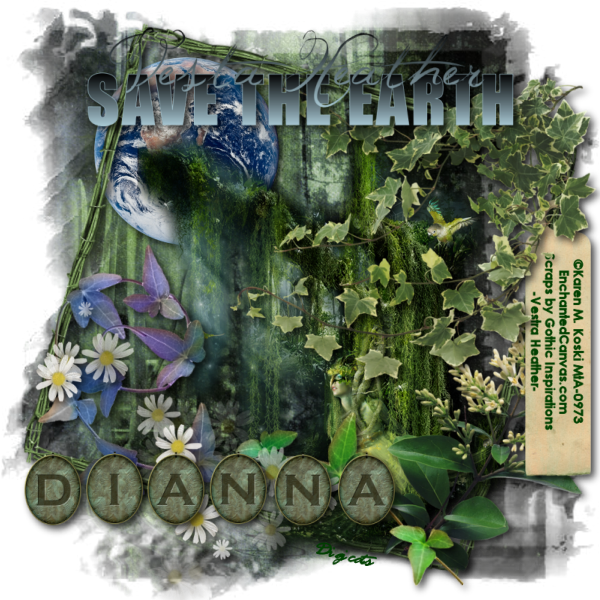
Earthy Encounter (PTU) tutorial

Earthy Encounter - Dianna


This tutorial was written by Dianna Richards of Digicats (and Dogs)/Di Before Dawn Tutorials. Any resemblance to any other tutorial, published or unpublished, living, dead or undead, is purely coincidental.

Please do not rebroadcast, redistribute or otherwise claim this tutorial or any part there of as your own work.


Items you will need to complete this project:

The Save the Earth taggers kit by Chili Designz, This is a PTU kit that is part of the new Earth Day collab at Stargazer Scraps. It is free with a $10 purchase, or you can purchase the collab outright for $12.50.

Tube of choice. I am using Fawn, by Karen M. Koski. This is a PTU tube, and you must have a license to use this tube, which is available at My Tubed Art.

Mask of choice. I am using the Grunge60 mask by Nik's Scripts & Scraps which is part of her PSP Masks Mega Pack.

Font(s) and/or alpha of choice. I am using Century Gothic which is a Windows System font. If you do not have it, you can download it HERE.

I am also using the Charmed alpha by C. Papier. This is a free to use alpha that may be downloaded at the link provided.


Note that H# and V# refer to horizontal and vertical coordinates on your canvas ruler grid. Make sure you have View -> Rulers checked in order to see the ruler grid.

When I say "Add to your canvas" I expect that you will copy and paste it as a new layer, unless otherwise stated in the tutorial.

This tutorial assumes you have a working knowledge of PSP. It was written using PSP X3, but should work in PSP 8 and up.

To begin, open a new raster layer canvas, 800 x 800 pxl, flood fill white.

Open paper of choice. I am using CHILI_DESIGNZ_Save_the_Earth_paper12. Resize to 90%. Layers -> Load/Save Mask -> Load Mask from Disk and select mask of choice. I am using Grunge60 by Nik's Scripts and Scraps. Make sure the Fit to Canvas box is checked, then click on load.

Edit -> Copy Special -> Copy Merged, then add to main canvas, centered.

Open CHILI_DESIGNZ_Save_the_Earth_flower3 and add to main canvas, centered at H550, V400.

Open CHILI_DESIGNZ_Save_the_Earth_greenery and add to main canvas, centered at H400, V550.

Open Tube of choice. I am using Fawn, but Karen M. Koski. Copy the tube layer and add to main canvas, centered.

Open CHILI_DESIGNZ_Save_the_Earth_beadspill and add to main canvas, centered at H250, V300.

Open CHILI_DESIGNZ_Save_the_Earth_owl and resize to 75%. Add to main canvas, centered at H650, V450.

Open CHILI_DESIGNZ_Save_the_Earth_ribbon03 and resize to 75%. Add to main canvas, centered at H400, V600.

Open CHILI_DESIGNZ_Save_the_Earth_flower6 and resize to 75%. Add to main canvas, centered at H600, V550.

Open CHILI_DESIGNZ_Save_the_Earth_sparkles, and add to main canvas, centered at H450, v300.

Starting with Raster 2, the flower3 layer, and working upward on your layer pallet, add a drop shadow of choice to each of the elements on your main canvas, except for the sparkles layer, Raster 9. I am using offsets, horizontal and vertical of 5 each, opacity of 75%, blur of 15, and color of black (#000000).

On the materials pallet, set both your foreground and your background colors of leaf green (#58862f). Using font of choice, add copyright information to the tag. For the Fawn tube, that information is:

©Karen M. Koski EnchantedCanvas.com MtA-(License#)

I am using Century Gothic, 4 points, bold and centered. I have my copyright centered at H400, V650, and have also added the background credits and optional tagged by information at this point.

Using the following settings, add a white drop shadow to your credits: Offsets of 3 each, opacity of 100%, blur of 5 and color #ffffff. Repeat using offsets of -3 each and leaving all other settings the same.

You should now save the artist's copy of your tag as a .pspimage file.

Using font or alpha of choice, add desired name to tag. I am using the Charmed alpha by C. Papier. I have my name centered at H300, V550, and added a drop shadow to match the rest of the elements on the canvas.

Drop the white background layer and merge visible, resize to 75% (600 x 600 pixels) and save as a .png file and you are all done.

I hope you enjoyed this tutorial. If you should have a problem, please feel free to E-Mail Me and I'll be happy to help you out.

Vestra Heather (PTU) tutorial

Vestra Heather - Dianna


This tutorial was written by Dianna Richards of Digicats (and Dogs)/Di Before Dawn Tutorials. Any resemblance to any other tutorial, published or unpublished, living, dead or undead, is purely coincidental.

Please do not rebroadcast, redistribute or otherwise claim this tutorial or any part there of as your own work.


Items you will need to complete this project:

The Vestra Heather taggers kit by Gothic Inspirations, This is a PTU kit that is part of the new Earth Day collab at Stargazer Scraps. It is free with a $10 purchase, or you can purchase the collab outright for $12.50.

Tube of choice. I am using Earth, by Karen M. Koski. This is a PTU tube, and you must have a license to use this tube, which is available at My Tubed Art.

Mask of choice. I am using the Grunge31 mask by Nik's Scripts & Scraps which is part of her PSP Masks Mega Pack.

Font(s) and/or alpha of choice. I am using Century Gothic which is a Windows System font. If you do not have it, you can download it HERE.

I am also using the Charmed alpha by C. Papier. This is a free to use alpha that may be downloaded at the link provided.


Note that H# and V# refer to horizontal and vertical coordinates on your canvas ruler grid. Make sure you have View -> Rulers checked in order to see the ruler grid.

When I say "Add to your canvas" I expect that you will copy and paste it as a new layer, unless otherwise stated in the tutorial.

This tutorial assumes you have a working knowledge of PSP. It was written using PSP X3, but should work in PSP 8 and up.

To begin, open a new raster layer canvas, 800 x 800 pxl, flood fill white.

Open paper of choice I am using Paper3-GI_VestaHeather. Resize to 800 x 800 pixels. Layers -> Load/Save Mask -> Load mask from Disk and select mask of choice. I am using Grunge31 by Nik's Scripts and Scraps. Make sure the fit to canvas box is checked, then click on load.

Edit -> Copy Special -> Copy Merged, then add to main canvas, centered.

Open Earth and resize to 40%. Add to main canvas, centered at H250, V200.

Open Frame5 and resize to 75%. Add to main canvas, centered. Image -> Free rotate -> Rotate right, 15 degrees.

Open tube of choice. I am using Earth by Karen M. Koski. Copy tube 3, and add to main canvas, centered at H425, V450.

Open Ivy and resize to 75%. Add to main canvas, centered at H550, V300.

Open Leaves1 and rotate right, then Mirror. Add to main canvas, centered at H600, V300. Image -> Free Rotate -> Rotate right, 30 degrees.

Open Daisies and resize to 75%. Add to main canvas, centered at H600, V250.

Open Floral1, resize to 75%, and mirror. Click on Raster 4, the tube layer, to activate, then add to main canvas, centered at H600, V600. Using your eraser tool erase the bits that fall below the frame on the bottom of the canvas.

Open Tag and resize to 75%. Rotate left. On the materials pallet, set both your foreground and your background colors to dark green (#004000). Using font of choice, add copyright information to the tag. for the Earth tube, that information is:

©Karen M. Koski EnchantedCanvas.com MtA-(License#)

I am using Century Gothic, 4 points, bold and centered. I also added the background credits and tagged by information at this point.

Merge visible, then rotate tag right. Copy and add to main canvas, centered at H750, V450.

Return to top layer.

Open WordArt and resize to 75%. Add to main canvas, centered at H400, V100.

Starting with Raster 2 on your layers pallet, the earth layer, and working upward, add a drop shadow of choice to each of the elements on your main canvas. I am using offsets, Vertical and horizontal of 5 each, opacity of 75%, blur of 15 and color black (#000000).

You should now save the artist's copy of your tag as a .pspimage file.

Using font or alpha of choice, add desired name to tag. I am using the Charmed alpha by C. Papier. I have my name centered at H275, V650, and added a drop shadow to match the rest of the elements on the canvas.

Drop the white background layer and merge visible, resize to 75% (600 x 600 pixels) and save as a .png file and you are all done.

I hope you enjoyed this tutorial. If you should have a problem, please feel free to E-Mail Me and I'll be happy to help you out.