This tutorial was written by Dianna Richards of Digicats (and Dogs)/Di Before Dawn tutorials. Any resemblance to any other tutorial, published or unpublished, living, dead or undead, is purely coincidental.
Please do not rebroadcast, redistribute or otherwise claim this tutorial or any part there of as your own work.
Items you will need to complete this project:
The Punk Fae kit (including the Add on Freebie) by Scraps by j0eswife, which may be purchased at Digital Chaos and other fine online stores.
Tube of choice. I am using PSP11444 Punk Pony by Cybercat. You must have a license to use this tube, which may be obtained at www.mypsptubes.com.
Cameron Mask # 25, which you can download for free from her website.
Font and Alpha (optional) of choice. I am using the Silver alpha by Crazed's Creations, which is a FTU alpha that may be which may be download from her blog.
Note that H# and V# refer to Horizontal and vertical coordinates on your canvas grid. Make sure you have View, Rulers checked in order to see the ruler grid.
When I say "Add to your canvas" I expect that you will copy and paste it as a new layer, unless otherwise state in the tutorial.
This tutorial assumes you have a working knowledge of PSP. It was written using PSP X1, but should work in most other versions of PSP.
Open a new raster canvas, 800 x 800 pxls, flood fill white.
Open SBJ_Paper 10. Resize to 60%. Select Layers --> Load/Save Mask --> Load Mask from Disk and locate Cameron Mask 25. Make sure the "Fit to canvas" box is checked in Orientation, and the "Invert Transparency" box under Options, then click on load.
Layers --> Merge --> Merge Group. Add to your canvas located at H500, V500.
Repeat the above steps with SBJ_Paper 1, except that when you add it the canvas, center at H300, V300.
Freebie Add on, open SBJ_Frame 5. Add to canvas, centered.
Still in the Freebie Add on, open SBJ_Flower 1, resize to 50% and add to canvas centered at H130, V200.
Open Freebie Add On SBJ_Flower 2, resize to 50% and add to canvas centered at H650, V600.
Open Freebie Add on Triple Heart frame, resize to 60% and add to canvas centered at H400, V200.
Resize your canvas to 75% (600 x 600 pxls).
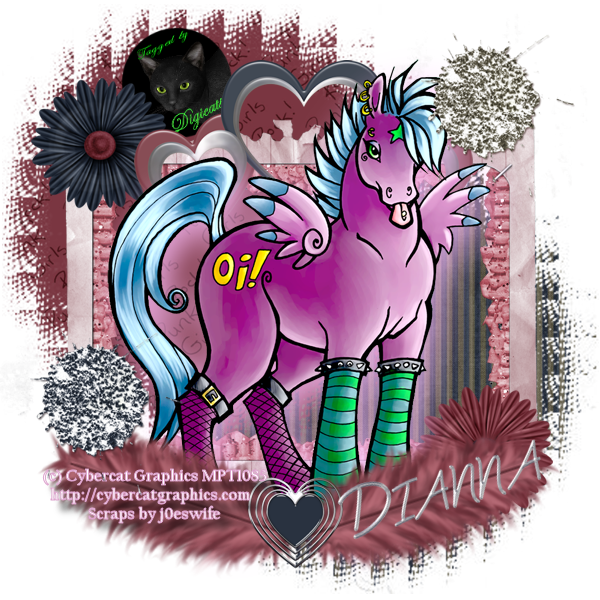
Open PSP11444_SCCyberCat PunkPony and copy the tube (no glow) and add to canvas, centered.
Add a drop shadow glow to the tube. I am using Offsets, V&H of 10 each, Opacity of 80, blur of 45 and color of #ffc0ff.
Open Freebie Add On Feather, then select image --> rotate left. Resize to 65% and add to canvas, centered at H180, V500. Using your pick tool, rotate clockwise about 20 to 25 degrees.
Duplicate and Mirror.
Open Heart Charm 2, resize to 50% and add to canvas, H300, V520.
On the materials pallet, set your foreground color to #dea5cf and your background color to #ffffff (White). Using font of choice, add the copyright info for your tube and your scraps by line to your tag.
For the Punk Pony tube, the copyright info is:
(c) Cybercat Graphics http://cybercatgraphics.com YOUR MPT License #
Scraps by j0eswife
I am using California FB, 4 points, bold and centered. I also added a drop shadow to make it more legible.
You may also add your tag by info at this point.
Open SBJ_Glitter Splat 4, resize to 50% and add to canvas, centered at H480, V100.
Repeat with SBJ_Glitter Spat 2, except center at V100, 400.
You can now save your artist's copy as a .pspimage file.
Using the optional alpha of choice, add the name of your choice to your canvas, then drop the white background select layers --> Merge --> Merge Visible and save as a .png file. Or merge to the white background and save as a .jpg file.
I hope you enjoyed this tutorial. If you should have a problem, please feel free to E-Mail Me and I'll be happy to help you out.
No comments:
Post a Comment