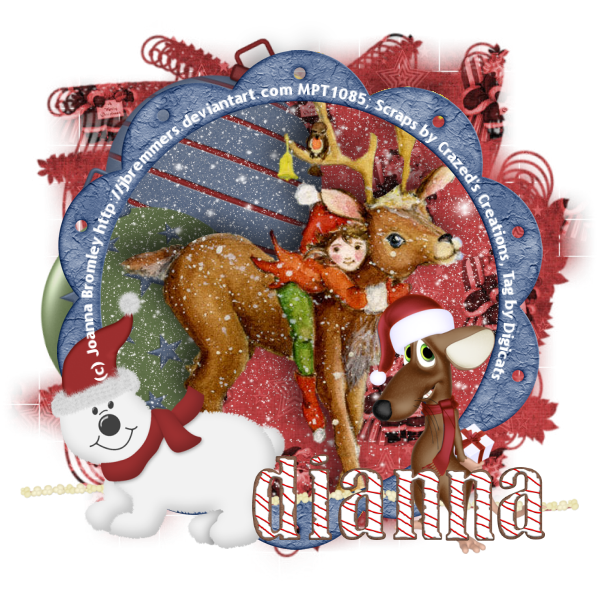
This tutorial was written by Dianna Richards of Digicats (and Dogs)/Di Before Dawn Tutorials. Any resemblance to any other tutorial, published or unpublished, living, dead or undead, is purely coincidental.
Please do not rebroadcast, redistribute or otherwise claim this tutorial or any part there of as your own work.
Items you will need to complete this project:
The Christmas Critters taggers kit by Crazed's creations. This is PTU kit available at Scrappeting.com.
Tube of choice. I am using psp6778-SCBromley Winter Elf and Deer by Joanna Bromley. You must have a license to use this tube, which is available at MyPSPTubes.com.
Wee Scots Mask #281 which you can download HERE.
Snow overlay, which you may snag HERE.
Alpha and/or font of choice. I am using the Striped Gingerbread Cookie Alpha by Nutshell Creations, which is a PTU alpha available at Scrappetizing.com.
Note that H# and V# refer to Horizontal and vertical coordinates on your canvas grid. Make sure you have View, Rulers checked in order to see the ruler grid.
When I say "Add to your canvas" I expect that you will copy and paste it as a new layer, unless otherwise state in the tutorial.
This tutorial assumes you have a working knowledge of PSP. It was written using PSP X1, but should work in PSP 8 and up.
Open a new raster layer canvas, 800 x 800, flood filled white.
Open Crazed-paper3_CCT. Select Layers --> Load/Save Mask --> Load Mask from Disk and find Wee Scots Lass mask # 281. Make sure the "Fit to Canvas" button is checked, then click on load.
Copy merged, and add to your canvas as a new layer, centered.
Open Crazeds_ornament3_CCT and add to canvas, H300, V250. Image --> Free Rotate --> Free Rotate right, 20 degrees.
Open Crazeds_ornament2_CCT and add to canvas, H150, V400. Image --> Free Rotate --> Free Rotate left, 20 degrees.
Resize your canvas by 75% to 600 x 600 Pxls. Make sure the resize all layers box is checked.
Add the snow overlay to your canvas, centered.
Open psp6778_SCBromley - Winter Elf and Deer. copy the tube layer and add to canvas, centered.
Add a drop shadow of choice to your tube layer. I am using offsets, vertical and horizontal of -10 ear, opacity of 65, blur of 25, color black (#000000),
Open Crazeds-frame5_CCT and add to canvas, centered.
Using your magic wand tool, click anywhere outside the frame to select. On the layers pallet, highlight the tube layer (it should be Raster 4) then click on delete.
Selections --> None.
On the layers pallet, click on the frame layer to activate it.
Open Popcornstring_CCT, resize to 70% and add to canvas, centered at H300, V500.
Open Crazeds_polarbear_CCT, resize to 65% and add to canvas, centered at H165, v420.
Open Crazeds_mouse2_CCT, mirror, resize to 65% and add to canvas centered at H450, V420.
On the Materials pallet, set your foreground color to transparent and your background color to White (#ffffff).
Using font of choice, add copyright info to tag. For the Bromley tube, the information is:
(c) Joanna Bromley http://jbremmers.deviantart.com Your MTPLicense#
I am using Trebucket MS, 4 point, bold, centered. and then converted to raster and manually adjusted using the pick tool.
Save you artist's copy as a .pspimage file.
Using the font or alpha of choice, add your name to the tag centered at around H400, V500. Actual location will depend on the length of the name. I am using the Gingerbread Alpha by Nutshell Creations. This is a full sized alpha I've resized for tagging.
Delete the White background layer, merge visible and save as a .png file and your all done!
I hope you enjoyed this tutorial. If you should have a problem, please feel free to E-Mail Me and I'll be happy to help you out.
No comments:
Post a Comment