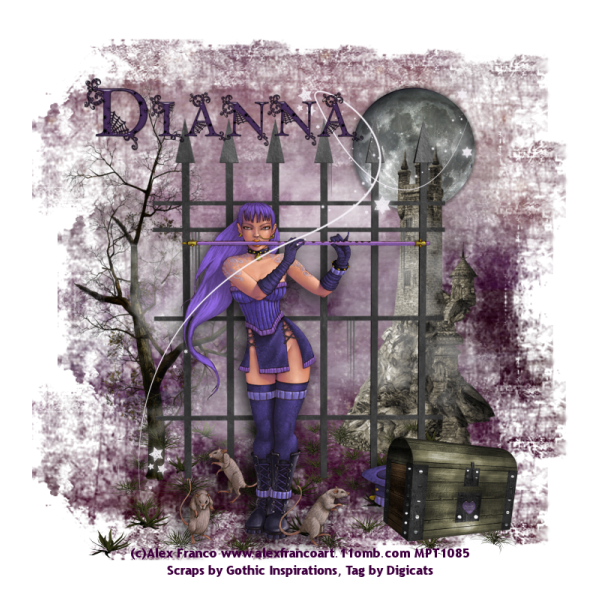
This tutorial was written by Dianna Richards of Digicats (and Dogs)/Di Before Dawn Tutorials. Any resemblance to any other tutorial, published or unpublished, living, dead or undead, is purely coincidental.
Please do not rebroadcast, redistribute or otherwise claim this tutorial or any part there of as your own work.
Items you will need to complete this project:
The Destiny taggers kit by Gothic Inspirations. This is a PTU kit which may be purchased at the Gothic Inspirations store.
Tube of choice. I am using psp12793-Piper by Alex Franco. You must have a license to use this tube, which may be purchased at MyPSPTubes.com.
Wee Scots Lass mask #83 which you can download HERE.
Font(s) and/or alpha of choice. I am using Trebuchet MS which is a windows system font, and the Goth Chic alpha by Whispy's D'zines, which is a FTU alpha that may be downloaded from her blog.
Note that H# and V# refer to Horizontal and vertical coordinates on your canvas grid. Make sure you have View, Rulers checked in order to see the ruler grid.
When I say "Add to your canvas" I expect that you will copy and paste it as a new layer, unless otherwise state in the tutorial.
This tutorial assumes you have a working knowledge of PSP. It was written using PSP X1, but should work in PSP 8 and up.
Open a new raster layer canvas, 800 x 800 pxls, flood filled white.
Open Paper2-GI_Destiny. Go to layers --> load/save mask --> load mask from disk and locate Wee Scots Lass mask #83. Make sure the fit to canvas box is checked, then click on load.
Copy merged and add to main canvas, centered.
Open Moon-GI_Destiny, resize to 35%, then add to main canvas, centered at H550, V200.
Open Castle1-GI-Destiny, resize to 65%, and add to main canvas, centered at H550, V400.
Open Tree-GI_Destiny, resize to 75% then add to canvas, centered at H250, V375.
Open Grass-GI_Destiny, and add to main canvas, centered at H400, V650
Open Fog2-GI_Destiny, and add to main canvas, centered.
Open Fog1-GI_Destiny, and add to main canvas, centered.
Open Fence-GI_Destiny, and add to main canvas, centered.
Open psp12793-SCFranco-Piper, copy the Tube 2 layer and add to main canvas, centered at H400, V500.
Add drop shadow of choice to tube. I am using offsets Vertical of 7, Horizontal of -7, opacity of 85, blur of 35, color black (#000000).
Open Chest-GI_Destiny, resize to 35% and add to main canvas, centered at H600, V650.
Open DustTrail-GI_Destiny, and add to main canvas, centered.
On the materials pallet, set your foreground color to transparent and your background color to dark purple (#400040). Using font of choice, add copyright information to the tag.
For the Piper tube, that information is: (c)Alex Franco www.alexfrancoart.11omb.com Your_MPTLicense#.
I am using Trebuchet MS, 4 points, bold and centered.
You can now save the artist's copy of your tag as a .pspimage file.
Using font of alpha of choice, add name of choice to tag. I am using the Goth Chic alpha by Whispy's D'zines. I have the name centered at H300, V150. Actual location will depend upon length and size of name.
Delete the white background layer and merge visible. Resize to 75% (600 x 600 pxls) and save as a .png file and your all done!
I hope you enjoyed this tutorial. If you should have a problem, please feel free to E-Mail Me and I'll be happy to help you out.
No comments:
Post a Comment