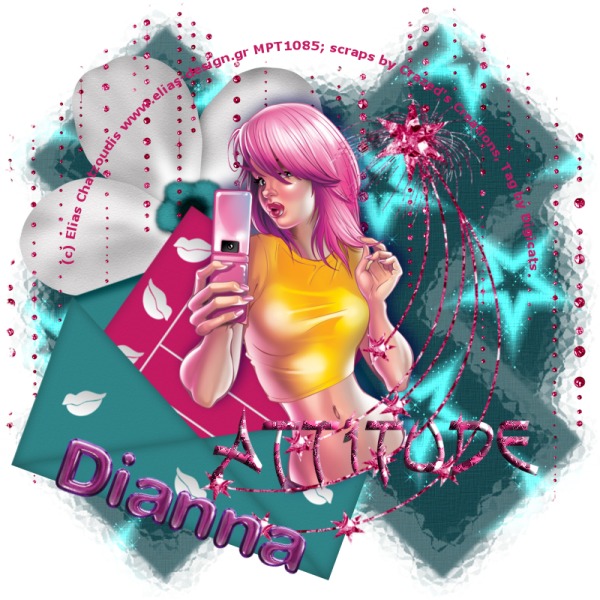
This tutorial was written by Dianna Richards of Digicats (and Dogs)/Di Before Dawn Tutorials. Any resemblance to any other tutorial, published or unpublished, living, dead or undead, is purely coincidental.
Please do not rebroadcast, redistribute or otherwise claim this tutorial or any part there of as your own work.
Items you will need to complete this project:
The All About Attitude taggers kit by Crazed's Creations. This is a PTU kit, which available at Just4Taggers.com as well as other fine online stores.
Tube of choice. I am using psp15216-Clubbing by Elias Chatzoudis. You must have a license to use this tube, which is available at MYPSPTubes.com.
Wee Scots Lass mask #225 which you can download HERE.
Font(s) and/or alpha of choice. I am using Verdana which is a windows system font, and the Goth Chic alpha by Sarah Bryan. This is a FTU alpha which may be downloaded from Sarah's Blog.
Note that H# and V# refer to Horizontal and vertical coordinates on your canvas grid. Make sure you have View, Rulers checked in order to see the ruler grid.
When I say "Add to your canvas" I expect that you will copy and paste it as a new layer, unless otherwise state in the tutorial.
This tutorial assumes you have a working knowledge of PSP. It was written using PSP X1, but should work in PSP 8 and up.
Open a new raster layer canvas, 800 x 800 pxls, flood fill white.
Crazeds_paper11_AAMAT. Layers --> Load/Save Mask --> Load Mask from Disk and select Wee Scots Lass mask #243. Make sure the "Fit to Canvas" button is checked, then click on load.
Copy Merged and add to main canvas, centered.
Open Crazeds_blingcurtain1_AAMAT and add to canvas, centered at top.
Using your magic wand tool, click anywhere outside the paper area on Raster 1 to select, then activate Raster 2, the bling curtain layer and press delete.
Selections --> Select None.
Open Crazeds_forgetmenot3_AAMAT and add to main canvas, centered at H250, V300. ON the layers pallet, drag it under the bling curtain layer.
Open Crazeds_envelope1_AAMAT and add to main canvas, centered at H300, V500. Images --> Free rotate --> Rotate right 20 degrees.
Open psp15216-SCChatzoudis-Clubbing, copy Raster 1 and add to main canvas, centered.
Open Crazeds_stars4_AAMAT and mirror. Add to main canvas centered at H500, V450.
Image --> free rotate --> rotate right 45 degrees.
Using your eraser tool, erase the part of the tube that falls between the second and outside lines of the star.
Add a drop shadow of choice to tube. I am using offsets vertical of -7, horizontal of 7, opacity 65, blur of 25, color very dark blue (#000040).
Open Crazed_word1_AAMAT and add to main canvas, centered at H500, V600.
On the materials pallet, set your foreground color to transparent and your background color to raspberry (#c51b63). Using font of choice add copyright information to the tag.
For the Clubbing tube, that information is (c) Elias Chatzoudis www.elias-design.gr Your MPTLicense#.
I am using Verdana, 6 points, bold and centered and fit text to patch to mirror the arch of the stars on the bottom of the tag.
You can now save the artist's copy of you tag as a .pspimage file.
Using font of alpha of choice add name of choice to tag. I am using the Goth Chic alpha by Sarah Bryan, which is a FTU alpha.
I centered the name at H150, V650 and then used free rotate to rotate it right, 20 degrees. Actual location may very depending upon the size and length of your name.
Delete your white background layer and Merge visible. Resize tag by 75% to 600 x 600 pxls and save as a .png file and your all done!
I hope you enjoyed this tutorial. If you should have a problem, please feel free to E-Mail Me and I'll be happy to help you out.
No comments:
Post a Comment