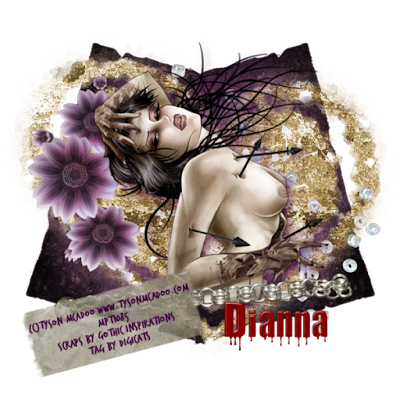
This tutorial was written by Dianna Richards of Digicats (and Dogs)/Di Before Dawn Tutorials. Any resemblance to any other tutorial, published or unpublished, living, dead or undead, is purely coincidental.
Please do not rebroadcast, redistribute or otherwise claim this tutorial or any part there of as your own work.
Items you will need to complete this project:
The Vindictive Pleasures taggers kit by Gothic Inspirations. This is a PTU kit which may be purchased at the Gothic Inspirations store.
Tube of choice. I am using psp15475-LovedToDeath by Tyson McAdoo. You must have a license to use this tube, which may be purchased at MyPSPTubes.com.
Wee Scots Lass mask #171 which you can download HERE.
Font(s) and/or alpha of choice. I am using Trash Hand which is a FTU font that can be downloaded from Free Digital Scrapbooking.com, and the Bloody alpha by Sarah Bryan, which is a FTU alpha that may be downloaded from Pimp by tags with Scraps.
Note that H# and V# refer to Horizontal and vertical coordinates on your canvas grid. Make sure you have View, Rulers checked in order to see the ruler grid.
When I say "Add to your canvas" I expect that you will copy and paste it as a new layer, unless otherwise state in the tutorial.
This tutorial assumes you have a working knowledge of PSP. It was written using PSP X1, but should work in PSP 8 and up.
To begin, open a new raster layer canvas, 800 x 800, Flood filled white.
Open Parchment-GI_VindictivePleasures. Copy and add to main canvas, centered. Images --> Free Rotate --> rotate right, 15 degrees.
Relocate to H300, V400. Duplicate and mirror.
Open Paper16-GI_VindictivePleasures. Go to Layers --> Load/Save Mask --> Load mask from disk and locate Wee Scots Lass mask #171. Make sure the fit to canvas box is checked, then click on load.
Copy merged and add to main canvas, centered.
Open Flowers-GI_VindictivePleasures and add to main canvas, centered at H250, V350.
Open Beads-GI_VindictivePleasures and add to main canvas, centered at H550, V400.
Open psp15475-SCMcAdoo-LovedToDeath and copy the bonus close up. Add to canvas centered at H400, V350.
Add drop shadow of choice to tube. I am using offsets, vertical and horizontal of 7 each, opacity of 65, blur of 25, color dark purple (#400040).
Open Chain-GI_VindictivePleasures and resize to 75%. Copy and add to main canvas, centered at H400, V600. This will put it right at the bottom of the tube layer.
Open Tape-GI-vindictivePleasures and add to main canvas, centered at H225, V650. Image --> Free Rotate --> Rotate left, 15 degrees.
On the materials pallet, set your foreground color to transparent and your background color to dark purple (#400040). Using font of choice add copyright info to the tag.
For the Loved to Death tube that information is: (c)Tyson McAdoo www.tysonmcadoo.com Your_MPTLicense_#.
I am using Trash Hand, 6 points, bold and centered and then free rotated the text left, 15 degrees to match the tape.
You can now save the artist's copy of the tag as a .pspimage file.
Using font or alpha of choice, add name of choice to tag. I am using the Bloody alpha by Sarah Bryan, and have located the name at H550, V650. Actual location will depend upon the size and length of the name you are using.
Delete the White background layer, merge visible and resize to 75% (600 x 600 pxls). Save as a .png file and your all done!
I hope you enjoyed this tutorial. If you should have a problem, please feel free to E-Mail Me and I'll be happy to help you out.
No comments:
Post a Comment