Tuesday, November 30, 2010

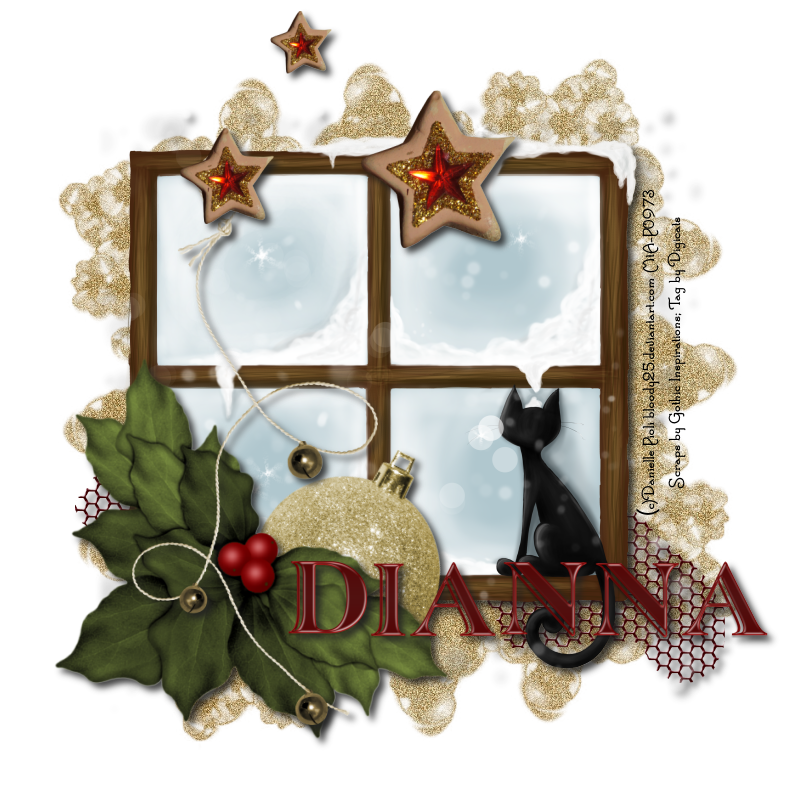
Christmas Memories (PTU) Tutorial - Free Scraps

Christmas Memories - Dianna


This tutorial was written by Dianna Richards of Digicats (and Dogs)/Di Before Dawn Tutorials. Any resemblance to any other tutorial, published or unpublished, living, dead or undead, is purely coincidental.

Please do not rebroadcast, redistribute or otherwise claim this tutorial or any part there of as your own work.


Items you will need to complete this project:

The Christmas Memories Sampler taggers kit by Gothic Inspirations, which you can download from Jessica's blog, HERE.

Tube of choice. I am using Snow Window, by Danielle Pioli. This is a PTU tube, and you must have a license to use this tube, which is available at MIStaken Art.

Mask of choice. I am using Wee Scots Mask #277 which you can download HERE.

Font(s) and/or alpha of choice. I am using Santa's Sleigh, which is a FTU font that can be downloaded from Free Digital Scrapbooking HERE, and the Classic Christmas Alpha, which is a FTU Alpha that you can download HERE.


Note that H# and V# refer to Horizontal and vertical coordinates on your canvas grid. Make sure you have View, Rulers checked in order to see the ruler grid.

When I say "Add to your canvas" I expect that you will copy and paste it as a new layer, unless otherwise state in the tutorial.

This tutorial assumes you have a working knowledge of PSP. It was written using PSP X3, but should work in PSP 8 and up.

To begin, open a new raster layer canvas, 800 x 800 pxl, flood fill white.

Open paper of choice. I am using Paper5-GI_ChristmasMemoriesSampler. Layers -> Load/Save Mask -> Load Mask from Disk and select mask of choice.

I am using Wee Scots Lass mask #277. Make sure the fit to canvas box is checked, then click on load.

Resize to 85%, edit -> Copy Special -> Copy Merged and add to main canvas, centered.

Open Mesh-GI_ChristmasMemoriesSampler, and add to main canvas, centered at H400, V550.

Open Snow Window by Danielle Pioli, copy the tube layer and add to main canvas, centered.

Open Holly-GI_ChristmasMemoriesSampler, resize to 85% and add to main canvas, centered at H250, V550.

Open Bells-GI_ChristmasMemoriesSampler, resize to 85% and add to main canvas, centered at H250, V435.

Open Stars-GI_ChristmasMemoriesSampler, Image -> Mirror, Image -> Flip, resize to 65% and add to main canvas, centered at H350, v125.

Click on the tube layer - Raster 3 - to activate. Open Christmas Ball-GI_ChristmasMemoriesSampler, resize to 50% and add to main canvas centered at H350, V550.

Image -> Free Rotate -> Rotate right, 25%.

Starting with the mesh layer - Raster 2 - and working upward, add a drop shadow of choice to the elements on your main canvas.

I am using offsets, vertical and horizontal of 5 each, opacity of 85, blur of 10 and color of very dark gray (#202020).

On the material pallet, set your foreground color to transparent and your background color to black (#000000). Using font of choice, add copyright information to your tag.

For the Snow window tube, that information is:

(c)Danielle Pioli bloody25.deviantart.com Your MtA-License#

You may also add the background credits and tagged by info at this point. I am using Santa's Sleigh Full, 4 points, bold and centered.

I then free rotated my text left, 90 degrees and aligned it on the right size of the window, at H660, V350.

You can now save the artist's copy of your tag as a .pspimage file.

Using font or alpha of choice, add name of choice to tag. I am using the Classic Christmas alpha, which is a FTU alpha, and have my name centered at H525, V600. Your location may vary depending upon the size of the font/alpha you are using, and the length of the name.

Add a matching drop shadow to the name.

Drop your white background layer, and merge visible. Resize to 75% (600 x 600 pixels) and add save as a .png file and you're all done.

Note that if you are planning on using the tag on Facebook, you may wish to save it as a .jpg as Facebook does not handle .png well.

I hope you enjoyed this tutorial. If you should have a problem, please feel free to E-Mail Me and I'll be happy to help you out.
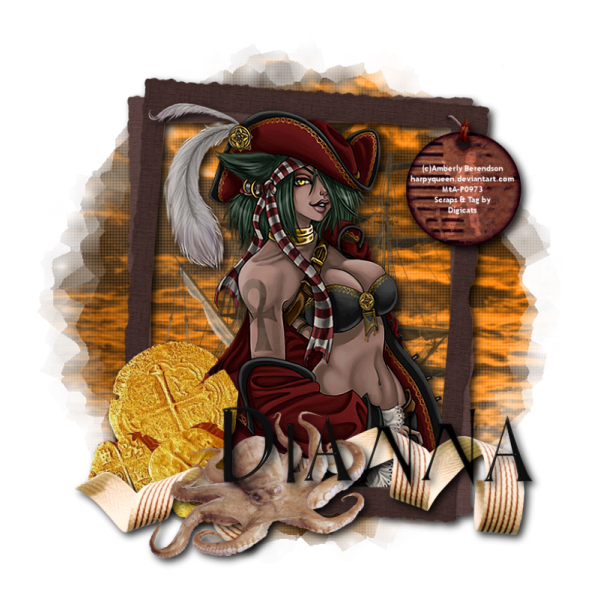
The Kracken's Daughter Tutorial (Free Scraps)

The Kracken's Daughter


This tutorial was written by Dianna Richards of Digicats (and Dogs)/Di Before Dawn Tutorials. Any resemblance to any other tutorial, published or unpublished, living, dead or undead, is purely coincidental.

Please do not rebroadcast, redistribute or otherwise claim this tutorial or any part there of as your own work.


Items you will need to complete this project:

My Treasure Isle taggers kit which you can download from my blog, HERE.

Tube of choice. I am using Cleo's PinUp, by Amberly Berendson. This is a PTU tube, and you must have a license to use this tube, which is available at MIStaken Art.

Mask of choice. I am using Wee Scots Mask #291 which you can download HERE.

Font(s) and/or alpha of choice. I am using Trebuchet MS, which is a windows system font, and the Black Epoxy Alpha, which is a FTU Alpha that you can download from Free Digital Scrapbooking - HERE.


Note that H# and V# refer to Horizontal and vertical coordinates on your canvas grid. Make sure you have View, Rulers checked in order to see the ruler grid.

When I say "Add to your canvas" I expect that you will copy and paste it as a new layer, unless otherwise state in the tutorial.

This tutorial assumes you have a working knowledge of PSP. It was written using PSP X3, but should work in PSP 8 and up.

To begin, open a new raster layer canvas, 800 x 800 pxl, flood fill white.

Open paper of choice. I am using DCD_TrIs_Paper08. Layers -> Load/Save mask -> Load Mask from Disk and select mask of choice. I am using Wee Scots Lass Mask # 219. Make sure the fit to canvas box it checked, then click on load.

Edit -> Copy Special -> Copy Merged and add to main canvas, centered.

Open DCD_TrIs_PirateShip02, resize to 75% and add to main canvas, centered. On the Layers pallet, change the Opacity to 75%.

Open DCD_TrIs_Frame04, resize to 85% and add to main canvas, centered.

Open tube of choice I am using CleosPinup by Amberly Berendson. Copy the tubed layer, and add to the main canvas, centered.

On the layers pallet, right click on the frame layer (Raster 3) and duplicate. Drag the copy over the tube layer, Raster 4.

With your selection tool set to rectangle, replace, select the top half of the Copy of Raster 3, and delete.

Selections -> Select None.

Open DCD_TrIs_Pieces_of_Eight, resize to 75% and add to main canvas, centered at H225, V575.

Open DCD_TrIs_Ribbon03, resize to 75% and add to main canvas centered at H400, V650.

Open DCD_TrIs_Octopus, resize to 75% and add to main canvas, centered at H350, V550.

On the Materials pallet, set your foreground color to transparent and your background color to white (#ffffff).

Open DCD_TrIs_Tag01. Using font of choice, add copyright information to the tag. For the Cleo's PinUp tube, that information is:

(c)Amberly Berendson harpyqueen.deviantart.com Your MtA-License#

I am using Trebuchet, 4 points, bold and centered and then used my pick tool to fine tune the size and placement on the tag.

Layers -> Merge Visible. Resize tag to 75%, and add to main canvas, centered at H625, V175.

Using your eraser tool, erase the strings on the tag. Use your pick tool to fine tune the placement, making it look like the string knot is tied to the staple on the frame.

Starting with the frame layer (Raster 3) and working upward, add a drop shadow of choice to each of the element on main canvas, except for the Copy of Raster 3, the frame copy.

I am using offsets, vertical and horizontal of 5 each, opacity of 85%, blur of 15, color black (#000000).

You can now save the artist's copy of your tag as a .pspimage.

Using font or alpha of choice, add name of choice to tag. I am using the Black Epoxy Alpha and have my name centered at H500, V600. Your actual placement may vary depending upon the size of the font/alpha and length of the name you are using.

Add a matching drop shadow to the name.

Drop the white background layer, and merge visible. Resize your tag to 75% (600 x 600 pixels), and save as a .png file, and you're all done.

Note that if you are planning on using the tag on Facebook, you may wish to save it as a .jpg as Facebook does not handle .png well.

I hope you enjoyed this tutorial. If you should have a problem, please feel free to E-Mail Me and I'll be happy to help you out.
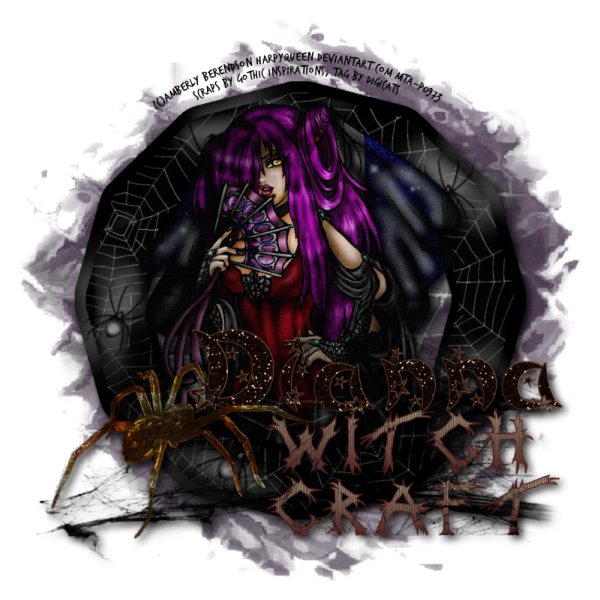
Witch Craft (PTU) Tutorial

WitchCraft - Dianna


This tutorial was written by Dianna Richards of Digicats (and Dogs)/Di Before Dawn Tutorials. Any resemblance to any other tutorial, published or unpublished, living, dead or undead, is purely coincidental.

Please do not rebroadcast, redistribute or otherwise claim this tutorial or any part there of as your own work.


Items you will need to complete this project:

The Two Friends, Two Styles taggers kit by Gothic Inspirations, which is a PTU kit available at Gothic Inspirations.com.

Tube of choice. I am using Beautiful Yet Deadly, by Amberly Berendson. This is a PTU tube, and you must have a license to use this tube, which is available at MIStaken Art.

Mask of choice. I am using Nik's Grunge100 mask by Nik's Scripts & Scraps which is part of her PSP Masks Mega Pack.

Font(s) and/or alpha of choice. I am using Trash Hand, which is a free to use font that you can snag HERE, and the Bewitched alpha, which is a PTU alpha from Gemini Creationz.


Note that H# and V# refer to Horizontal and vertical coordinates on your canvas grid. Make sure you have View, Rulers checked in order to see the ruler grid.

When I say "Add to your canvas" I expect that you will copy and paste it as a new layer, unless otherwise state in the tutorial.

This tutorial assumes you have a working knowledge of PSP. It was written using PSP X3, but should work in PSP 8 and up.

To begin, open a new raster layer canvas, 800 x 800 pxl, flood fill white.


Open paper of choice. I am using Paper7-GI_TwoFriendsTwoStyles. Layers -> Load/Save Mask -> Load mask from Disk and select mask of choice. I am using Nik's Grunge100. Make sure the fit to canvas box is checked, then click on load.

Resize to 90%. Edit -> Copy Special - Copy Merged and add to main canvas, centered.

Open Brick-GI_TwoFriendsTwoStyles, copy and add to main canvas, centered.

Open Frame3-GI_TwoFriendsTwoStyles, resize to 75% and add to main canvas, centered.

Open tube of choice. I am using Amberly Berendon's "Beautiful Yet Deadly". Copy the tube layer and add to your main canvas, centered.

On the layer pallet, click on Raster3. With you selection tool set to rectangle, replace, select only small portion of the frame down near the bottom where the dress on the tube overlaps.

Select -> Select none.

Copy, then click on the tube layer (Raster 4) and add to main canvas. Realign so that the copied portion matches up with the frame underneath the tube.

Open Web1-GI_TwoFriendsTwoStyles, and add to main canvas, centered at H400, V550.

Open Word Art-GI_TwoFriendsTwoStyles, resize to 75% and add to main canvas, centered at H550, V625.

Open Spider-GI_TwoFriendsTwoStyles, resize to 75%, and add to main canvas, centered at H250, V600.

Starting with Raster 2 and working upward add a drop shadow of choice to each of the layers except the frame copy (Raster 5). I am using offsets, vertical and horizontal of 5 each, opacity of 85, Blur of 15 and color black (#000000).

On the Materials pallet, set your foreground color to transparent and your background color to black (#000000). Using font of choice, add copyright information to the tag. For the "Beautiful Yet Deadly" tube, that information is:

(c)Amberly Berendson harpyqueen.deviantart.com Your MtA-License#

I am using Trash Hand, 4 points, bold and centered, and then I fit the text to path. I also add the background and tagged by information.

You can now save the artist's copy of your tag as a .pspimage file.

Click on the word art layer, Raster 8.

Using font or alpha of choice, add name of choice to tag. I have my name centered at H500, V500, right over the word art. Your placement may vary depending upon the size of the font or alpha and the length of the name you are using.

Add a matching drop shadow to the name.

Drop your white background layer, and merge visible. Resize to 75% (600 x 600 pixels) and save as a .png file and you're all done.

If you are planning on using the tag on Facebook, you might want to save it as a .jpg file, as Facebook's handling of .pngs has changed and the tags look better with the white background on them.

I hope you enjoyed this tutorial. If you should have a problem, please feel free to E-Mail Me and I'll be happy to help you out.

Monday, November 29, 2010

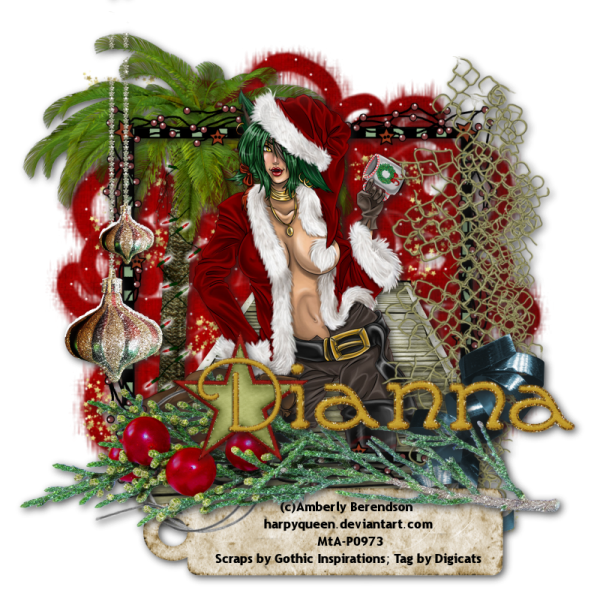
A Pirate's Christmas

Xmas in July - Dianna


This tutorial was written by Dianna Richards of Digicats (and Dogs)/Di Before Dawn Tutorials. Any resemblance to any other tutorial, published or unpublished, living, dead or undead, is purely coincidental.

Please do not rebroadcast, redistribute or otherwise claim this tutorial or any part there of as your own work.


Items you will need to complete this project:

The Christmas in July taggers kit by Gothic Inspirations, which is a PTU kit available at Gothic Inspirations.com.

Tube of choice. I am using Cleo Claus, by Amberly Berendson. This is a PTU tube, and you must have a license to use this tube, which is available at MIStaken Art.

Mask of choice. I am using Wee Scots Mask #341 which you can download HERE.

Font(s) and/or alpha of choice. I am using Trebuchet MS, which is a windows system font, and the Tis the Season alpha, which is a PTU alpha from Gemini Creationz.


Note that H# and V# refer to Horizontal and vertical coordinates on your canvas grid. Make sure you have View, Rulers checked in order to see the ruler grid.

When I say "Add to your canvas" I expect that you will copy and paste it as a new layer, unless otherwise state in the tutorial.

This tutorial assumes you have a working knowledge of PSP. It was written using PSP X3, but should work in PSP 8 and up.

To begin, open a new raster layer canvas, 800 x 800 pxl, flood fill white.

Open paper of choice. I am using Paper9-GI_CIJuly. Layers -> Load/Save Mask -> Load mask from Disk. Select mask of choice. I am using Wee Scots Lass mask # 341.

Resize to 90%, Edit -> Copy Special -> Copy Merged and add to main canvas, centered.

Open GlitterTrail-GI_CUJuly and add to main canvas, centered.

Open PalmTree-GI_CIJuly, resize to 75%, and add to main canvas, centered at H250, V350.

Open BdWalk_GI_CIJuly and add to main canvas, centered at H400, V550. On the layers pallet click on the paper layer, Raster1. Using your magic wand, click anywhere outside the masked layer to select. With the area still selected, click on the boardwalk (Raster 4) and delete.

Selections -> Select None.

Open Frame1-GI_CIJuly, resize to 75%, and add to main canvas, centered.

Open tube of choice. I am using Amberly Berendson's CleoClaus. Copy the tube layer and add to main canvas, centered at H370, V360.

On the Layers pallet, right click on the frame layer (Raster5) and duplicate. Drag the copy of the frame over the tube.

With your selection tool set to rectangle, replace, select the top half of the copy of the frame and delete.

Selections -> Select None.

Open Netting_GI_CIJuly, resize to 85% and add to main canvas centered at H620, V400.

Open CurledRib-GI_CIJuly, resize to 50% and add to main canvas, centered at H630, V580.

Open Festive-GI_CIJuly, and add to main canvas, centered at H400, V600.

Open Ornaments-GI_CIJuly and add to main canvas, centered at H150, V200.

Using your eraser tool, erase the bits of the ornament cords that are above the palm tree and between the palm tree leaves.

Open Tag2-GI_CIJuly and rotate left. Using font of choice add the copyright information to the tag. For the CleoClaus tube that information is:

(c)Amberly Berendson harpyqueen.deviantart.com Your MtA-License#

I am using the font Trebuchet MS, 4 points, bold and centered.

Layers, merge visible and then add to your main canvas, centered H400, V640.

On the layers pallet, drag the Festive layer (Raster10) over the op of the tag (Raster12). Using your eraser tool erase just a tiny little bit of the branch so the copyright is clear to read and the artist's name isn't covered.

On the layers pallet, click on Raster 3, the palm tree layer to active. Starting with that layer and working upward add a drop shadow of choice to the elements on your main canvas, except for the copy of the frame layer.

I am using offsets, vertical and horizontal of 3 each, opacity of 85, blur of 15 and color of light black (#202020).

You can now save the artist's copy of your tag as a .pspimage file.

Using font or alpha of choice, add name of choice to tag. I have the name centered at H500, V575. Actual location will vary depending upon the size of the font/alpha you are using and the length of the name.

Add a matching drop shadow to the name.

Drop the white background layer and merge visible. Resize to 75% (600 x 600 pixels) and save as a .png file, and your all done.

Note that if you are planning on using your tag on Facebook, you will probably want to save the file as a .jpg file. Facebook changed the way they handle .pngs, and they look pretty horrid.

I hope you enjoyed this tutorial. If you should have a problem, please feel free to E-Mail Me and I'll be happy to help you out.

Sunday, November 28, 2010

Mama Noel Tutorial (PTU)

Mama Noel - Dianna


This tutorial was written by Dianna Richards of Digicats (and Dogs)/Di Before Dawn Tutorials. Any resemblance to any other tutorial, published or unpublished, living, dead or undead, is purely coincidental.

Please do not rebroadcast, redistribute or otherwise claim this tutorial or any part there of as your own work.


Items you will need to complete this project:

The Silver Bells taggers kit by Crazed's Creations which is a PTU kit available at Scrappetizing.com.

Tube of choice. I am using Mama Noel, by Luna Designs. This is a PTU tube, and you must have a license to use this tube, which is available at MIStaken Art.

Wee Scots Mask #315 which you can download HERE.

Font(s) and/or alpha of choice. I am using the font Trebuchet MS, which is a windows system font, and the Icy Snow Alpha. This is a FTU alpha that can be downloaded from Free Digital Scrapbooking.com.


Note that H# and V# refer to Horizontal and vertical coordinates on your canvas grid. Make sure you have View, Rulers checked in order to see the ruler grid.

When I say "Add to your canvas" I expect that you will copy and paste it as a new layer, unless otherwise state in the tutorial.

This tutorial assumes you have a working knowledge of PSP. It was written using PSP X3, but should work in PSP 8 and up.

To begin, open a new raster layer canvas, 800 x 800 pxl, flood fill white.

Open Paper of choice. I am using Crazeds_paper9_SBT. Layers -> Load/Save Mask -> Load Mask from Disk and load mask of choice. I am using Wee Scots Lass mask #315. Make sure the fit to canvas box is checked, then click on load.

Edit -> Copy Special -> Copy Merged and add to main canvas, centered.

Open Crazeds_tree2_SBT, and add to main canvas, centered at H250, V350.

Open Crazeds_frame2_SBT, and add to main canvas, centered.

Open Tube of choice. I am using Mama Noel by Luna Designs. Copy Raster1 and add to main canvas, centered at H450, V350.

On the layers pallet, right click on the frame layer (Raster3) and duplicate. Drag Copy of Raster3 over the tube layer (Raster4).

With you selection tool set to rectangle, replace, select top half of the frame copy and delete.

Selections -> Select None.

Open Crazeds-branch2_SBT and add to main canvas, centered at H450, V600.

Open Crazeds_bird_SBT, resize to 65% and add to main canvas, centered at H600, V635.

Click on the paper layer (Raster1) to activate. Open Crazeds_snowflake4_STB and add to main canvas, centered at H550, V200.

Click on Copy of Raster 3, the frame copy layer to activate. Open Crazeds_bells1, and add to main canvas centered at H225, V400.

Open Crazeds_Snowflake6_SBT. Resize to 50%, and add to main canvas centered at H225, V200.

On the layers pallet, click on the first snowflake (Raster7) to activate. This is the snowflake right on top of the paper layer Raster 1.

Starting with the snowflake and working upward, add a drop shadow of choice to each of the elements in your tag, except for Copy of Raster 3 (the frame copy).

I am using offsets of vertical and horizontal, 3 each, opacity of 85, blur of 15, and color of very dark grey (#202020).

On the materials pallet, set your foreground color to transparent, and your background color to dark blue (#000040). Using font of choice, add copyright information to the tag.

For the Mama Noel tag, that information is (c)Luna Designs ladolccevitta.blogspot.com Your MTA-License#

I free rotated the copyright left, 90 degrees and located it at copyright at H600, V400. You can put it where ever you want, as long as it's on there.

you can now save the artist's copy of your tag as a .pspimage file.

Using font of alpha of choice, add name of choice to tag. I have my name centered at H250, V650. Actual location will Vary depending upon the size of the font/alpha and the length of name you are using.

Add a matching drop shadow to the name.

Drop your white background layer and merge visible. Resize to 75% (600 x 600 pixels), and save a .png file and you're all done!

I hope you enjoyed this tutorial. If you should have a problem, please feel free to E-Mail Me and I'll be happy to help you out.
Woodland Winter PTU Tutorial (Scraps only)

Woodland Winter - Dianna


This tutorial was written by Dianna Richards of Digicats (and Dogs)/Di Before Dawn Tutorials. Any resemblance to any other tutorial, published or unpublished, living, dead or undead, is purely coincidental.

Please do not rebroadcast, redistribute or otherwise claim this tutorial or any part there of as your own work.


Items you will need to complete this project:

The Golden Christmas taggers kit by Tammy's Scraps which is a PTU kit available at Scrappetizing.com.

Wee Scots Mask #327 which you can download HERE.

Font(s) and/or alpha of choice. I am using the font Santa's Sleigh (Full) and the Classic Christmas Alpha. Both are FTU and can be downloaded from Free Digital Scrapbooking.com.


Note that H# and V# refer to Horizontal and vertical coordinates on your canvas grid. Make sure you have View, Rulers checked in order to see the ruler grid.

When I say "Add to your canvas" I expect that you will copy and paste it as a new layer, unless otherwise state in the tutorial.

This tutorial assumes you have a working knowledge of PSP. It was written using PSP X3, but should work in PSP 8 and up.

To begin, open a new raster layer canvas, 800 x 800 pxl, flood fill white.

Open paper of choice. I am using Golden Winter Paper10. Layers -> Load/Save Mask -> Load Mask from Disk and select mask of choice. I am using Wee Scots Lass mask #327.

Make sure the fit to canvas box it checked, then click on load.

Edit -> Copy Special -> Copy Merged and add to main canvas, centered.

Open Golden winter Star Beads 1 and add to main canvas, centered.

Open Golden Winter Element 18, and add to main canvas centered at H200, V400. Right click on the element on the layer pallet and duplicate. Image -> Mirror.

Open Golden Winter Element1 and add to main canvas, centered at H400, V350.

Open Golden Winter Element22, resize to 50%, and add to main canvas, centered at H450, V400.

On the layers pallet, right click on the Wreath layer and duplicate. Drag the copy of the wreath over the bird. With you selection tool set to rectangle, replace, select the right hand side of the Wreath copy and press delete.

Selections -> Select None.

Open Golden Winter Element 27, resize to 75% and add to main canvas, centered at H550, V550.

Open Golden Winter Element 23, resize to 75%, and add to main canvas, centered at H300, V550.

Open Golden winter Cloud 1 and add to main canvas, centered at H400, V650.

Open Golden Winter Element 3, resize to 85% and add to main canvas, centered at H200, V450.

Open Golden Winter Element 7 and add to main cavas centered at H400, V600.

On the layers pallet, starting with the bead layer (Raster 2) and working upward, add a drop shadow of choice to all the elements except for the cloud layer and the coy of the wreath layer.

I am using offsets, vertical and horizontal of 5 each, opacity of 85, blur of 15 and color of dark gray (#404040).

Using font of choice, add credits to your tag. I am using Santa's Sleigh (Full) size 6 points, bold and centered and color of dark brown (#30240f). I have the credits centered at H400, V700.

You can now save the artist's copy of your tag as a .pspimage file.

Using font of alpha of choice, add name of choice to tag. I have my name centered at H500, V100. Actual location will vary depending upon the size of the font/alpha and the length of the name you are using.

Add a drop shadow to the name to match the rest of the tag.

Drop the white background layer and merge visible. Resize to 75% (600 x 600 pixels) and save a .png file and you're all done.

I hope you enjoyed this tutorial. If you should have a problem, please feel free to E-Mail Me and I'll be happy to help you out.

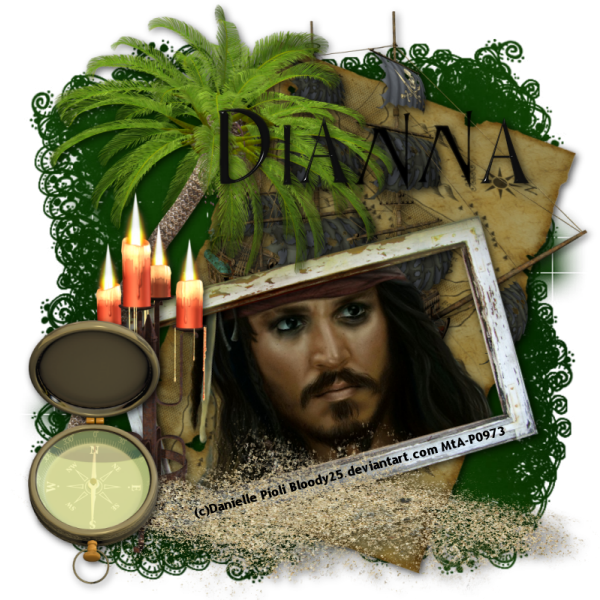
Treasure Island tutorial (PTU)

Treasure Isle - Dianna


This tutorial was written by Dianna Richards of Digicats (and Dogs)/Di Before Dawn Tutorials. Any resemblance to any other tutorial, published or unpublished, living, dead or undead, is purely coincidental.

Please do not rebroadcast, redistribute or otherwise claim this tutorial or any part there of as your own work.


Items you will need to complete this project:

The Arrr Treasure Isle taggers kit by Gothic Inspirations, which is a PTU kit available at Gothic Inspirations.com.

Tube of choice. I am using Jack Sparrow, by Danielle Pioli. This is a FTU tube, but you must have a license to use this tube, which is available at MIStaken Art.

Mask of choice. I am using Wee Scots Mask #283 which you can download HERE.

Font(s) and/or alpha of choice. I am using Trebuchet MS, which is a windows system font, and the Black Epoxy alpha, which is a FTU alpha you can download from Free Digital Scrapbooking.com.


Note that H# and V# refer to Horizontal and vertical coordinates on your canvas grid. Make sure you have View, Rulers checked in order to see the ruler grid.

When I say "Add to your canvas" I expect that you will copy and paste it as a new layer, unless otherwise state in the tutorial.

This tutorial assumes you have a working knowledge of PSP. It was written using PSP X3, but should work in PSP 8 and up.

To begin, open a new raster layer canvas, 800 x 800 pxl, flood fill white.

Open paper of choice, I am using Paper12-GI_ArrrTreasureIsle. Layers -> Load/save mask -> Load mask from disk and select mask of choice. I am using Wee Scots Lass mask #283. Make sure the fit to canvas box is checked, then click on load.

Resize to 90%. Edit -> Copy special -> Copy merged and add to canvas, centered.

Open Map2-GI_ATresIsle, resize to 90% and add to main canvas, centered. Free Rotate -> rotate right -> 20 degrees.

Open Ship-GI_ATresIsle, resize to 75% and add to main canvas, centered at H525, V250.

Open Danielle Pioli's Jack Sparrow and select the tube layer. Copy and add to the main canvas, centered at H450, V500. Image -> free rotate -> rotate left, 15 degrees.

Open Frame3-GI_ATresIsle, resize to 65%, and add to main canvas, centered at H525, V500. Image -> free rotate -> rotate left, 15 degrees.

Use your pick tool to make any fine adjustments to the tube and the frame.

Open Palm2-GI_ATresIsle, resize to 90% and mirror. Add to main canvas centered at H285, V350.

Open Candles-GI_ATresIsle, resize to 75%, and add to main canvas, centered at H200, V500.

Open SandSmuge-GI_ATresIsle and add to main canvas, centered at H400, V675.

Open Compass-GI_ATresIsle, resize to 75%, and add to main canvas, centered at H125, V600.

On the materials pallet, set your foreground color to transparent, and your background color to #000000. Using font of choice, add the copyright information to your tag.

I am using Trebuchet MS, which is a windows system font, 4 points, bold and centered.

For the Jack Sparrow tube, that information is: (c)Danielle Pioli bloody25.deviantart.com Your_MtA-License#

You may also add the background credit and tagged by information at this time if you so choose.

I have free rotated my text left, 15 degrees to match the frame and aligned it on the bottom of the frame.

Starting with the map layer (Raster2) on your materials pallet and working upward, add a drop shadow of choice to the elements in your tag.

I am using offsets vertical and horizontal of 3 each, opacity of 75, Blur of 15, and color black (#000000). So NOT add a drop shadow to your copyright information.

You can now save the artist's copy of your tag as a .pspimage file.

Using font or alpha of choice, add name of choice to the tag. I have located the name at H500, V200. Actual location my vary depending upon the size the length of the name you are using.

Add matching drop shadow to the name.

Drop the white background layer, and merge visible. Resize to 75% (600 x 600 pixels), and save as a .png file and you're all done!

I hope you enjoyed this tutorial. If you should have a problem, please feel free to E-Mail Me and I'll be happy to help you out.
Friday, November 26, 2010

Skelly Night PTU Tutorial

Skelly Night - Dianna


This tutorial was written by Dianna Richards of Digicats (and Dogs)/Di Before Dawn Tutorials. Any resemblance to any other tutorial, published or unpublished, living, dead or undead, is purely coincidental.

Please do not rebroadcast, redistribute or otherwise claim this tutorial or any part there of as your own work.


Items you will need to complete this project:

The Silent Night taggers kit by Grunge and Glitter Scraps, which is a PTU kit available at Digital Chaos.

Tube of choice. I am using Snow Day, by Misty Benson. You must have a license to use this tube. I has come to my attention that Misty is no longer licensing out of My PSP Tubes.com, and I've had no success in tracking down her new licensing agent. Her FAQ's still show MPT.

Mask of choice. I am using Wee Scots Mask #332, which you can download HERE.

Font and/or Alpha of choice. I am using the Moonbeam alpha by Julie It Is. This is an awesome FTU alpha which is available HERE. (Please leave a thank you when you download.)


Note that H# and V# refer to Horizontal and vertical coordinates on your canvas grid. Make sure you have View, Rulers checked in order to see the ruler grid.

When I say "Add to your canvas" I expect that you will copy and paste it as a new layer, unless otherwise state in the tutorial.

This tutorial assumes you have a working knowledge of PSP. It was written using PSP X3, but should work in PSP 8 and up.

To begin, open a new raster layer canvas, 800 x 800 pxl, flood fill white.

Open a dark paper of choice. I am using Paper1. Add to main canvas.

Select a second paper of a lighter color. I am using paper14.jpg. Layers -> Load/Save Mask -> Load Mask from Disk and select mask of choice. I am using Wee Scots Lass mask #332.

Edit -> Copy Special -> Copy Merged, and add to main canvas, centered.

Open Moon, resize to 75%, and add to main canvas, centered at H300, V250.

Open Star, resize to 50%, and add to main canvas, centered at H450, V175.

Open Tree2, and add to main canvas, centered at H550, V400.

Open Dead Bush and add to main Canvas, centered at H250, V400.

Open tube of choice. I am using Misty Benson's Snow Day. Copy the tube layer and add to main canvas centered at H400, V450.

Open String2 and rotate right. add to main canvas centered at H400, V650.

Image -> free rotate -> rotate left, 20 degrees.

On the Materials pallet, set your foreground color to transparent and your background color to white (#ffffff). Using font of choice, add copyright information to the tag. For the Snow Day tube that information is:

(c)Misty Benson www.mistybenson.com Your_MPTLicense#

I am using the font Santa's Sleigh, 6 points, bold and centered. If you need that font, you can snag it HERE.

You can also add the background information and tagged by information at this point.

On the layers pallet, click on the moon layer, Raster3 to activate. working upward, add a drop shadow of choice to the elements in the tag.

I am using offsets, vertical and horizontal of 3 each, opacity of 75%, blur of 25, color black (#000000).

For the copyright information, use a much stronger drop shadow. I suggest Opacity of 100%, and blur of 3.

On the layers pallet, click on the masked paper layer (Raster2) to activate. With your magic wand, click anywhere outside the masked paper area to select.

With the area still selected, click on the the first paper layer (Raster1) on your layers pallet, and press the delete key.

Selections -> Select None.

You can now save the artist's version of your tag as a .pspimage file.

Using font or alpha of choice, add name of choice to the tag. I have my name centered at H275, V625. You location will vary depending upon the size, and length of your name. Add a matching drop shadow to the name.

Drop the white background layer and merge visible. Resize your tag to 75% (600 x 600 pixels), and save as a .png file and you're all done.

I hope you enjoyed this tutorial. If you should have a problem, please feel free to E-Mail Me and I'll be happy to help you out.
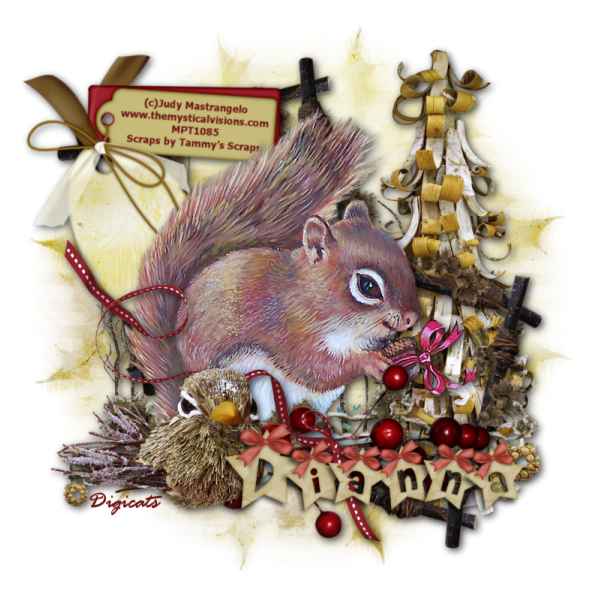
A Squirrel's Christmas

A Squirrel's Christmas - Dianna


This tutorial was written by Dianna Richards of Digicats (and Dogs)/Di Before Dawn Tutorials. Any resemblance to any other tutorial, published or unpublished, living, dead or undead, is purely coincidental.

Please do not rebroadcast, redistribute or otherwise claim this tutorial or any part there of as your own work.


Items you will need to complete this project:

The Golden Christmas taggers kit by Tammy's Scraps which is a PTU kit available at Scrappetizing.com.

Tube of choice. I am using A Squirrel's Christmas Gift, by Judy Mastrangelo. You must have a license to use this tube, which is available at My PSP Tubes.com.

Wee Scots Mask #337 which you can download HERE.

Font(s) and/or alpha of choice. I am using Tahoma which is a windows system font (or you can snag it at www.fontparade.com, and the Red Bow Alpha by Heaven Dreams.


Note that H# and V# refer to Horizontal and vertical coordinates on your canvas grid. Make sure you have View, Rulers checked in order to see the ruler grid.

When I say "Add to your canvas" I expect that you will copy and paste it as a new layer, unless otherwise state in the tutorial.

This tutorial assumes you have a working knowledge of PSP. It was written using PSP X3, but should work in PSP 8 and up.

To begin, open a new raster layer canvas, 800 x 800 pxl, flood fill white.

Open paper of choice. I am using Golden Winter Paper4. Layers -> load/save mask -> load mask from disk and select mask of choice.

I am using Wee Scots Lass mask #337. Make sure the fit to canvas box is checked, then click on load.

Edit -> copy special -> copy merged and add to main canvas, centered.

Open Golden Winter Element16, and add to main canvas, centered at H300, V400. On the layers pallet, right click on Raster2 and duplicate. Image -> Mirror.

Open Golden Winter Element 4, and add to main canvas, Centered at H500, V500.

Image -> free rotate -> rotate right, 17 degrees.

On the layers pallet, right click on the frame layer (Raster3) and duplicate. Image -> flip, then relocate the copy to H300, V300.

Open tube of choice. I am using a Squirrel's Christmas Gift by Judy Mastrangelo. This is was part of the MPT2010 Christmas Gift to it's customers. Copy Raster 2, and add to main canvas, centered.

Open Golden Winter Element 21, and add to main canvas, centered at H400, V600.

Click on the Copy of Raster 2 layer to activate. Open Golden Winter Element 2 and add to main canvas, centered at H600, V400.

Click on Raster 5 to activate.

Open Golden Winter Berrys 1, resize to 75%, and add to main canvas, centered at H400, V500. Image -> Free Rotate -> Rotate right 20 Degrees. Relocate downward to V600.

Open Golden Winter Element 8, resize to 50% and add to main canvas, centered at H250, V600.

Using your eraser tool, erase any part of the berry stem that sticks out to the left of the bird.

With the Berry Layer selected (Raster 7) open Golden Winter Ribbon2, and add to main canvas centered at H300, V520.

On the layers pallet, click on Raster2 - the tree layer - to activate. Working upward, add a drop shadow of choice to each of your elements.

I am using offsets vertical and horizontal of 3 each, opacity of 75, blur of 15, color black (#000000).

Open Golden Winter Tag 1. Image -> Flip.

On the materials pallet, set your foreground color to transparent and your background color to dark red (#6f1313).

Using font of choice, add the copyright information to Tag1. Make it large enough to be legible once the tag is resized.

For the Squirrel's Christmas Gift tube, that information is:

(c)Judy Mastrangelo www.themysticalvisions.com Your_MPTLicense#

You can also add the scraps credit and tagged by information at this time.

I am using Tahoma, which is a windows system font, 12 point, bold and centered, and then free rotated it 45 degrees. I then used my pick tool to do the fine tuning to fit the text onto the tag properly.

Layers -> Merge visible, then resize the tag to 75%.

On your layers pallet, click on Copy of Raster 3 to activate. Add the tag to your main canvas, centered at H200, V200.

Image -> free rotate -> rotate right, 45 degrees. Add a drop shadow to the tag.

You can now save the artist's copy of the tag as a .pspimage file.

Click on the top layer (the little bird) on your layers pallet to activate. Using font or alpha of choice, add name of choice to the tag. I have my name centered at H500, V625. You actual locations will vary depending upon the size and length of the name.

Add a matching drop shadow to the name.

You can now drop the white background layer and merge visible. Resize to 75% (600 x 600 pixels), and save your tag as a .png file.

I hope you enjoyed this tutorial. If you should have a problem, please feel free to E-Mail Me and I'll be happy to help you out.
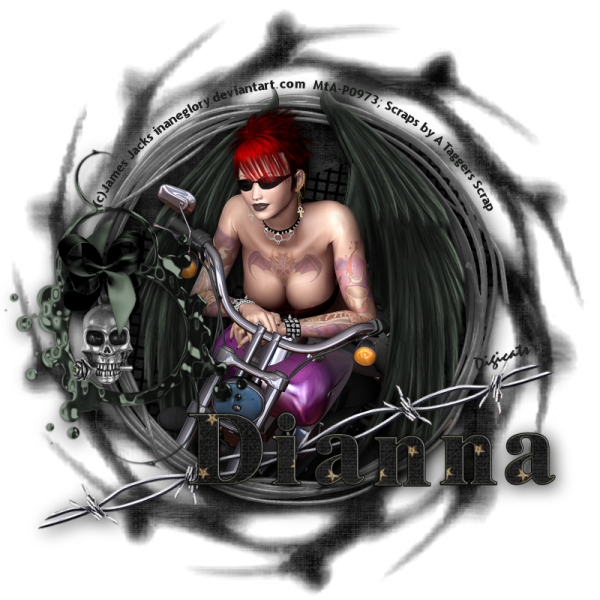
Hell's Angel tutorial (PTU)

Hell's Angel - Dianna


This tutorial was written by Dianna Richards of Digicats (and Dogs)/Di Before Dawn Tutorials. Any resemblance to any other tutorial, published or unpublished, living, dead or undead, is purely coincidental.

Please do not rebroadcast, redistribute or otherwise claim this tutorial or any part there of as your own work.


Items you will need to complete this project:

The Black Dagger Brotherhood: Wrath taggers kit by A Taggers Scrap, which is a PTU kit available at Scraps and the City.

Tube of choice. I am using PinUp3, by James Jacks. You must have a license to use this tube, which is available at MIStaken Art.

Mask of choice. I am using the tambourine mask by Nik's Scripts & Scraps which is part of her PSP Masks Mega Pack.

Font and/or Alpha of choice. I am using the PTU Tricksters alpha by Gemini Creationz, which is also available at Scraps and the City.


Note that H# and V# refer to Horizontal and vertical coordinates on your canvas grid. Make sure you have View, Rulers checked in order to see the ruler grid.

When I say "Add to your canvas" I expect that you will copy and paste it as a new layer, unless otherwise state in the tutorial.

This tutorial assumes you have a working knowledge of PSP. It was written using PSP X3, but should work in PSP 8 and up.

To begin, open a new raster layer canvas, 800 x 800 pxl, flood fill white.

Open paper of choice. I am using Paper4.jpg. Layers -> Load/Save Mask -> Load mask from disk and select mask of choice. I am using Nik's Tambourine.

Make sure the fit to canvas button is checked, then click on load.

Edit -> Copy Special -> Copy Merged and add to main canvas, centered.

Open Mesh.png and add to main canvas, centered. Image -> Free rotate -> rotate left, 17 degrees.

Open Frame5 and add to main canvas, centered.

Open darkwings. Edit -> Copy special -> copy merged and add to main canvas, centered.

Open tube of choice. I am using JamesJacks PinUp3 - TubeCU1. Add to main canvas, centered.

On the layers pallet, click on the frame layer (Raster3) and duplicate. Drag the copy over the top of the tube layer, Raster4.

With your selection tool set to rectangle, replace, select the top half the Copy of Raster3 and delete.

Selections -> Select None.

Using your eraser tool, erase the bits of the tube that fall below the frame on the bottom. Also erase the parts of the mesh that fall outside the frame on either side.

On the layers pallet, click on the Copy of Raster 3 to activate.

Open Darkwings, and copy only the right hand wing and add to canvas. Relocate it to match it's copy on the canvas (right around H500, V390). Erase the bits of the wing that cover the girl's shoulder and arm.

Open Frame2, resize to 75% and rotate right. Add to main canvas, centered at H170, V450.

Open charm, resize to 75%, and add to main canvas, centered at H140, H430.

Open bow2, resize to 50% and add to main canvas, centered at H140, V370.

Open Wire deco, and add to main canvas. Image -> Free rotate -> Left 17 degrees and relocate to H400, V600.

Starting with the frame layer (Raster 3) and working upward, add a drop shadow of choice to the elements on the tag except for Copy of Raster 3 (the frame copy).

I am using offsets of vertical & horizontal 4, opacity 80, blur 35 and color black (#000000).

On the materials pallet, set your foreground color to transparent and you background color to very dark green (#1b1e1b).  

Using font of choice, add copyright information to the tag. For the PinUp3 tube, that information is:

(c)James Jacks inaneglory.deviantart.com Your_MTALicense#

I am using Trebuchet MS, which is a windows system font, 4 points, bold and centered. I then fit the text to path to wrap it around the frame.

It is outside the scope of this tutorial to explain how to do that.

Add a white drop shadow to the text to make it stand out against the background.

You can add the tagged by information at this time as well.

Save the artist's copy of your work as a .pspimage file.

Using font or alpha of choice, add name of choice to tag. I'm an alpha whore, so I'm using the Trickster alpha by Gemini Creationz.

I have the name centered at H500, v600, and added a matching drop shadow to it. Remember that where your name is located will depend on the length of the name and the size of the alpha or font you are using.

Drop the White background layer and merge visible. Resize to 75%, and save as a .png file and you're all done.

I hope you enjoyed this tutorial. If you should have a problem, please feel free to E-Mail Me and I'll be happy to help you out.
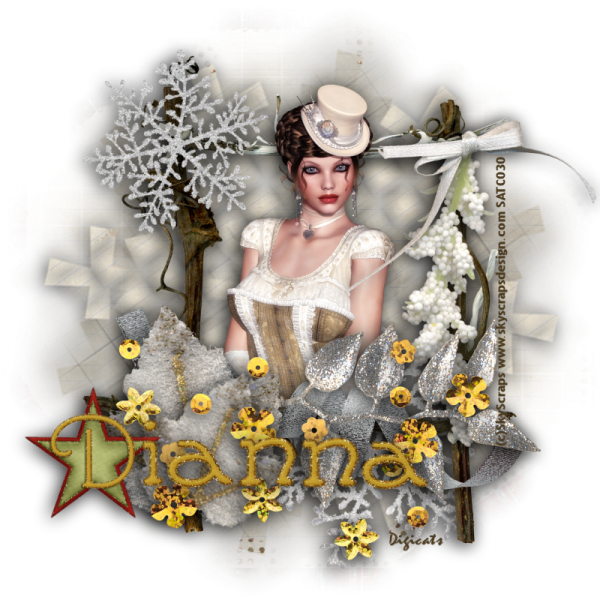
Thursday, November 25, 2010

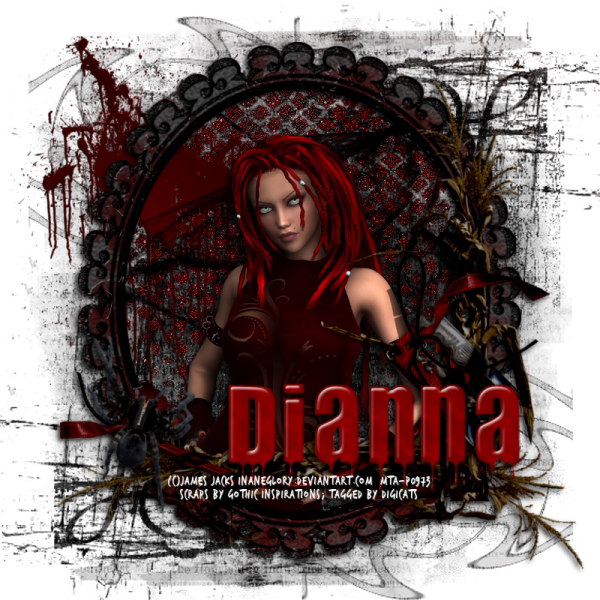
Horror Whorez tutorial (PTU)

Horror Whorez - Dianna


This tutorial was written by Dianna Richards of Digicats (and Dogs)/Di Before Dawn Tutorials. Any resemblance to any other tutorial, published or unpublished, living, dead or undead, is purely coincidental.

Please do not rebroadcast, redistribute or otherwise claim this tutorial or any part there of as your own work.


Items you will need to complete this project:

The Horror Whorez taggers kit by Gothic Inspirations, which is a PTU kit available at Gothic Inspirations.com.

Tube of choice. I am using Crimson Mileena, by James Jacks. You must have a license to use this tube, which is available at MIStaken Art.

Mask of choice. I am using Wee Scots Mask #221 which you can download HERE.

Font(s) and/or alpha of choice. I am using the Bloody Alpha by Sarah Bryan which is available for free on her blog HERE.


Note that H# and V# refer to Horizontal and vertical coordinates on your canvas grid. Make sure you have View, Rulers checked in order to see the ruler grid.

When I say "Add to your canvas" I expect that you will copy and paste it as a new layer, unless otherwise state in the tutorial.

This tutorial assumes you have a working knowledge of PSP. It was written using PSP X3, but should work in PSP 8 and up.

To begin, open a new raster layer canvas, 800 x 800 pxl, flood fill white.

Open paper of choice. I am using Paper3-GIHorrorWhorez.jpg. Layers -> Load/Save Mask -> Load mask from Disk and select mask of choice. I am using Wee Scots Lass mask #221. Make sure the "Fit to canvas" box is checked, then click on load.

Edit -> Copy Special -> Copy merged and add to main canvas, centered.

Open Frame1-GIHorrorWhorez.png, resize to 85%, copy and add to main canvas, centered.

Open Drop-GI_HorrorWhorez.png, and add to main canvas centered at H400, V380. The top of the drop should like up with the inside top half of the frame. On the layers pallet, drag the Frame (Raster2) on top of the drop (Raster3).

Using your magic wand tool, click anywhere on the outside of the frame to select. With the area still selected, activate Raster3 and delete.

Selections -> Select None.

Open Splatter1-GI_HorrorWhorez.png and add to main canvas, centered at H200, V300.

Open Web-GI_HorrorWhorez.png, resize to 75% and add to main canvas, centered at H380, V370.

Open tube of choice. I am using Crimson Mileena by James Jacks, wich is a PTU tube. You must have a license to use this tube. Copy the tube layer, and add to main canvas, centered.

using your pick tool, Relocate the tube so the bottom half lines up with the inside end of the frame (Raster2).

Note that the tube should be behind the frame layer. If it is not, drag it behind the frame layer on the Layers pallet.

On the layers pallet, click on the frame layer to activate.

Open Ribbon3-GIHorrorWhorez.png, copy and add to main canvas, centered at H400, V500.

Open Spider, resize to 35% and add to main canvas, centered at H180, V560. Image free rotate right -> 17 degrees.

Open Stalks-GI_HorrorWhorez.png and using your eraser tool, erase the pool of blood. (Jess is overly fond of blood in this kit.) Resize to 85%.

On the layers pallet, click on the frame layer to activate, and add the Stalks to your main canvas, centered at H430, v430.

Starting with the tub layer and working upward, add a drop shadow of choice to your elements.

I am using offsets Vertical of 3, horizontal of -3, Opacity of 85, blur of 10, and color black (#000000).

On the materials pallet, set your foreground color to transparent and your background color to white (#ffffff). Using font of choice, add the copyright information to the tag. For the James Jacks tube, that information is:

(c)James Jacks inaneglory.deviantart.com Your_MtALicense#

I am using TrashHand, 4 points, bold and centered and have information located at H400, V650. You can snag that font HERE if you care to use it.

You can now save the artist's copy of your tag as a .pspimage file.

Click on the spider layer to activate.

Using font or alpha of choice, add name of choice to tag. I have the name centered at H500, V580. Make sure the name is BEHIND the copyright information because if you obscure the copyright information, you will be in violation of your license.

Add a matching drop shadow to the name.

Drop the White background layer, and merge visible. Resize to 75%, and save as a .png file and your all done.

I hope you enjoyed this tutorial. If you should have a problem, please feel free to E-Mail Me and I'll be happy to help you out.
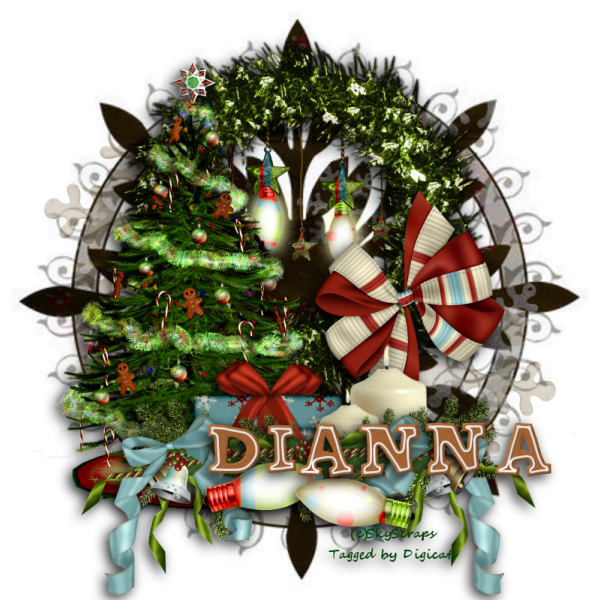
Wednesday, November 24, 2010

Vintage Noel Tutorial PTU (Free Scraps)

Vintage Noel - Dianna


This tutorial was written by Dianna Richards of Digicats (and Dogs)/Di Before Dawn Tutorials. Any resemblance to any other tutorial, published or unpublished, living, dead or undead, is purely coincidental.

Please do not rebroadcast, redistribute or otherwise claim this tutorial or any part there of as your own work.


Items you will need to complete this project:

The Joyeux Noel taggers kit by Sky Scraps, which is a FTU kit that can be downloaded from Marie's blog. Be sure to leave a thank you when you download it!

Tube of choice. I am using Marina by Sky Scraps. You must have a license to use this tube, which is available at Scraps and the City.

Wee Scots Mask #325 which you can download HERE.

Font and/or Alpha of choice. I am using the Tis the Season alpha by Gemini Creationz. This is a PTU alpha.


Note that H# and V# refer to Horizontal and vertical coordinates on your canvas grid. Make sure you have View, Rulers checked in order to see the ruler grid.

When I say "Add to your canvas" I expect that you will copy and paste it as a new layer, unless otherwise state in the tutorial.

This tutorial assumes you have a working knowledge of PSP. It was written using PSP X3, but should work in PSP 8 and up.

To begin, open a new raster layer canvas, 800 x 800 pxl, flood fill white.

Open paper of choice. I am using SkyScraps_JN_PP20. Layers -> Load/Save Mask -> Load Mask from Disk and select mask of choice. I am using Wee Scots Lass Mask #325. Make sure the fit to canvas button is checked, then click on load.

Edit -> Copy Special -> Copy Merged and add to main canvas, centered.

Duplicate. Image - Free rotate - Left, 35%.

Open SkyScraps-JN-Frame1 and add to main canvas, centered.

Open tube of choice, I am using SkyScraps-Marina, which is a PTU tube. I am using Parisienne1 tube. Resize to 50% and add to main canvas, centered at H450, V400.

On the layers pallet, right click on the frame layer (Raster2) and duplicate. Drag the copy of the frame over the tube layer.

With your selection tool set to rectangle, replace, select the top half of the frame copy and delete.

Select -> Select None

Using your eraser tool, erase the part of the tube that falls below the lower part of the frame.

Open SkyScraps-JN-E1 and add to main canvas, centered at H600, V350. Erase the bit of the stem that is above the top of the frame layer.

Open SkyScreaps-JN-E12 and rotate left. Add to main canvas centered at H440, V550.

Open SkyScraps-JN-E3,resize to 75% and add to main canvas, centered at H250, V550.

Erase the bit of the steam of Raster5 that hangs beyond the left of the leaf (Raster6)

On the layer pallet, right click on Raster6 and duplicate. Resize to 75%. Make sure you Uncheck the "Resize all layers" box as you only want to resize the leaf at this point, not the whole tag.

Image -> Free Rotate -> Right, 35 degrees and relocate downward to V600.

Open SkyScraps-JN-E9 and resize to 75%. Add to the main canvas centered at H235, V190.

Open SkyScraps-JN-E11, and resize to 75%. On the layers pallet, click on Copy of Raster 1 (the paper copy layer) to activate, then add the snowflake to the canvas centered at H500, V600.

Click on the top snowflake (Raster7) to activate.

Open SkyScraps_JN_Bling4, copy and add to your main canvas, centered at H400, V600.

On the layers pallet, click on Raster4 to activate. Open SkyScraps-JN-Bow7, resize to 65% and add to main canvas centered at H625, V275.

Click on Copy of Raster2 to activate. Open SkyScraps-JN-Ribbon6 and add to main canvas, centered at H430, V530.

On the layers pallet, click on Copy of Raster1. Working upward, add a drop shadow of choice to all the elements except Copy of Raster2 (the frame copy).

I am using offsets, vertical of 3, horizontal of -3, opacity of 85, blur of 30, color black (#000000).

On the materials pallet, set your foreground color to transparent, and your background color to brown (#4d3d23). Using font of choice, add the copyright information to the tag.

For the Marina tube, that information is (c)SkyScraps www.skyscrapsdesign.com Your_SATCLicense#.

I am using Trebuchet MS, which is a windows system font, 4 points, bold and centered. I free rotated left 90 degrees and located it to the right of the frame at H670, V400.

You can also add your tagged by information at this point.

You can now save the artist's copy of your tag as a .pspimage file.

Using font or alpha of choice, add name of choice to the tag. I am using the Tis the Season alpha by Gemini Creationz. I have the name centered at H300, V600. Actual location will vary depending upon size and length of the name you are using.

Add a matching drop shadow to the name.

Drop the white background layer, and merge visible. Resize the tag to 75% (600 x 600 pixels), and save as a .png file and you're all done.

I hope you enjoyed this tutorial. If you should have a problem, please feel free to E-Mail Me and I'll be happy to help you out.

Christmas Lights (PTU) tutorial

Christmas Lights 2 - Dianna


This tutorial was written by Dianna Richards of Digicats (and Dogs)/Di Before Dawn Tutorials. Any resemblance to any other tutorial, published or unpublished, living, dead or undead, is purely coincidental.

Please do not rebroadcast, redistribute or otherwise claim this tutorial or any part there of as your own work.


Items you will need to complete this project:

The Christmas taggers kit by Sky Scraps, which is a PTU kit that can be purchased at Scraps and the City.

Wee Scots Mask #315 which you can download HERE.

Font of choice.


Note that H# and V# refer to Horizontal and vertical coordinates on your canvas grid. Make sure you have View, Rulers checked in order to see the ruler grid.

When I say "Add to your canvas" I expect that you will copy and paste it as a new layer, unless otherwise state in the tutorial.

This tutorial assumes you have a working knowledge of PSP. It was written using PSP X3, but should work in PSP 8 and up.

To begin, open a new raster layer canvas, 800 x 800 pxl, flood fill white.

Open paper of choice. I am using SkyScraps_PP10. Layers -> Load/Save Mask -> Load mask from Disk and select mask of choice. I am using Mask #315. Make sure the fit to canvas box is checked, then click on load.

Edit -> Copy Special -> Copy Merged, and add to main canvas, centered.

Open SkyScraps_Element29, and add to main canvas, centered at H400, V300.

Open SkyScraps-Bow8 and add to main canvas, centered at H550, V400.

Open SkyScraps_XmasTree and add to main canvas, centered at H250, V400.

Open SkyScraps-Gift, resize to 75%, and add to main canvas, centered at H300, V575.

Open skyScraps-Candle, resize to 85% and add to main canvas, centered at H500, V570.

Open SkyScraps-Deco1, and add to main canvas, centered at H400, V630.

Using your eraser tool, erase the part of the ropes on Deco1 that hang off on either side.

Open SkyScraps-Element1, resize to 50% and add to main canvas, centered at H350, V650.

Open SkyScraps-Element2, resize to 50%, mirror, and add to main canvas, centered at H475, V675.

Click on the Paper layer, Raster1 to activate. Open SkyScraps-Lights, resize to 75% and add to main canvas, centered at H400, V270

Using font of choice, add tagged by information to the tube. I used Segoe Script, which is windows system font, 4 points, bold and centered.

Click on the white background layer to activate. Open SkyScraps-Snow and add to the main canvas.

On the layers pallet, click on the paper layer, raster 1 to activate, then using your magic wand tool, click anywhere on the outside of the masked paper to select.

Leaving the area selected, click on the snow layer, Raster12, on the layers pallet, and press the delete key.

Selections -> Select None.

Open SkyScraps-Snowflake1 and add to main canvas, centered at H200, V300. (Yes, it will be behind the paper layer, but on top of the snow layer.

Right click Snowflake1 (Raster13) on the layers pallet and duplicate. Image -> Mirror. Image-> Flip.

Starting with the wreath layer (Raster2) and working upward on your layers pallet, add a drop shadow of choice to each of the elements on the main canvas.

I am using offsets vertical of 5, horizontal of -5, opacity of 75%, blur of 15 and color Black (#000000).

You can now save the artist version of your tag as a .pspimage file.

Using the gingerbread alpha included in the kit, add the name of choice to the tag. I have mine centered at H500, V600. Your actual location will of course depend upon the length of the name you are using.

Add a matching dropshadow to the name.

Drop the white background layer, and merge visible. Resize to 75% (600 x 600 pixels) and save as a .png file and you're all done.

I hope you enjoyed this tutorial. If you should have a problem, please feel free to E-Mail Me and I'll be happy to help you out.

Jilted FTU tuorial

Jilted


This tutorial was written by Dianna Richards of Digicats (and Dogs)/Di Before Dawn Tutorials. Any resemblance to any other tutorial, published or unpublished, living, dead or undead, is purely coincidental.

Please do not rebroadcast, redistribute or otherwise claim this tutorial or any part there of as your own work.


Items you will need to complete this project:

My Jilted taggers mini-kit which is available for free at Stargazer Scraps, Scrappetizing, and TKO Scraps.

Tube of choice. I am using Lucretia, by Morgana Wynter. This is a free to use tube, but you must have a license to use this tube (also free), which is available at Mistaken Art.

Wee Scots Mask #302 which you can download HERE.

Font(s) and/or alpha of choice. I am using Century Gothic which is a windows system font (or you can snag it at www.fontparade.com, and the Goth Chic alpha by Whispy's D'zines. This is a FTU alpha which can be downloaded from her blog.


Note that H# and V# refer to Horizontal and vertical coordinates on your canvas grid. Make sure you have View, Rulers checked in order to see the ruler grid.

When I say "Add to your canvas" I expect that you will copy and paste it as a new layer, unless otherwise state in the tutorial.

This tutorial assumes you have a working knowledge of PSP. It was written using PSP X3, but should work in PSP 8 and up.

To begin, open a new raster layer canvas, 800 x 800 pxl, flood fill white.

Open paper of choice. I am using DCD_Jilt_Paper04AO. Layers -> Load/Save Mask -> Load Mask from Disk and select mask of choice. I am using Wee Scots Lass mask #302. Make sure the fit to canvas box is checked, then click on load.

Edit -> Copy Special -> Copy Merged, then add to main canvas, centered.

Open DCD-Jilt_Archway and add to main canvas, centered.

Open tube of choice. I am using Morgana Winter's Lucretia. Add to main canvas, centered at H550, V420.

Open DCD-Jilt_Ruffled Ribbon03 and add to main canvas, centered at H500, V550.

Open DCD-Jilt_Cross1, resize to 50%, and add to main canvas, centered at H200, V575.

Open DCD_Jilt_Candle1, resize to 75% and add to main canvas, centered at H130, V535.

Open DCD_Jilt_Candle3, resize to 50%, and add to main canvas, centered at H200, V600.

On the layers pallet, drag Candle1 (Raster6) behind the cross layer (Raster5). Then click on Raster7 (Candle3) to activate.

Open_Jilt_Heart2, resize to 75%, and add to main canvas, centered at H200, v650.

Image -> free rotate -> rotate left, 48 degrees. Using your pick tool, realign the heart at H200, V650.

Open DCD_Jilt_Fabric Flower1, resize to 75%, and add to canvas at H650, V650. Free rotate -> right -> 30 degrees.

Open DCD_Jilt-Rose1, resize to 25% and add several amongst the greenery on the archway, to taste.

Add a drop shadow of choice to all the elements on your main canvas except for the paper (Raster1).

I am using Offsets Vertical of 5, Horizontal of -5, Opacity of 85, blur of 25, and color black (#000000_.

Return to your top layer. On the materials pallet, set your foreground color to transparent, and your background color to White (#ffffff). Using font of choice, add the copyright information to the tag. For the Lucretia tube, that information is:

(c)Morgana Wynter morganawynter.deviantart.com Your_MtA_License#

I am using Century Gothic, 4 points, bold and centered, free rotated it left, 90 degrees, and located it at H650, V400.

You may now save the artist's copy of your tag as a .pspimage file.

Using font of alpha of choice, add name of choice to tag. I am using the Goth Chic alpha by Whispy's D'zines, and have located the name at H450, V675. Your actual location will depend upon the size & length of the name you are using.

Add a matching drop shadow to the name.

Drop the white background layer, and merge visible. Resize the tag to 75%, and save as a .png file, and you're all done!

Tuesday, November 23, 2010

Santa's Little Helper PTU tutorial

Letter to Santa - Dianna


This tutorial was written by Dianna Richards of Digicats (and Dogs)/Di Before Dawn Tutorials. Any resemblance to any other tutorial, published or unpublished, living, dead or undead, is purely coincidental.

Please do not rebroadcast, redistribute or otherwise claim this tutorial or any part there of as your own work.


Items you will need to complete this project:

The Letter to Santa taggers kit by DN Scraps which is a PTU kit available at Scrappetizing.com.

Tube of choice. I am using Santa's Little Helper, by Angela Newman. You must have a license to use this tube, which is available at My PSP Tubes.com.

Wee Scots Mask #350 which you can download HERE.

Font(s) and/or alpha of choice. I am using Century Gothic which is a windows system font (or you can snag it at www.fontparade.com, and the Mistletoe and Wine alpha by Wishing on a Starr. This is a PTU alpha which can be purchased at Scrappetizing.com.


Note that H# and V# refer to Horizontal and vertical coordinates on your canvas grid. Make sure you have View, Rulers checked in order to see the ruler grid.

When I say "Add to your canvas" I expect that you will copy and paste it as a new layer, unless otherwise state in the tutorial.

This tutorial assumes you have a working knowledge of PSP. It was written using PSP X3, but should work in PSP 8 and up.

To begin, open a new raster layer canvas, 800 x 800 pxl, flood fill white.

Open Paper of choice. I am using LettersToSantaPaper11. Layers -> Load/Save Mask -> Load Mask from disk and select Mask of choice. I am using Wee Scots Lass mask #350.

Edit -> Copy Special -> Copy Merged and add to main canvas, centered.

Open Lettertosantadoubleframe2. Add to main canvas, centered.

Image -> Free Rotate -> right, 15 degrees.

Open Tube of Choice. I am using Santa's Lil Helper by Angela Newman, which was part of the 2010 Christmas Gift from My PSP Tubes. I am using the close up, Layer 1, which I have copied and add to the main canvas, centered at H400, V420.

On the layers pallet, right click on the frame layer, Raster2, and duplicate. Drag the copy of Raster 2 over the tube layer, Raster3, on the layers pallet.

With you selection tool set to rectangle, replace, select the upper half of the Frame copy, and delete.

Selections -> Select None.

Open lettertosantastars. On the layers pallet, click on the paper layer, Raster 1 to activate. Add the stars to the main canvas, centered at H200, V400.

Click on the top layer - copy of Raster2 to activate.

Open Lettertosantawhitetree and add to main canvas, centered at H400, V500.

Open lettertosantaleafs2, resize to 75%, and add to main canvas, centered at H400, V600.

Open lettertosantaribbonstring3, and add to main canvas, centered at H400, V600.

Open Lettertosantatag5. With the foreground color set to transparent and the background color set to white (#ffffff) on your Materials pallet, and using a font of choice, add the copyright information to the tag.

For the Angela Newman tube, that information is: (c)Angela Newman www.angelanewman.com YourMPTLicense#.

I used Century Gothic, 6 points, centered and bold, but then I used to pick tool to shrink it down to fit the tag. I then free rotated the text right, 3 degrees to match the angel of the tag.

Layers -> Merge visible. Image ->Rotate Left. Resize to 65%, and add to your main canvas, centered at H700, V500. On the layers pallet, drag the tag below the leaf layer, Raster6.

Using your erase tool, erase just the little bit of the tag that's above the frame level, and the little tiny bit on the right and side of the hanger so that it appears to be hanging from the frame.

Add a drop shadow of choice to the all the elements on the main canvas, except the paper layer, Raster1, the Frame copy (Copy of Raster2) and the stars (Raster 4).

I am using offsets, Vertical of 5, Horizontal of -5, Opacity of 85, Blur of 25, color black (#000000).

You can now save the artist's copy of your tag as a .pspimage file.

using alpha of choice, add name of choice to tag. I am using the Mistletoe and Wine alpha by Wishing on a Starr.

This is a full size alpha and I have resized all the letters down to 10% in order to compose the name for use on the tag, which I did on a separate pallet. I then resized the completed name down to 60% before adding it to the tag.

I have the name centered at H500, V125, although your actual locate will vary depending upon the length of the name and the size of the font or alpha you are using.

Add a matching drop shadow to the name.

Drop your white background layer, and merge visible. Resize tag to 75% (600 x 600 pixels) and save as a .png image and you're all done!

I hope you enjoyed this tutorial. If you should have a problem, please feel free to E-Mail Me and I'll be happy to help you out.
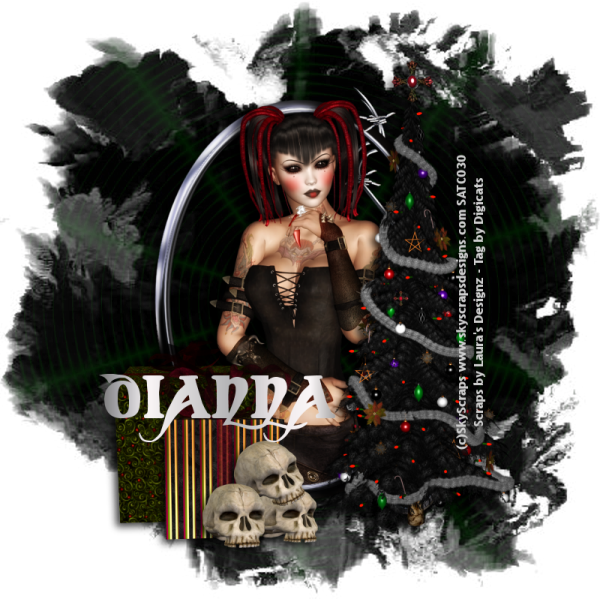
Monday, November 22, 2010

A Gothic Christmas PTU tutorial

AGKOC - Dianna


This tutorial was written by Dianna Richards of Digicats (and Dogs)/Di Before Dawn Tutorials. Any resemblance to any other tutorial, published or unpublished, living, dead or undead, is purely coincidental.

Please do not rebroadcast, redistribute or otherwise claim this tutorial or any part there of as your own work.


Items you will need to complete this project:

A Gothic Kind of Christmas taggers kit by Laura's Designz, which is a PTU kit that can be purchased at Scraps and the City.

Tube of choice. I am using Buffy Gaian Dark (or Buffy6 from the Buffy Bundle) by Sky Scraps. You must have a license to use this tube, which is available at Scraps and the City.

Mask of choice. I am using the Grunge16 mask by Nik's Scripts & Scraps which is part of her PSP Masks Mega Pack.

Font(s) and/or alpha of choice.


Note that H# and V# refer to Horizontal and vertical coordinates on your canvas grid. Make sure you have View, Rulers checked in order to see the ruler grid.

When I say "Add to your canvas" I expect that you will copy and paste it as a new layer, unless otherwise state in the tutorial.

This tutorial assumes you have a working knowledge of PSP. It was written using PSP X3, but should work in PSP 8 and up.

To begin, open a new raster layer canvas, 800 x 800 pxl, flood fill white.

Open LD_AGKOC_Paper8. Layers -> load/save mask -> load mask from disk and select mask of choice. Make sure the fit to canvas button is checked, then click on load.

I am using Nik's Grunge16 from Nik's Scripts and Scraps.

Edit -> Copy Special -> Copy Merged and add to main canvas, centered.

Open LD_AGKOC_ELement26, and add to main canvas, centered.

Open LD-AGKOC_ELement7, and add to main canvas, centered at H550, V400.

Open tube of choice. I am using Buffy6 by Sky Scraps. Resize to 75%, and add to main canvas, centered.

On the layers pallet, right click on the frame (Raster 2) and duplicate. Right click on the Copy of Raster2 -> Arrange -> Bring to top.

With your selection tool set to rectangle, replace, select the top half of the Copy of Raster 2, and delete.

Selections -> Select None.

Click on Raster 4 to activate. Using your eraser tool, erase the bits of the tube that are showing outside the bottom of the frame.

On the layers pallet, right click on the tree layer (Raster3) -> Arrange -> Bring to top.

Open LD_AGKOC_Element8, resize to 50% and add to main canvas, centered at H250, V575.

Open LD_AGKOC_Element10, resize to 50% and add to main canvas, centered at H300, V600.

Open LD_AGKOC_Element25, resize to 35% and add to main canvas, centered at H350, V660.

Add a drop shadow of choice to each of the elements on your main canvas, except for Copy of Raster2 (the frame copy) and the background paper, Raster1. I am using offsets vertical 5, horizontal -5, opacity 75, blur 15, color black (#000000).

Click on Raster7 to activate.

On the materials pallet, set your foreground color to transparent and your background color to silver (#cdcdcd). Using font of choice, add the copyright information to your tag. I am using Trebuchet MS, which is a windows system font, 4 points, bold and centered. I then free rotated the text left, 90 degrees centered it at H625, V400. You can of course put the copyright on the tag where ever you please.

You can now save the artist's copy of the tag as a .pspimage.

Using a nice suitable Gothy sort of font, add the name of choice to the tag. I am using Coverack Demo, which you can snag HERE. I have the name centered at H300, V525 or there abouts. The actual location will vary depending upon the size of the font and length of the name you are using.

Drop the white background layer, merge visible and resize your tag to 75% (600 x 600 pixels). Save a .png file, and you're all done!

I hope you enjoyed this tutorial. If you should have a problem, please feel free to E-Mail Me and I'll be happy to help you out.

Sunday, November 21, 2010

O Christmas Tree tutorial

O Christmas Tree - Dianna


This tutorial was written by Dianna Richards of Digicats (and Dogs)/Di Before Dawn Tutorials. Any resemblance to any other tutorial, published or unpublished, living, dead or undead, is purely coincidental.

Please do not rebroadcast, redistribute or otherwise claim this tutorial or any part there of as your own work.


Items you will need to complete this project:

The O Christmas Tree taggers kit by Candy's Treats, which is a PTU kit that you could have gotten for one buck on Stargazer Sundays at Stargazer Scraps.

Tube of choice. I am using PSP 14491 Santa's Sexy Babe by Elias Chatzoudis. You must have a license to use this tube, which is available at My PSP Tubes.com.

Mask of choice. I am using the Snowflakes mask by Nik's Scripts & Scraps which is part of her PSP Masks Mega Pack.

Font(s) and/or alpha of choice. I am using the Tis the Season alpha by Gemini Creationz, which is a PTU alpha.


Note that H# and V# refer to Horizontal and vertical coordinates on your canvas grid. Make sure you have View, Rulers checked in order to see the ruler grid.

When I say "Add to your canvas" I expect that you will copy and paste it as a new layer, unless otherwise state in the tutorial.

This tutorial assumes you have a working knowledge of PSP. It was written using PSP X3, but should work in PSP 8 and up.

To begin, open a new raster layer canvas, 800 x 800 pixels, flood fill white.

Open CT-Paper5 (or paper of choice). Layers -> Load/Save Mask -> Load mask from disk and select mask of choice. I am using the Snowflakes mask by Nik's Scripts and Scraps.

Edit -> Copy Special -> Copy Merged and add to your main canvas, centered.

Open CT-GlitterFrame4 and add to main canvas, centered.

Open CT-Tree6, and add to main canvas, centered at H225, V400.

Open psp14491-SCChatzoudis-SantasSexyBabe. Select the close up (Layer1), copy and add to main canvas, centered at H400, V350.

On your layers pallet, right click on the frame layer (Raster 2) and duplicate. Drag the copy of the frame over the tube layer.

With you selection tool set to rectangle, replace, highlight the top of the copy of the frame, and delete.

Selections -> Select none.

Using your eraser tool, erase the bit of the sexy babe that hangs out of bottom part of the frame.

On the layers pallet, right click on the tree (Raster 3) and go to arrange -> bring to top.

Open CT-BearGifts2, resize to 50% and add to main canvas, centered at H200, V550.

Open CT-XmasBeads, and add to the main canvas, centered at H400, V650.

Open Flower5, resize to 50%, and add to main canvas, centered at H300, V600.

On the materials pallet, set your foreground color to transparent and your background color to white (#ffffff). Using font of choice, add the copyright information to your tag. I am using Trebuchet MS, which is a windows systems font, 4 points, bold and centered.

It doesn't matter just at the moment where you put it, Go to Image -> free rotate - rotate left 83 degrees. Using your pick tool, relocate the copyright information to the right side of the frame. (The angles should match up.)

Open CT-Bling, resize to 25% and add to main canvas at H225, V150 (or right on the top of the Christmas Tree).

Add a drop shadow of choice to the tree, gifts, flowers, beads and sexy babe. I am using vertical of 5, horizontal of -5, opacity of 75% blur of 30 and color black (#000000).

You can now save the artist's copy of your tag as a .pspimage file.

Using font or alpha of choice, add the name of choice to the tag. I am using the Tis the Season alpha by Gemini Creationz, and have it centered on the canvas at H400, V550. Actual location will depend upon the size of the name and the font or alpha you use.

Add a drop shadow to the name to match the rest of the tag.

Drop the white background layer and merge visible. Resize to 75% (600 x 600 pixels) and save a .png file and you're all done.

I hope you enjoyed this tutorial. If you should have a problem, please feel free to E-Mail Me and I'll be happy to help you out.

Saturday, November 20, 2010

Sassy Scarletta PTU Tutorial

Sassy Scarletta - Dianna


This tutorial was written by Dianna Richards of Digicats (and Dogs)/Di Before Dawn Tutorials. Any resemblance to any other tutorial, published or unpublished, living, dead or undead, is purely coincidental.

Please do not rebroadcast, redistribute or otherwise claim this tutorial or any part there of as your own work.


Items you will need to complete this project:

The Steampunk Sass taggers kit by A Taggers Scrap, which is a PTU kit available at Scraps and the City.

Tube of choice. I am using Scarletta by Sky Scraps. You must have a license to use this tube, which is available at Scraps and the City.com.

Mask of choice. I am using the Train Tracks mask by Nik's Scripts & Scraps which is part of her PSP Masks Mega Pack.

Font(s) and/or alpha of choice.


Note that H# and V# refer to Horizontal and vertical coordinates on your canvas grid. Make sure you have View, Rulers checked in order to see the ruler grid.

When I say "Add to your canvas" I expect that you will copy and paste it as a new layer, unless otherwise state in the tutorial.

This tutorial assumes you have a working knowledge of PSP. It was written using PSP X3, but should work in PSP 8 and up.

To begin, open a new raster layer canvas, 800 x 800 pxl, flood fill white.

Open paper of choice (I am using Paper 1). Layers -> Load/Save Mask -> Load Mask from Disk and choose mask of choice. I am using Train Tracks from Nik's Scripts and Scraps.

Edit -> Copy Special -> Copy Merged and add to main canvas, centered.

Open Frame 6, rotate right, then add to main canvas, centered.

Image -> Free Rotate -> rotate left, 17 degrees.

Open tube of choice. I am using Scarletta3CU by Sky Scraps. Resize to 75% (if necessary) then add to main canvas, centered at H450, V400.

On the materials pallet, right click on the frame layer (Raster 2) and duplicate. Drag the copy of Raster 2 over the tube layer. With you selection tool set to rectangle, replace, select the top part of the frame copy (no further down than V300), and delete.

Selections -> select none.

Open Clock Ribbon, and add to canvas centered at H400, V500.

On the layers pallet, click on your paper layer (Raster 1) to activate.

Open Cog2, and add to your main canvas, centered at H300, V350.

Open Cog3, and add to your main canvas, centered at H200, V450.

On the layers pallet, click on the top layer, Raster 4, to activate.

Open Bow 10 and Mirror. Resize to 50%, and add to your main canvas, centered at H680, V350.

Open clock and add to main canvas, centered at H200, V600.

Open Floral2, and add to main canvas, centered at H350, V600.

Open nameplate. Using font of choice, add copyright & tagged by information. I am using Cup and Talon, 8 points, bold and centered. I have my foreground color set to black (#000000) and my background color set to brown (#492605).

Merge visible, but do not save. Reside to 50% and add to main canvas, centered at H600, V700. On the layers pallet, drag it under the floral2 layer (Raster 9).

Add a drop shadow to all the elements on your main canvas, except the paper layer (Raster 1), and the copy of frame (Copy of Raster 2). I am using offsets vertical 5, horizontal -5, opacity 85, blur 30, color black #000000.

Save the artist's copy of your tag as a .pspimage file.

Using font or alpha of choice, add name of choice to tag. There are any number of nice Steampunk alphas out there, none of which I'm overly wild about, so I am using the Corrigated alpha by Elyane Araujo Designs. I have the named centered at H250, V150, and then rotated it left, 17 degrees to match the angle of the frame. Your mileage may very depending upon the alpha, font, and/or size of the name you are using.

Add a drop shadow to the name to match the rest of the tag.

Drop the white background layer, merge visible, resize the tag to 75% (600 x 600 pixles) and save your tag as a .png file, and you're all done.

I hope you enjoyed this tutorial. If you should have a problem, please feel free to E-Mail Me and I'll be happy to help you out.