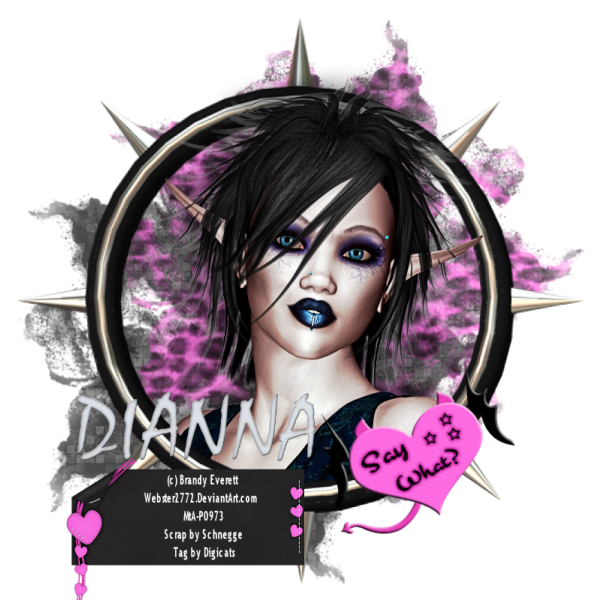
This tutorial was written by Dianna Richards of Digicats (and Dogs)/Di Before Dawn Tutorials. Any resemblance to any other tutorial, published or unpublished, living, dead or undead, is purely coincidental.
Please do not rebroadcast, redistribute or otherwise claim this tutorial or any part there of as your own work.
Items you will need to complete this project:
The Say What taggers kit by Schnegge's Scraps. This kit is available for purchase at Scrappetizing as well as other fine stores.
Tube of choice. I am using Dark Faerie Portrait by Brandy Everett, which is available for purchase at Mistaken Art. You must have a license from MtA to use this tube.
Wee Scots Mask #225 which you can download HERE.
Alpha or font of choice. I am using the White Grunge alpha by Dreams Fulfilled. This is a FTU alpha that can be downloaded at her blog.
Note that H# and V# refer to Horizontal and vertical coordinates on your canvas grid. Make sure you have View, Rulers checked in order to see the ruler grid.
When I say "Add to your canvas" I expect that you will copy and paste it as a new layer, unless otherwise state in the tutorial.
This tutorial assumes you have a working knowledge of PSP. It was written using PSP X1, but should work in PSP 8 and up.
Open a new raster layer canvas, 800 x 800 pxls, flood filled white.
Open P-04, then select layers --> load/save mask --> load mask from disk. Locate WSL mask # 225, make sure the fit to canvas box is checked, then click on load.
Edit --> Copy Merged, then add to your canvas, centered at H350, V450.
Open P-18, then select layers --> load/save mask --> load mask from disk. Locate WSL mask # 225, make sure the fit to canvas box is checked, then click on load.
Edit --> Copy Merged, then add to your canvas, centered at H450, V350.
Open tube of choice. I am using Brandy Everett's Dark Faery Portrait which can be purchased at MTA.
Copy the tube layer, and add to canvas, centered.
Open Frame 10, resize to 150%, and add to canvas, centered.
Using your eraser tool, erase the parts of the tube that show outside of the frame ON THE BOTTOM ONLY.
On the layers pallet, duplicate the frame, then drag the copy under the tube layer.
Set your selection tool to rectangle, then use it to select the top half of the original frame (Raster 4). Then press your delete key. Selections --> Select None.
Add a drop shadow of choice to the tube. I am using Vertical and Horizontal offsets of -10, opacity 65, blur 35, color black (#000000).
Open DevilHeart1, and add to your canvas centered at H550, V600.
Image --> Free Rotate: rotate left, 20 degrees --> Okay.
Open Tag01. Add your copyright information to the tag. For the Dark Faery tube, that information is:
(c) Brandy Everett Webster2772.DeviantArt.com YOURMtALICENSE #
You can also add your "tagged by" information to the tag.
Edit --> Copy Merged, then add to canvas, centered at V250, H700.
You can now save your artists' copy as a .pspimage.
Using alpha or font of choice, compose the name you wish to add to the tag and add to the image, centered at around H260, V575. Resize to taste, this may vary based on the length of the name you are using.
I am using the White Grunge alpha by Dreams Fulfilled. This is a FTU alpha available on her blog.
Delete the white background layer, and then select layers --> Merge --> Merge Visible.
Resize your canvas to 75% (600 x 600 pxls), and save as a .png file and your all done!
I hope you enjoyed this tutorial. If you should have a problem, please feel free to E-Mail Me and I'll be happy to help you out.
Thank You so much, love it *hugs*
ReplyDelete