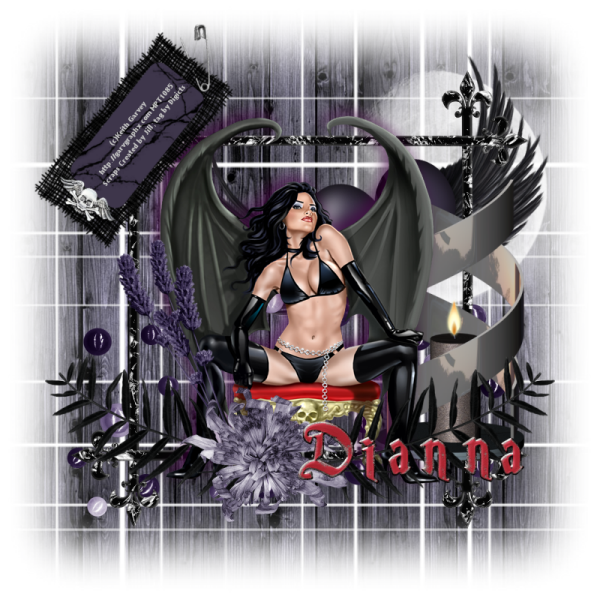
This tutorial was written in the darkness before dawn by Dianna Richards of Digicats (and Dogs)/Di Before Dawn Tutorials. Any resemblance to any other tutorial, published or unpublished, living, dead or undead, is purely coincidental.
Please do not rebroadcast, redistribute or otherwise claim this tutorial or any part there of as your own work.
Items you will need to complete this project:
The Darkness before Dawn taggers kit Created by Jill. This is a PTU kit which may be purchased exclusively at DigitalChaos.com.
Tube of choice. I am using psp7500-Vamp by Keith Garvey. You must have a license to use this tube, which is available at MyPSPTubes.com.
Wee Scots Mask #194 which you can download HERE.
Font(s) and/or alpha of choice. I am using Trebuchet MS which is a windows system font, the Halloween alpha by Crazy Diamond. This font was created in 2008 and is no longer available online (sorry).
Note that H# and V# refer to Horizontal and vertical coordinates on your canvas grid. Make sure you have View, Rulers checked in order to see the ruler grid.
When I say "Add to your canvas" I expect that you will copy and paste it as a new layer, unless otherwise state in the tutorial.
This tutorial assumes you have a working knowledge of PSP. It was written using PSP X1, but should work in PSP 8 and up.
To begin, open a new raster layer canvas, 800 x 800 pxls, flood filled white.
Open DBD_paper10_cbj. Layers --> load/save mask --> load mask from disk and locate WSL mask # 194. Make sure the "Fit to canvas" button is checked, then click on load.
Image --> Resize --> 110%. Make sure that the "Resize all layers" is not marked, as you only want to resize the mask layer.
Edit --> copy merged and add to your main canvas, centered.
Open DBD_moon_cbj and add to main canvas, centered at H600, V250.
Open DBD_heartwings_cbj, and add to main canvas, centered at H500, V250.
Open DBD_beadspill_cbj and add to main canvas centered at H400, V500.
Open DBD_frame09_cbj and add to main canvas, centered.
Open DBD_candle_cbj, resize to 75% and add to canvas, centered at H600, V425.
Open psp7500-SCGarvey-Vamp, copy the tube layer and add to main canvas, centered.
Add drop shadow of choice to tube. I am using offsets, horizontal and vertical of -7 each, opacity of 65, blur of 25, color Dark Purple (#400040).
Open DBD_leaves22_cbj. Resize to 75% and rotate right, 90 degrees. Add to main canvas centered at H500, V575. Duplicate and Mirror.
Open DBD_flowers_cbj, resize to 75% and add to main canvas, centered at H250, V500.
Open DBD_flower1_cbj, resize to 50% and add to main canvas, centered at H350, V600.
Open DBD-tag2_cbj, and mirror. On the Materials pallet, set your foreground color to transparent and your background color to white (#ffffff) or light grey (#c0c0c0). Using font of choice, add the copyright info for the tube to the tag.
For the Vamp tube, that info is (c)Keith Garvey http://garvgraphx.com MPTLicense#.
I used Trebuchet MS, 20 pts, bold and centered, free rotate --> left -->55 degrees, and then made additional corrections using my pick tool to light it up on the tag to taste.
Resize by 75%. Make sure the "Resize all layers" button is checked.
Copy Merged, then add to main canvas, centered at H175, V180.
You can now save the artist's copy of your tag as a .pspimage file.
Using font or alpha of choice, add name of choice to tag. I have located by name at H550, V600. Actual location will vary depending upon the size and length of name you are using.
Layers --> merge visible. Then resize your image by 75% (to 600 x 600 pxls), save as a .jpg file and you're all done.
I hope you enjoyed this tutorial. If you should have a problem, please feel free to E-Mail Me and I'll be happy to help you out.
No comments:
Post a Comment