Please do not rebroadcast, redistribute or otherwise claim these tutorials or any part there of as your own work.
Items you will need to complete these projects:
The Stargazing collaboration kit. This kit is available for FREE with an $8 purchase at the store, or it may be purchased outright for the same price. It is available EXCLUSIVELY at Stargazer Scraps.
Various masks by Wee Scots Lass which you can download HERE.
Font(s) choice. I am using MS Gothic which is a Windows System font. If you do not have it, you can download it HERE.
The Moonbeam alpha by Julie It Is. This is a free to use alpha that you may download from Julie's blog HERE. Be sure to leave her a thank you if you download.
Note that H# and V# refer to Horizontal and vertical coordinates on your canvas grid. Make sure you have View -> Rulers checked in order to see the ruler grid.
When I say "Add to your canvas" I expect that you will copy and paste it as a new layer, unless otherwise stated in the tutorial.
These tutorials assumes you have a working knowledge of PSP. They were written using PSP X3, but should work in PSP 8 and up.
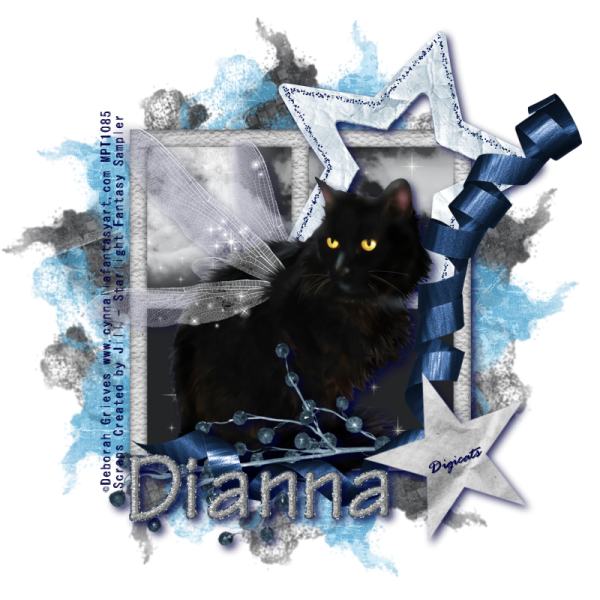
Created by Jill - Starlight Fantasy tutorial

For this tutorial you will need a tube of choice. I am using Under a Full Moon by Deborah Grieves. Deborah is no longer licensing her art for PSP use so if you do not already have this tube you will have to find one similar.
To begin open a new raster layer canvas, 800 x 800 pixels, flood filled white.
Open CreatedbyJill_StarlightFantasySampler_paper04. Layers -> Load/Save Mask -> Load Mask from Disk and select mask of choice. I am using Wee Scots Lass mask #225. Make sure the fit to canvas box is checked, then click on load.
Edit -> Copy Special -> Copy Merged and add to canvas, centered.
Image -> Free Rotate -> Rotate Left, 20 degrees.
Open CreatedbyJill_StarlightFantasySampler_paper01. Layers -> Load/Save Mask -> Load Mask from Disk and select mask of choice. I am using Wee Scots Lass mask #225. Make sure the fit to canvas box is checked, then click on load.
Edit -> Copy Special -> Copy Merged and add to canvas, centered.
Open CreatedbyJill_StarlightFantasySampler_window, resized to 65% and add to main canvas, centered.
Open CreatedbyJill_StarlightFantasySampler_Frame1, resize to 50% and add to main canvas, centered at H550, V225.
Open tube of choice. I am using Debrorah Grieves under the Full Moon. Copy tube layer and add to main canvas, centered at H350, V420.
Open CreatedbyJill_StarlightFantasySampler_foliage1, resize to 75% and add to main canvas, centered at H450, V600. Using your eraser tool, erase the parts of the stem that fall the right of the window frame.
Open CreatedbyJill_StarlightFantasySampler_Ribbon, resize to 75% and add to main canvas, centered at H475, V400.
Open CreatedbyJill_StarlightFantasySampler_Star, resize to 75% and add to main canvas, centered at H600, V600. Image -> Free Rotate -> Rotate left, 20 degrees.
On the materials pallet, set your foreground color to transparent and your background color to dark blue #000040. Using font of choice add copyright information to the tag. For the Deborah Grieves tube that information is:
©Deborah Grieves www.cynnaliafantasyart.com Your MPT_License#
You may also add the background credits and tagged by information at this time. I am using MS Gothic, 4 points, bold and centered. and then free rotated my text left, 90 degrees, and centered the credits at H150, V400.
On the layers pallet, starting with Raster 3, the window layer and working upward, add a drop shadow to each of the elements on your tag. I am using offsets, vertical and horizontal of 5 each, opacity 85, Blur 15 and color Dark Navy Blue (#00013e).
Do not add a drop shadow to your credits.
You can now save the artist's copy of your tag as a .pspimage file.
Using font or alpha of choice add desired name to tag. I am using the Moonbeam alpha by Julie It is. I have the name centered at H300, V650. (H350 for longer names).
Add a matching drop shadow to the name.
Delete the white background layer and merge visible. Resize to 75% (600 x 600 pixels) and save as a .png file and you are all done.
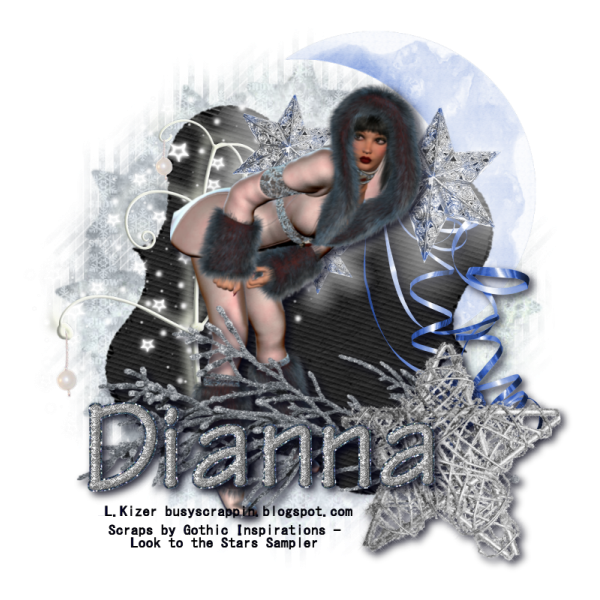
Gothic Inspirations - Look to the Stars Tutorial

To begin open a new raster layer canvas, 800 x 800 pixels, flood filled white.
Open Paper of choice. I am using Paper4-GI_LTTSSampler. Layers -> Load/Save Mask -> Load Mask from Disk and select mask of choice. I am using Wee Scots Lass mask #162. Make sure the fit to canvas box is checked, then click on load.
Open Moon-GI_LTTSSampler, resize to 75% and add to main canvas, centered at H550, V250.
Open Tagback-GI_LTTSSampler, and resize to 75%. Add to main canvas, centered. Image -> Free Rotate -> Rotate Right 17 degrees.
Open Tree-GI_LTTSSampler, resize to 75% and add to main canvas, centered at H250, V400.
Open Ribbon2-GI_LTTSSampler and add to main canvas, centered at H600, V400. Using your eraser tool, erase the bits of the ribbon that appear over the top of the tag back.
Open 3stars-GI_LTTSSampler, and resize to 75%. Add to main canvas, centered at H500, V250
Open Snowbunny-GI_LTTSSampler, resize to 85% and add to main canvas, centered.
Open bough-GI_LTTSSampler and resize to 85%. Add to main canvas, centered at H400, V550.
Open Star-GI_LTTSSampler and resize to 65%. Add to main canvas, centered at H600, V600.
Add a drop shadow of choice to the Snowbunny, the ribbon, bough and star. I am using offsets, vertical and horizontal of 5 each, opacity of 85, blur of 15 and color of Very Dark Blue (#020212).
on the Materials Pallet, set your foreground color to black (#000000) and your background color to Dark Blue (#000040). Using font of choice add copyright and background credits to the tag. For the Snow Bunny tube that information is:
©L.Kizer busyscrappin.blogspot.com
I am using the font MS Gothic, 4 points bold and centered. I have the credits centered at H300, V700.
You can now save the artist's copy of your tag as a .pspimage file.
Using font or alpha of choice add name of choice to tag. I am using the Moonbeam alpha by Julie It Is. I have centered the name at H350, V600, and added a drop shadow to match the one used on the rest of the tag.
Drop the white background layer and merge visible. Reside to 75% (600 x 600 pixels) and save as a .png file and you are all done.
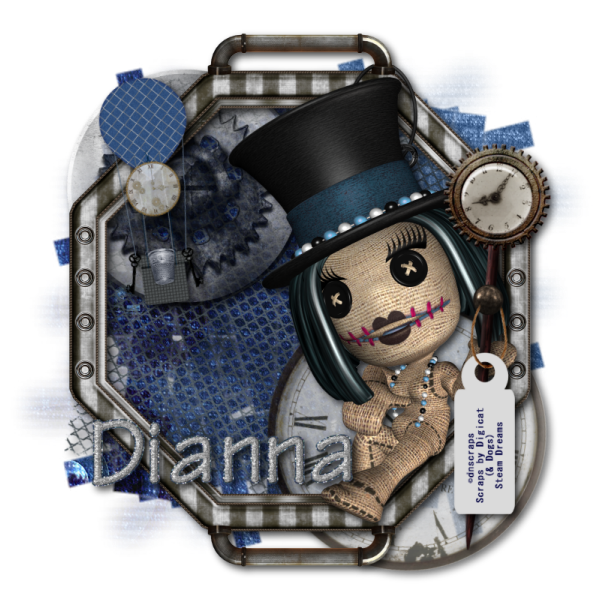
Digicats (& Dogs) - Steam Dreams tutorial

To begin open a new raster layer canvas, 800 x 800 pixels, flood filled white.
Open DCD_StDr_Paper04. Layers -> Load/Save Mask -> Load Mask from Disk and select mask of choice. I am using Wee Scots Lass mask #147. Make sure the fit to canvas box is checked, then click on load. Resize the Mask layer - only - to 115%.
Edit -> Copy Special -> Copy Merged and add to main canvas, centered.
Open DCD_StDr_Steel Mesh and add to main canvas, centered. Image -> Free Rotate -> Rotate Right 17 degrees.
Open DCD_StDr_Cog4 and resize to 75%. Add to main canvas, centered at H250, V250. Set opacity to 75%
Open DCD_StDr_clock and resize to 75%. Add to main canvas, centered at H550, V550. Image -> Free Rotate -> Rotate right, 10 degrees. Set opacity level to 75%.
Open DCD_StDr_frame04 and add to main canvas, centered.
Open DCD_StDr_Hot Air Balloon and resize to 50%. Add to main canvas, centered at H200, V250. Image -> Free Rotate -> Rotate Left, 7 degrees.
Open DCD_StDr_VooDoo2, and add to main canvas centered at H500, V400.
Open DCD_StDr_Clock Pin 2, and resize to 75%. Add to main canvas, centered at H660, V460.
Open DCD_StDr_Tag03 and rotate right. On the materials pallet, set your foreground color to transparent and your background color to Dark Blue (#000040). Using font of choice add copyright and background information to the kit.
This is a scraps only kit but if you wish to add the copyright information for the VooDoo Doll that information is:
©dnscraps designingscraps.blogspot.com
I am using MS Gothic, 4 points, bold and centered. You can also add the background and tagged by information at this time.
Merge visible then rotate the tag left. Resize to 75%, and add to main canvas centered at H650, V500. Using your eraser tool, erase the bits of the string that are over the pin clock, so that the tag appears to be hanging from the pin clock.
Starting with the steel mesh layer, Raster 2, on the layers pallet and working upward, add a drop shadow of choice to each of the elements in the tag. I amusing offsets, vertical and horizontal of 5 each, opacity of 75%, blur of 15 and color black (#000000).
You can now save the artist's copy of the tag as a .pspimage file.
Using font or alpha of choice, add name of choice to tag. I am using the Moonbeam Alpha by Julie It Is, and have the name centered at H300, V600. I then added a matching drop shadow to the name.
Drop the white background layer and merge visible. Resize to 75% (600 x 600 pixels) and save a .png file and you are all done.
I hope you enjoyed these tutorials. If you are planning on using any of these tags on Facebook, be sure to save them as .jpg files with white backgrounds, as those look better on Facebook.
If you should have a problem, please feel free to E-Mail Me and I'll be happy to help you out.
No comments:
Post a Comment