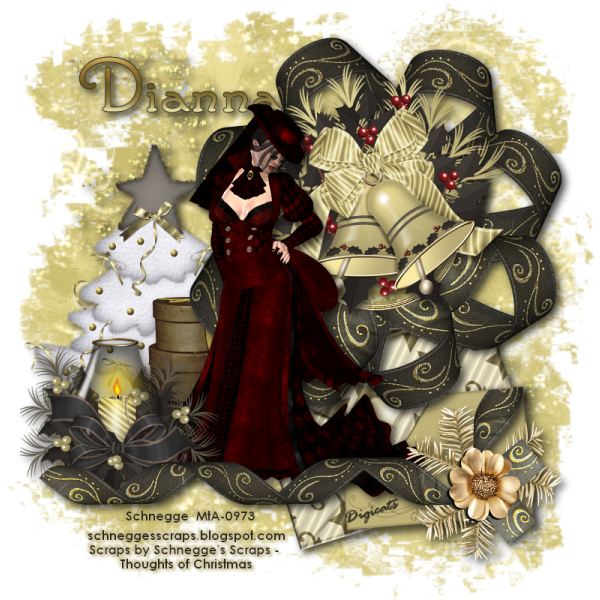
This tutorial was written by Dianna Richards of Digicats (and Dogs)/Di Before Dawn Tutorials. Any resemblance to any other tutorial, published or unpublished, living, dead or undead, is purely coincidental.
Please do not rebroadcast, redistribute or otherwise claim this tutorial or any part there of as your own work.
Items you will need to complete this project:
The very beautiful Thoughts of Christmas taggers kit by Schnegge's Scraps. This is a PTU taggers kit that is available exclusively at My Tubed Art.
Tube of choice. I am using Morgan1 by Schnegge. This is a PTU tube and you must have a license to use it, which is available at My Tubed Art.
Mask of choice. I am using the Pixelated Edges mask by Nik's Scripts & Scraps which is part of her PSP Masks Mega Pack.
Font(s) choice. I am using Century Gothic, which is a windows system font, and Santa's Sleigh which is a FTU font that be downloaded from Free Digital Scrapbooking.
Note that H# and V# refer to horizontal and vertical coordinates on your canvas grid. Make sure you have View -> Rulers checked in order to see the ruler grid.
When I say "Add to your canvas" I expect that you will copy and paste it as a new layer, unless otherwise state in the tutorial.
This tutorial assumes you have a working knowledge of PSP. It was written using PSP X3, but should work in PSP 8 and up.
Open a new raster layers canvas, 800 x 800 pxls, flood filled White.
Open Paper of choice. I am using P10_TOC_Schnegge. Layers -> Load/Save Mask -> Load mask from disk and select mask of choice. I am using Pixelated Edges by Nik's Scripts and scraps. Make sure the fit the canvas box is checked, then click on load.
Resize to 115%. Edit -> Copy Special -> Edit Copy Merged and add to main canvas, centered.
Open Fairydust_TOC_Schnegge and add to main canvas, centered.
Open Card01_TOC_Schnegge and add to main canvas, centered at H550, V600. Image -> Free Rotate -> Rotate left, 17 degrees.
Open Tree03_TOC_Schnegge, and add to main canvas, centered at H200, V400.
Open Present01_TOC_Schnegge, and resize to 50%. Add to main canvas, centered at H250, V500.
Open Frame04_TOC_Schnegge, and add to main canvas, centered at H500, V300.
Open BellsAndHollies_TOC_Schnegge and resize to 75%. Add to main canvas, centered at H500, V250.
Open Schnegge-Morgan1 Copy the tube layer and add to main canvas, centered at H350, V400.
Open Candle01_TOC_Schnegge and resize to 75%. Add to main canvas, centered at H160, V560.
Open Ribbon02_TOC_Schnegge and add to main canvas, centered. With your selection tool set to rectangle - replace, select the part of the ribbon that is going up the right hand side of the main canvas, from V510 to the top. Delete.
Selections -> Select none.
Use your eraser tool to erase just enough of the stub of the ribbon to make it match the top of card01.
Starting with Raster 2 on your layers pallet and working upward, add a drop shadow of choice to each of the elements on your main canvas. I am using offsets, vertical and horizontal of 5 each, opacity of 85, blur of 15 and color of #11100f.
On your materials pallet, set your foreground color to transparent and your background color to #2e2a21. Using font of choice, add copyright information to your tag. For the Morgan1 tube, that informations is:
©Schnegge schneggesscraps.blogspot.com Your MtA_License#
You may also add the background credits and tagged by information at this time. I am using Century Gothic, 4 points, bold and centered. My credits are centered at H250, 720.
Using the following settings, add a drop shadow to your credits: Offsets of 3 each, opacity 100%, blur 5, color #bcb078. Repeat using offsets of -3 each with all other settings remaining the same.
You can now save the Artist's Copy of your tag as a .PSPImage file.
Using font or alpha of choice, add desired name to tag. I using the font Santa's Sleigh. I have my foreground color set to #2e2a21 and my background color set to a Metallic Brass gradient. I am using 24 points, bold and center, and I have the name centered at H250, V125.
Add a matching drop shadow to the name.
Drop the white background layer, and merge visible. Resize to 75% (600 x 600 pixels) and save as a .png file and you are all done.
Please note that if you are planning on using this tag on Facebook you may want to save it as a .jpg file with a white background, as Facebook does not handle .pngs well.
I hope you enjoyed this tutorial. If you should have a problem, please feel free to E-Mail Me and I'll be happy to help you out.
No comments:
Post a Comment